Usually, we consider a cartoonist or an artist who can draw different types of cartoon pictures from imagination or as a replica of a realistic scenario and subject. But when you want to become one, many steps must be covered. From studying different courses to acquiring in-depth technical knowledge, many things must be considered.
So, to save you from all these, Adobe has introduced an Illustrator tool. It helps you convert images to cartoon illustrator online in just a few clicks without hassle. Let's look at how the tool works, its features, and other such details here.
In this article
Part I. What is Adobe Illustrator, and why should you use one?
Adobe Illustrator is an online photo editor that helps you easily convert any image into a cartoon. It can be a selfie, group photo, pet, or scenery you clicked on a few days back. So, there is no need to rely on another artist to get cartooned images at any time.
The tool has many cartoon effects and allows you to impose different filters. So, acquiring the desired results won't be a problem anymore. But, before moving ahead, let's look at some of the benefits of using this tool to convert images to cartoon illustrators.
- You don't need to rely on any particular skill to use this tool.
- Since adobe illustrator is a reliable tool, all your pictures will be in safe hands.
- The tool comes with umpteen filters and customizable effects to help you get the desired look on the cartoon image.
- It doesn't take long to produce the best and most accurate cartoon pictures of the original image you upload.
- Furthermore, it also ensures to map of the facial features correctly and converts every detail into that of a cartoon.
Part II. Key Features of Adobe Illustrator
Undoubtedly, adobe illustrator is one of the best tools to convert a regular image into a cartoon. So, some of its most notable features are described below.
- Vector graphics: the tool can apply motion graphics and artistic graphics to any picture, irrespective of the resolution and directional lines. That's why it is ideal for getting cartoon images from pictures like selfies, portraits, DSLR shots, candid images, and even sceneries or landscapes.
- Quality: Adobe Illustrator maintains optimal quality for each work it generates. Whether you want to use it for applying a classic cartoon look or a comic one, it will maintain authenticity and quality at high levels.
- Standard saving: once you are done creating a cartoon image, the illustrator will help you save the file to your device in standard form. You can choose between multiple formats, including PNG and JPEG.
- No size compression: Some illustrator tools often compress the image size and establish distortion. However, adobe illustrator ensures no such thing is done while you save the file. As a result, the image downloaded is of the highest quality, with all the features being highlighted prominently.
- Cloud access: This photo to cartoon illustrator can sync with the cloud network and upload all your images to the same. As a result, you can access those files from anywhere and at any point in time without any worry.
Part III. Step-by-step guide for converting image to cartoon using Adobe Illustrator
Below we have discussed the steps to use this tool and convert photos to cartoons with adobe illustrator in simple clicks.
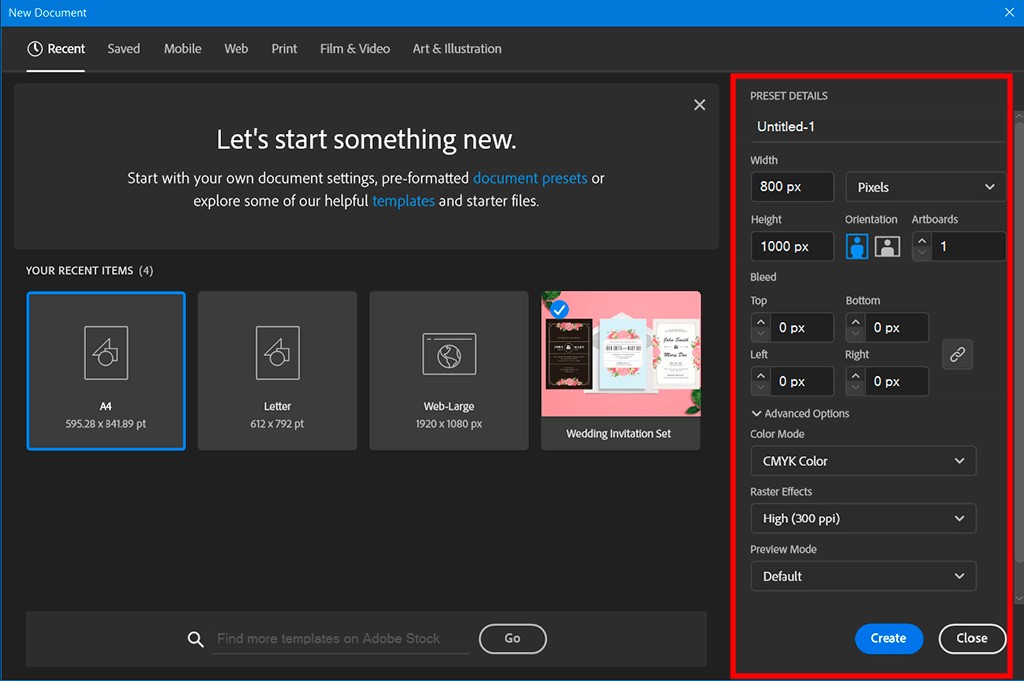
- Create a new document on Adobe Illustrator and choose its type from print, Mobile, Web, Video, and more options. The primary purpose of doing so is to set the default parameters of the document according to the type.
- If you want to define the document dimensions yourself, use custom presets. Adobe Illustrator allows users to define the Custom height and length of the document and then click on create.
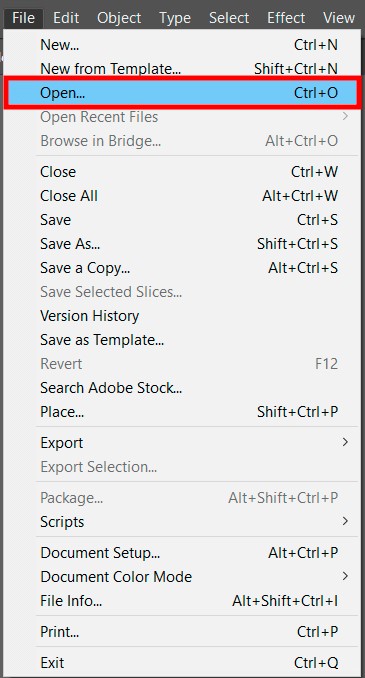
- Now navigate to File from the dashboard and click on Open. Upload the image you want to convert into a cartoon. Try to choose a larger image since it defines the outline and can be scaled per your size requirements.
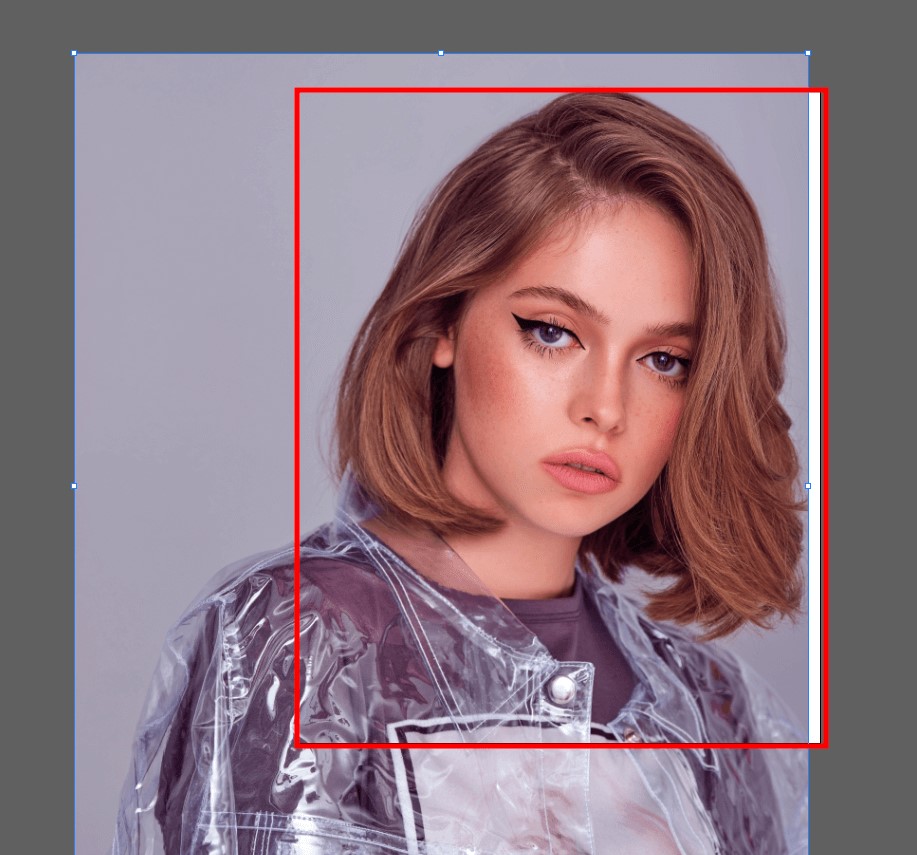
- Once the image appears on the Artboard, drag the red box to ensure the subject’s face or main features are within it.
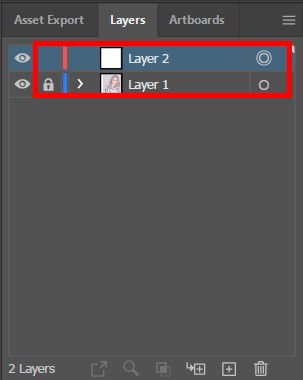
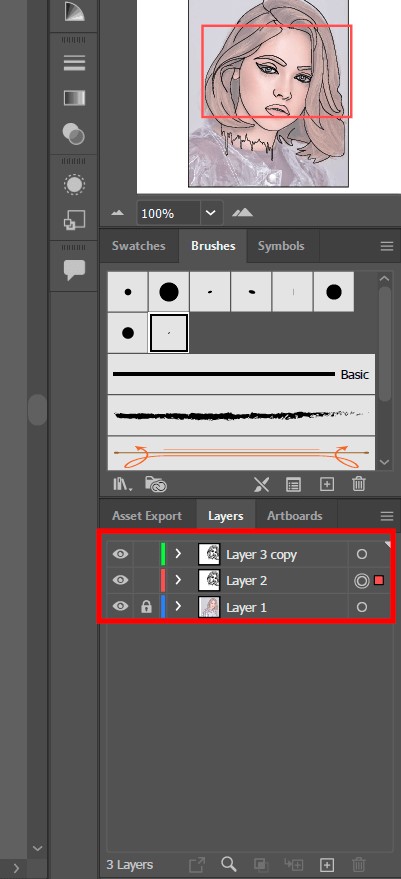
- Navigate to Layers directly in the panel, click on the Windows tab, and then click on Layers. From all the dropdown options shown, click on the one having a blank paper. This will create a new layer.

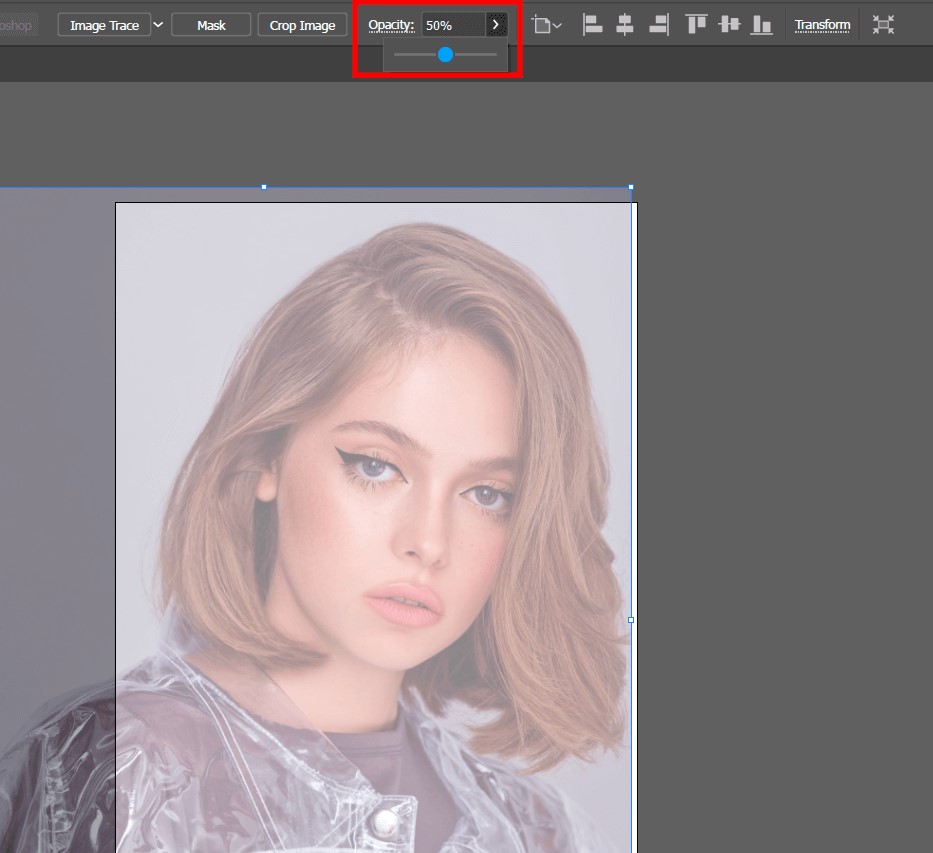
- Now, you can drag the slider to set the image’s opacity present on the Artboard. For maximum realistic effects, you should set the opacity at 50%.
- Again move to the Layer panel and click on the empty boxes right after the eye sign to lock them together. Once the lock is done, a sign will appear in the respective boxes.
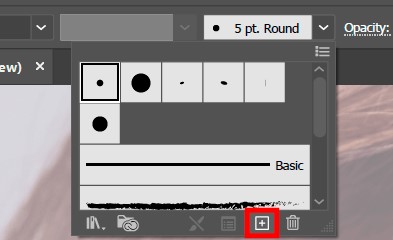
- Now, click on Windows, followed by Brushes. There, click on (+) to create the new brush.
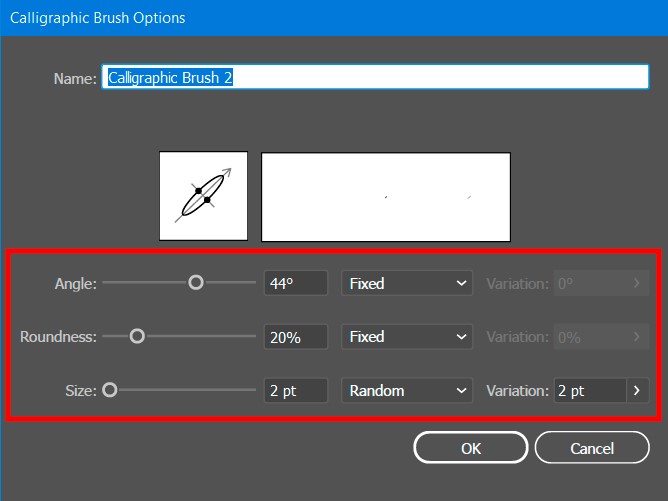
- Here, you need to enter custom brush settings. For instance, you can define the brush stroke angle, size, name, and more. Once done, click on OK from the bottom left corner.
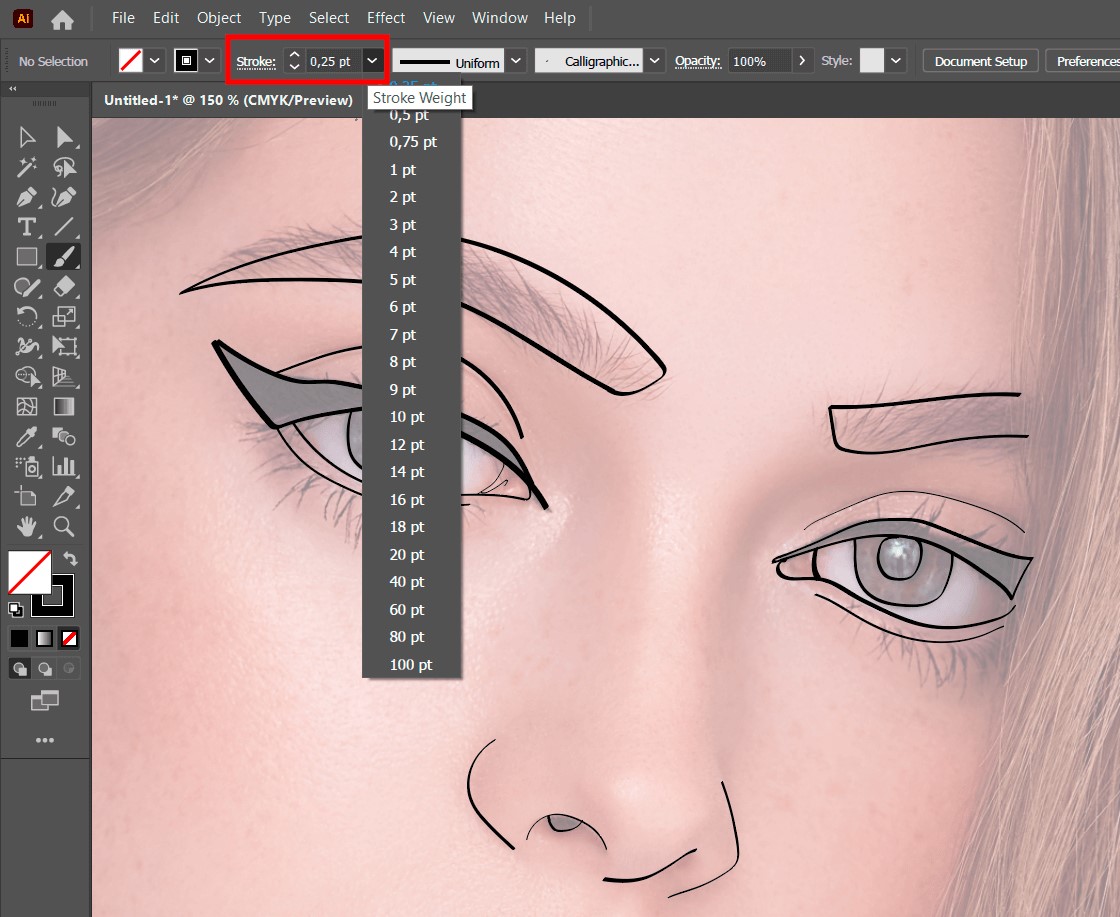
- You can choose the stroke's size from the illustrator's drawing window. There are many options to do so, from 0.5 pt to 100 pt. Once done, start outlining the main subject's features, like the eyebrows, eyes, lips, nose, and many more.
- After this, navigate to Options from the menu bar and click on the Duplicate layer. If unsatisfied with the copied layer dimensions, drag and select the outline at your convenience.
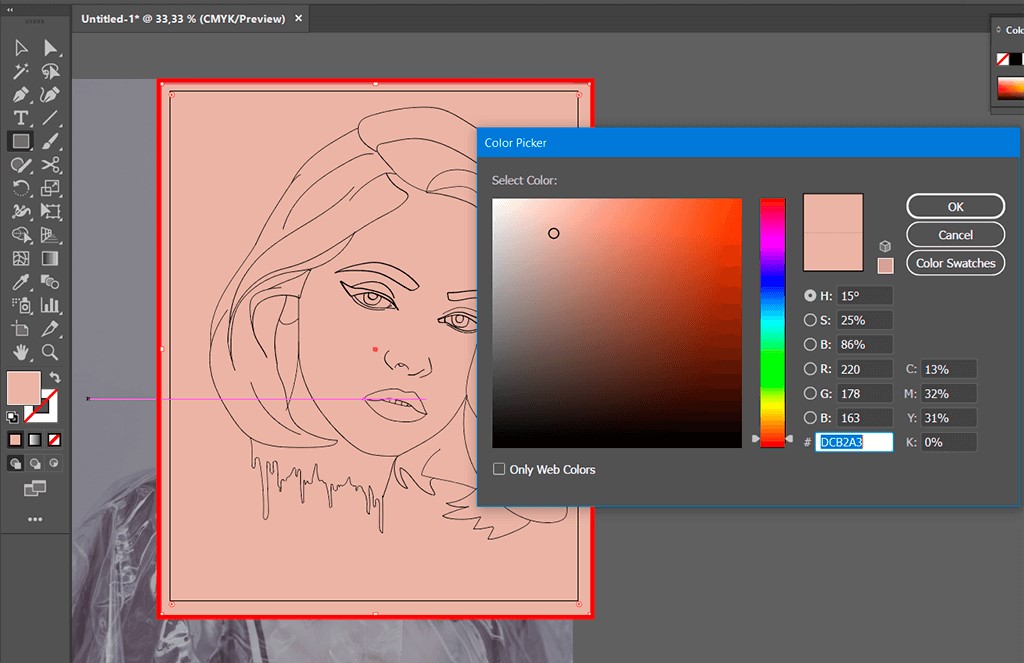
- Now, you must select the layer's rectangular part and fill it with the skin color. After this, you need to drag the rectangle over the subject.
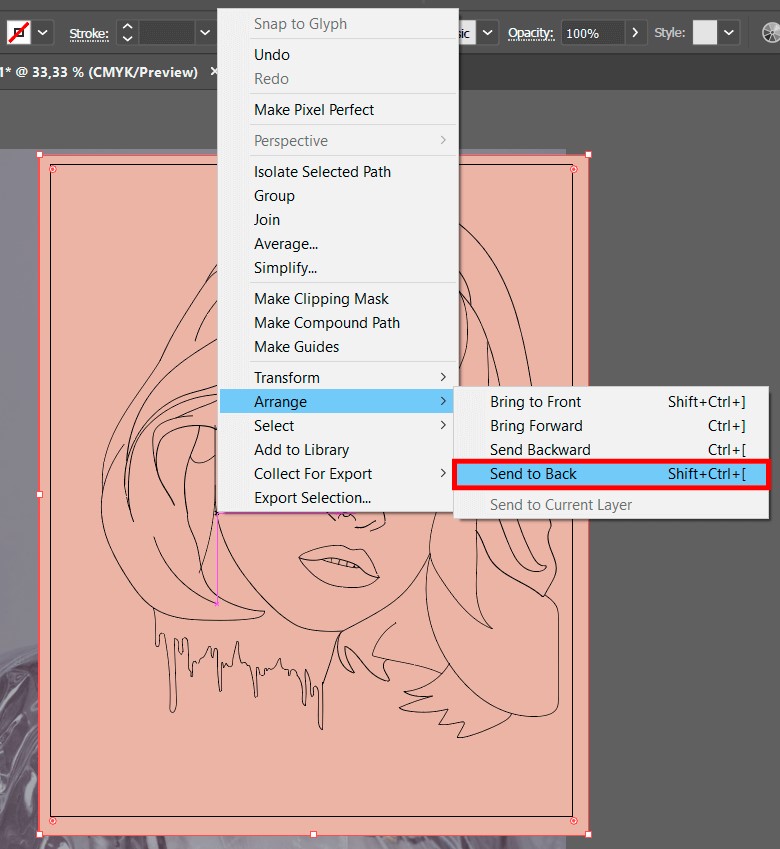
- You need to send the object to the back. To do so, right-click on it and Click on Arrange from the dropdown. Select Send to Back from the expanded menu and wait till it is sent backward.
- Now, select the entire portrait, click on Windows, and then Pathfinder. This will help you combine everything once you click on Merge.

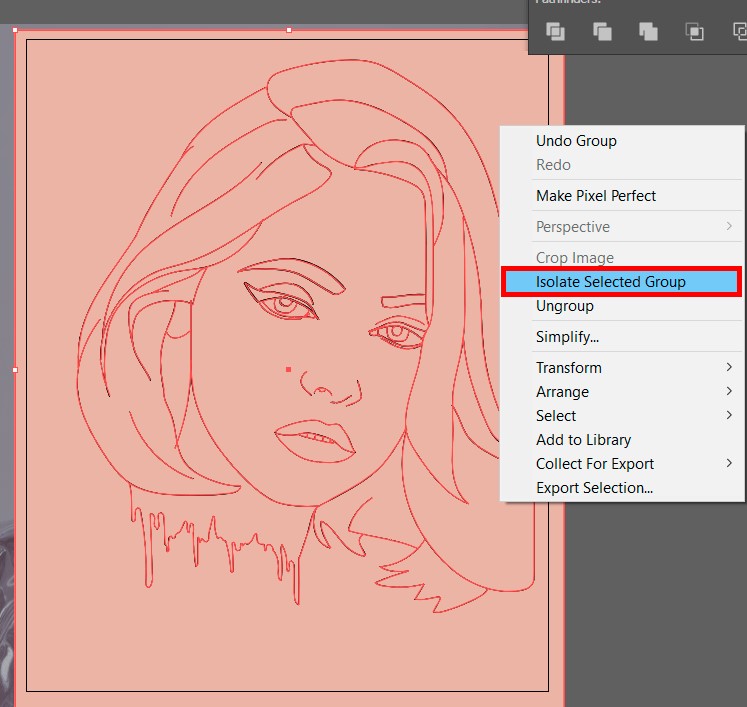
- Right-click on the edited portrait and click on Isolate Selected Group.
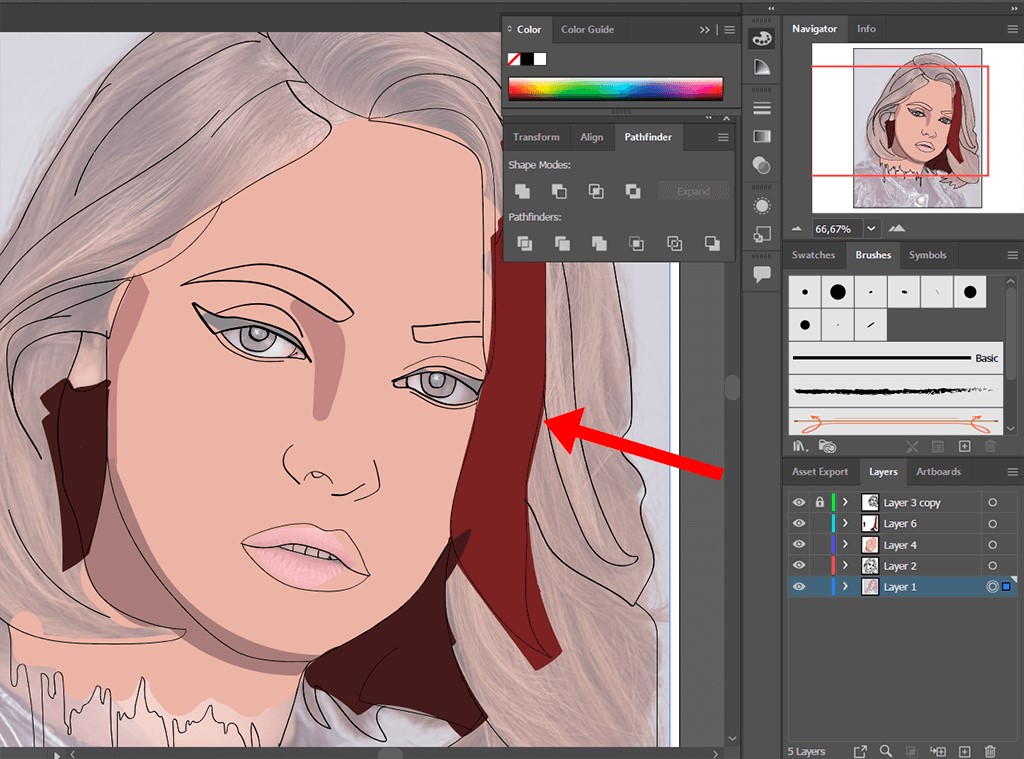
- You can now access the coloring tool to fill the blank spaces with different shades.
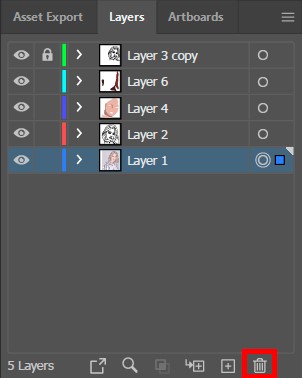
- Once you outline the model, navigate to Layers and delete the one with the source photo.
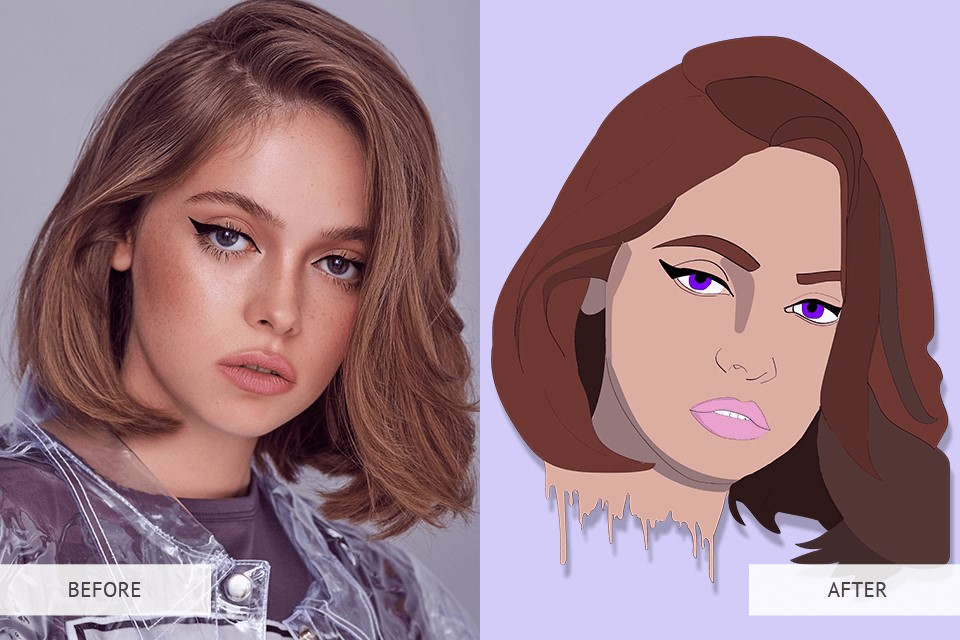
- Download the cartoon image you have created on Adobe Illustrator, and voila! You have a cartoon version now.
Part IV. Media.io Cartoonizer - the best online alternative to Adobe Illustrator
Since there are a lot of steps you need to keep in mind to use Adobe Illustrator cartoon yourself, let's look at another alternative — Media.io Cartoonizer. It is a web app that lets you transform the image into a cartoon in just a few clicks. Following are the steps to do so.
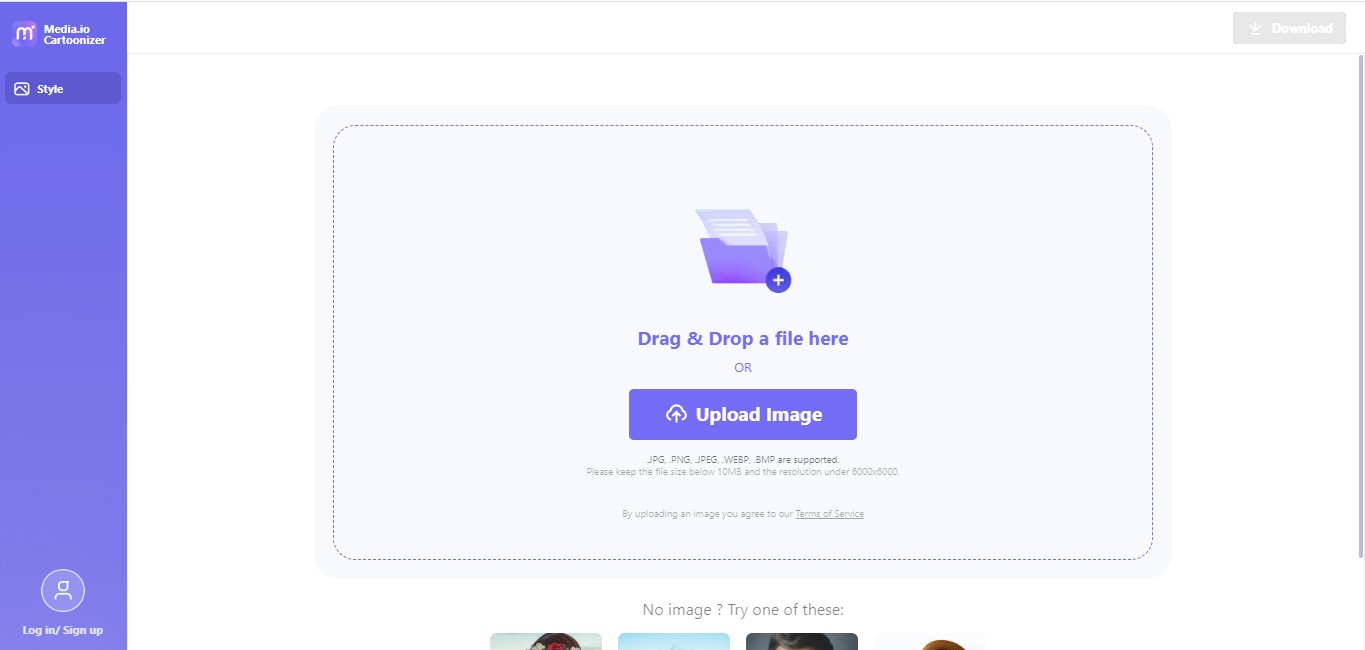
- Launch the official website of Media.io Cartoonizer and upload an image.
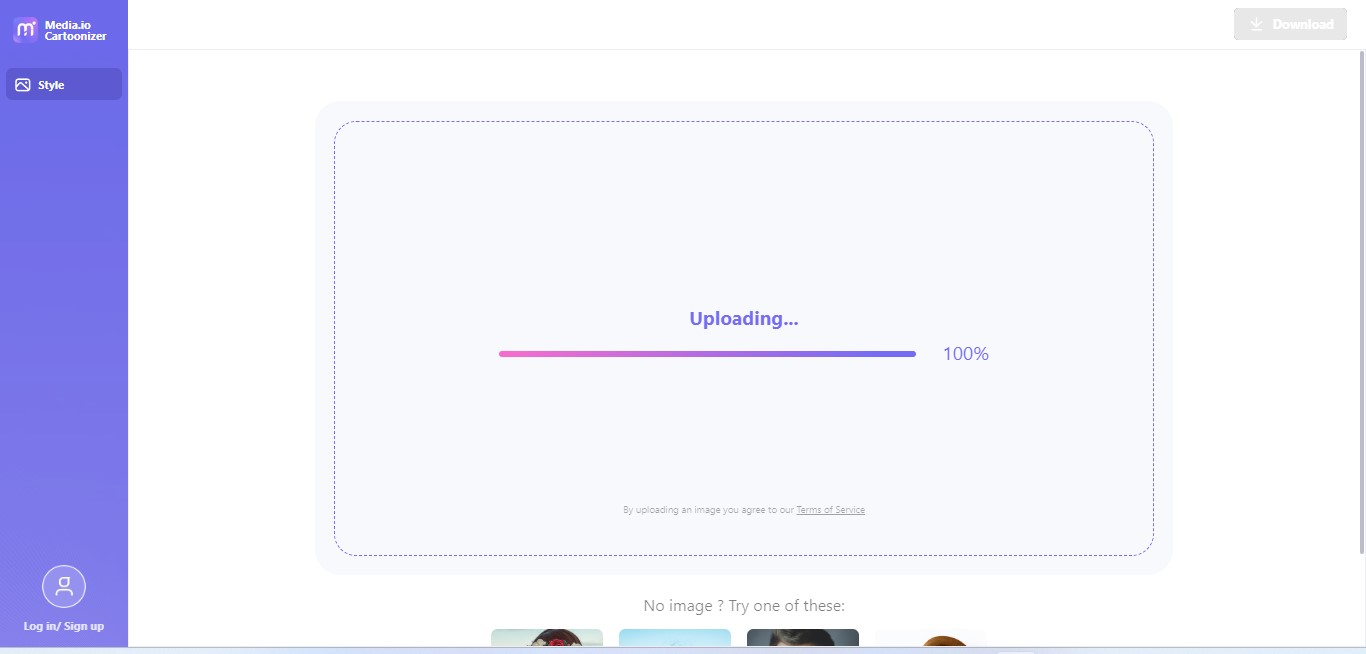
- Wait till the processing gets finished.
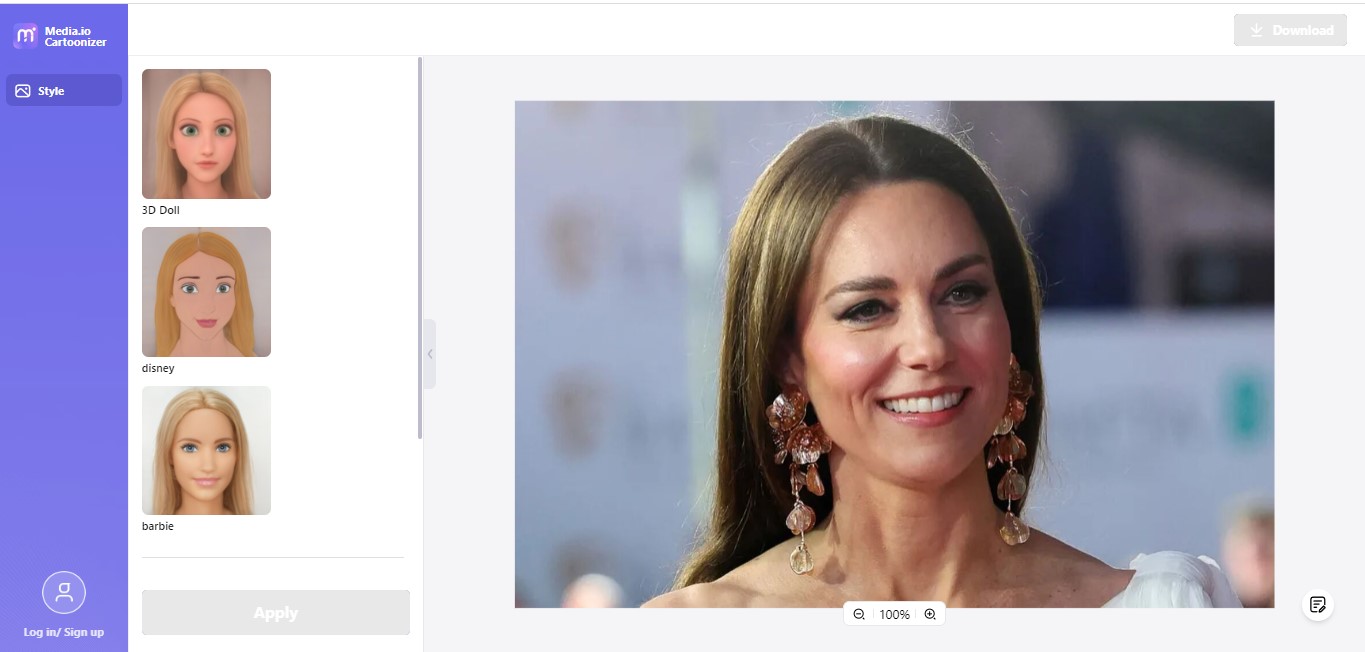
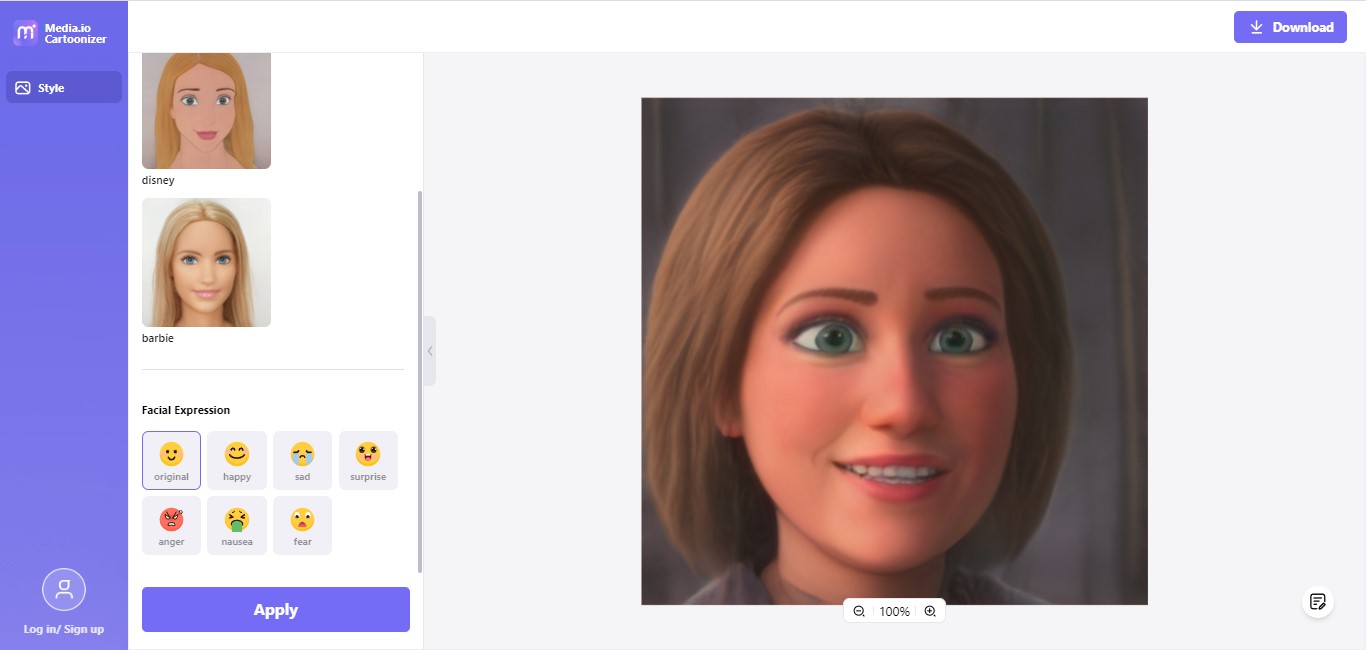
- After the photo is uploaded to the editor window, you can select 3D Doll, Barbie, and Disney from any three cartoon effects. Once done, click on Apply button.
- Wait till the effects are processed.
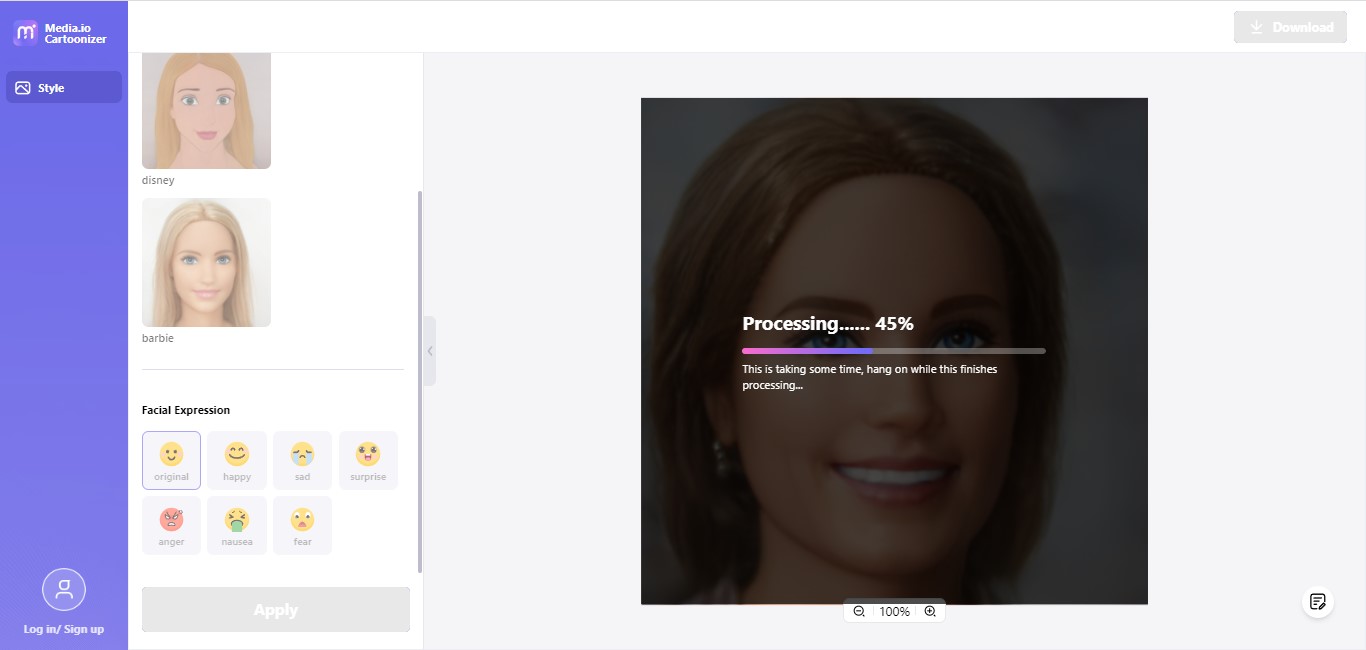
- After this, you can select from any facial expressions below and click apply to get the desired effects.
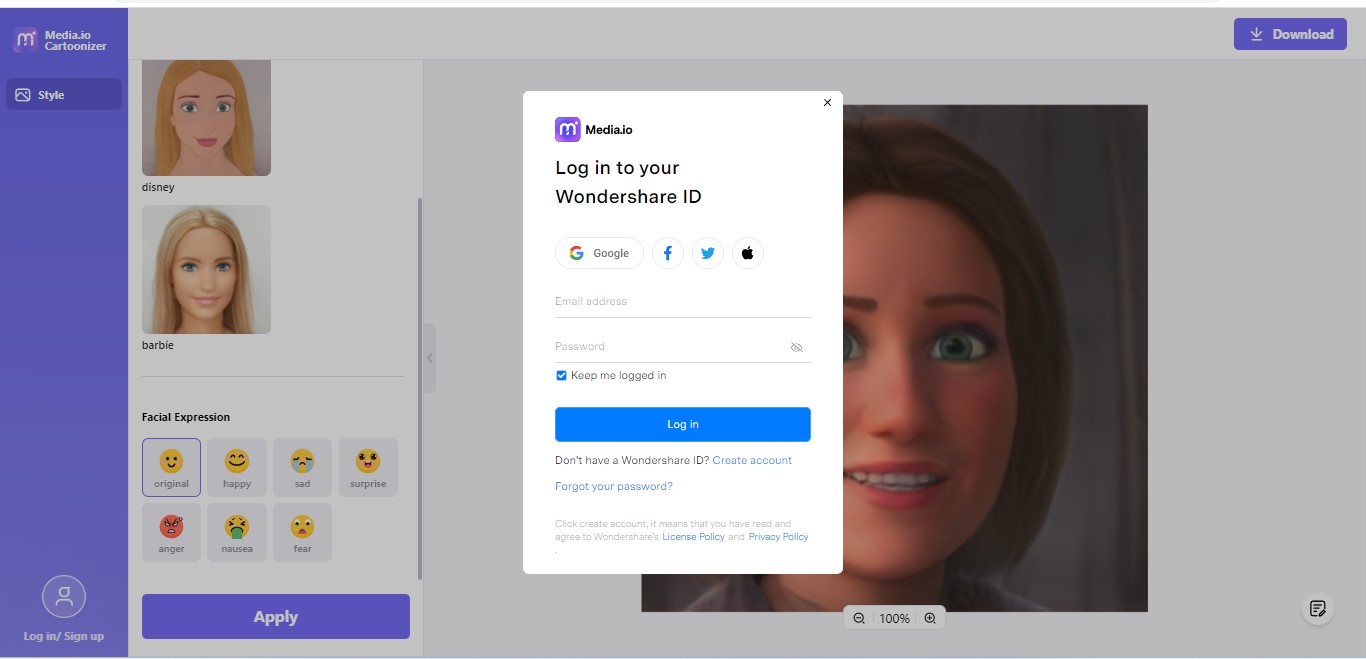
- To download, sign up with any of the options on the screen, and you will get the cartoon image.
Frequently Asked Questions
Q. Why is Adobe Illustrator best for creating cartoon images?
- Adobe Illustrator allows you to add custom effects to the photo, like filling the blank spaces with different colors. You can also choose the areas where you want to add the cartoon effect, thereby having maximum control when multiple subjects are in one image.
Q. Is Media.io Cartoonizer free?
- Yes, Media.io Cartoonizer is entirely free to use. You need to sign in to download the cartoon image.
Q. Will Adobe Illustrator help save images in different formats?
- Adobe Illustrator allows you to save images in different formats, including JPEG and PNG.