ChatGPT
 Perplexity
 Gemini
 Claude
 Grok
Grok
Getting irritated when capturing blurry pictures is a very common thing. It can happen for several reasons, which include no image stabilization or slow shutter speed. However, instead of deleting the blurry photo, making it unblurry is a good option. The most known software that can help you in fixing blurry pictures is Lightroom.
Don't worry if you don't know how to unblur photos in Lightroom. By the end of this Lightroom article, you will learn all about the unblurring picture on both desktop and mobile devices. Moreover, the extraordinary AI alternative will improve your user experience and optimize workflow efficiency.
In this article
Part 1: Why Pictures Get Blurred in the First Place
Most people are new in the domain of photography, and they don't understand why the pictures are getting blurry. If you are also new and wonder what factors lead you to capture blurry images, you are in the right place. Before getting into Lightroom unblur photo, the understated points will help you to know why pictures are getting blurry:
- Subject and Object Movement: When the subject begins to move, focusing on it can be very difficult. If the blurry image is caused by subject movement, it can be termed motion blur. Moreover, taking a picture of an object like a leaf can also lead to a blurry picture. For example, just at the point of capture, it is moved by wind, so the chances of getting a blurry image are high.
- Uncalibrated Autofocus: Even a negligible amount of wrong autofocus can blur your images. If the autofocus is not calibrated properly, your subjects in an image will look soft. Moreover, there are several modes of autofocus, and if you are working with the wrong one, the photos can be blurry.
- DLA and Environment: The aperture of which the diffraction is beginning results in the impact sharpness of the image negatively. You can get the right value of DLA by multiplying your sensor pitch by 1.61. It can save you from capturing a blurry picture of an important memory. Also, the environment, like heat waves, can compromise your image quality.
- Malfunctioning of Lens: The camera lenses are the basics of getting high-quality and sharp images. If you are using low-quality camera lenses, then it can lead to soft pictures. The lenses like 18-55mm also bundle with the camera. Moreover, some zoom lenses can also lead to pic distortion and blurriness.
Part 2: How to Unblur Photos in Lightroom Desktop
Using Lightroom is a good choice for fixing blurry images. In this section, you will learn how to unblur an image in Lightroom easily. Have a look below to discover its procedure:
Step 1Import your image
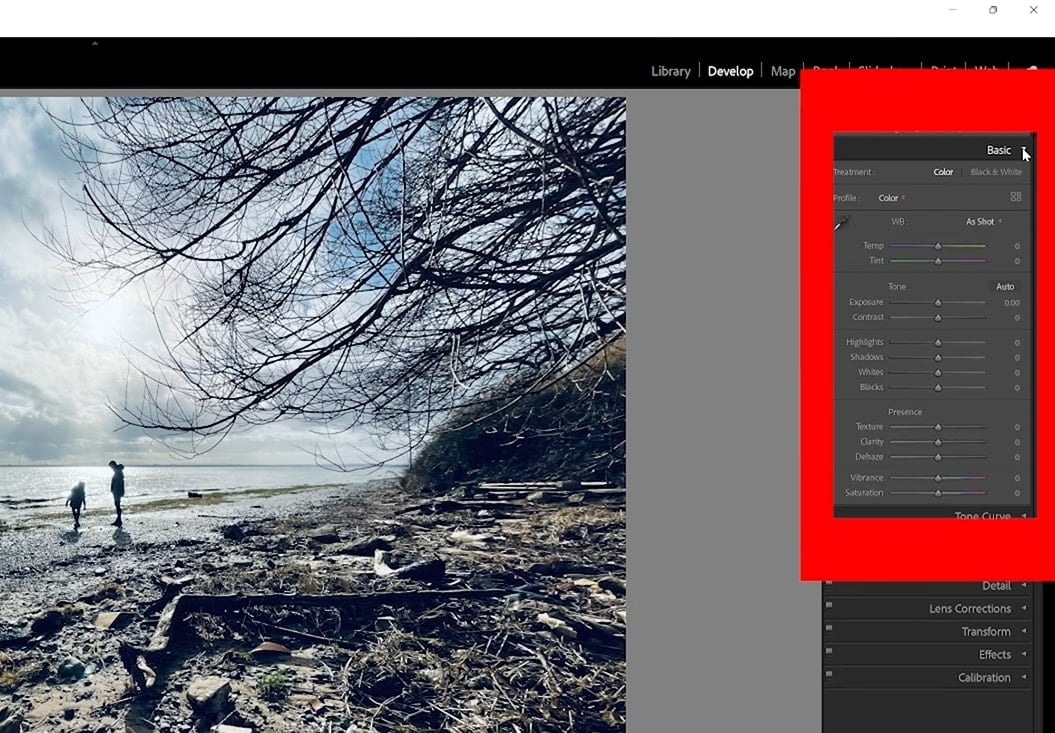
You can use the basic and detail panel of Lightroom to fix your blurry images. For this, import your image in Lightroom and go to the right side panel.

Step 2Change image metrics
From here, click on the "Basic" tab and expand its options. From here, make an adjustment on a photo by changing image metrics like highlights and contrast.
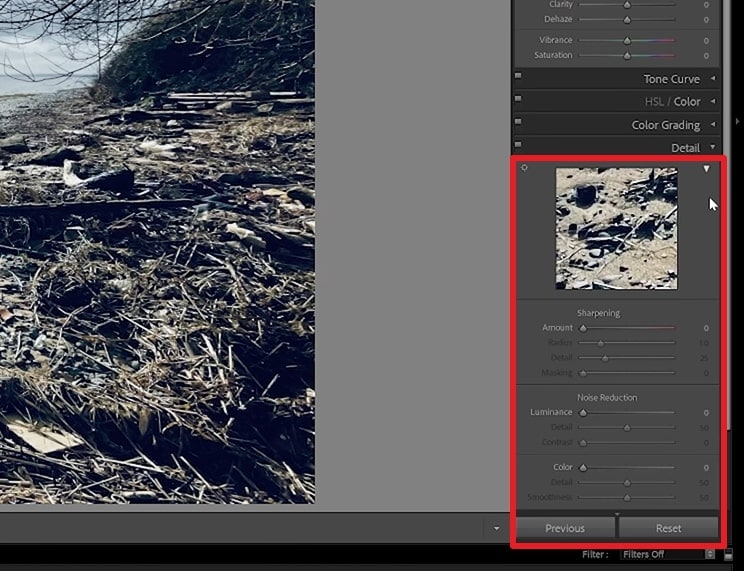
Step 3Adjust the details
You can customize its opacity with the help of sliders. Following this, click on the "Detail" panel. From here, you can customize your image's "Sharpness" and "Noise Reduction" to make it unblurry.
Part 3: How to Unblur a Photo in Lightroom Mobile
Adobe Lightroom can also help you in unblurring images on mobile devices. Follow the steps listed below to learn how to unblur a photo in Lightroom mobile:
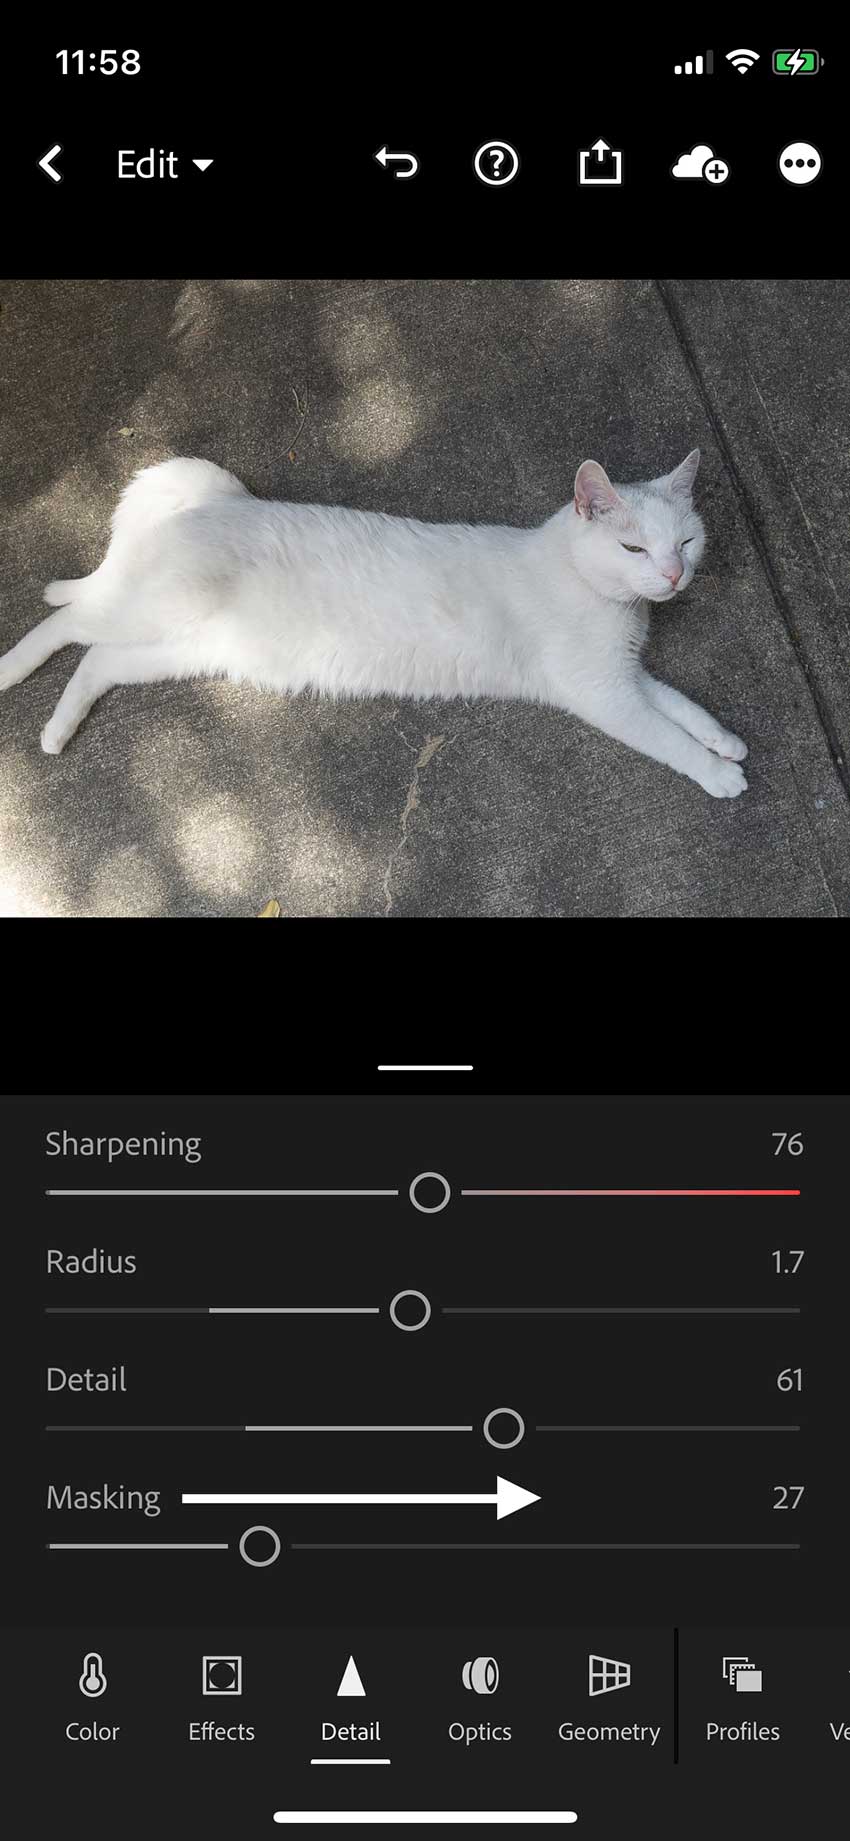
Step 1Choose Sharpening on your mobile Lightroom
To unblur images with Lightroom, download Lightroom on your mobile and launch it. After this, import the picture you wish to work on. Once the image is imported, click on the "Detail" option from the bottom of the screen, and once its options are revealed, go to "Sharpening."
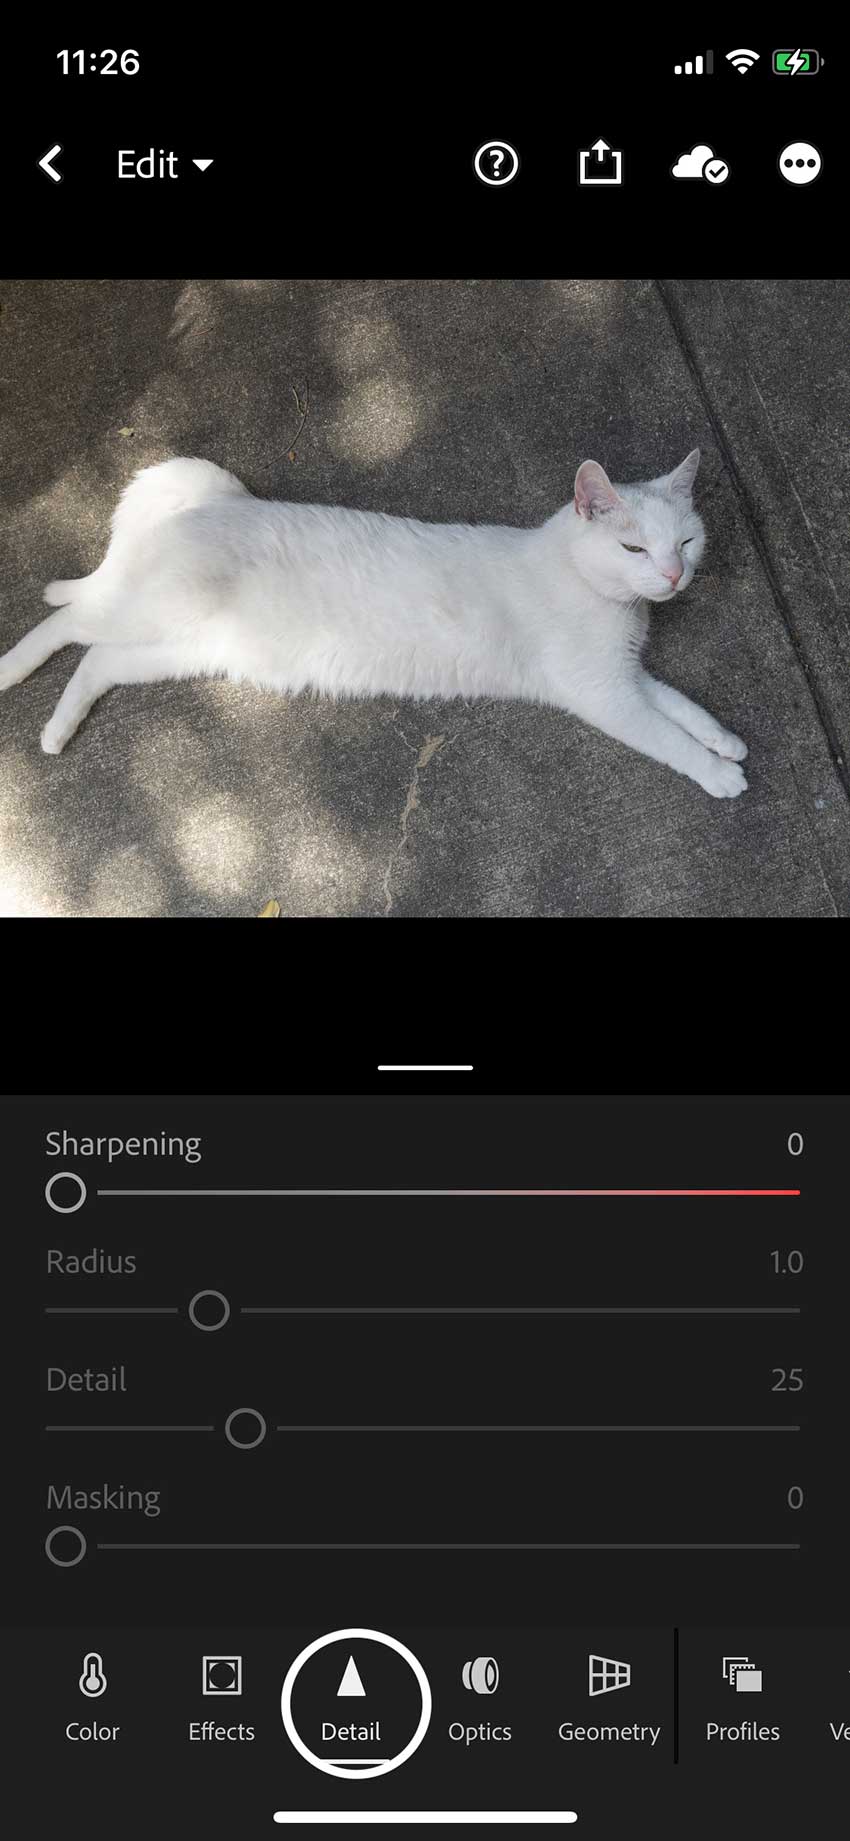
Step 2Slide to adjust
Hereafter, drag the "Sharpening" slider to make the image unblurry and notice its color. The red color on the slider indicates that you are over-sharpening your image.

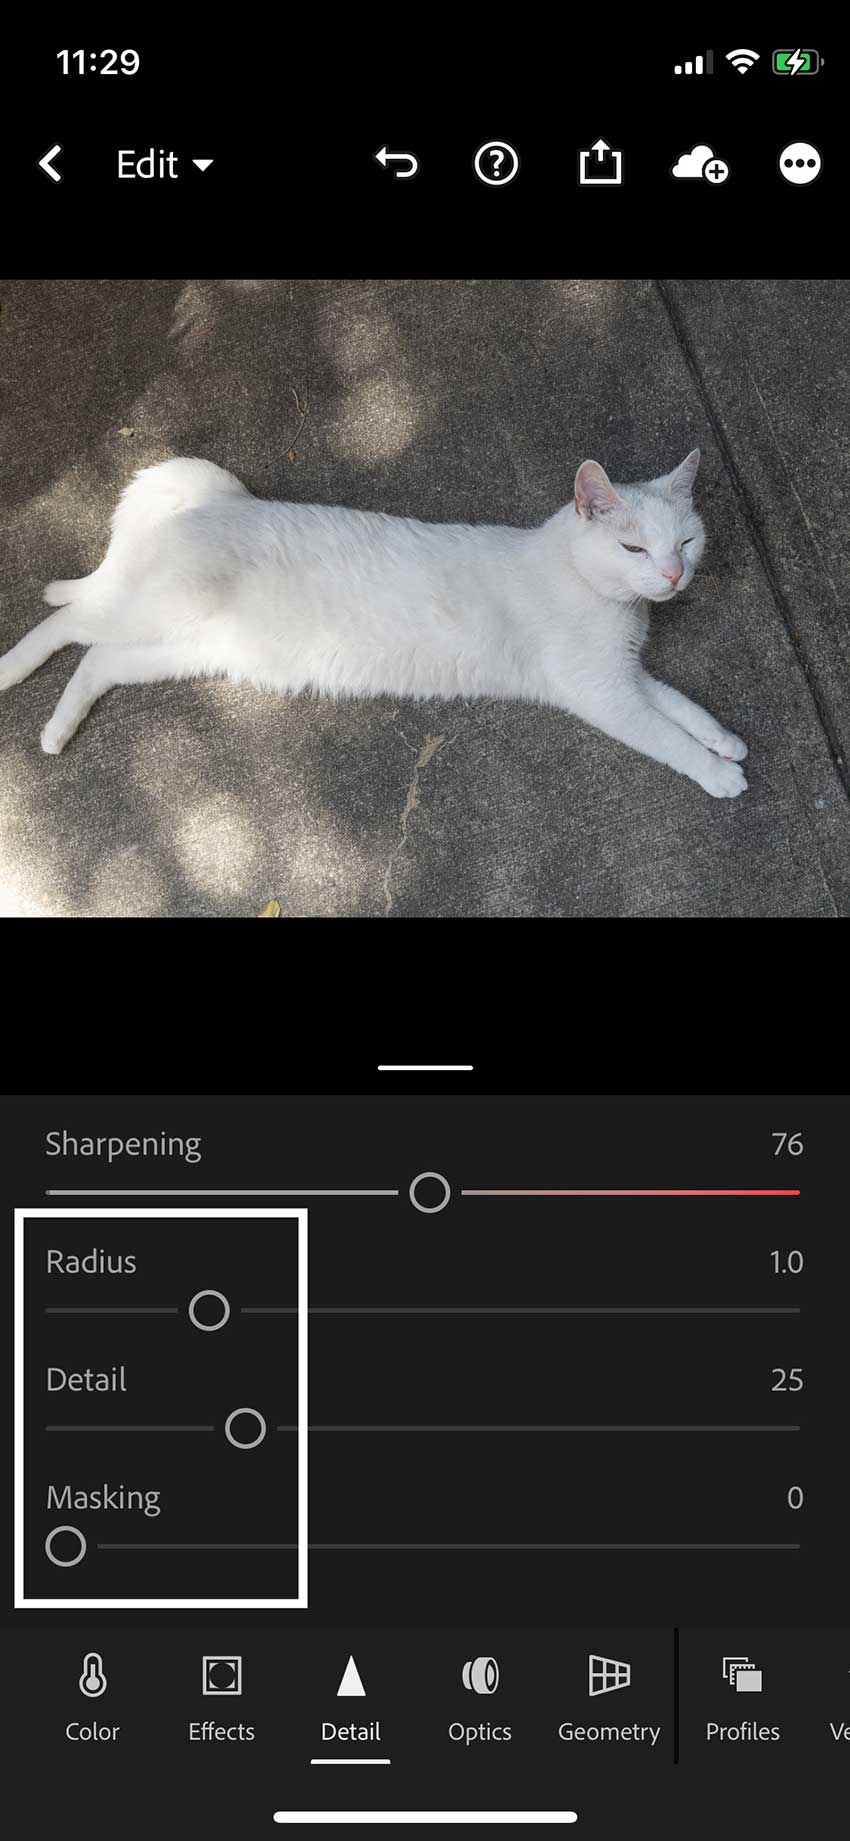
Step 3Make detailed adjustment
Following this, you can also manage "Sharpening" metrics with the help of "Radius," "Detail," and "Masking." With the "Radius" slider, you can control the thickness of edge contrast. On the other hand, the "Detail" slider can sharpen more minor details.
Step 4Save the image
The "Masking" slider can help to decrease the noise. After adjusting, click on the "Back Arrow" from the top of the screen and save the image for later use.
Bonus Tip: The Easiest and most Robust AI Alternative to Lightroom
Media.io offers a massive set of tools by which you can upgrade your image outlooks without integrating its quality. It is powered by artificial intelligence, so the process of this tool is truly automated. You can also perfectly unblur your blurry images with Media.io - AI Image Sharpener. Above all, you don't have to download this tool on your device as it works on a browser.
The sleek and smooth interface allows you to work on the images without mastering editing skills. As for the processing speed, it is blazing fast, so you can now optimize your media content in the blink of an eye. It has secure SSL (HTTPS), which keeps your data safe. For user data security, all uploaded files and generated content on Media.io are automatically deleted from our servers within 7 days. This ensures that your data remains private and protected.
How to Unblur Images with Media.io - AI Image Sharpener
The below-listed steps will help you to know how to unblur images with Media.io AI Image Sharpener:
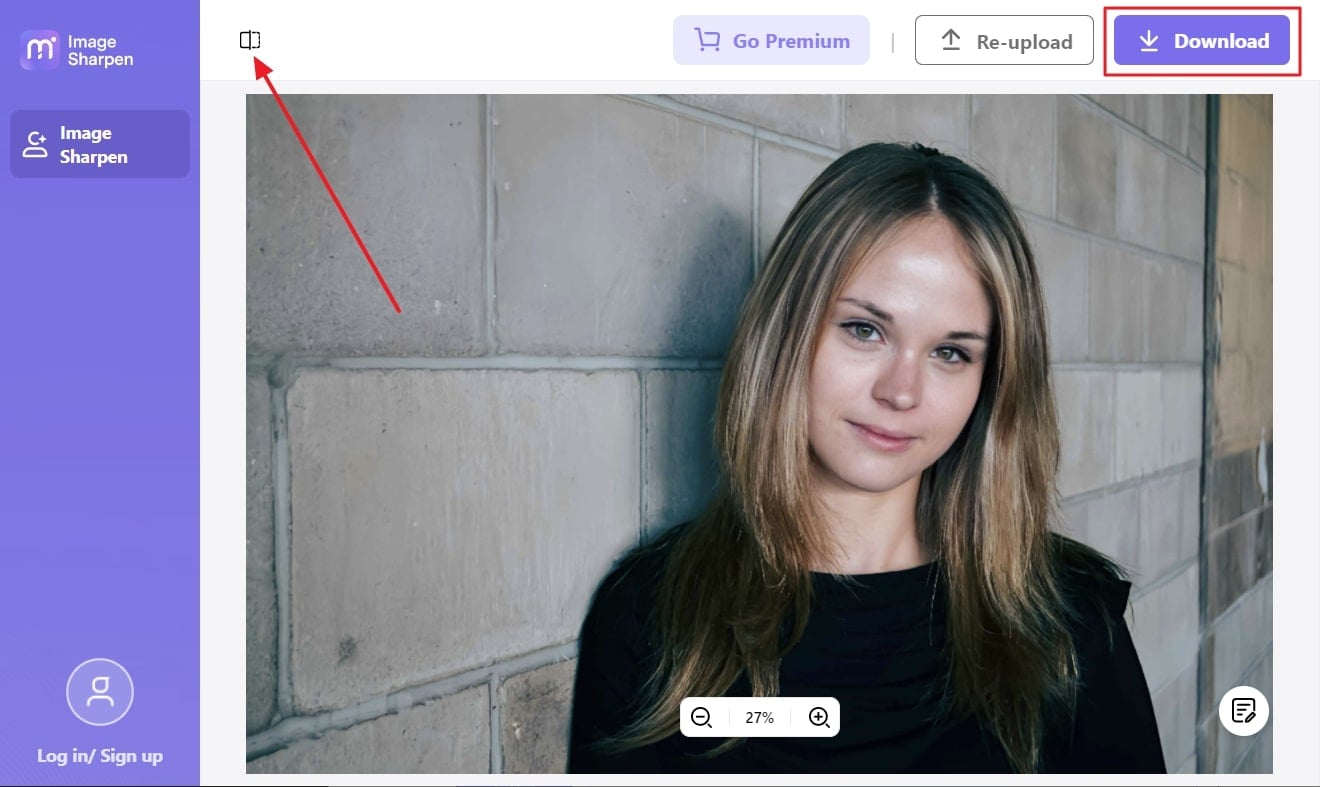
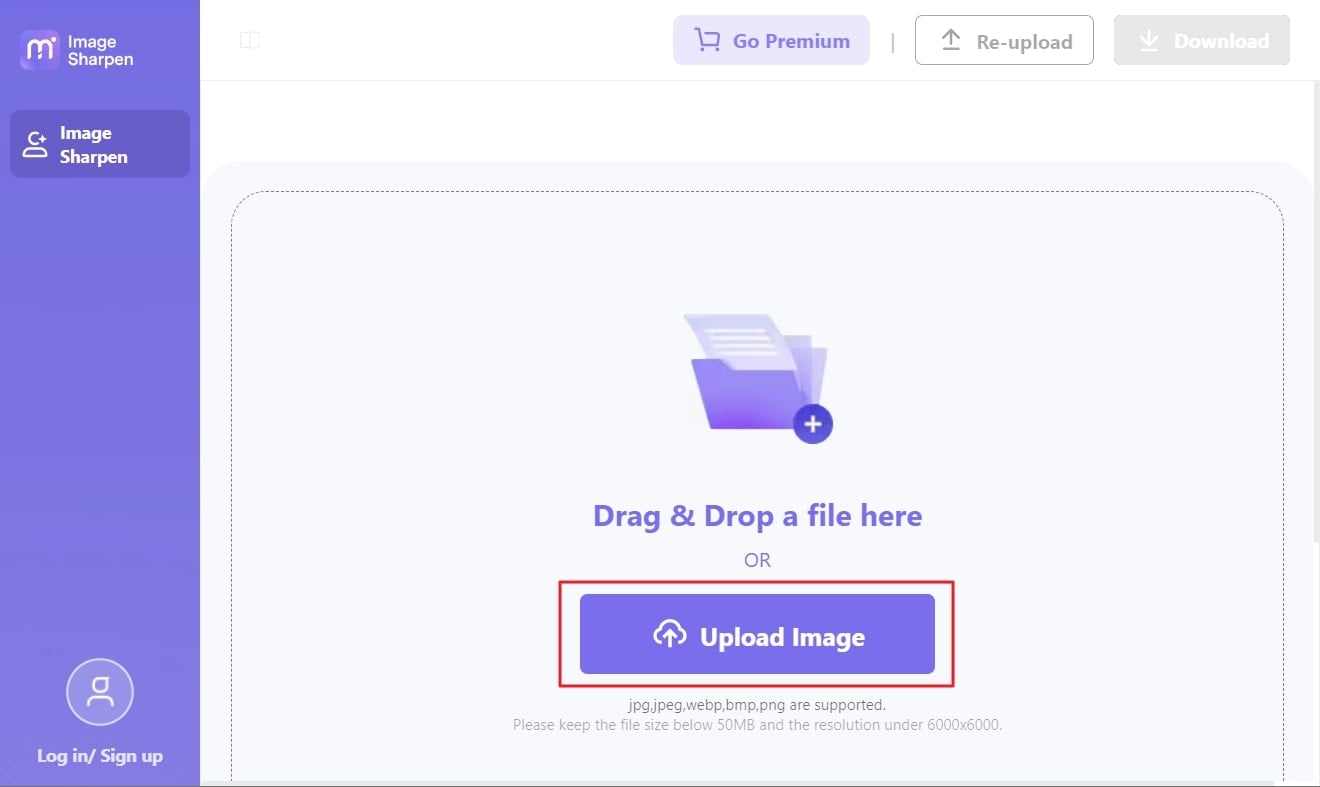
Step 1 Launch Media.io - AI Image Sharpener and Add Image
For unblurring images, open your browser and search for " Media.io - AI Image Sharpener." Click "Unblur Image Now" from its main interface and select "Upload Image." After this, locate the image you want to unblur and double-click on it.
Step 2 Save the Unblur Image in Device
As the process of unblurring is automated, it will be unblurred when the image is uploaded to the Media.io - AI Image Sharpener. You can also click on the "Compare" button to check the comparison between new and old photos. After this, click on the "Download" button from the top right of the screen.