Noise in audio is a common problem, especially if you are not recording in a sound-canceling studio. The noise can be background chatter, traffic, or even recordings made in less-than-ideal conditions. It can be a bother and makes it difficult to hear the audio clearly.
Thankfully, there are a few ways to reduce noise in an audio recording. One of them is to use an audio editor like Audacity.
So, how do you use Audacity to remove background noise? It's actually pretty simple. This article will show you the steps to get rid of unwanted background noise in your recordings.
In this article
Part 1: A brief overview of Audacity
Audacity is a powerful audio editor that lets you make all sorts of edits to your audio recordings. The program is compatible with most operating systems, so it is accessible to any user. Also, this software is free and open-source, so that anyone can access and use the source code.
You can use Audacity for noise reduction, creating high-quality recordings, editing existing audio files, or adding special effects to your recordings. Whether you are new to audio editing or an experienced user, you have everything you need to create great audio using Audacity.
OS Compatibility: Windows, macOS, Linux.
Cost: Free
Official website: https://www.audacityteam.org/.
Some of Audacity's impressive features include:
- Audacity Vocal Remover
- Edit multiple tracks at once
- Zoom in on the audio waveform to make precise edits
- Change the sound to a higher or lower pitch without affecting the recording's original pitch
- Record and playback audio
Although it is one of the popular audio editing software, there are both pros and cons of using Audacity to remove noise. For your consideration, take a look at some of them:
Pros
The software is free to use without having to pay anything.
Anyone can contribute to its development as the software is open source.
Cons
It can be confusing for some people who are not familiar with audio editing tools.
It is designed for audio recording/editor only.
There have been reports of slowdown and bugs.
Overall, Audacity is a good choice if you are looking for a free audio editor. However, it may not be the best option if you need an editor that is reliable and always works smoothly.
Part 2: How to remove background noise in Audacity
After learning a brief introduction about Audacity, you now know a great way to record audio on a budget and produce excellent sound quality. By giving a little effort, you can remove unwanted background noise from your recordings using this free audio editing software.
Follow this step-by-step tutorial on how to remove background noise from audio with Audacity:
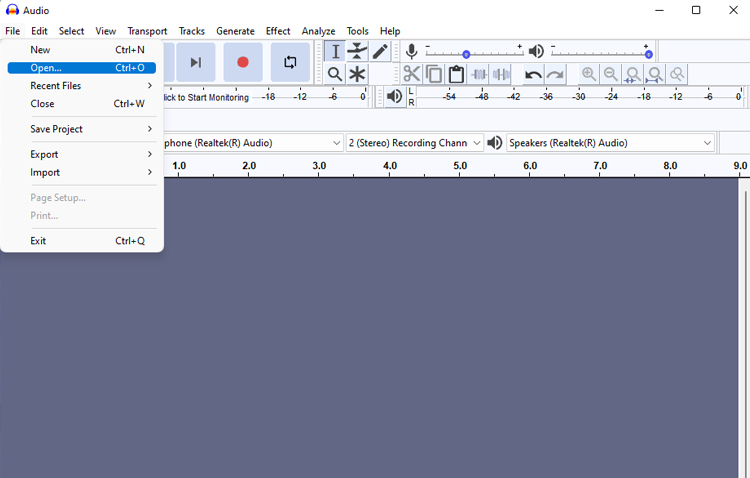
Step 1 Import the audio file to Audacity software.
After you have installed Audacity, you can open the software and go to File > Open. Then, select the audio file you need to fix.
Step 2 Select the audio noise on the waveform using the Selection tool.
To remove unwanted noise from your audio, click on the Selection Tool in the toolbar. Then, make a selection of the waveform around the noise that you want to remove.
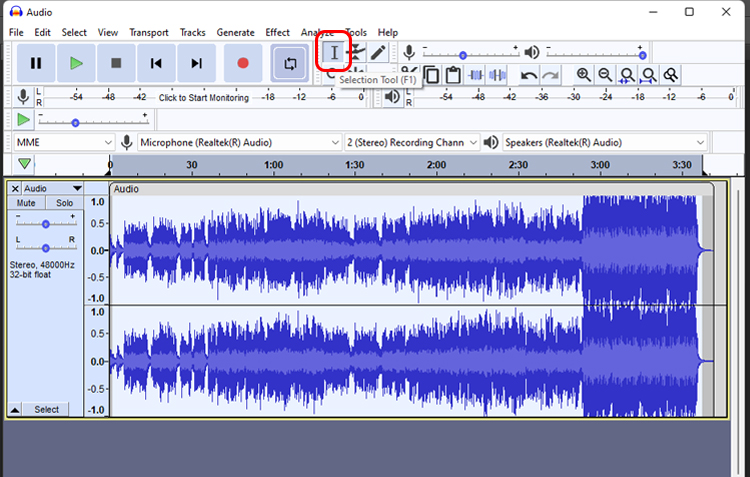
Please be careful when making the selection, and only select the noise. If you accidentally select part of the audio that you want to keep, you can press the "Undo" button or press "Ctrl+Z" on your keyboard.
Step 3 Apply the Noise Reduction effect.
Go to Effect > Noise Reduction to open the Noise Reduction window.
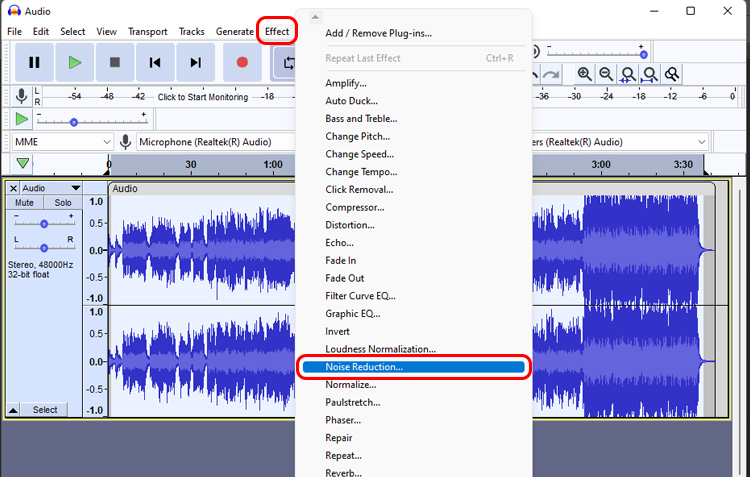
Then, click Get Profile to have the software analyze and create the noise profile. Once the program has finished the process, click OK.
Step 4 Adjust the Noise Reduction level.
Repeat Step 3, but since the software has created the noise profile, you can just adjust how much noise you want to reduce. You can set a certain level of Noise Reduction, Sensitivity, and Frequency Smoothing.
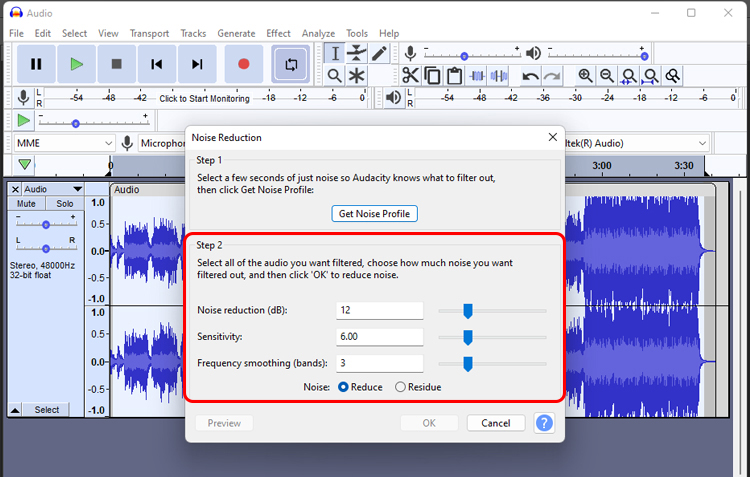
For additional information, the Noise Reduction level (dB), sensitivity, and frequency smoothing (bands) help you optimize analyzer performance. The values you choose will depend on the specific audio you are trying to clean up.
For example, if you are trying to remove hiss from a recording, you would want to use a higher Noise Reduction level, while if you are trying to remove clicks and pops, you would want to use higher sensitivity.
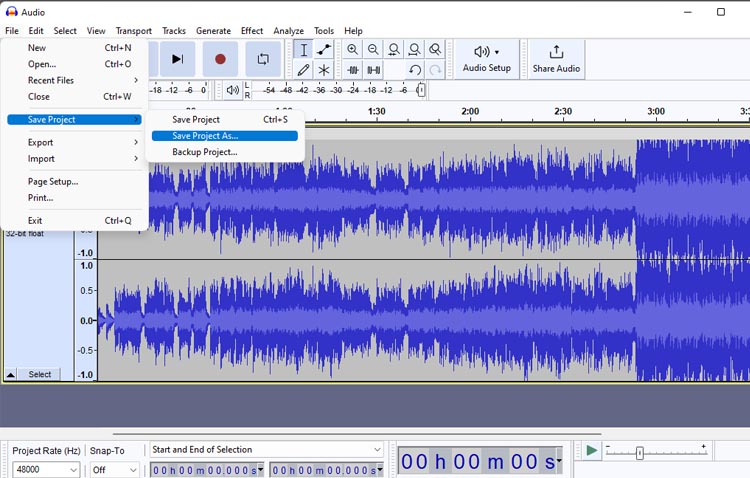
Step 5 Save your audio.
After everything has been set, click File > Save Project > Save Project/Save Project As and select the location where you want to save it.
Part 3: The best alternative to Audacity
Audacity is a great piece of software for recording and editing audio. However, it's not the only option out there, as it also has its drawbacks. The software can be confusing to use for people who are not tech-savvy or familiar with audio editing. While it is a free program, it also lacks some features that are found in paid programs.
So, if you are looking for an audio editing tool that is more straightforward to use, Media.io can be the best alternative of your choice. Since Media.io is powered by artificial intelligence, it can handle some of the more complex audio editing tasks for you. Plus, this tool works online. You don't need to work on installing or downloading any software.
You can visit the official website at: https://www.media.io/.

Compared to Audacity, you don't need any technical expertise or experience with audio editing. The tool will do all the work for you in just a few clicks. Simply upload your audio file and let Media.io take care of the rest.
Other than that, Media.io has several features that make any work easier, such as:
- File compressor with high-quality output
- File converter with many supported formats
- Online screen recorder to capture any screen-based activity
- Auto text-to-speech
Now, let’s get to the steps on how to remove noise from audio using Media.io:
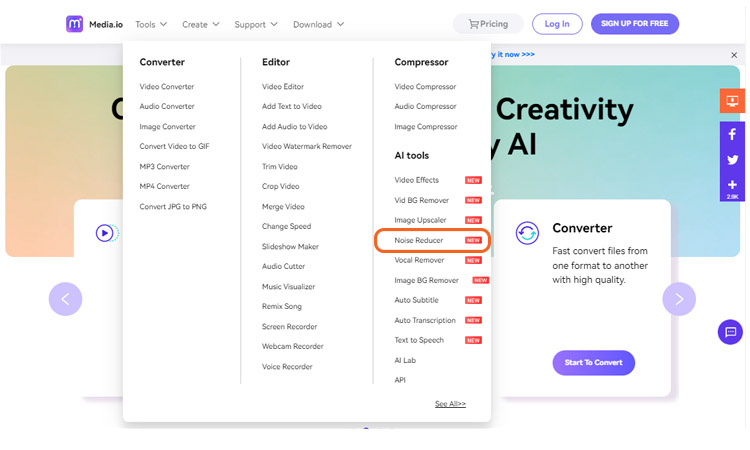
Step 1 Open the Media.io website and go to the Noise Reducer tool.
On the Media.io website, you can go to Tools > Noise Reducer or visit the Media.io Noise Reducer at https://www.media.io/ai/ai-tools/noise-reducer.
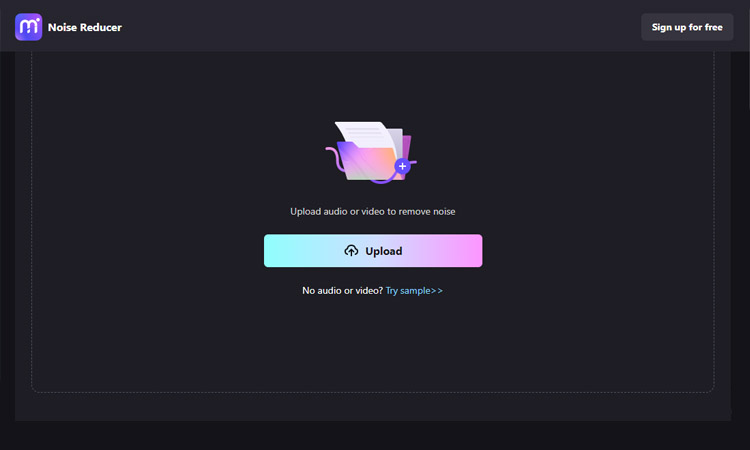
Step 2 Upload the audio file.
Once you have opened the Noise Reducer tool, click the Upload button and open the audio file you want to fix. Media.io also offers audio samples if you want to try out the tool first.
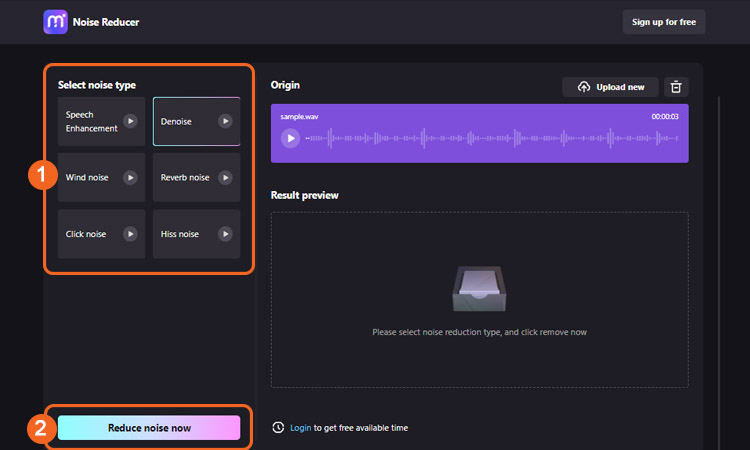
Step 3 Select the noise type and start reducing the noise.
You can choose which noise you want to reduce, then click Reduce Noise Now. The tool will start processing your audio in a few seconds.
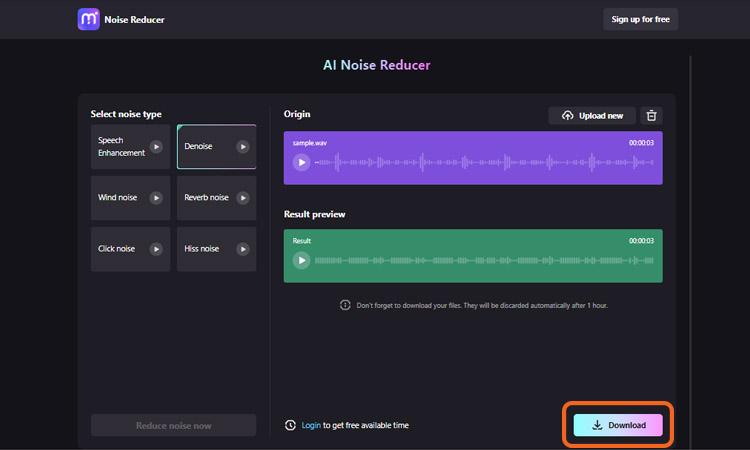
Step 4 Download the audio file.
Once the process is done, you can listen to the preview on the Result Preview. It is noteworthy that the Noise Reducer tool will also enhance the quality of your audio aside from reducing the noise.
So, if you are satisfied with the result, you can click Download and save it to your computer.
Those are the steps you need to do to remove background noise with Audacity. If you find yourself having any difficulties using Media.io, you can always reach out to their support service for assistance. Their team is very responsive to help you with any problems or questions you may have.
Otherwise, you can always use their blogs to learn about new features or figure out how to use the platform in different ways. There is also a community platform to ask questions or share your own tips and tricks with other users.