
 ChatGPT
 Perplexity
 Gemini
 Claude
 Grok
Grok

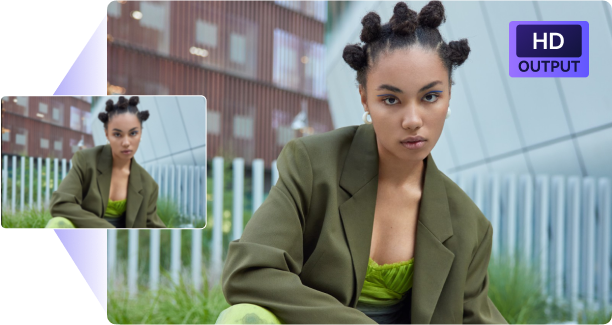
The purpose of sharpening images is to make them appear more realistic. Sharpened images are utilized in a variety of ways, from professional presentations to personal projects. For example, if you want to create a photo that looks like taken with a high-quality camera, then you should sharpen it so that it appears more realistic. When you sharpen an image, you're essentially making the edges of the pixels more defined.
The quality of your images is necessary. It's not just about how they look but also how they make you feel. When people look at your images, they want to see them as clearly as possible. In this article, we'll show you how to unblur a photo in Photoshop. We'll also talk about how to use some tools in Photoshop to help with image sharpening.
In this article
Part 1: Understanding Blurred Photos
Blurred photos are the most common error that people make when taking photos. It's easy to do, and it's easy to fix, but if you don't know what to look for, you can easily miss it. When you are taking a photo of something that is moving, ensure your camera is set on burst mode to capture as many frames as possible.
It will ensure that if there are any blurry areas in your photo afterward, they can be evenly distributed across all the images captured by your camera. Suppose you want to blur out the part of your picture without affecting other parts of it. Like someone's face, use an editing program. Now we are going to take a look at different types of blurs.
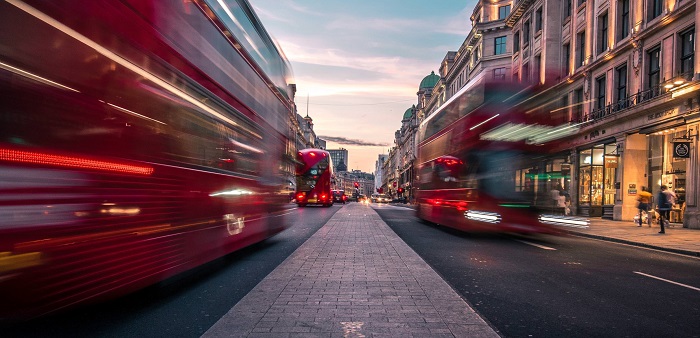
1.Motion blur
This occurs when the camera or the subject moves during the exposure, resulting in a blurry image. For example, if you're photographing a moving object and use a slow shutter speed, the object will appear blurred in the image.
2.Out-of-focus blur
This occurs when the camera's focus is not set correctly, resulting in an image that is not sharp. For example, if you focus on the background instead of the subject, the subject will appear blurry in the image.
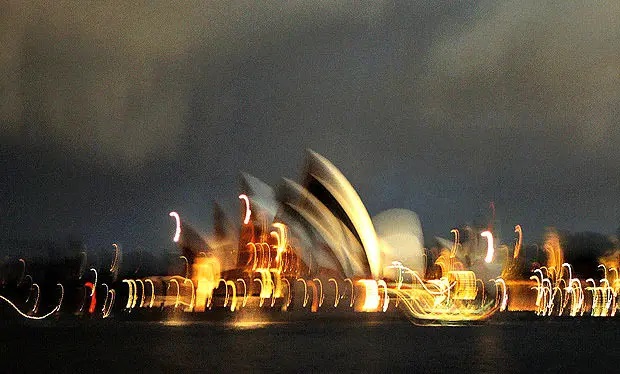
3.Camera shake blur
This occurs when the camera moves while taking a photo, resulting in a blurry image. For example, if you handhold the camera with a slow shutter speed, the image may appear blurry due to the camera shake.
4.Noise blur
This occurs when the camera's ISO setting is too high, resulting in a grainy, blurry image. For example, if you shoot in low light and increase the ISO to compensate, the image may appear blurry due to the noise introduced by the high ISO.

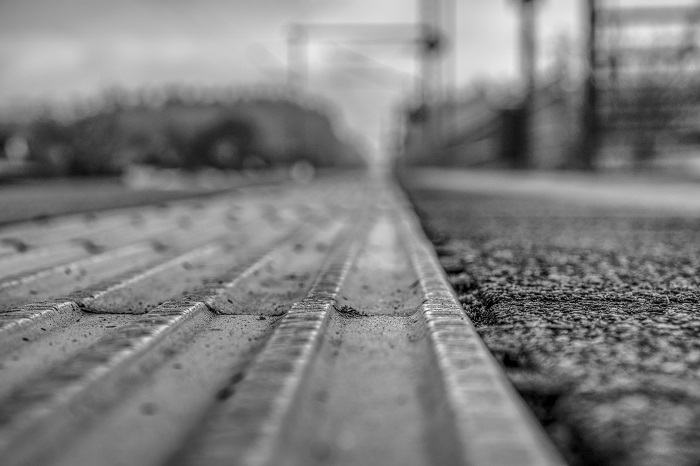
5.Depth-of-field blur
This occurs when the depth of field is too shallow or too deep, resulting in parts of the image appearing blurry. For example, if you use a wide aperture to create a shallow depth of field, only the subject will be in focus, while the background will appear blurry.

Part 2: Basic Sharpen Tools in Photoshop
If your photos look too soft or blurry, you can try sharpening them to add contrast. To sharpen an image, you can increase the contrast between adjacent pixels. It makes the edges of objects look sharper and more defined. You can experiment with different sharpening settings to see what works best for your photos. Be careful not to overdo it, as over-sharpening can make your photos look artificial and unattractive.
When you're working on a photo, the first thing you want to do is fix it. You might be thinking that "I don't know how to fix my blurry images." The good news is that there's a quick way to fix blur in Photoshop: the sharpening tools! With these tools, you can fix your blurry images smoothly by turning up the sharpness level until the picture looks clear.
1.Shake reduction tool
The Shake Reduction tool is a feature in Adobe Photoshop that helps reduce blur in images caused by camera shake. It identifies the areas in the image that may be affected by movement or blurring, then applies algorithms to correct them. This filter is beneficial for correcting photos taken in low light or slow shutter speeds, as well as for photos taken with a motion camera.
You can use the tool by following these steps:
- Install Adobe photoshop and open the image in it.
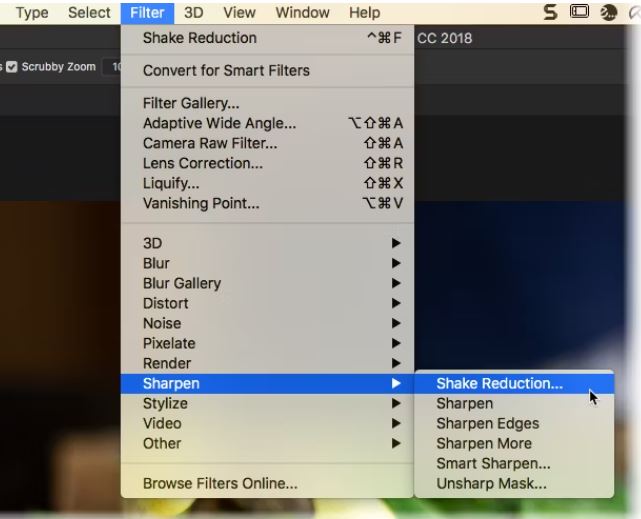
- Click on the Filter from the toolbar and then select the Sharpen button.
- Click on "Shake Reduction", it will unblur the image.
2.The Sharpen filter
The Sharpen filter is a feature in Adobe Photoshop that helps to enhance the detail and sharpness of an image. It works by increasing the contrast between pixels that are adjacent to each other, thereby making edges and details appear more pronounced. It can be used to improve the overall appearance of an image.
3.Unsharp Mask
Blurriness is used to sharpen an image, and then uses masking to soften that effect. The unsharp mask tool works well for small areas of focus where there isn't much contrast between objects in your photo (like eyelashes or bird feathers). You can adjust how much blurriness occurs by changing its radius.
4.Sharpen more
The Sharpen More filter is a type of Sharpen filter in Adobe Photoshop that increases the sharpness and clarity of an image by accentuating the edges and details within it. It is more aggressive than the regular Sharpen filter and should be used with care to avoid oversharpening the image.
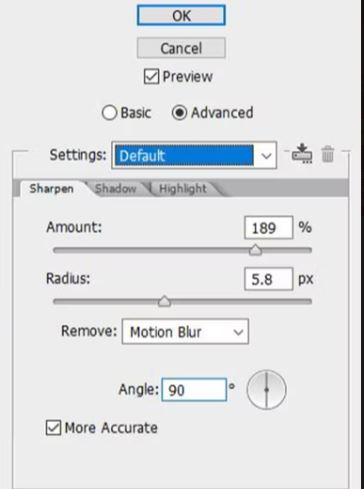
5.Smart sharpen
Smart Sharpen is quite good with the Unsharp mask and is used to detect the edges. It created a sharp image and did make a sharpening noise. It is also used to fade the edges of the image. Your image will look sharper without losing quality. It's a bit more complicated to use than the other sharpening filters. Here's a quick rundown of how to use the Smart Sharpen filter in Photoshop.
- Open the image you want to sharpen in Photoshop. Then, go to Filter > Sharpen > Smart Sharpen. It will open the Smart Sharpen dialog box.
- In the dialog box, you will see two options Amount and Radius. The Amount slider controls how much sharpening is applied to the image, while the Radius slider controls the size of the sharpening effect.
- Start by adjusting the Amount slider until you are happy with the amount of sharpening. Then, adjust the Radius slider.
Part 3: How to Unblur a Photo in Photoshop
When an image is blurry, it means that the camera is not able to take a clear picture. It usually happens when the subject is moving, or the camera is shaking. Blurry images can be frustrating, especially when you are trying to capture a special moment.
Whatever the cause, blurred images are often fixed by using image editing software to sharpen the image. One way is to use Photoshop to unblur the image. It can do by using the sharpen filter. In this article, we will show you how to unblur an image in Photoshop.
1. Use of Shake Reduction Filter
When trying to fix a blurry image, the main thing you should do is try the shake reduction filter. This filter can sometimes fix slightly blurry photos. To use this filter, open the image in Photoshop. Choose the layer of the picture and move to the Filter option. Click on convert for smart files. It will maintain the original quality of the image.
Go to Filter > Sharpen > Shake Reduction. It will open the shake reduction dialog box. Next, you will need to select the area of the image that is blurry.
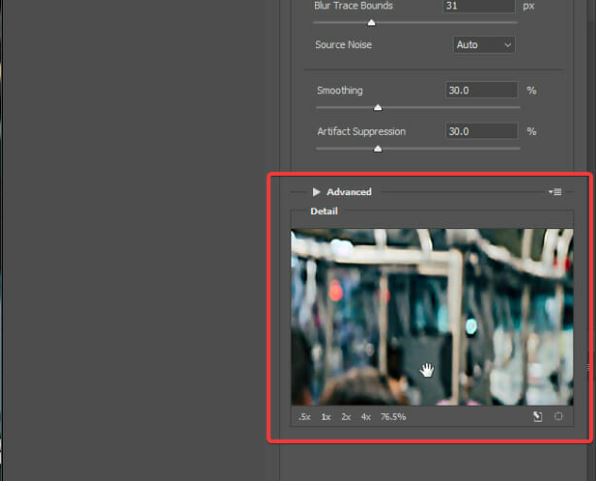
You need to go to the Advanced panel and move to the Add suggested blur trace. Focus on more blurry areas of the picture. Then further use and apply the blur traces all over the blur parts. Lastly, review your image and save it on your computer.
Experiment with the amount of shake reduction until you find a setting that gives you the best results. Photoshop sharpens the images, you can try other methods, such as the sharpen filter or the smart sharpen filter.
2. Use of Unsharp mask to unblur the photo
Are you looking for a way to unblur an image in Photoshop? You can use the unsharp mask filter to fix blurry photos. This filter allows you to sharpen the details in an image and make it look crisper and clearer. In this article, we'll show you how to use the unsharp mask filter to unblur an image in Photoshop.
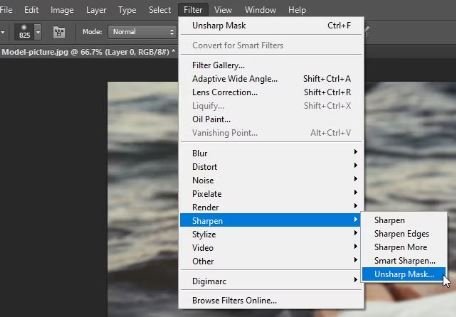
First, open your image in Photoshop. Then, go to the Filter menu and select Sharpen > Unsharp Mask. In the Unsharp Mask dialog box, you can adjust the Amount, Radius, and Threshold to control how much the image is sharpened.
There are three settings you can adjust: Amount, Radius, and Threshold.
- Amount
This setting controls the intensity of the sharpening. A higher amount will make the image crisper, but too high of an amount to create an artificial "halo" effect around objects.
- Radius
This setting determines the size of the details used for sharpening the image. A larger radius will sharpen larger details, while a smaller radius will sharpen small details.
- Threshold
This setting helps to prevent sharpening the noise in your image. A higher threshold will only sharpen the edges of objects.
Set the Amount to 100%, the Radius to 1.0, and the Threshold to 0. Click OK to apply the filter. You should now see a much sharper image. Play around with these settings until you get the desired results. Preview your picture before downloading it.
3. Use of smart sharpen filter to unblur the image
When you need to unblur an image in Photoshop, it is a filter that will do the job perfectly: the smart sharpen filter. This filter is specifically designed to remove blur from images. It does a great job at it. This filter is available under the Filters menu, and it uses advanced algorithms to sharpen your image.
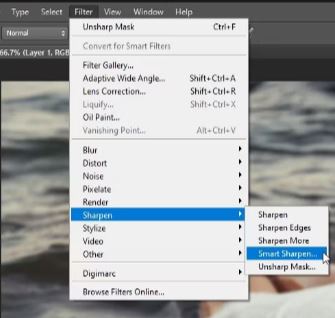
Open your image and duplicate it. Click on the convert to smart object option. To use the smart sharpen filter, open your image in Photoshop and go to the Filter > Sharpen > Smart Sharpen menu. In the smart sharpen dialog box, you can adjust the amount of sharpening and the radius of the effect. For most images, the default settings will work just fine.
Once you are happy with the settings, click OK to apply the filter. And that's it! The smart sharpen filter will quickly and easily remove any blur from your image.
4. Use of High Pass filter to unblur the image
If you want to sharpen more than one area of your image, you can use various filters in Photoshop. With the filter option, you can select the areas you want to sharpen and then apply the filter to those areas.
A high pass filter is a tool used in Photoshop to sharpen images. This filter quickly goes through an image and looks for areas of contrast. It then increases the contrast in those areas, which makes the image appear sharper. To use a high pass filter, open the filter menu and select "High Pass." You can then adjust the strength of the filter.
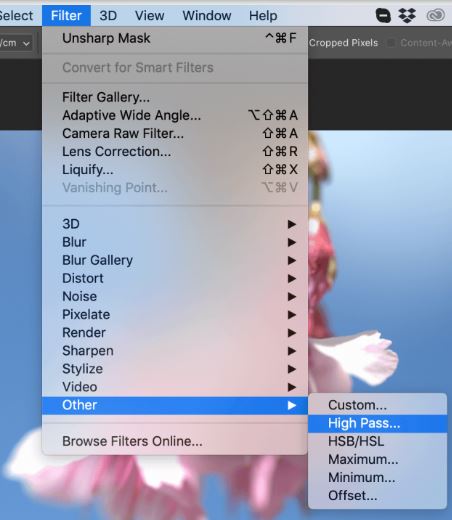
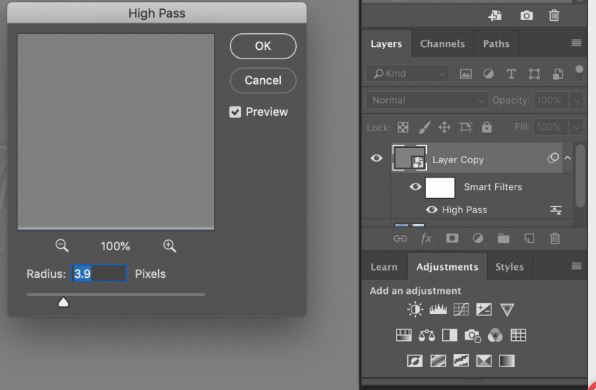
Set the radius to the minimum:
This filter is found in the toolbar Filter > Other option. When you apply this filter, you will see a dialog window where you can adjust the radius of the filter. The higher the radius, the more intense the effect will be. You can also adjust the threshold to control how much of the image is affected by the filter.
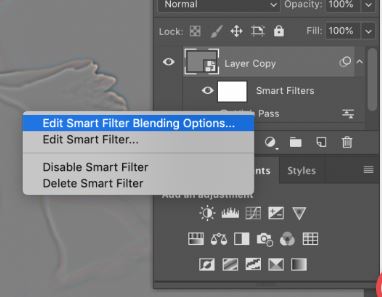
Changing of blending mode
After adding the grayscale, change the blending mode. Click on the Edit Smart Filter Blending Option. You can select many options: hard light, soft light, vivid light, hard mix, overlay, and linear light. It will sharpen your image and provides you with your desired result.
Save the image for later
When all the editing is done, export your image to the computer. Just click on export and provides the location where you want to save the project. And then click on ok.