

One of the major platforms for editing and modifying images is Adobe Photoshop. With photo retouching in Photoshop, you can maximize the productivity of your pictures and engagement ratios. Moreover, you can also perfect the images by making your skin smoother and removing all the spots.
However, it can be difficult for new users in this domain. For this reason, this article will guide you about retouching Photoshop in detail. In addition, you will also learn about a tool that is very easy to use and always derives efficient results.
In this article
Part 1: What are the Benefits of Retouching Photos?
If you are new in the photography field, you must think about the reasons for skin retouching in Photoshop. Don't fret because provided below are some fundamental reasons to retouch your images before sharing them:
- To Enhance Attractiveness
You first need to make your photos more attractive to engage more users. A perfect way to do this is to retouch them. It turns out to be helpful in emphasizing a picture's key features.
- Give Professional Outlook
A photo with multiple mistakes can never fulfill the criteria of professionalism. Retouching is the best solution to make images problem-free. From personal portfolios to product enlisting, everything looks professional with retouching.
- Remove Skin Imperfections
The imperfections like blemishes, spots, and red eyes can minimize the image's attractiveness. It also has a direct impact on one's confidence. Thus, it is important to remove all the imperfections in images with a retouching app.
- Improve Composition
The arrangement of elements in the photos is termed image composition. Retouching helps remove all the distractions in a picture. By this, users can focus on the important elements within an image.
Part 2: How to Retouch Pictures with Photoshop? The Most Straightforward Guide
Are you tired of posting photos that are not attractive enough to engage more users? Do you want to get out of this irritable scenario? Worry no more because Adobe Photoshop has got you covered in this scenario. With the help of Photoshop skin smoothing, you can make the image more flawless than ever. Above all, you can also work on 3D photographs with it.
It also helps in cropping, rotating, and adjusting color balance in raw images. You can customize the image layouts with multiple effects like blur, filters, and distortions. Photoshop lets the users customize shadows, balanced contrast, and other features such as "Intensity." Image wrapping tools, alpha composition, and masking are other known features of Photoshop.
Step-by-Step Guide to Retouch Pictures via Photoshop
Do you seek a proper way to execute photo retouching in Photoshop? If so, the following method guides you into executing this process with perfection:
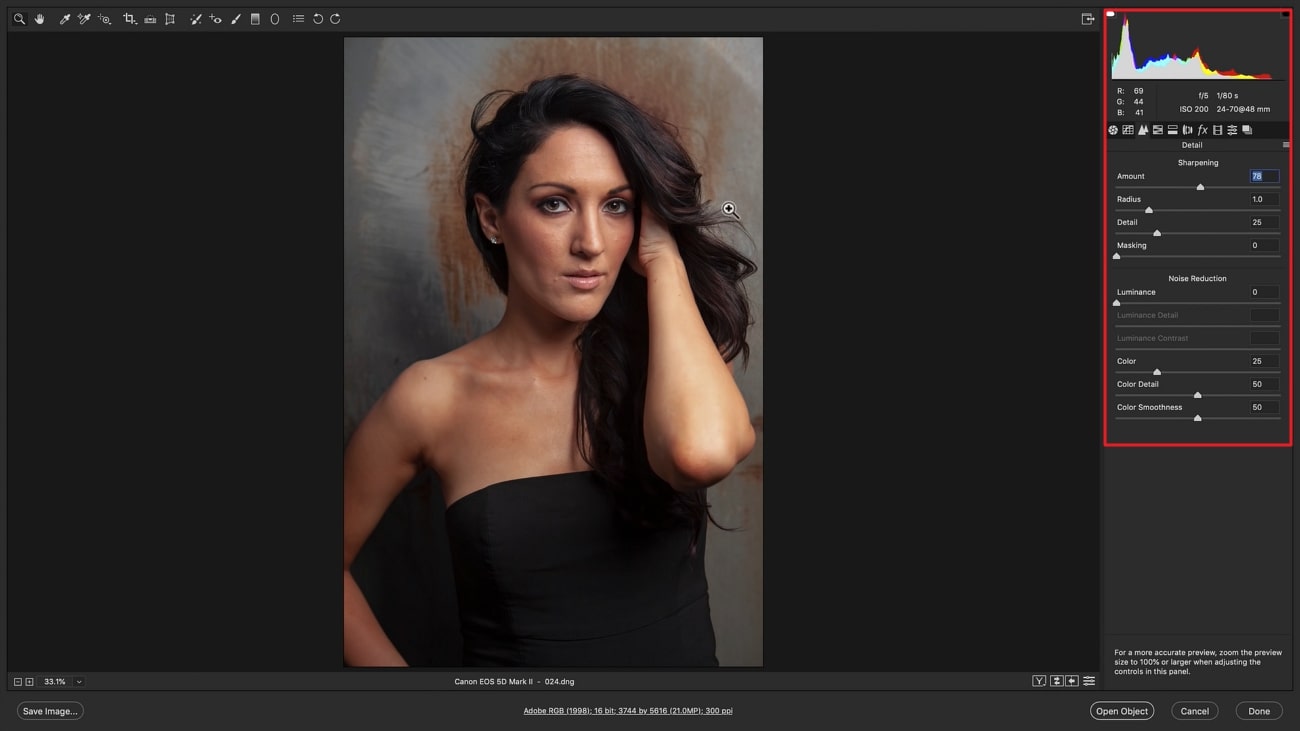
Step 1
Import your image in Photoshop and select "Camera Raw" to adjust color balance and temperature. You can also sharpen the image from the "Detail" tab. After this, open "Lens Correction" to remove chromatic aberration. Enable "Open in Photoshop as Smart Object" from the dialogue box.
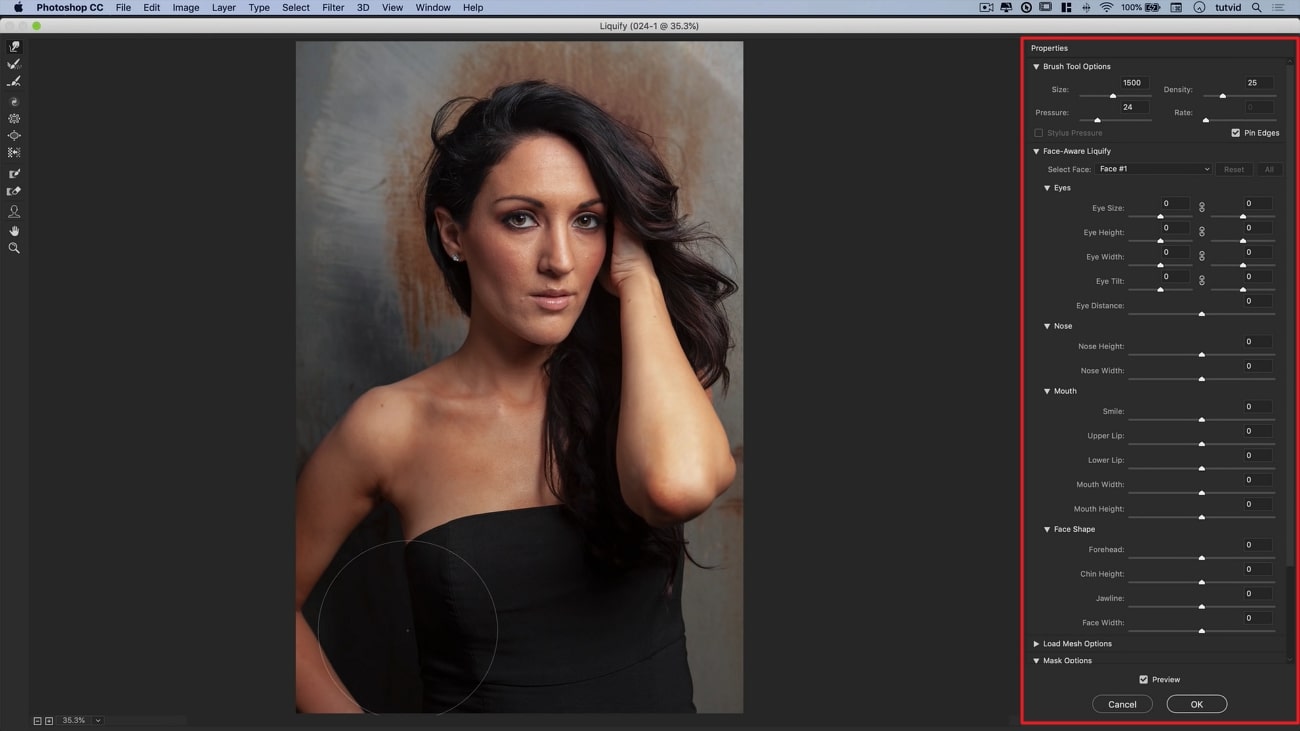
Step 2
Following this, hit "Open Object" and select "Liquify" from the "Filters" tab to retouch the face. You can also choose "Frequency Aberration" for retouching eyebrows and eyeballs. Manage "Opacity" until it adjusts perfectly. For "Frequency Separation Skin Retouch," merge all the layers into a new layer.
You can do it by pressing the "Command + Shift + E" or "Ctrl + Alt+ Shift + E" shortcuts. You can also name the top and bottom layers for your convenience.
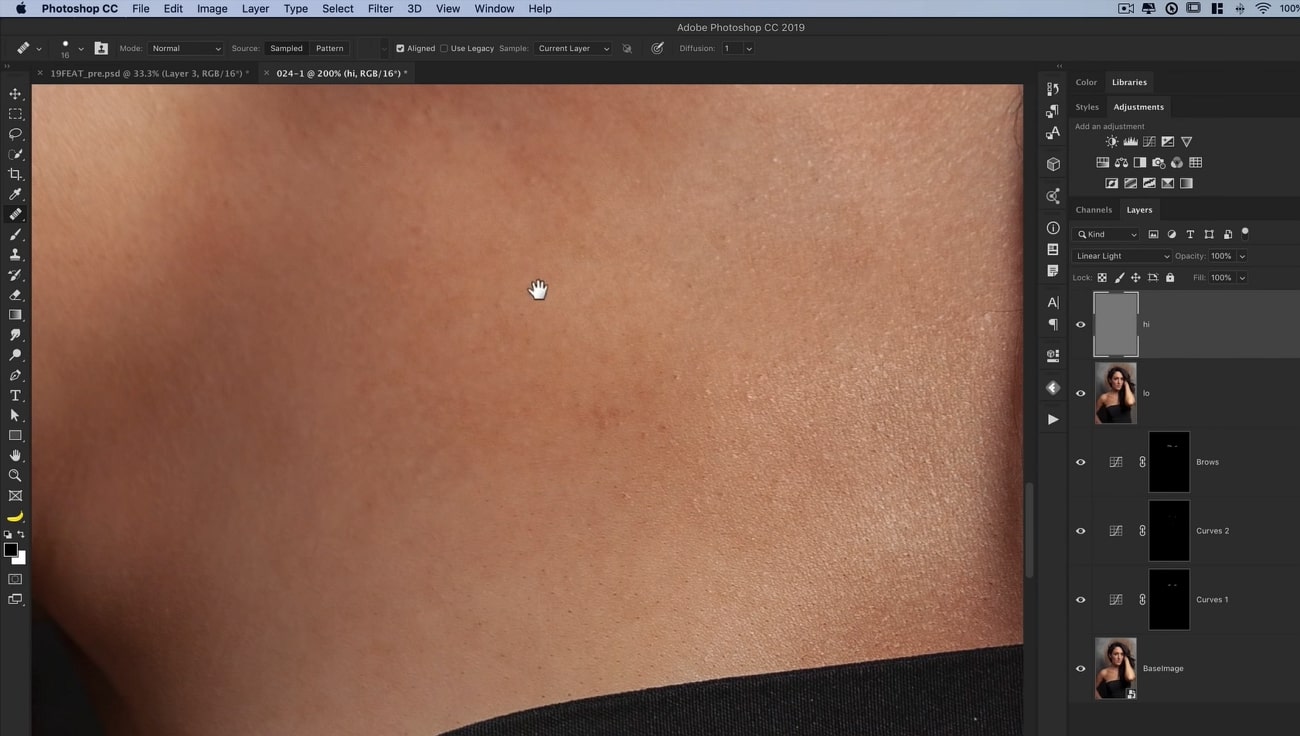
Step 3
By using "Gaussian Blur," you can customize the pixels to eliminate pores on the face. After this, go to "Image," select "Apply Image," and choose the layer. Following this, select "RGB" and lead to "Blending Mode." Hereafter, you can select your scale as per your choice. Now, select the "High Layer" and customize its blending mode. Select "Healing Brush" and remove all the pimples and pores from the skin.
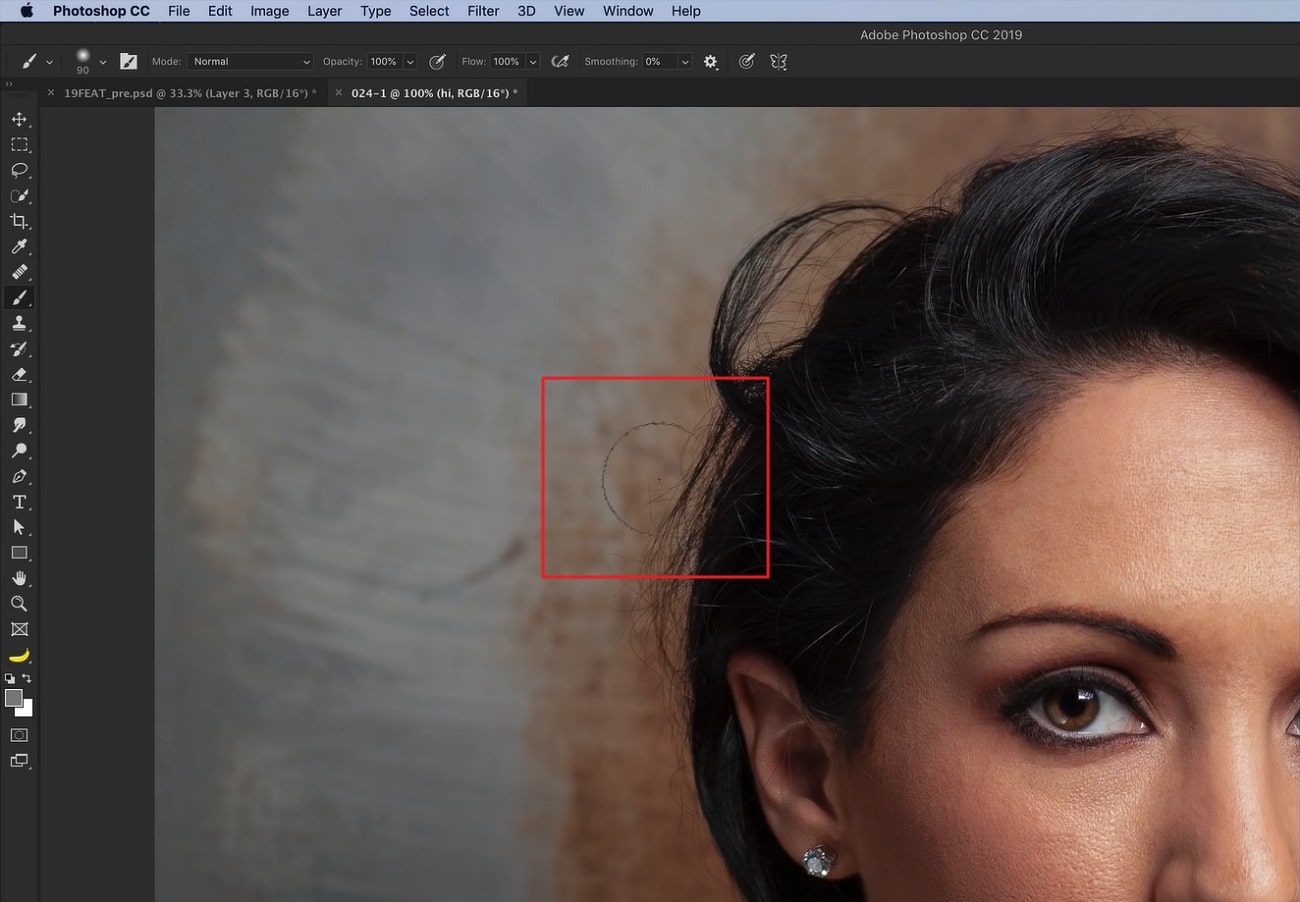
Step 4
Now, click the "Paint Brush" tool and remove all the flyaway hair in the top layer. After this, select "Bottom Layer" and click on the "Clone Stamp" tool. With this, you can remove and darken unwanted objects. Following this, select "Dodge and Burn" and create a new layer. Right-click on the screen, click "Fill," and retouch the image.
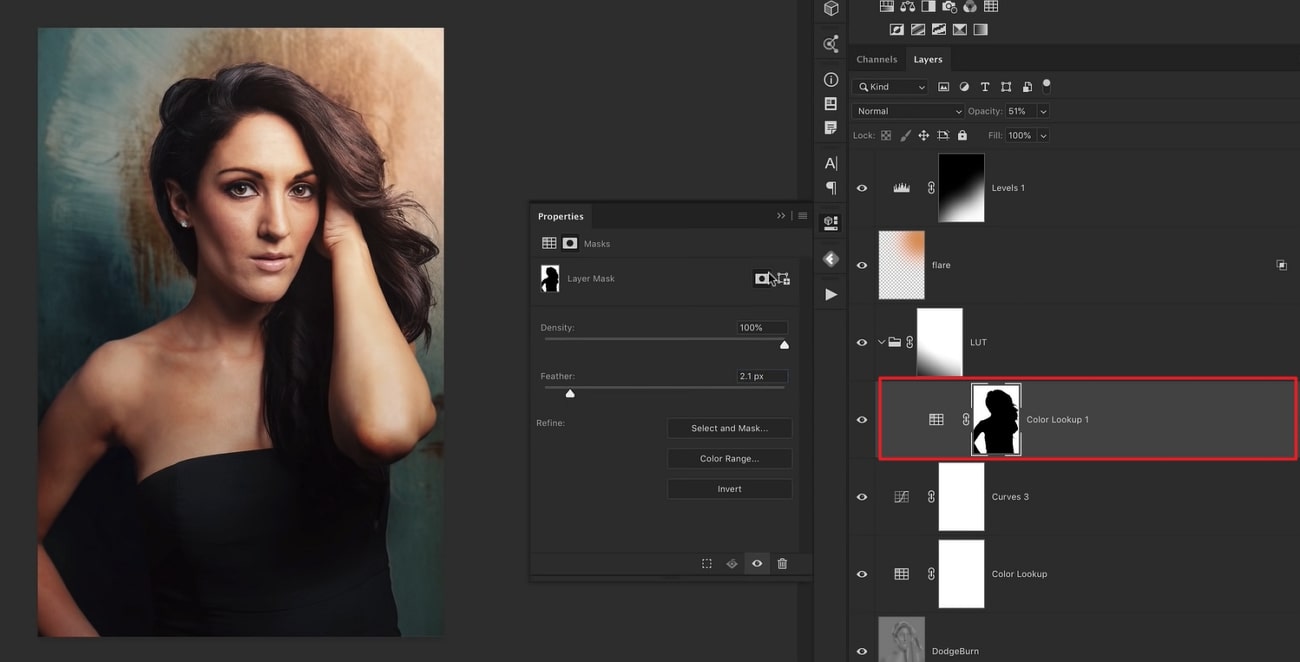
Step 5
Press "Command/Ctrl + J" and create a duplicate layer. Adjust pixels again by using "Gaussian Blur" and open "Color Lookup Table" to add colors. You can manage the colors by using "Opacity" sliders. Press "Command + Shift + opt + E" or "Ctrl+ Alt + Shift + E" and merge layers. Following this, select "Sharpening" engines and sharpen the image and manage "Blend Modes."
Part 3: The Best AI Alternative to Photoshop for Making Process Automatic
The above discussion shows that Photoshop is quite tricky to use. The process of Photoshop face smoothing is very challenging. You cannot follow them until you have mastered editing skills. For this reason, you need to use an easy-to-use tool like AniEraser. This prevalent tool never stops assisting users in a time of need.
Moreover, the process of retouching is far more simplified in comparison to soft skin in Photoshop. The interface of AniEraser plays an important role in making it an excellent retouching tool. The processing speed of retouching is blazing fast, and you can get the work done in the blink of an eye.
Prominent Features Provided by AniEraser
- You can remove all unwanted objects like watermarks, text, logos, and strangers from photos and videos with it.
- It can be used on several distinctive platforms like Windows, Mac, iOS, etc. Users who don't want to compromise their device's storage can use its online version.
- It is very cost-effective, and you can use its premium version on all platforms with one license.
The Process of Retouching Images with AniEraser
Want to retouch your images with the help of AniEraser? Find dedicated support for the process of retouching images with this tool by following the steps below:
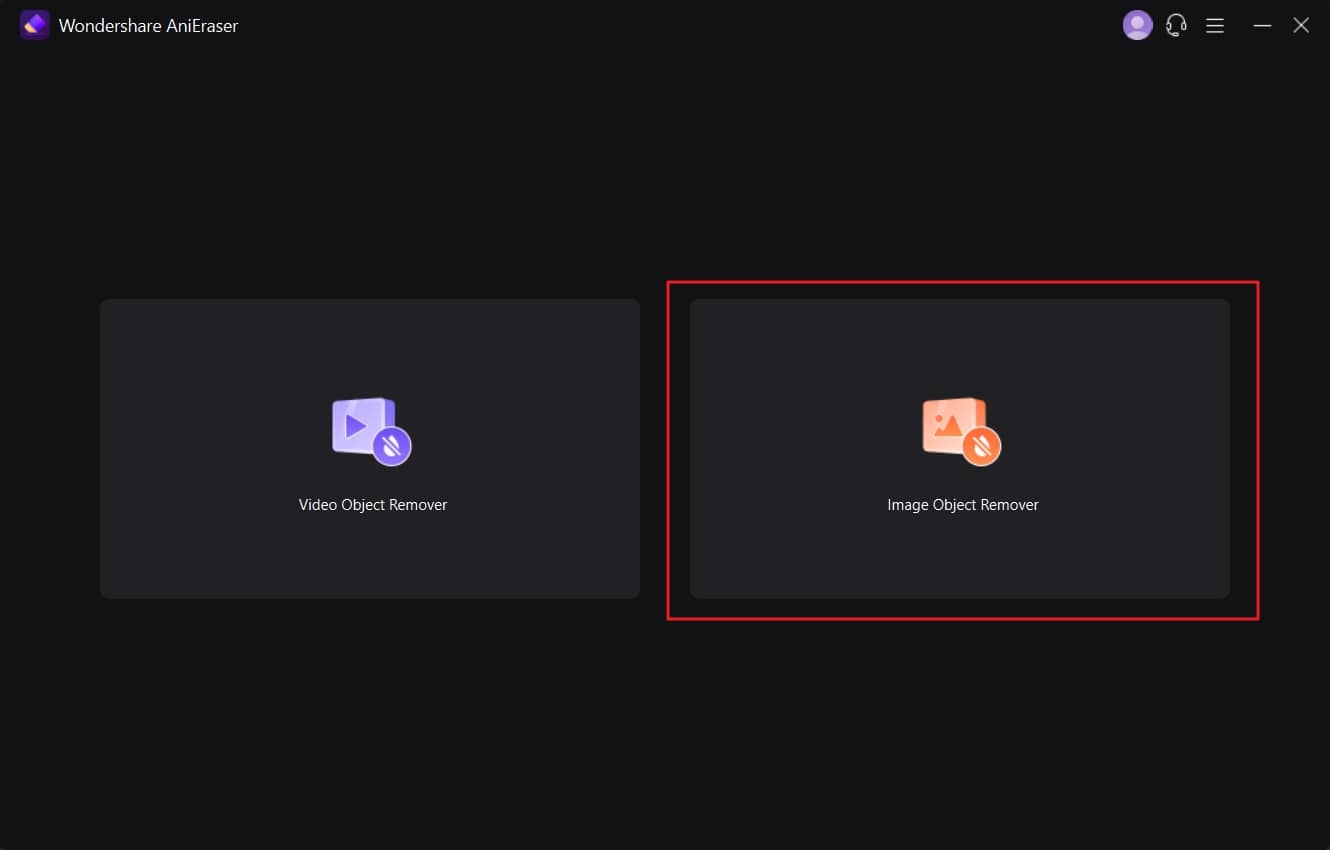
Step 1 Download and Launch AniEraser
First, download AniEraser on your device and launch it. Click "Image Object Remover" from the home window and add the image that needs some retouching.
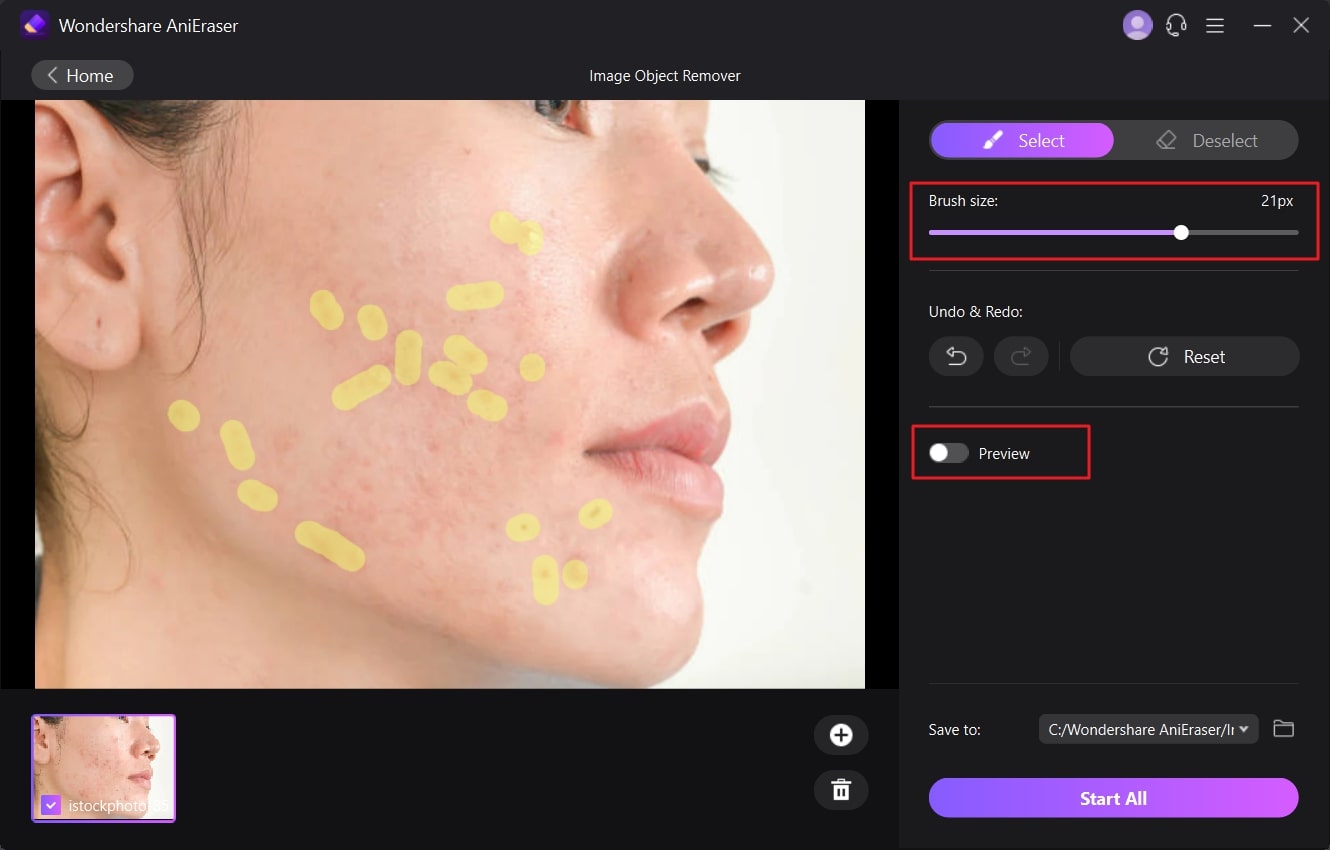
Step 2 Retouch the Image with AniEraser
After adding the image to AniEraser, highlight all the spots, blemishes, and pimples. You can also manage the "Brush Size" with the help of sliders. After this, toggle the "Preview" option to check the retouching results of AniEraser.
Step 3 Save the Image in the Device
After checking the retouching quality, disable the "Preview" option and click the "Save to" menu. From the opened window, select a folder to save the retouched image and click on the "Start All" button.

Conclusion
To wrap things up, retouching images is crucial to remove all the distractions and imperfections from the image. You can do this perfectly with Photoshop. However, Photoshop portrait editing is not an easy thing. The steps are very complicated, and they can cause lots of confusion.
To eliminate this confusion, you can use an easy-to-use tool named AniEraser. The process of retouching an image is straightforward in AniEraser compared to Photoshop image editing. You can also follow the steps instructed in this article to accomplish this task.