

world, and it comes with so many inbuilt applications to make your life easier. If we talk about screen recorder Windows, this is not possible in the most Windows system because there is only a sniping tool available, which allows you to take screenshots. In that case, if you need to record the screen on the Windows, then you need to go for another third-party screen recorder windows program. There are several screen recorders for Windows available over the internet, and here we are going to discuss some of the best screen recorders for Windows operating system devices.
Part 1. Top 11 Screen Recorder to Record Screen in Windows
Wondershare UniConverter
URL: https://www.media.io/video-converter-desktop.html
Price: $69.95 Lifetime
This is hands down, one of the best screen recording tools for windows-based computer devices. This software comes with a powerful screen recorder along with many other features such as downloading videos, converting, transferring, and burns the videos to DVD. The toolbox option in this tool will take you to the various functions that this tool can perform. The screen recording and casting tool is also present inside the toolbox option and can be easily accessed from there.
- · Wondershare UniConverter supports screen record, simple and easy to use.
- · With UniConverter, you can upload, convert, and compress batch files at one time.
- · You could transfer videos or images from computer to iPhone or Android mobiles without using iTunes.
- · Toolbox functions are powerful, includes convert images, create GIF, burn CD, rip CD, cast to TV, and fix Meta tags with just a few clicks.
- · Wondershare UniConverter allows you to burn video and other media files to DVD as well.
Pros:
- This is an all in one program for all your multimedia files issues.
- Supports the recording screen using an adjustable frame.
Con:
- The software is paid, and you can try it for a few days.
How to Use UniConverter to Record Screen?
Step 1. Download, Install, and Run UniConverter First
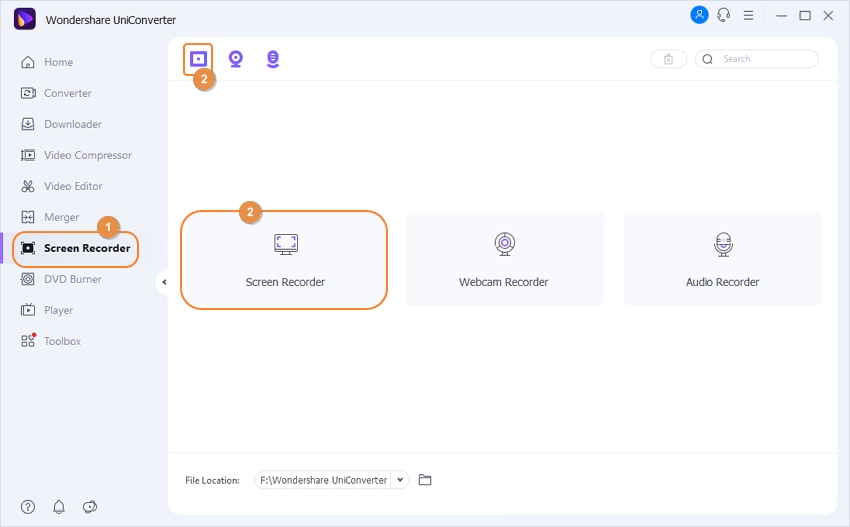
Download the Windows version of Wondershare UniConverter and then run it. After running, click on the Toolbox > Screen Recorder button.
Step 2. Adjust and Set the Record Frame Before Start to Record
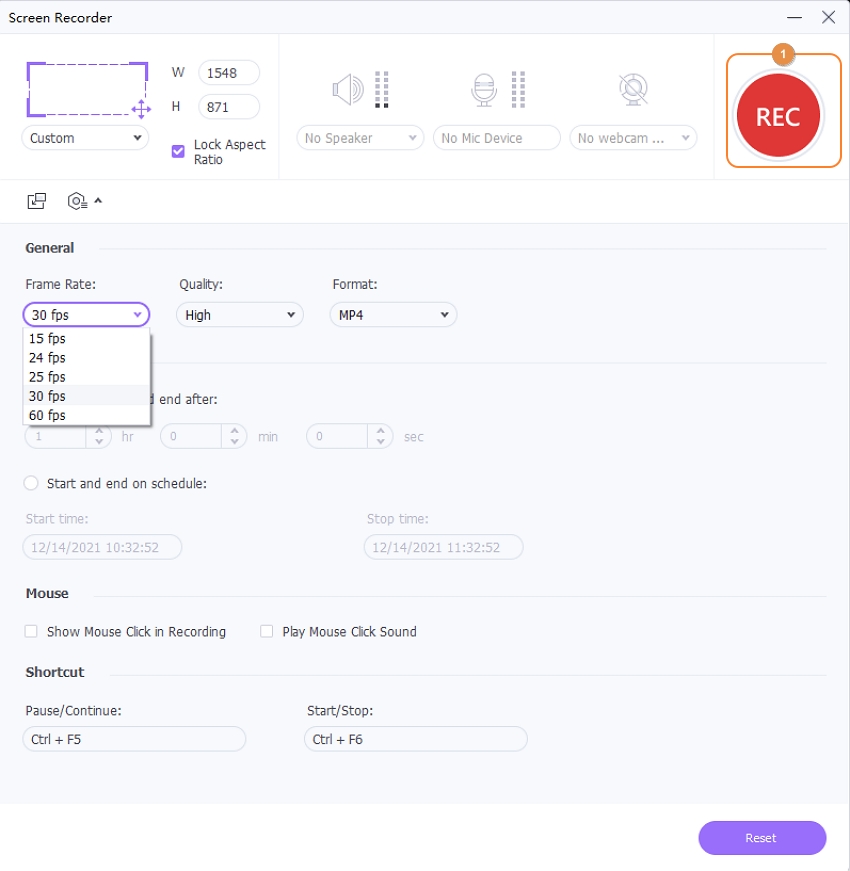
Now a recording frame will be there on your screen. Adjust the structure according to the screen which you want to record using the orange color adjustment window and then click on the Rec button from the right side controls. Now the Wondershare UniConverter will start recording.
Step 3. Stop the Record
Once the video recording is finished, click on the Stop button. This is how to record screen on Windows using Wondershare UniConverter.

Filmora Scrn
URL: https://filmora.wondershare.com/screen-recorder/
Price: $19.99
A lot of experts and professionals use this tool in their day to day life to record their on-screen processes and sharing them with their friends and family. This tool is prevalent among content creators across all the significant platforms because it provides you a lot of options to record videos in the highest quality possible by setting suitable frame rates, quality, format, etc. It also allows you to take screenshots and draw or highlight on your screen while the recording is in progress. It can help you in creating more exciting content.
Pros:
- It supports recording the videos in high quality.
- You can draw on the screen while recording for tutorials.
Con:
- It supports recording videos only.
- The program trial version is limited to a few days.
How to Use Filmore to Record Screen?
Now, let’s see how to record videos on Windows 10 operating system computers using Filmora Screen Recorder.
Step 1. Install the Filmora Scrn Software and Open it
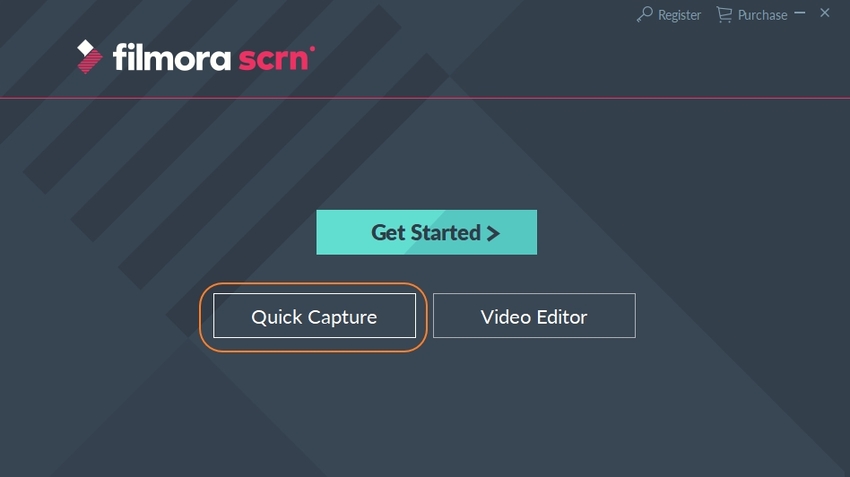
Firstly, download, install & run the program. After launching the program, you will see two options Quick Capture and Video Editor. Click on the Quick Capture option to record the Windows screen.
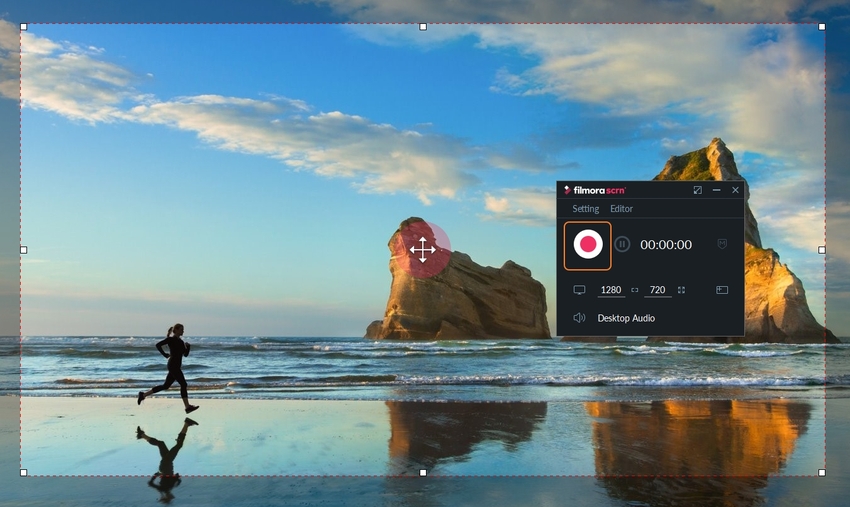
Step 2. Set up Before Start to Record the Screen
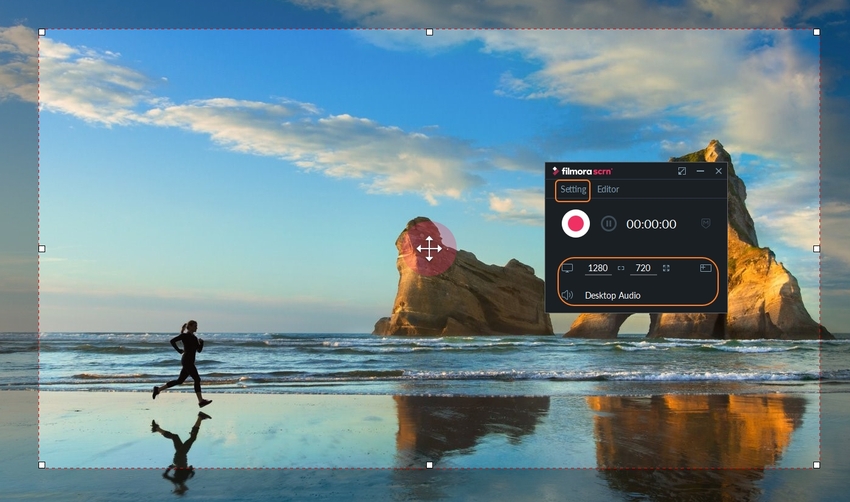
After entering the screen capture menu, you can select the record full screen, custom size, or specific target. You can also tell the program that you want to record the game. Finally, select the frame rate and then click the capture button. You can also do settings of the camera and audio using the other tabs from the left side of the program screen.
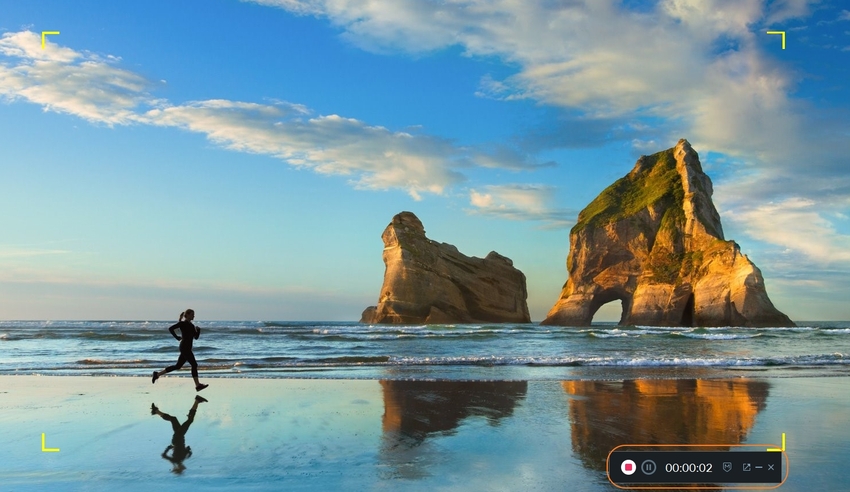
Step 3. Click Record Button to Record Screen
On the next screen, you will see a button to start recording. Click on the big red color button, and then the software will start count down of 3 seconds. After finishing this count down, the screen recording of windows will be started. You can also stop the screen recording using the F10 button before starting if you are not ready.
Step 4. Export and Save the Recorded Video
After finishing the screen recording, you can export the recorded video to the Video Editor and save the recording to your computer. This is about how to record your screen on Windows 10 computers.
Screen o MaticScreen Recorder
URL: https://screencast-o-matic.com/screen-recorder
Price: $48
Among the many tools for windows that allow screen recording, this one stands apart since it has a lot of exciting features. You can blur out certain parts of the screen while recording the screen, mark specific points, and even directly add background music without any problem. It is considered to be the best screen recorder for Windows 10 by a lot of experts.
Pros:
- Enables you to choose the loyalty free music for your videos for free.
- Allows you to blur any area while recording.
Con:
- The free version is worst because so many limitations are there.
- The program's processing speed is plodding.

Ezvid
URL: https://www.ezvid.com/ezvid_for_windows
Price: Free
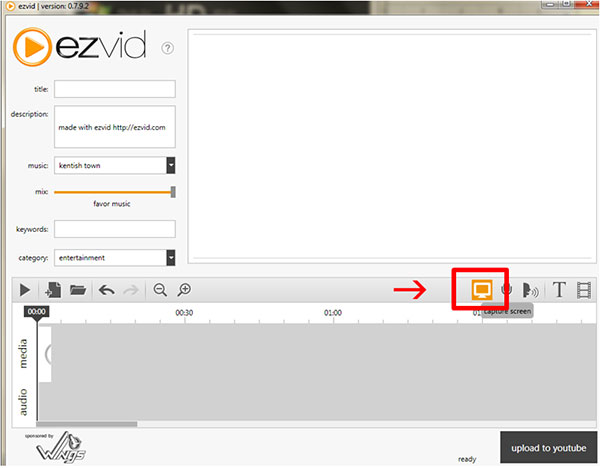
EZvid is free and straightforward to use video recorder that lets you record high-quality videos of your screen processes in a simple click. This is a very light tool that doesn’t occupy a lot of space on your hard disk. This tool also allows you to perform essential editing functions, like adding colorful text while recording. Overall this is an excellent tool for beginners in this field and is a great way to start creating high-quality content.
Pros:
- The software can record the screen with your audio and image.
- You can also control the speed of the video.
Con:
- You can’t use it on Mac.
- Unable to process other things, such as the conversion of the files.
TinyTake
Price: $29.95
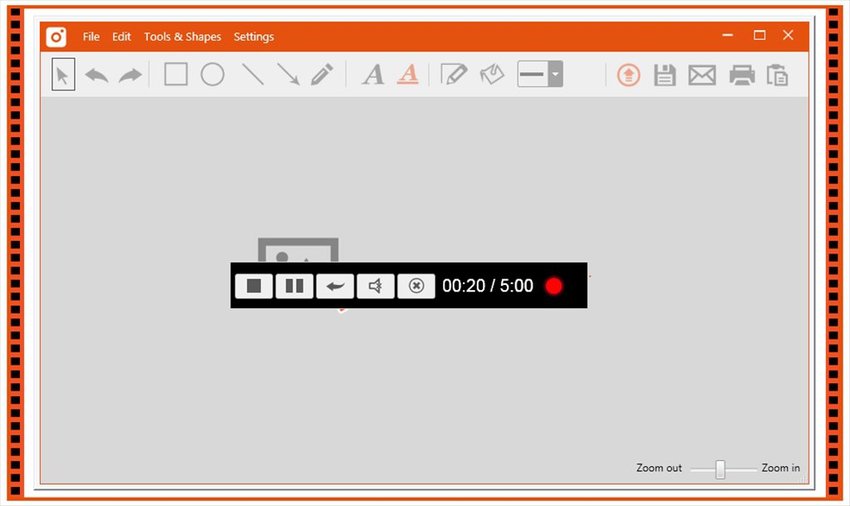
TinyTake is another popular screen recording tool for Windows that is widely used by professionals and beginners alike. This tool allows users to record clips for free, which lasts up to 5 minutes. To record for a long time, you need to pay the subscription fee. It allows the users to add video input from their webcams as well alongside the standard screen recording. This greatly enhances the possibilities of your videos, and you will be able to create more elaborate content.
Pros:
- It allows you to record videos using a webcam as well.
- You can copy the videos to the clipboard and directly save it in the local hard drive.
Con:
- The free version of the software is minimal following the features.
- In the free version, you can record up to 5 minutes of videos only.
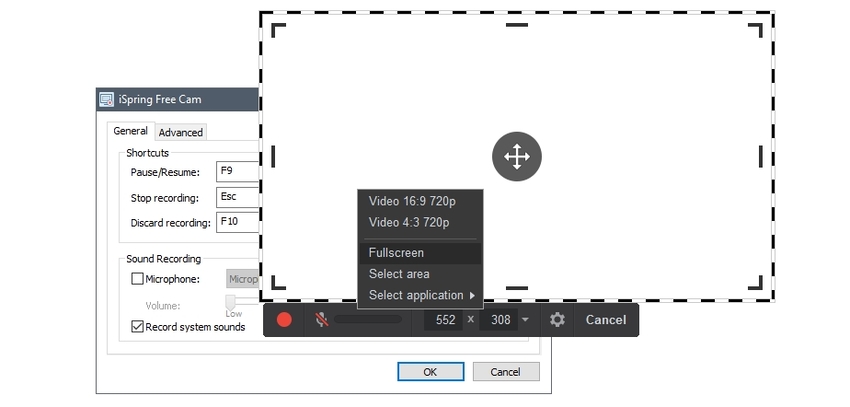
Free Cam
URL: https://www.freescreenrecording.com/
Price: Free
As the name suggests, this program allows users to record screen on the Windows computers without spending anything. A lot of users recommend this tool as the best free to use screen recorder available on windows. It allows you to capture high definition videos of your on-screen processes easily. It supports all the major formats like MP4, 3gp, etc.
Pros:
- It supports recording Windows 10 computer screens for free.
- It is also capable of recording the sound of the computer.
Con:
- Still, there is a lack of features if you want to use for the professional purpose.
- The interface is slightly hard to use.
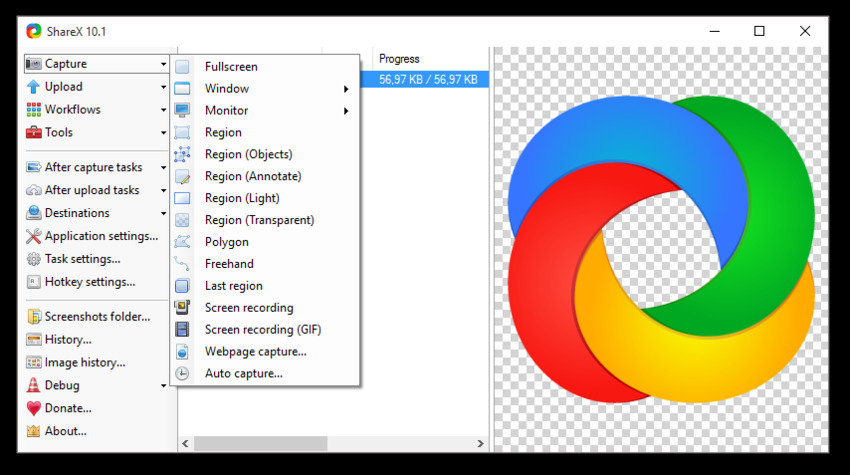
ShareX
Price: Free
ShareX is one of the most widely used free to use screen recording tool for Windows platform. It is compelling and can record high-quality videos without any problem. This tool is compatible with recording in mostly all versions of the Windows operating system devices. The best part is that this program is open source, so you are not limited to use it for any purpose.
Pros:
- The software is free and open-source and not limited to use it for any purpose.
- Supports the full recording screen of the computer.
Con:
- Unable to process the videos in higher quality.
- The program's options are slightly hard, and you may face issues in understanding them.
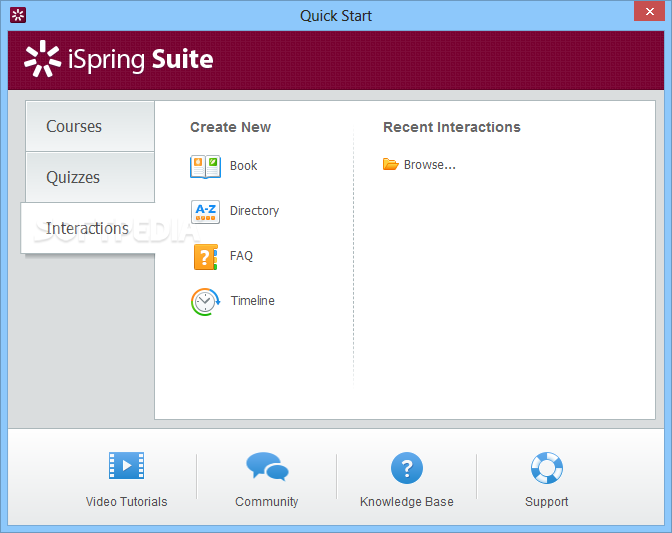
iSpring Suite 9.7
URL: https://www.ispringsolutions.com/ispring-suite
Price: $970/year/user
This tool has got tons of features and options that are targeted at professional users. This software allows you to make professional videos without making any effort, and you can also record online videos with ease. There are mostly all kinds of features offered in the program that you need while recording the screen or online videos on your computer.
Pros:
- There is a mobile application, which is available to use it on Android or iOS mobile devices.
- It allows you to use your voice while recording.
Con:
- This is good for professional people only because the interface is tough to use.
- You can’t use it for personal use as the program is very costly.
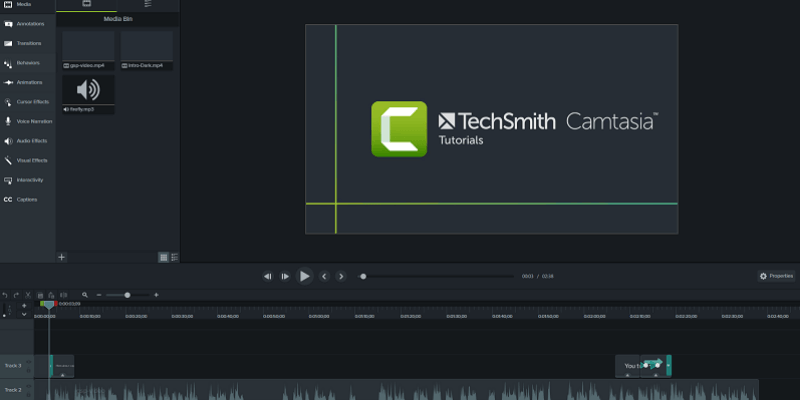
Techsmith Camtasia
URL: https://www.techsmith.com/video-editor.html
Price: $299
This tool is meant for video editing, but it also has a potent screen recording tool that lets you record high-quality videos at high frame rates. The software comes with compelling features such as drawing on the screen while recording, adding effects, creation of Quizzes, import presentations from computer, and zooming videos.
Pros:
- You can edit and record the videos.
- Most famous companies trust them.
Con:
- The software price is very costly and not competitive.
- Sometimes you may face issues in finding the right options.
FlashBack Recorder
URL: https://www.flashbackrecorder.com/
Price: $49
This recorder is specially designed for content creators and lets you record your screen in high-quality. It also allows some basic editing for your videos that can be used to modify your content as per your requirements. This software supports mainly all kinds of video formats so you can export the recorded videos in any form on your computer. There is an option available that enables you to add watermarks as well to make your videos private.
Pros:
- Supports editing the videos and recording them on the windows computers.
- Enables you to record the content on any windows version.
Con:
- The free version is available for only 30 days.
- The premium version goes up to $49, a little bit expensive.

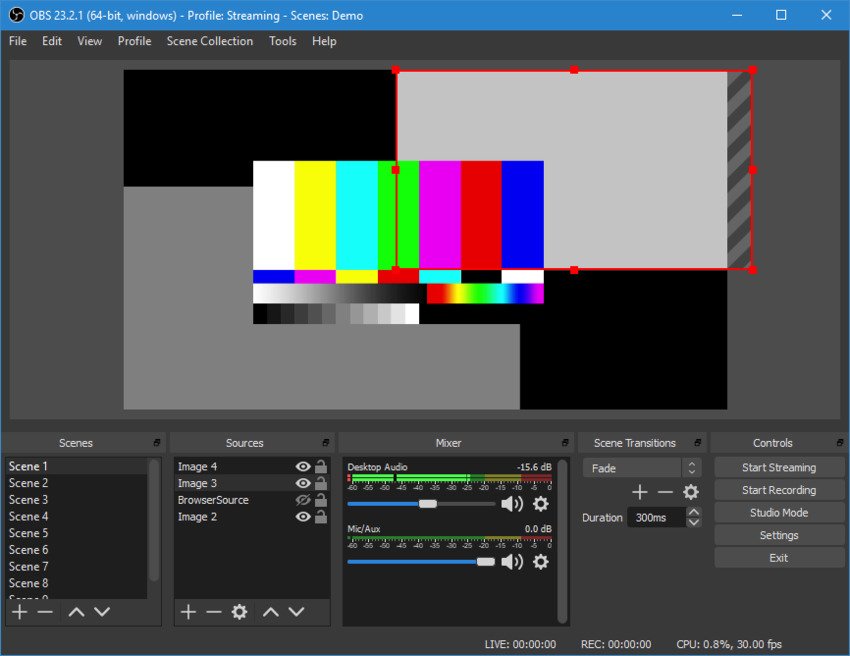
OBS Studio
URL: https://obsproject.com/download
Price: Free
This online conversion tool allows converting your RAW files to JPG and other image formats in a quick and simple manner. The files to be converted can be added from the computer, Dropbox or your Google Drive account. The tool allows adding multiple files at a time. You can also download and save the processed file to the cloud storage account or share it's link or QR code.
Pros:
- It supports recording videos on the cross-platform operating systems.
- Record videos and save them offline on your computer.
Con:
- Very few features are there.
- You can use it for personal purpose only.
Part 2. How to Record Video on Windows 10 with Built-in Feature
Windows 10 also comes with the inbuilt feature that allows you to record screen on your Windows 10 computer. This feature is actually able to record games you are playing on your desktop or broadcast it with others. While using this inbuilt screen recorder you can’t record the file explorer or desktop of your computer. So, make sure that you are recording a game because it will not work with the others.
How to Set Up Screen Record Feature and Start to Record Screen in Windows 10
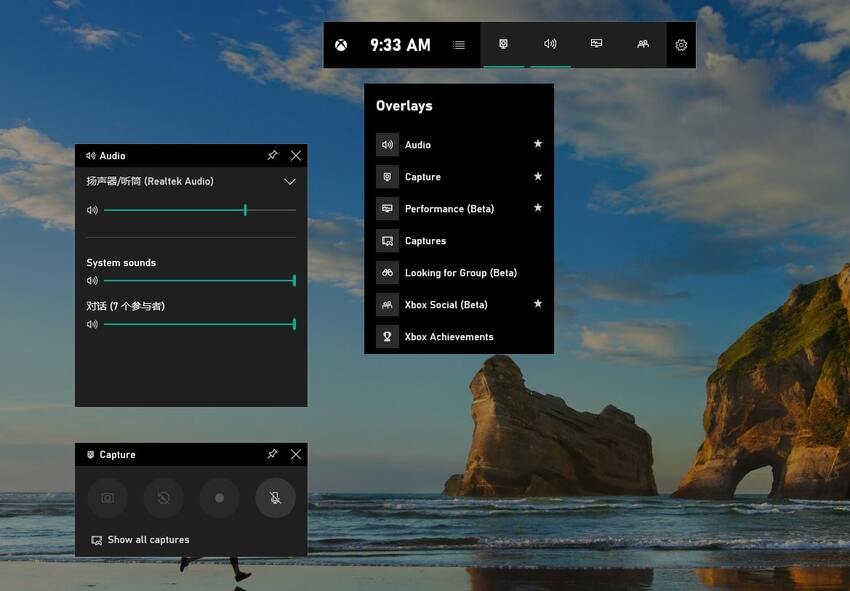
Step 1. Run Windows Game Bar Feature
Firstly, click in the search bar of Windows 10 at the lower left side next to the Windows icon, Windows Setting>Gaming>Game Bar. Besides, you can press Windows + G buttons together to launch the game bar. After pressing the keys, you will see a pop-up toolbox.
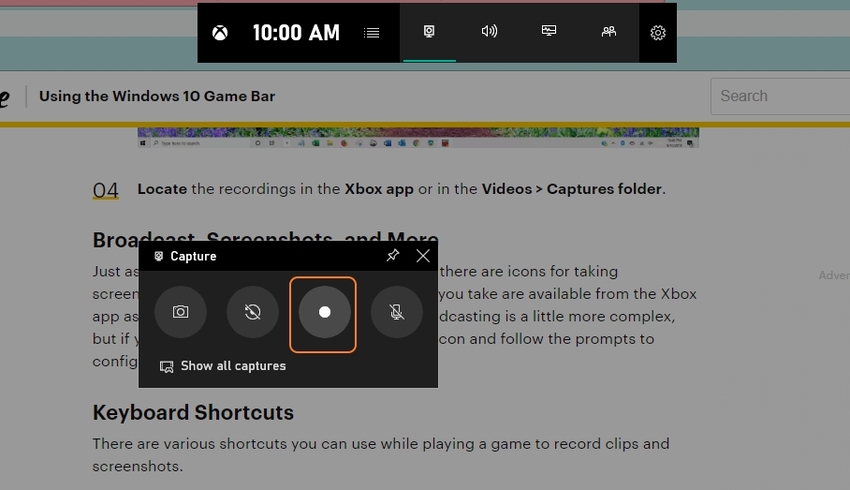
Step 2. Start to Record Screen with Gamebar
Now move your cursor on the recording control and then click on Start Recording. Now it will start recording the game of your computer.
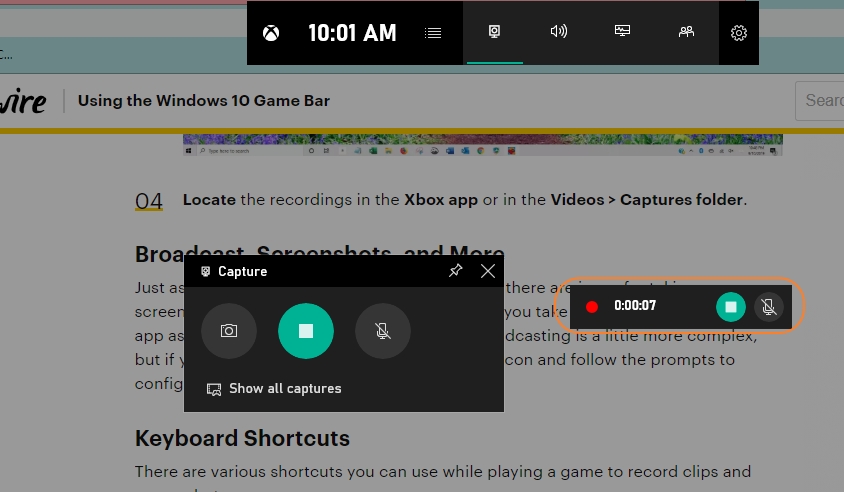
Step 3. Step to Record the Screen
After finishing the game recording, you can stop it by using the red color recording bar of the windows recorder. This bar will be available there at the top right side of the recording screen.
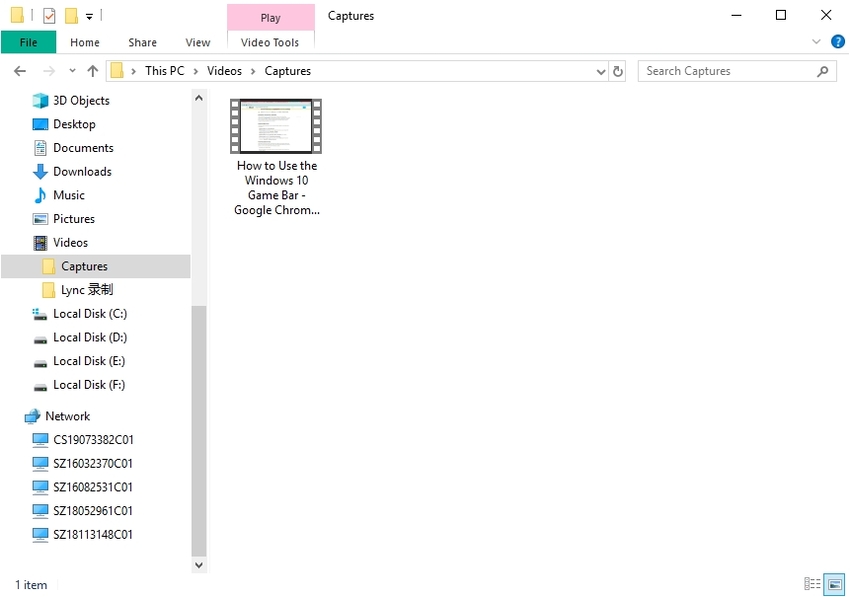
Step 4. View the Recorded Video in Game DVR
After finishing the recording now, the recorder will save the records in the hard drive of your computer. You can find them in the Xbox application under the Game DVR menu. There is a folder available with a name capturer in the videos folder.
Summary
Well, these are some of the best Windows programs to record the screen of the windows computers. You can try anyone that fulfills your requirement of recording, but here as per our research, we have found the Wondershare UniConverter and Wondershare Filmora as the best one because these programs are cost-effective. The price of these programs is not much higher, but you get everything at low price whatever you need to record your Windows computers.