ChatGPT
 Perplexity
 Gemini
 Claude
 Grok
Grok
Have you ever taken a photo that seemed perfect to you, only to notice a harsh reflection, bright streak, or shiny spot that’s ruining the shot later when you are reviewing your work? It’s very annoying to say the least.
Glare is one of the most common problems in iPhone photography. It can come from sunlight, indoor lighting, reflective surfaces, eyeglasses, or even shiny skin. A single bright reflection can wash out details, distract from your subject, and make an otherwise great photo look unusable.
The good news is that you don’t need professional editing skills to fix this.
In this guide, you’ll learn a few simple ways to remove glare directly on your iPhone using:
- Built-in editing tools
- Free photo editing apps
- AI-powered mobile solutions
- Online tools for stronger reflections
Let’s start by understanding why glare happens in the first place.
In this article
Why and How Does Glare Happen in iPhone Photos?

Explaining glare is very simple. Glare appears when strong light hits the camera lens directly or off reflective surfaces. But, to help you make the perfect shot, you can try a position that avoids the most common causes. Check them out:
- Direct sunlight: Shooting in bright sunlight can create washed-out areas in your shot. You might encounter light streaks and lens flare as well.
- Artificial light sources: Indoor lighting, spotlights, or flash reflections can create bright hotspots.
- Shooting through glass: Windows, display cases, or car windshields often reflect surrounding light, sometimes directly into the iPhone lens.
- Reflective surfaces: Water, metal, polished floors, or glossy objects bounce light back into the lens.
- Wrong camera angle: When the lens aligns with a reflection path, glare becomes more visible.
- Shiny skin: Oil or sweat on the face or skin can create bright highlights, especially under strong light.
- Glasses reflections: Light reflecting off lenses can hide the eyes or create distracting white spots.
Understanding these causes will help you choose the right editing method if you want to remove glare, and it will also help you avoid the problem next time.
How to Remove Glare from a Photo on Your iPhone Using Built-In Editing Tools
The iPhone’s Photos app includes some powerful adjustment tools that can reduce mild glare without you having to install any additional tools.
NOTE: This method works best for light reflections or slightly overexposed areas.
Here’s what you need to do.
Step 1: Open the Photos app on your iPhone, open the photo with glare, and tap on the Edit feature.
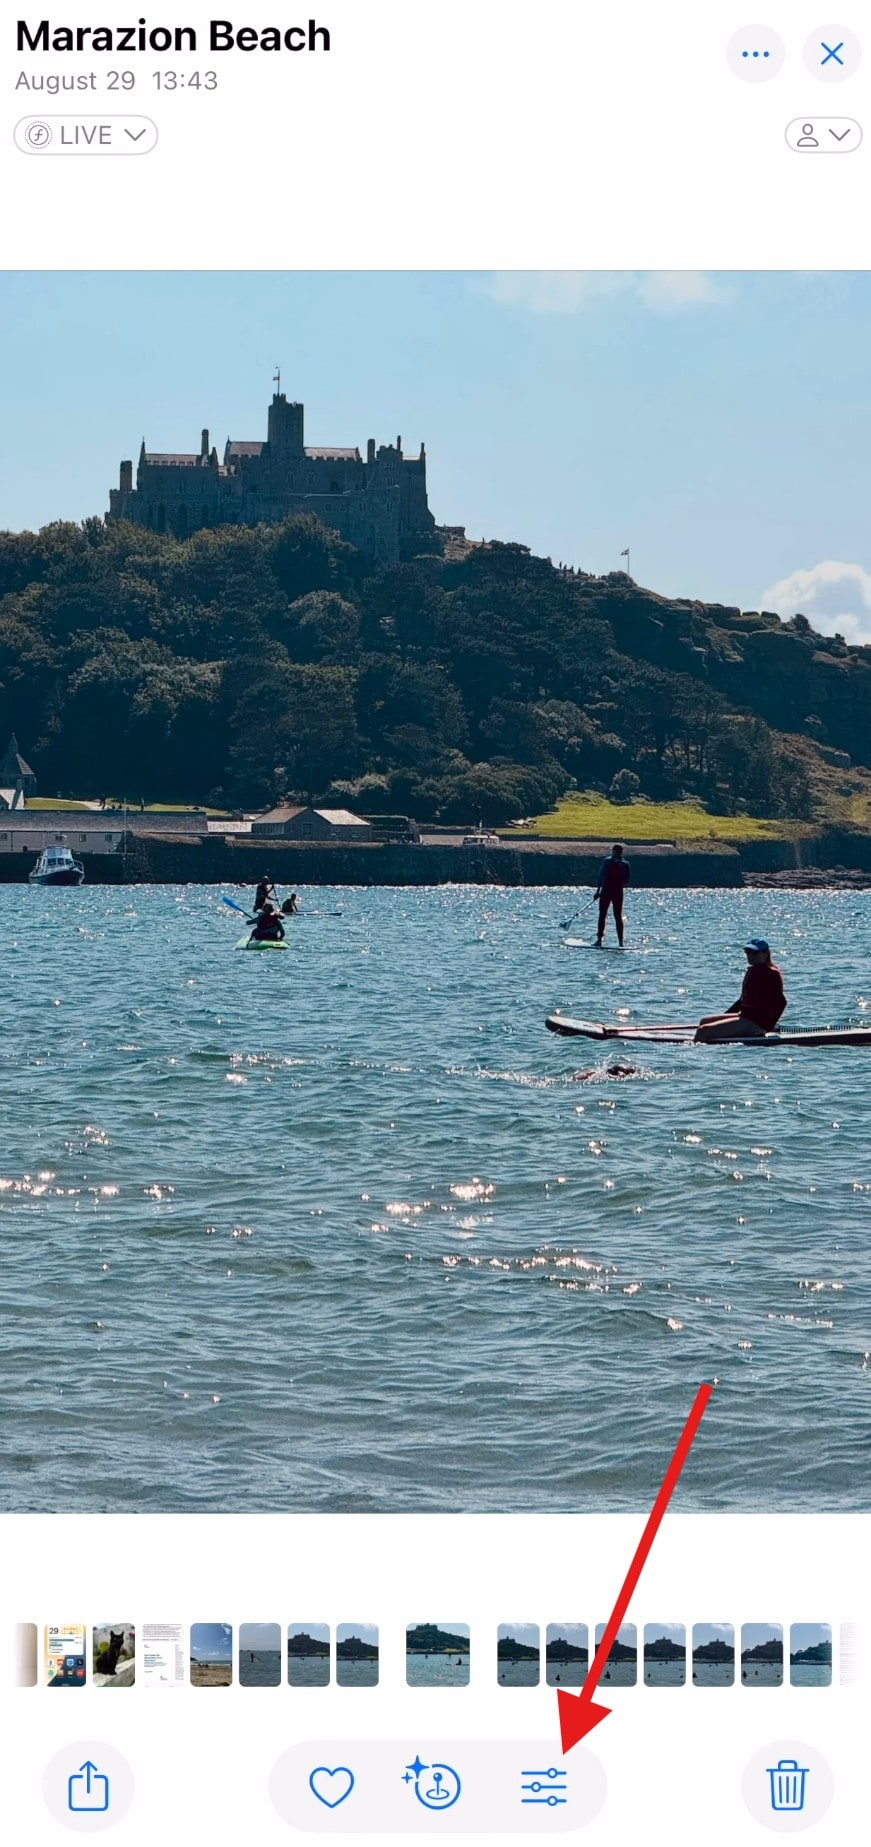
Step 2: Tap on the Clean Up feature. For this, you need to have Apple Intelligence enabled.
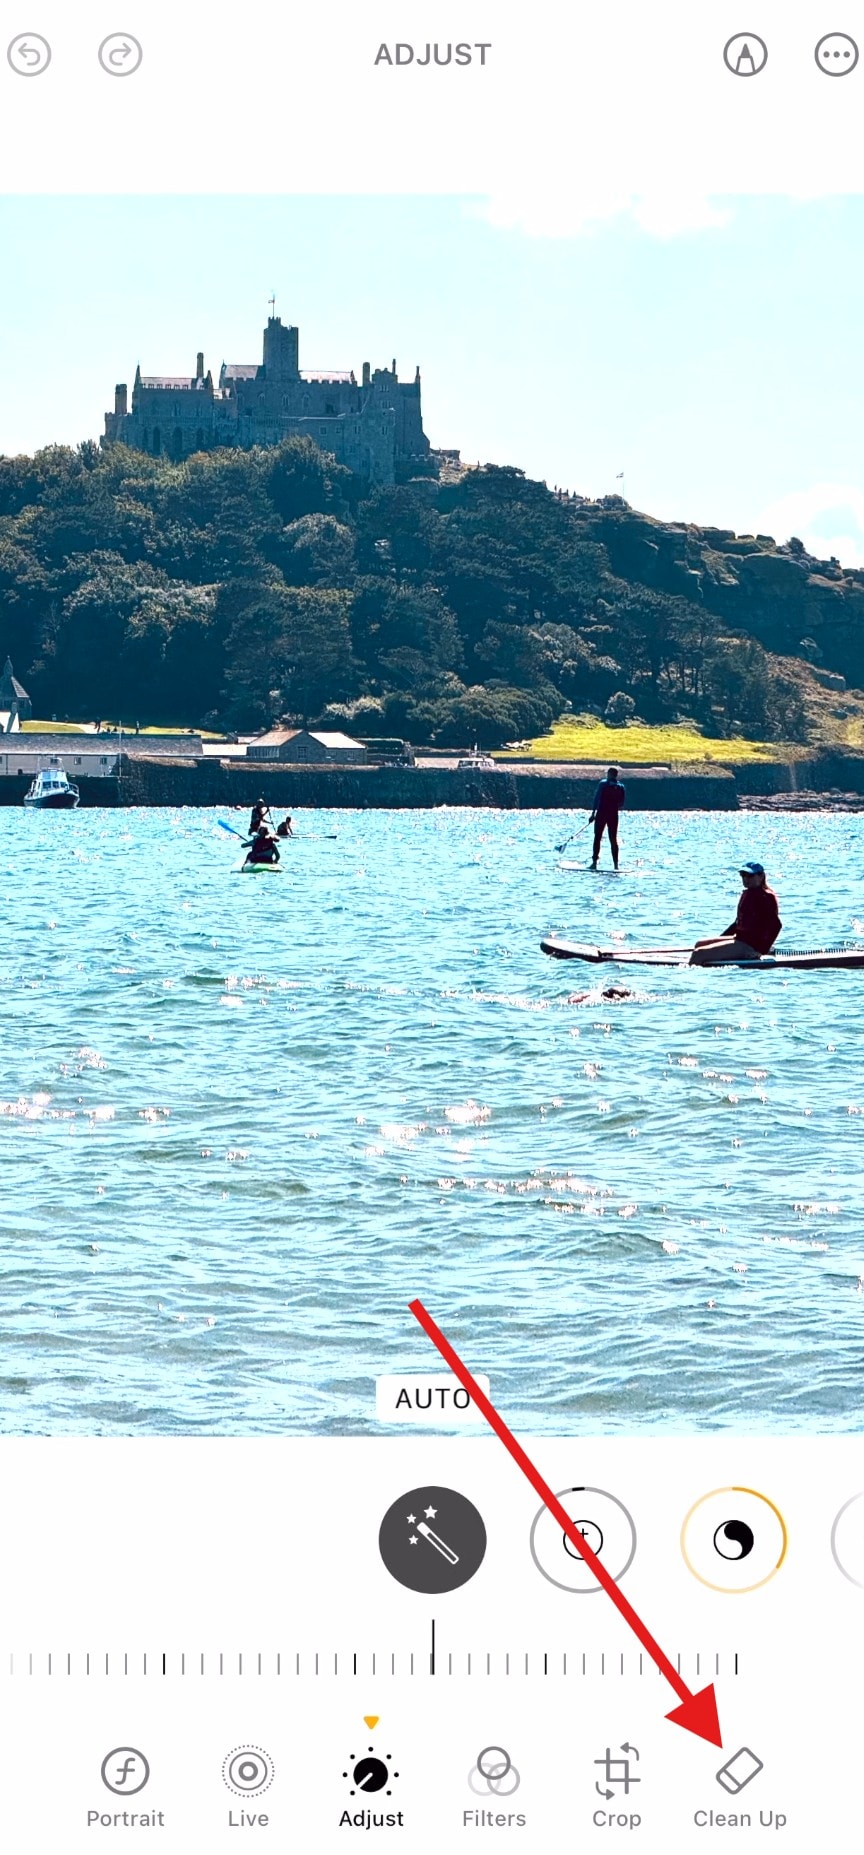
Step 3: Zoom in and brush over the glare in the photo. This should work.

The glare should be removed automatically.
If this doesn’t work, there are a few other options.
Adjust Highlights and Exposure to Remove Light Glare from a Photo on an iPhone
The iPhone’s Photos app also includes powerful adjustment tools that can reduce mild glare, but if you are not skilled with photo editing, this approach might take some time. But still, you don’t need to install anything to try it.
This method also works best for light reflections or slightly overexposed areas.
Follow these steps:
Step 1: Open the Photos app.

Step 2: Tap on the Adjust feature.
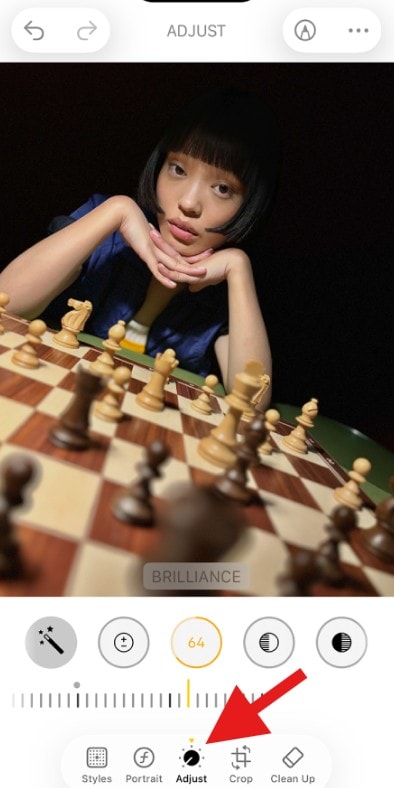
Step 3: Find different sliders and adjust them like this:
- Highlights: lower the value to reduce bright glare.
- Exposure: decrease slightly if the image looks washed out.
- Brightness: fine-tune the overall light levels.
- Contrast: increase slightly to restore detail.
When you feel that your editing process is complete, you can tap on Done to save your changes.

But, again, this approach works well for sun glare, light streaks, or bright reflections that affect a larger area.
Remove Shine from a Face or Small Reflections Manually
If you have some smaller problem areas, like shiny skin or tiny reflections, you can try manually fine-tuning the image.
Zoom in and make subtle adjustments to highlights, shadows, and contrast. Work slowly and compare before-and-after results to avoid over-editing.
This method takes a bit more patience but works well for face shine, small reflective spots, and mild glasses glare.
However, if there is too much glare in the photo, you need an app that offers specialized features.
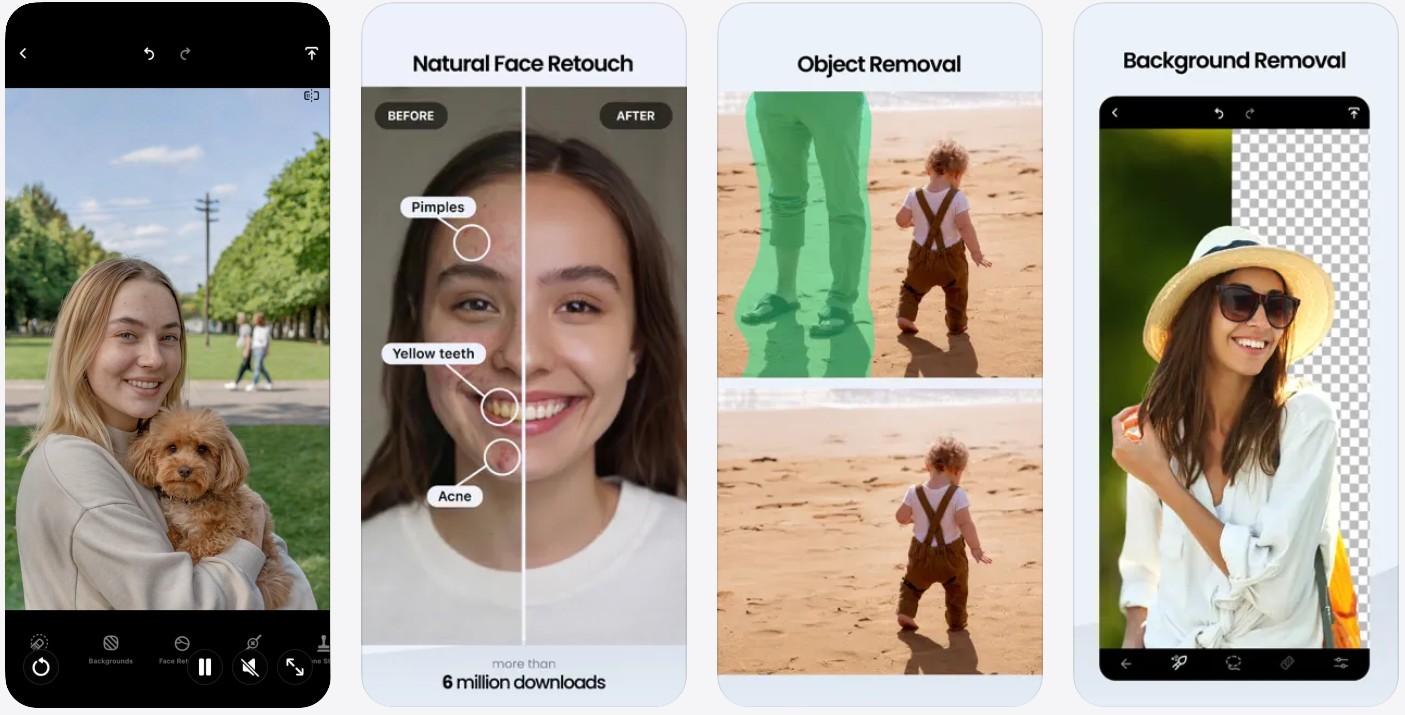
How to Remove Sun Glare and Light Streaks from Photos on an iPhone with Free Apps
So, if the reflection in the image is localized, covers an important part of the image, or creates visible streaks, you’ll need more precise controls. That’s where free photo editing apps come in.
These apps allow you to target specific areas, remove unwanted reflections, and recover details without affecting the rest of the photo. Many also include healing brushes, selective adjustments, and advanced lighting tools that make it much easier to fix sun glare, glass reflections, or bright hotspots.
Here are a few good choices.
Snapseed

Download URL: https://apps.apple.com/app/snapseed/id439438619
Snapseed is one of the most powerful free photo editors available for iPhone. Developed by Google, it combines professional editing tools with an easy-to-use interface.
Best for: Removing small glare spots, light reflections, and shine on faces
Key feature: Healing tool that lets you brush over glare and blend it into surrounding areas
Pros: Completely free, precise control, strong selective editing tools
Cons: Manual work required for larger glare areas
Adobe Photoshop Express
Download URL: https://apps.apple.com/app/adobe-photoshop-express/id331975235
Adobe Photoshop Express offers a simplified version of Photoshop’s powerful lighting controls, making it ideal for quick glare reduction.
Best for: Fixing overexposed areas, sun glare, and uneven lighting
Key features: Highlights reduction, exposure adjustment, and automatic correction tools
Pros: Professional-quality results, fast automatic fixes
Cons: Some advanced features require an Adobe account
TouchRetouch
Download URL: https://apps.apple.com/app/touchretouch/id373311252
TouchRetouch is designed specifically for removing unwanted elements from photos, including reflections, glare spots, and light streaks.
Best for: Removing strong reflections, light streaks, or glare on glasses and windows
Key feature: Object removal tool that intelligently fills selected areas
Pros: Very accurate results, easy selection tools
Cons: Free trial only; full version requires a one-time purchase
When Should You Use Apps Instead of Built-In Tools?
The iPhone’s Photos app is great for general adjustments like lowering highlights or reducing exposure, but it applies changes to the entire image. That works for mild glare, but it’s not ideal when the reflection affects only a small area or hides important details.
Free editing apps give you localized control, meaning you can remove glare from a specific spot without changing the rest of the photo. They’re also better for stronger reflections, light streaks, and complex glare patterns that basic sliders can’t fix.
Here’s a quick comparison:
| Feature | Built-In iPhone Editor | Free Editing Apps |
|---|---|---|
| Best for | Mild glare, overall brightness issues | Localized glare, reflections, light streaks |
| Editing type | Global adjustments (entire image) | Selective and area-based editing |
| Ease of use | Very simple | Slight learning curve |
| Precision | Limited | High precision control |
| Cost | Free | Free (some apps offer optional paid features) |
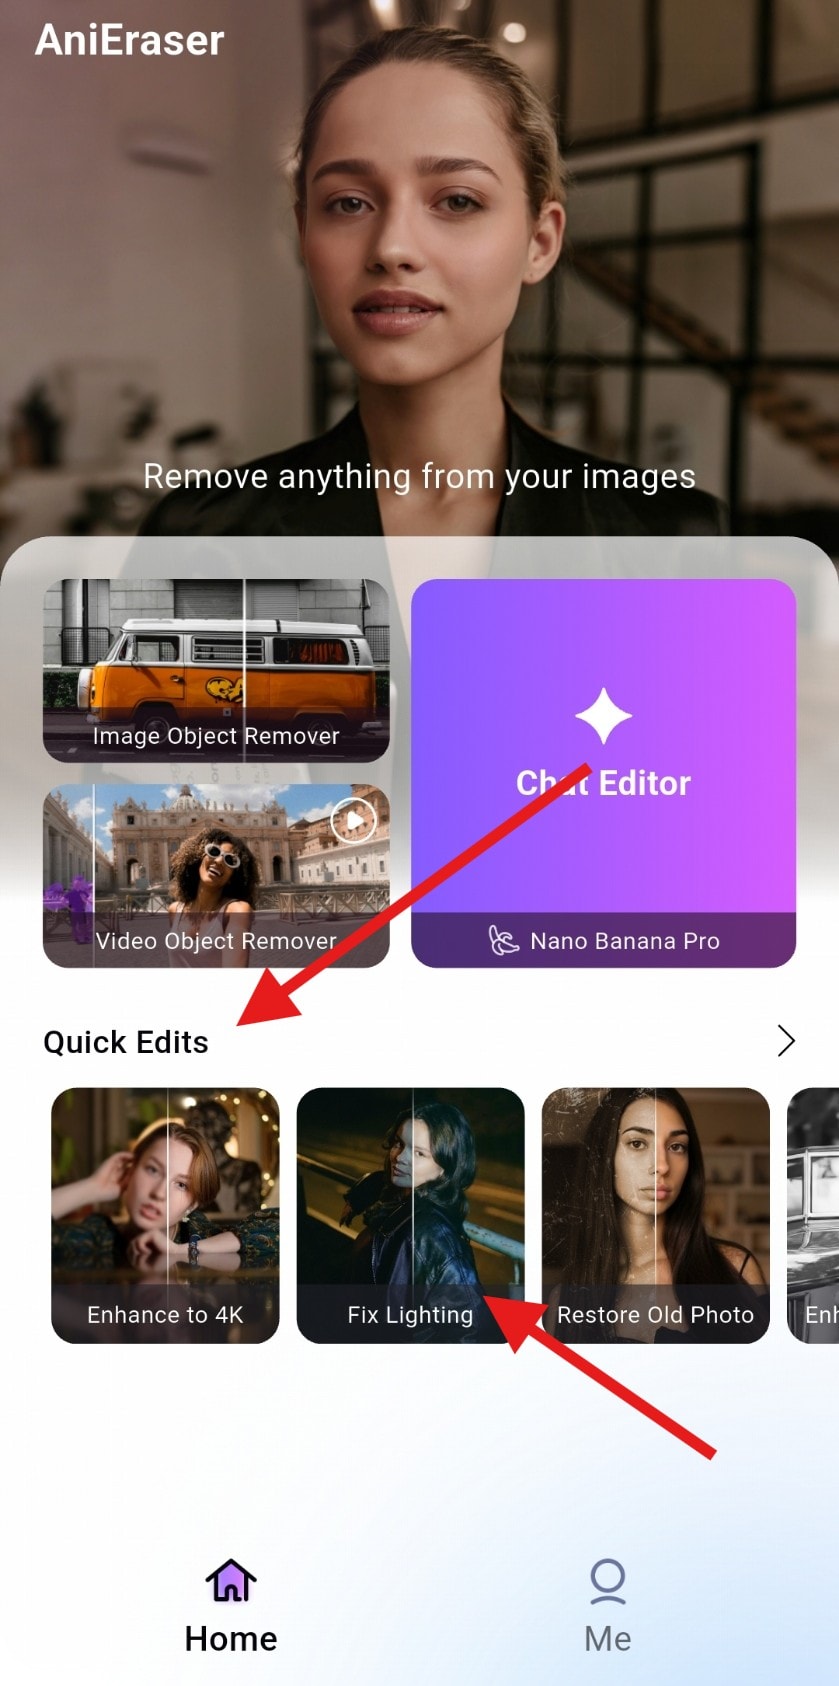
Remove Glare from a Photo on Your iPhone Instantly with the AniEraser App
Now, if you don’t want to spend time adjusting sliders or manually brushing over reflections, there is an app called AniEraser, and it offers one of the fastest ways to fix glare on your iPhone.
Instead of editing the photo yourself, this AI-powered tool detects lighting issues and removes glare automatically. Whether it’s reflections on glasses, harsh sunlight, shiny skin, or bright hotspots, AniEraser can clean up the image in seconds. You don’t need any editing experience.
It is the best option when you want quick, clean results with minimal effort.
Here’s how it works.
Step 1: Download and install the AniEraser app on your iPhone.
Step 2: Under Quick Edits, tap on Fix Lighting.
Step 3:Type in your prompt to remove the glare from the photo and initiate the process.
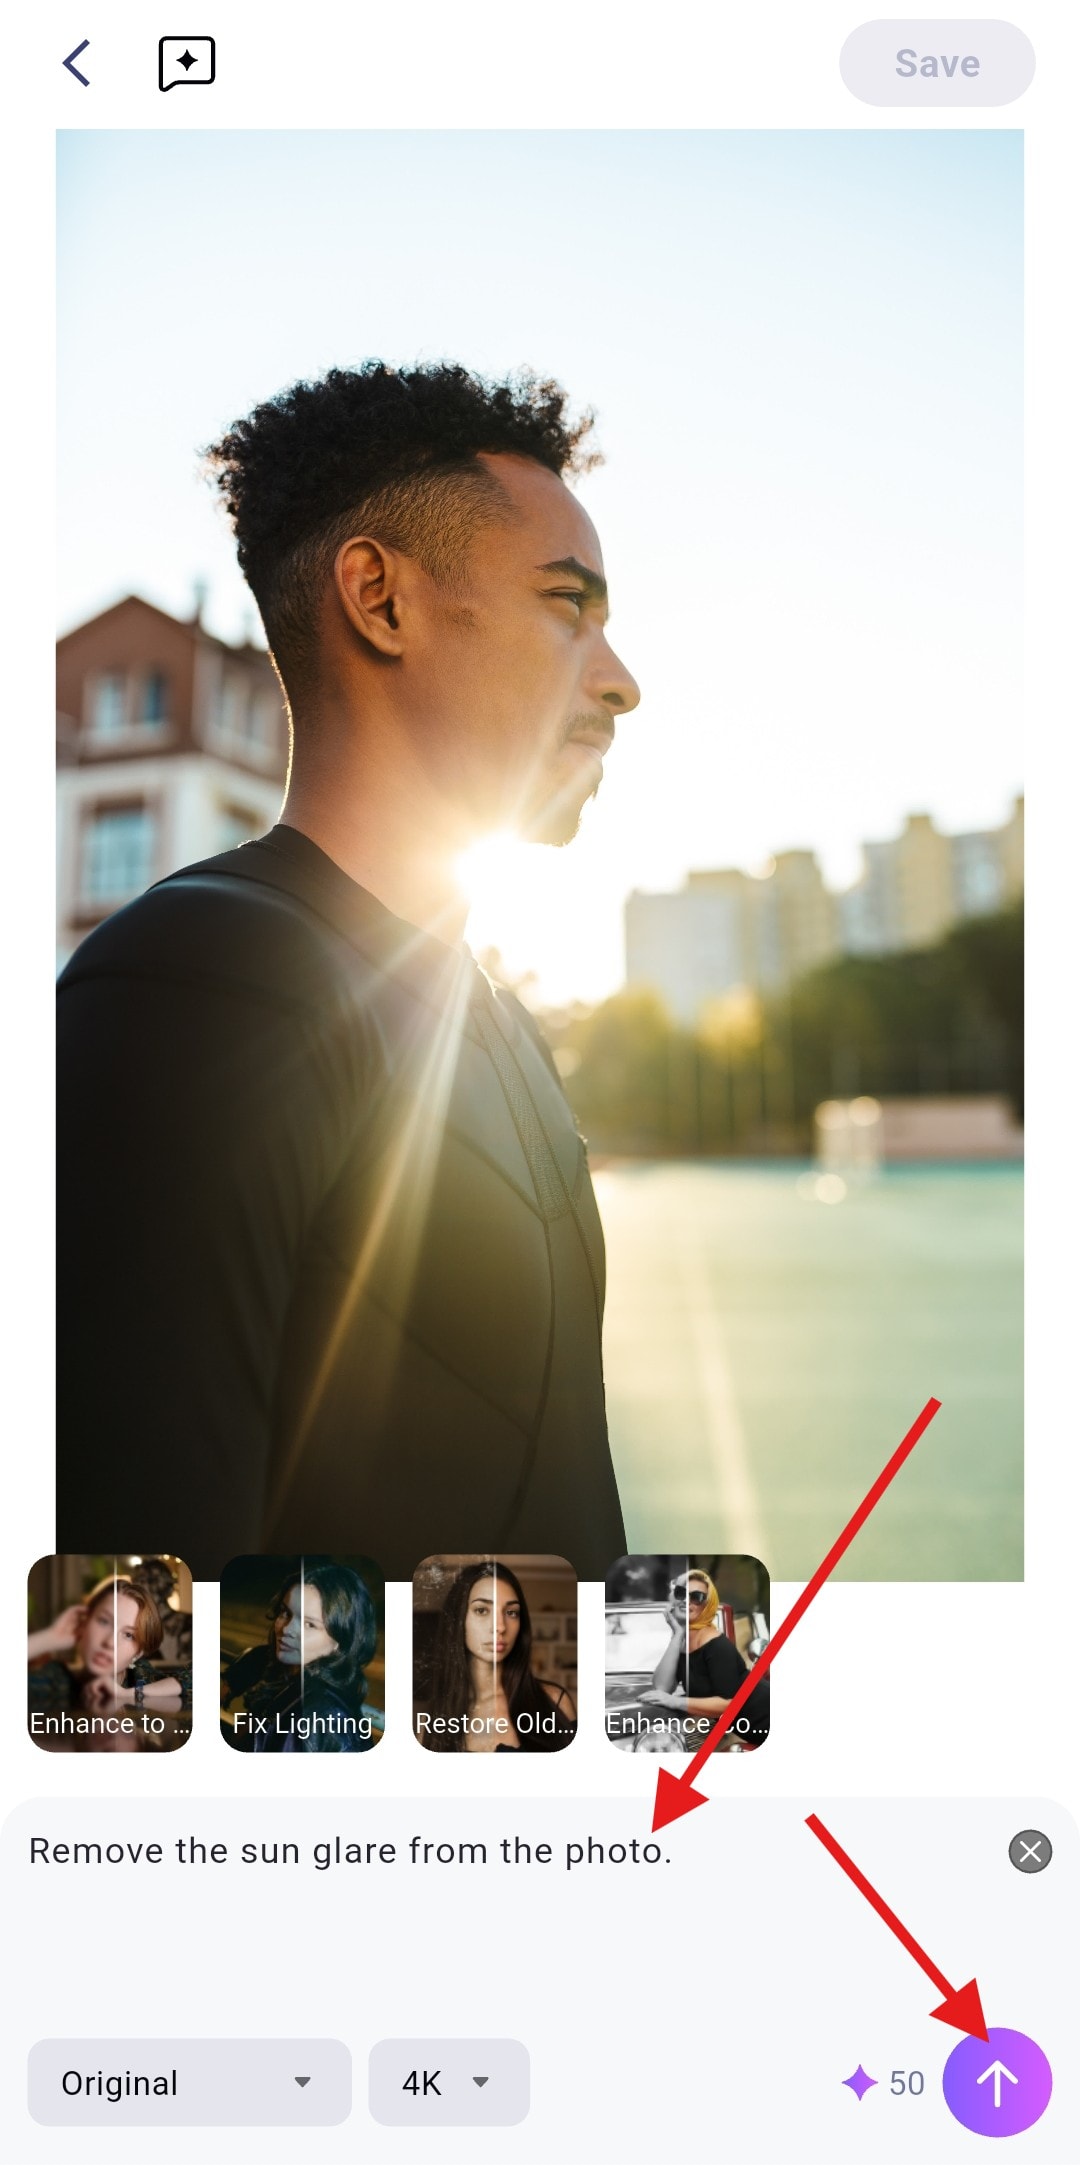
When the AI process is done, simply save the image. Here’s a quick comparison.

AniEraser works best in the following scenarios.
- Removing glare from glasses: Reflections on lenses often hide the eyes or create distracting white spots. AniEraser intelligently reduces glare while preserving facial details, making portraits look natural again.
- Removing light glare from photos: If bright areas from sunlight or indoor lighting are washing out parts of your image, the AI balances exposure and restores detail without affecting the rest of the photo.
- Removing strong reflections: For glare caused by windows, glass surfaces, or reflective objects, AniEraser can soften or remove the reflection while keeping textures and colors intact.
Why Choose AniEraser?
Fast results: fixes glare in seconds
- Fully automatic: no manual editing or precision brushing
- Mobile-friendly: works directly on your iPhone
- Beginner-friendly: just upload, prompt, and save
- Natural-looking edits: preserves image quality and details
If you’re looking for the easiest way to remove glare without trial and error with an app on your iPhone, AniEraser delivers professional results with almost zero effort. It’s the ideal solution for quick fixes, social media photos, and everyday images that need a clean, polished look.
How to Remove Glare from a Photo on Your iPhone Online
AI Objects Remover
Powered by AI, Media.io can remove unwanted objects from photos and videos for desirable results.
Try Free Online
If you just don’t want to download a new app and you simply want to open your browser and remove glare online, then Media.io is a great solution. It offers a powerful online toolkit that works directly from your browser.
This AI-powered platform removes glare, reflections, and bright hotspots automatically. Plus, you can use it on any device, be it your iPhone, tablet, laptop, or desktop.
Media.io also gives you the option to remove glare from videos. Take a look.
Remove Glare from Photos Online (Object Remover)
Step 1: Open the Media.io Object Remover tool from your browser.
Step 2: Tap to upload an image from your device.
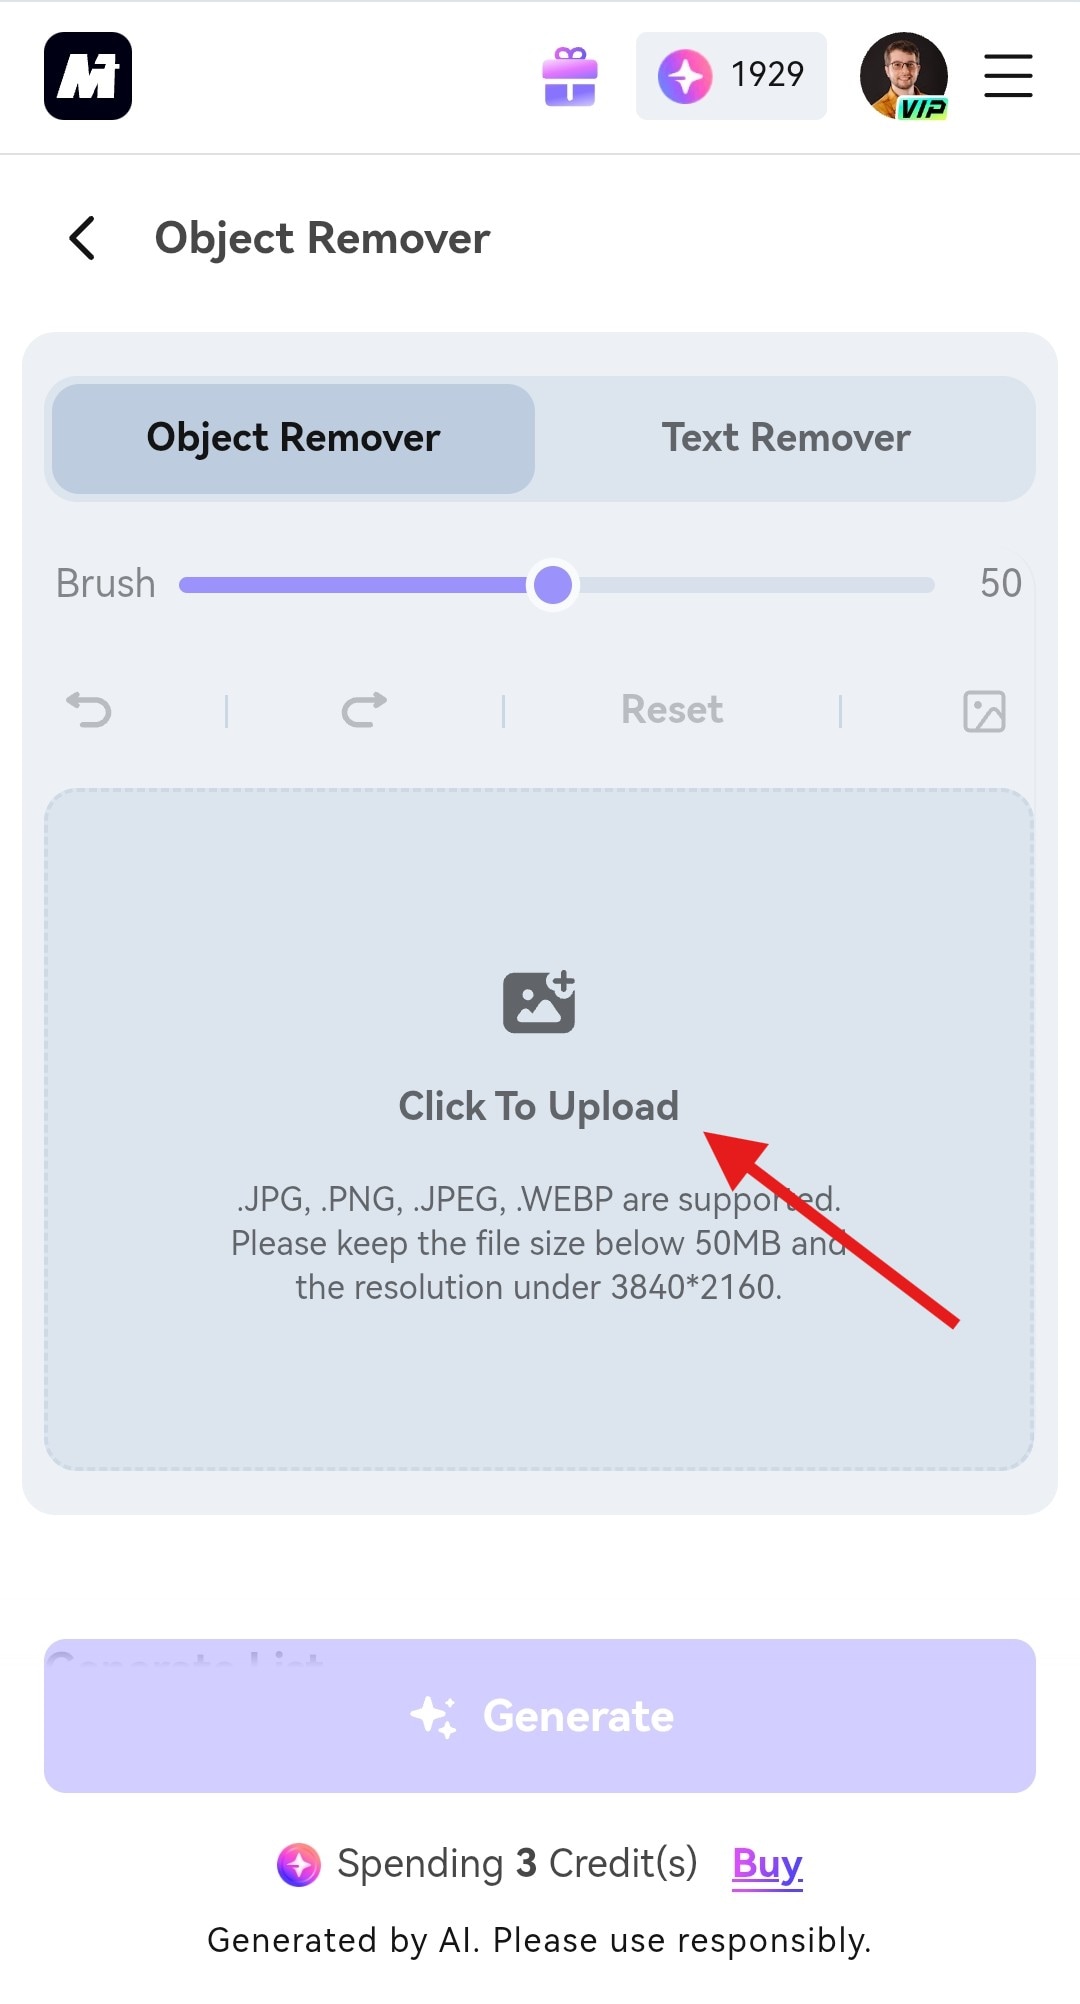
Step 3: Carefully select the glare in the photo and, when you are done, tap on Generate.
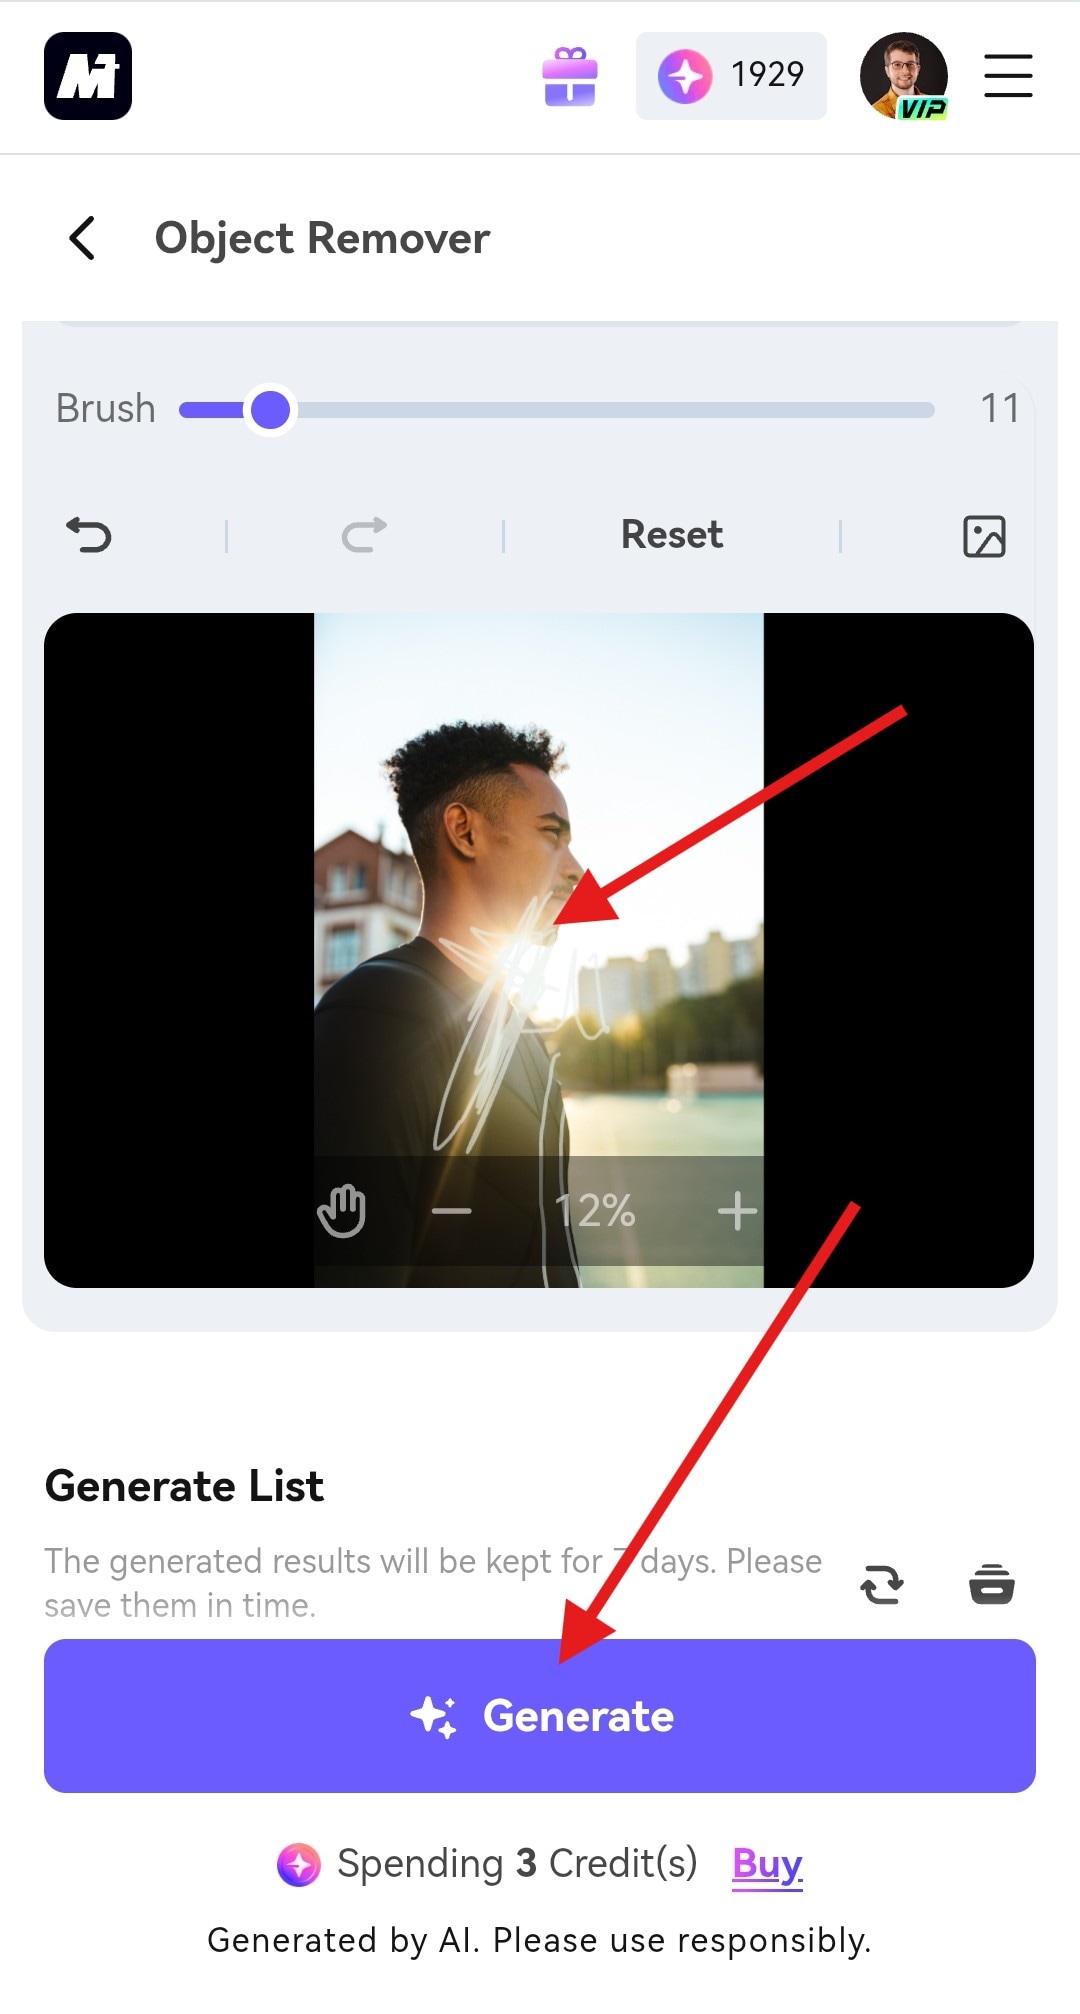
This AI process will look at glare as an object and remove it after you select it. The AI fills in the selected area naturally, blending textures and colors so the edit looks seamless.
Best for:
- Strong sun glare
- Window or glass reflections
- Bright hotspots on objects or backgrounds
- Light streaks or lens flare
Remove Glare or Light Reflections from Videos (Video Eraser)
Of course, glare isn’t limited to photos, and it often appears in videos as well. Media.io’s Video Eraser uses AI to remove reflections and unwanted bright areas frame by frame.
Here’s how it works.
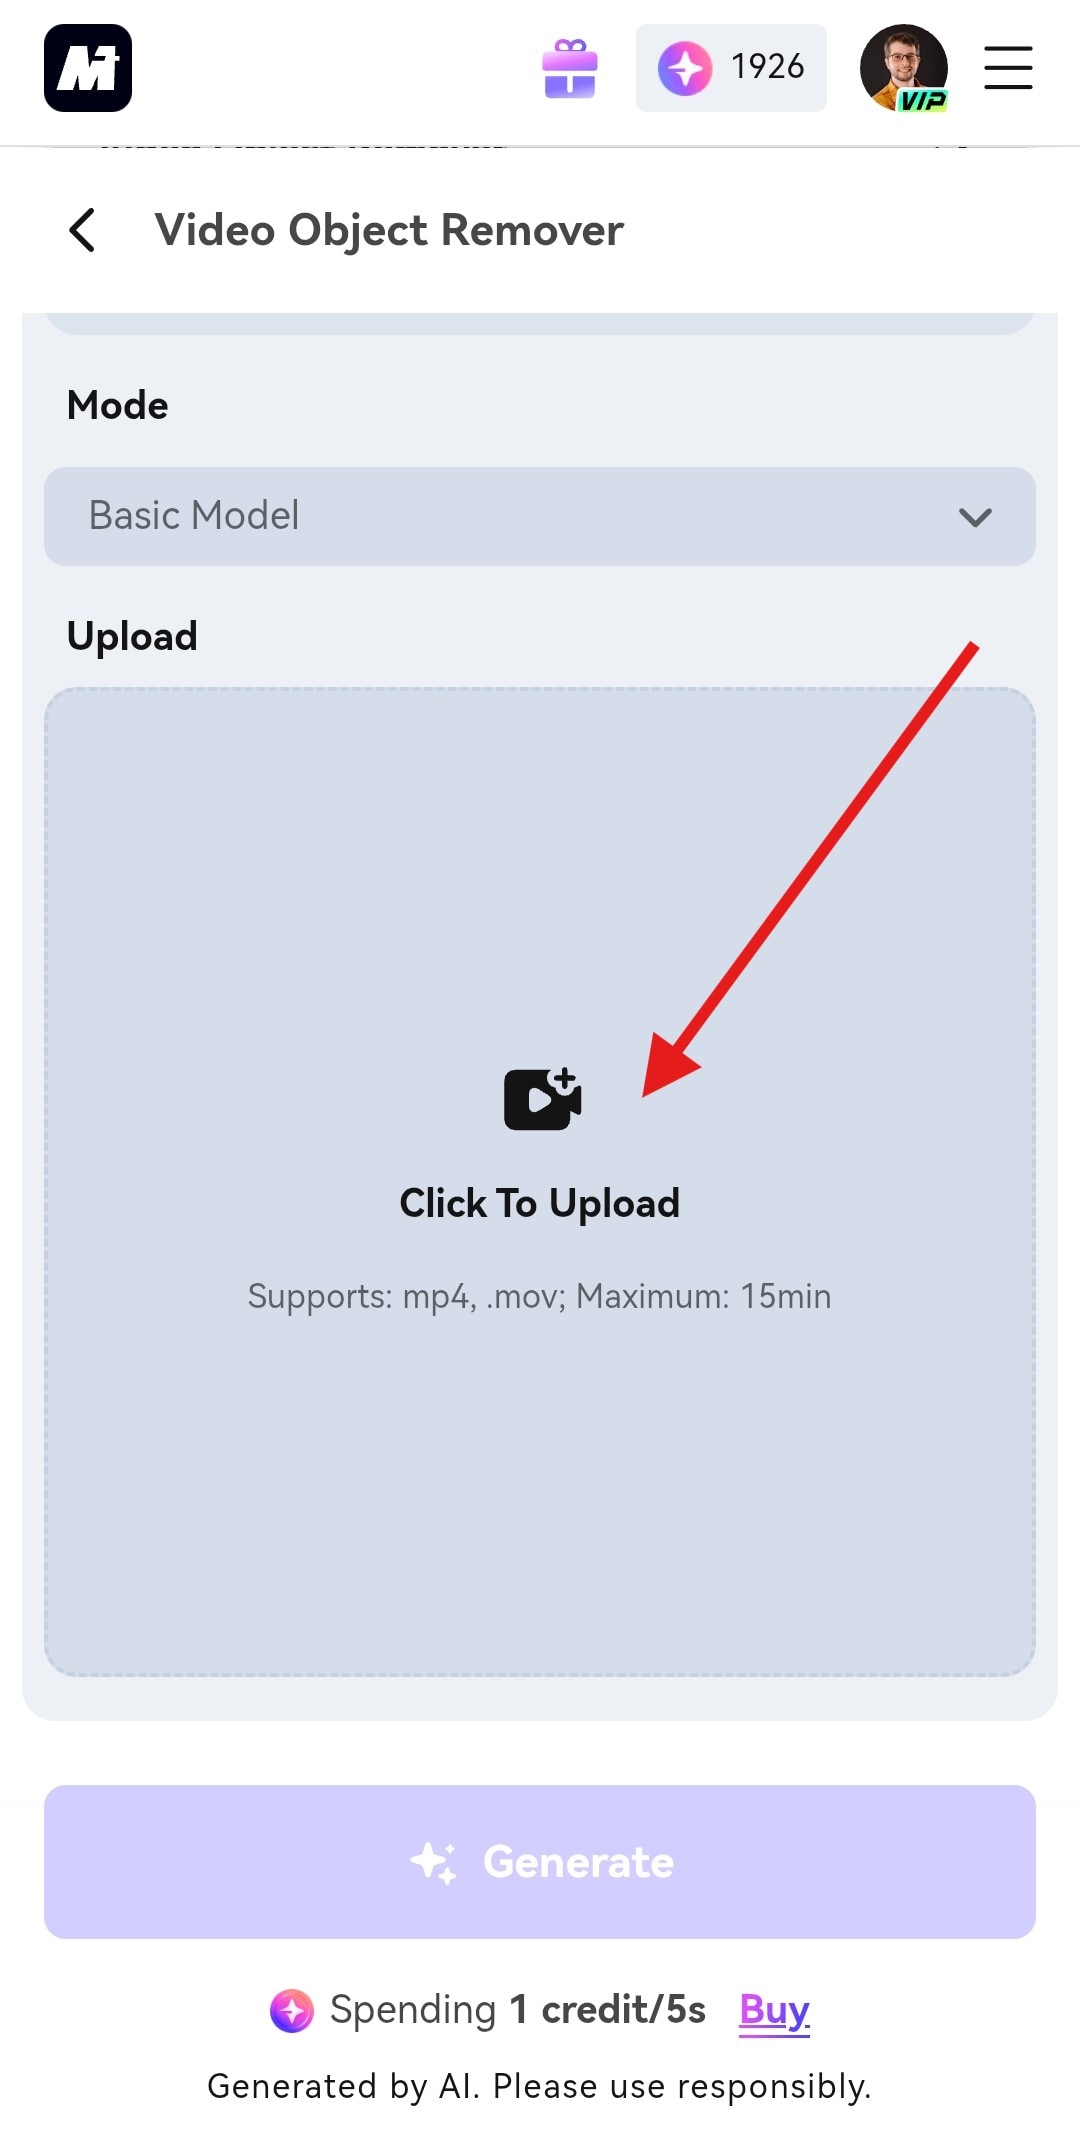
Step 1: Open the Media.io video eraser online tool.
Step 2: Tap to upload your video.
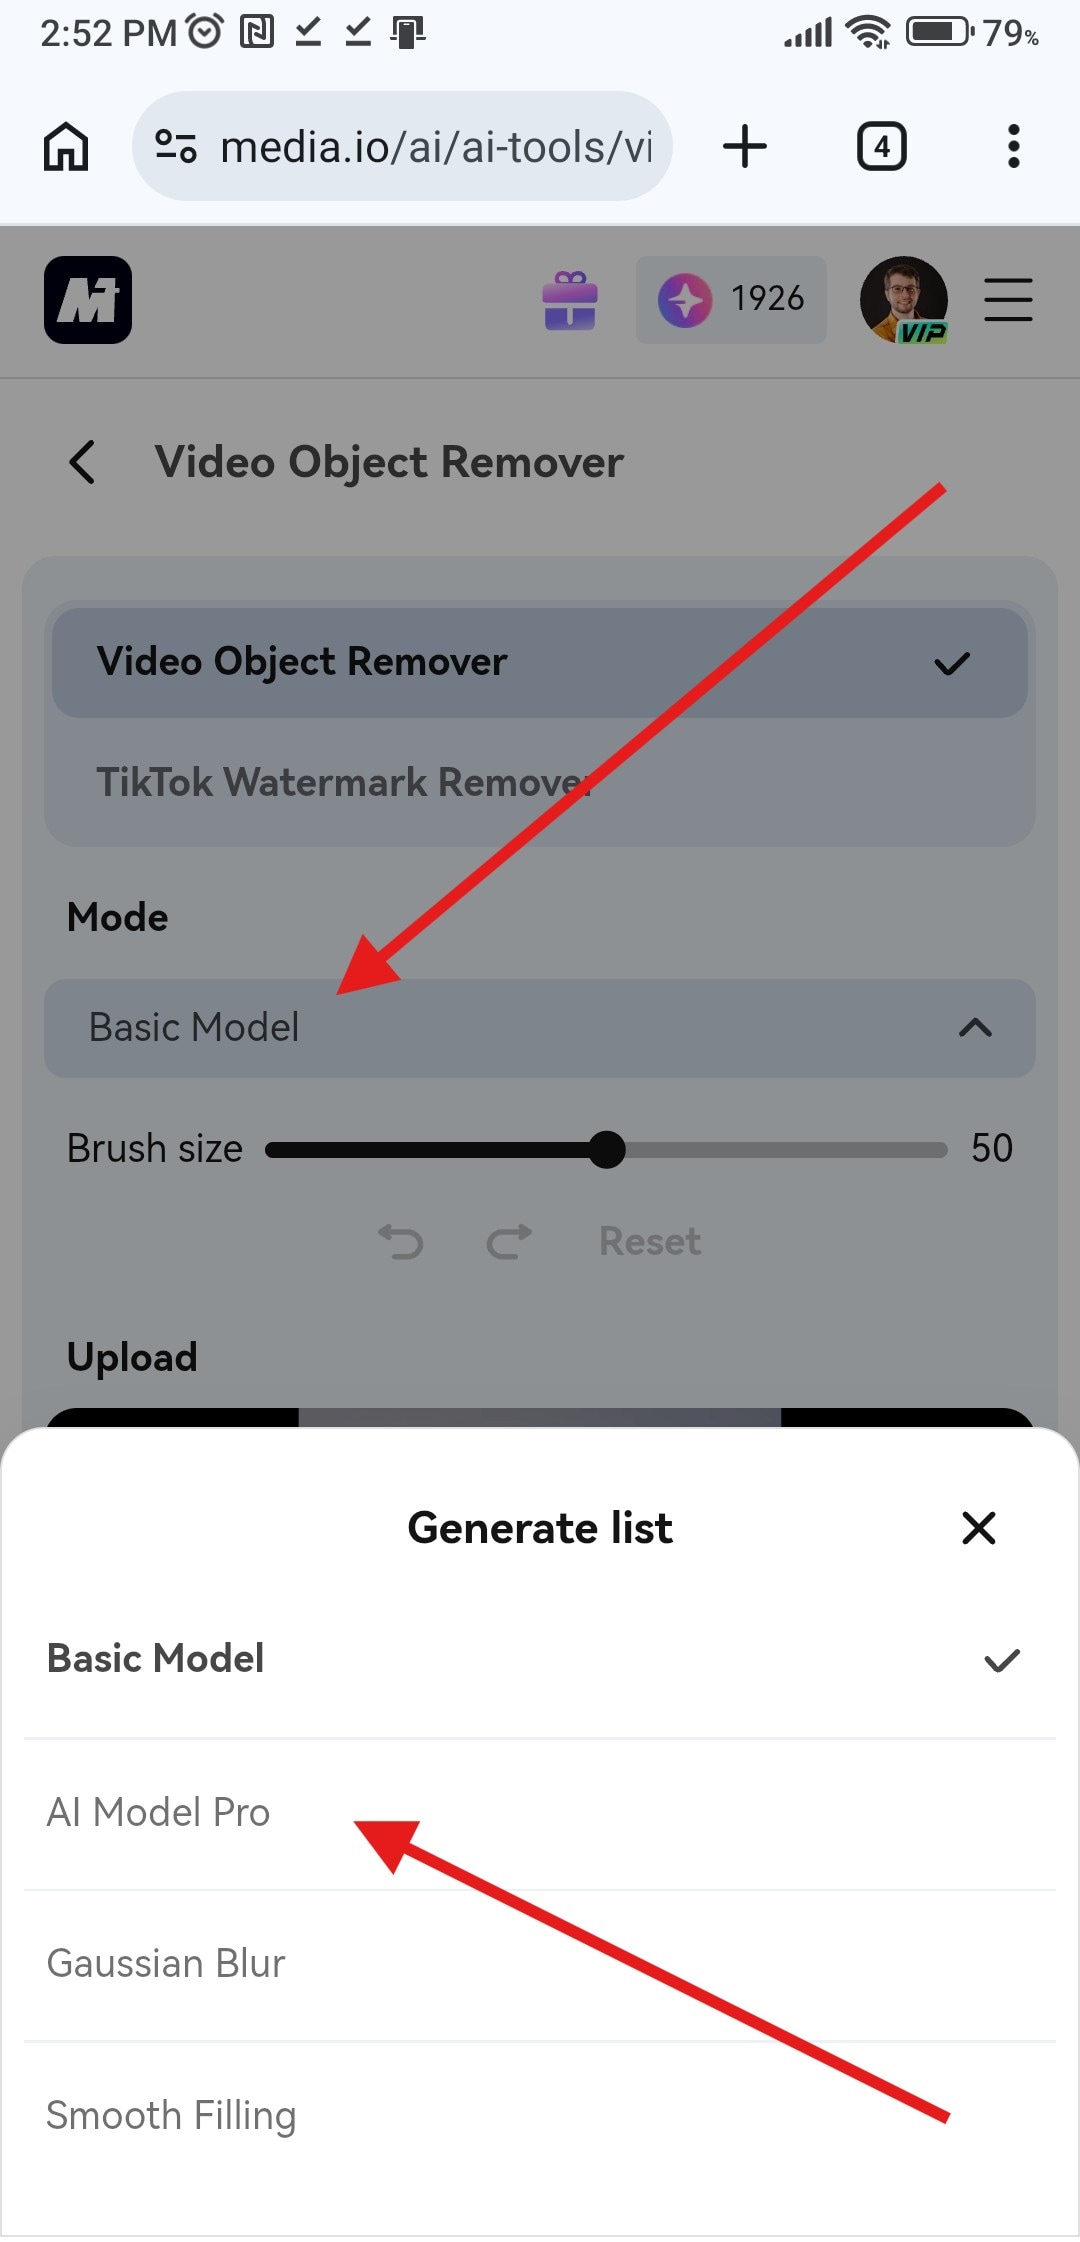
Step 3: Now, to select a Mode, tap on Basic Model, and then select AI Model Pro.
Step 4: Scroll down, and type in a prompt to remove glare from the shot. After that, all you need to do is tap on Generate.
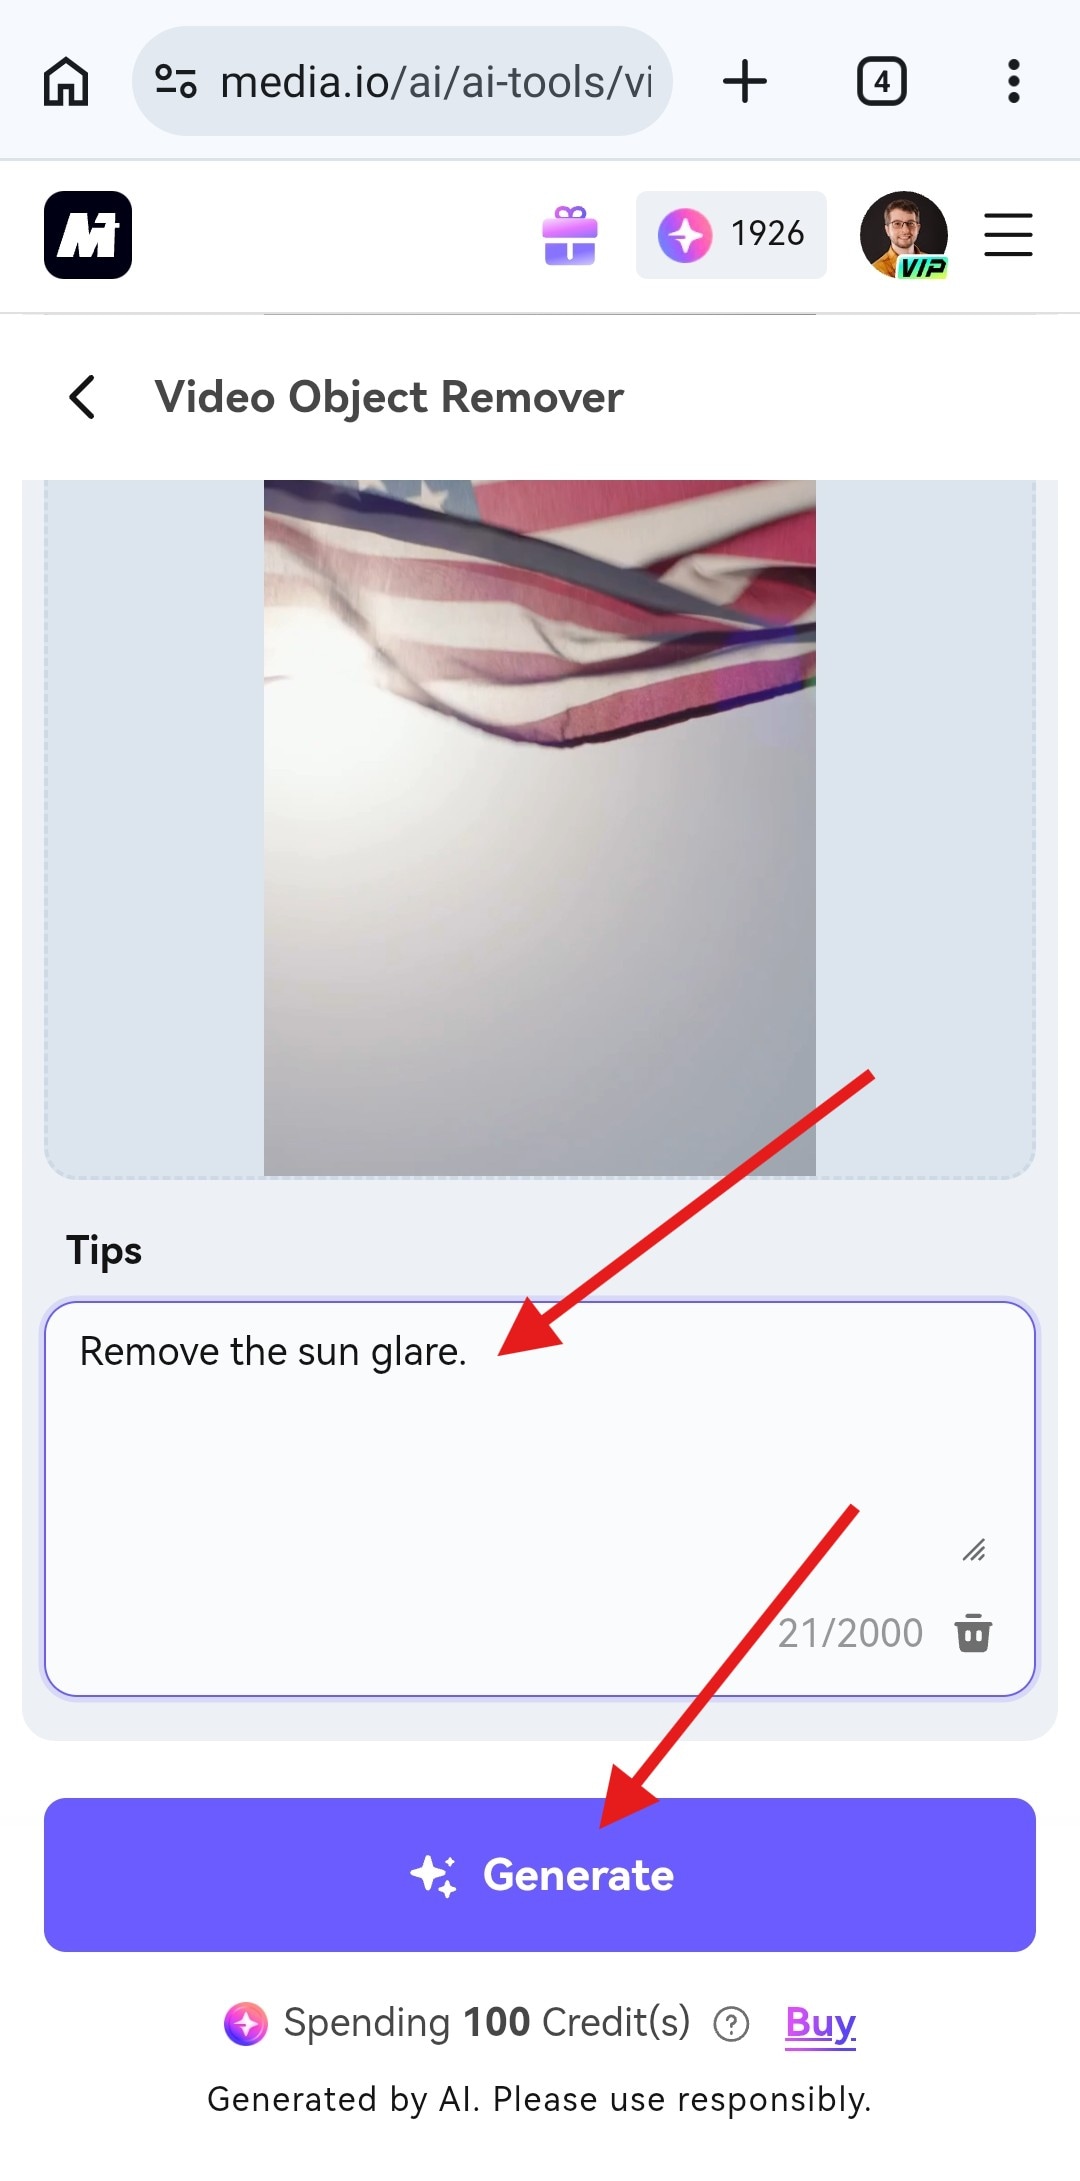
This tool can be a lot of help when cleaning up footage affected by sunlight, glass reflections, or uneven lighting, and you don’t need complex video editing software.
So, Why Choose Media.io?
There are several reasons.
- It handles strong glare that mobile editors can’t fix.
- There is no app installation; it works entirely online.
- It works on any device (iPhone, Android, Windows, Mac…)
- It offers AI-powered precision for clean, natural results.
- It supports both photos and videos, all in one platform.
If you’re dealing with heavy reflections, and you want a quick, professional fix without downloading extra apps, Media.io gives you powerful editing tools right in your browser. It’s one of the easiest ways to handle stubborn glare and restore clarity to your images or videos quickly and efficiently.
How Do You Get Rid of Glare on iPhone Photos Before Taking Them?
The easiest solution to remove glare from iPhone photos is to prevent reflections before you press the shutter. A few small adjustments to your shooting setup can reduce harsh highlights, lens flare, and unwanted reflections by a considerable margin. These simple techniques can help you capture a cleaner image from the very start.
- Change Your Shooting Angle: Glare often appears when light reflects directly into the camera lens. Try moving slightly to the left or right, lowering or raising your phone, or tilting it at a different angle.
- Avoid Direct Light: Shooting directly toward the sun or a strong light source increases the chance of flare and washed-out areas. Whenever possible, position the light behind you or to the side. This helps your camera capture balanced exposure and preserves more detail.
- Use HDR Mode: HDR (High Dynamic Range) helps your iPhone balance bright and dark areas in high-contrast scenes. When glare comes from strong sunlight or uneven lighting, HDR can reduce blown-out highlights and recover detail automatically.
- Clean Your Lens: Fingerprints, dust, and smudges scatter light and make glare worse. Before taking a photo, quickly wipe your lens with a soft cloth or clean fabric. This simple habit can noticeably improve clarity and reduce unwanted light effects.
- Adjust Your Subject’s Position: If you’re photographing a person or reflective object, try changing their position relative to the light source. Turning the subject slightly away from direct light can reduce shine on skin and minimize reflections on glasses.
- Use Shade or a Diffuser: Harsh light creates harsh glare. Move your subject into open shade, step under a tree or awning, or use something simple, like your hand, a hat, or a piece of paper, to block or soften direct light.
A few seconds of adjustment before shooting can save you time when editing later, and it often results in a much better photo overall.
Conclusion
So, as we have established, glare doesn’t have to ruin your photos. And, when it does, you have a few options on your iPhone. You can try the built-in iPhone edits, which can work for minor glare. Then, you can try free apps that give you more control over localized reflections. You can also give AniEraser a shot. It offers fast AI fixes with minimal effort. Media.io, on the other hand, offers powerful online removal for strong glare.
The best method will depend on the glare itself. For small issues, simple adjustments may be enough. For stronger reflections, AI tools can save time and deliver cleaner results.
In any case, with the right approach, you can turn a washed-out photo into a clear, professional-looking image, directly from your iPhone.