

One of the nicest solutions to make the image more eye-catching is removing unwanted objects. No, it's not as challenging as you think. There are many tools that can help you regarding this issue. Yet Photoshop and AniEraser are the most known among them. With these brilliant tools, you can finish the work in a limited time.
Moreover, you will also learn how to remove part of an image in Photoshop. This article will also outshine the most sustainable tool between AniEraser and Photoshop at the end.
In this article
Part 1: Why is it Important to Remove Unwanted Parts from an Image?
If you want to remove objects in the image for personal or professional purposes, Photoshop and AniEraser can help you with everything. Removing objects in images holds its importance in many scenarios. You can find the importance of removing unwanted parts from an image in the understated points:
1. To Make Photos More Visually Appealing
If you want to make a photo visually appealing, consider removing all its mistakes. The first thing you will do is to obviously remove an unwanted object from an image as they are not contributing to the composition of the picture, so the attractiveness of the image will improve by this.
2. For Consistency
The best way to create a constituency in images is to remove unwanted objects from it. Unwanted things can impact the rhythm and theme of images. To make them more consistent, ensure you don't capture any unrequired object initially. If you capture it, consider removing it with a reliable tool.
3. Enhance Attractiveness
Do you wish to make photos in such a regard that no one can skip them? The perfect method to actually accomplish this goal is to create unwanted object-free photos. You can also enhance the aesthetics of the pictures with it and make them optimistically majestic.
4. For Better Marketing of a Brand
If you are marketing your brand with visual outlets in the form of photos, then it should be perfect. If your images are loaded with unrequired objects, they will automatically damage the customers' interest. For this reason, you need to make the branding photos more professional and perfect compared to personal photos.
5. Professional Requirement
If you are a professional photographer, you might encounter a scenario where clients demand mistake-free photos. The unwanted objects in photos are very big mistakes, and they can impact your photography career, which is why removing all the unwanted parts of an image is crucial.
Part 2: Best Ways for Removing Part of an Image in Photoshop
Adobe Photoshop is indeed the most known tool for creating studio-level photos. This tool allows you to create multiple types of unique graphic designs to streamline the business workflow. Moreover, the algorithm in this platform helps you manage Photoshop by removing part of the image. It also comprises diversified features and plugins.
Moreover, you can use this tool on multiple platforms like Windows, Mac, and iPad. It is the perfect tool for large enterprises to mid-size businesses. You can also share your unique masterpiece with the world by using it.
Way 1: Content-Aware Fill
This tool is known to be best in the domain of erasing parts of the image in Photoshop. With it, you can create more professional-looking and class images. It removes the area by blending it with the other pixels, which makes it almost negligible to notice. You can learn the process of removing unwanted objects with Content-Aware Fill below:
Step 1
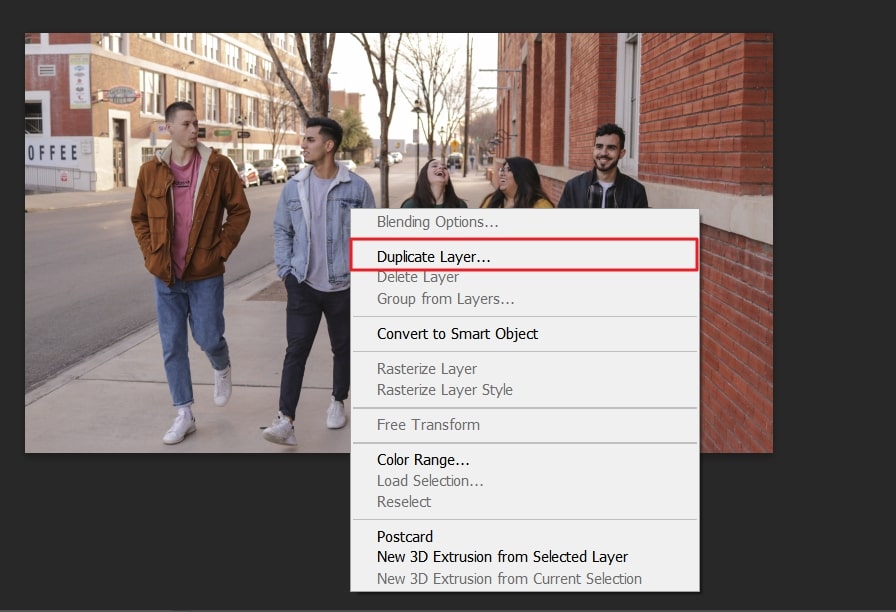
Open Photoshop on your device and select the "File" tab. After this, click "Open" and choose the image of your choice. As the image is imported, right-click on it and then hit "Duplicate Layer."
Step 2
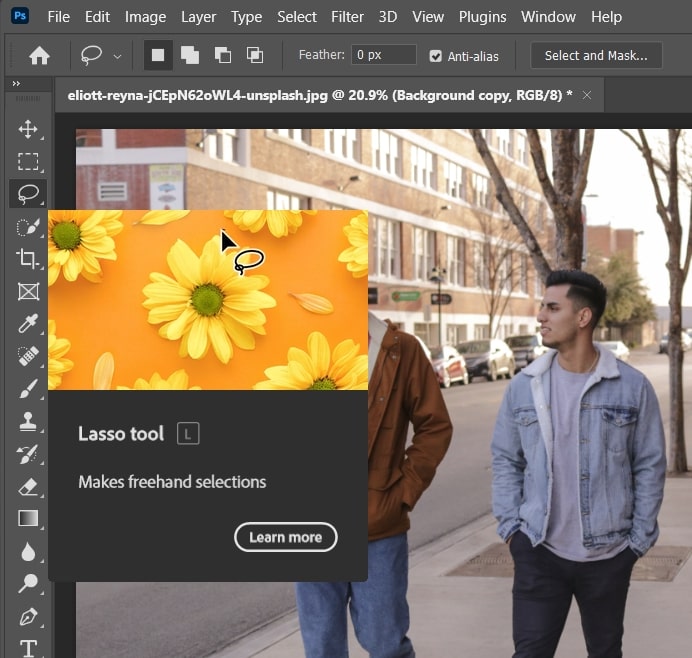
Photoshop will create two copies of the image, access the toolbar and click on the "Lasso" tool. Following this, draw a loop around the part you want to remove. After this, you will see a moving line around the selected area.
Step 3
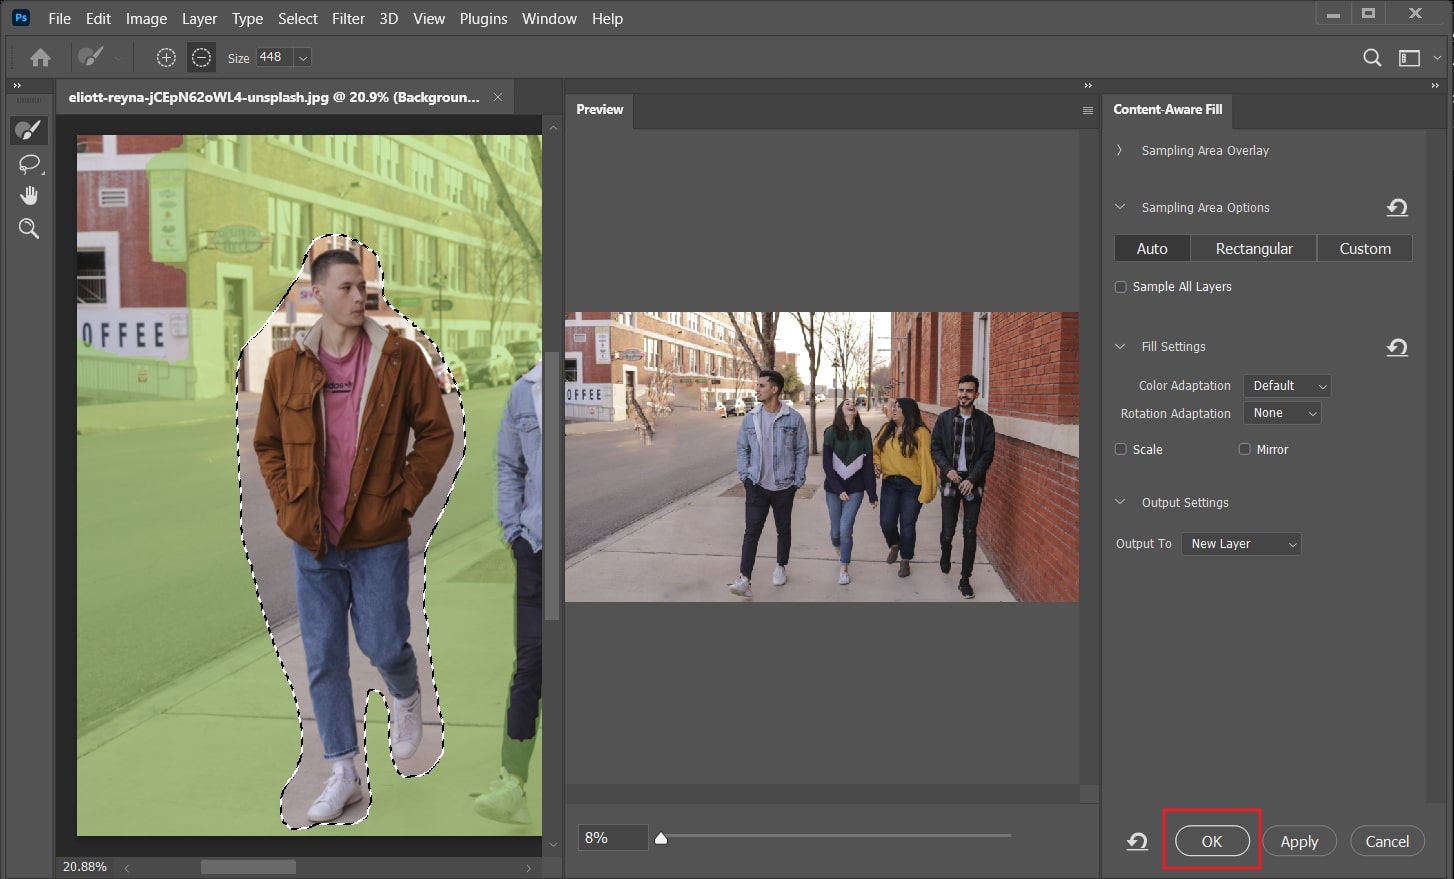
Hereafter, click "Edit" and select the "Content-Aware Fill" option. Once the new window appears on the screen, customize the settings of "Content-Aware Fill." Once you are satisfied with the results, click "OK," and the object will be removed from the photo.
Way 2: Spot Healing Brush
With this magical tool, you can remove small distractive elements from any photo. Whether it's a blemish or an acne spot, this tool can eliminate unwanted objects for you. Besides this, it is a perfect tool for cleaning up images for a seamless look. Have a look below to learn how to remove part of an image in Photoshop with Spot Healing Brush:
Step 1
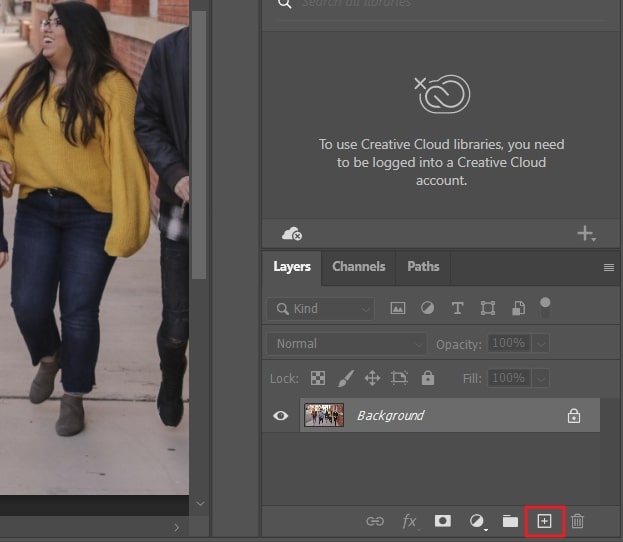
Open the photo in Photoshop, and from the "Layers" panel, select "New Layer." Next, rename the layer to eliminate the risk of confusion.
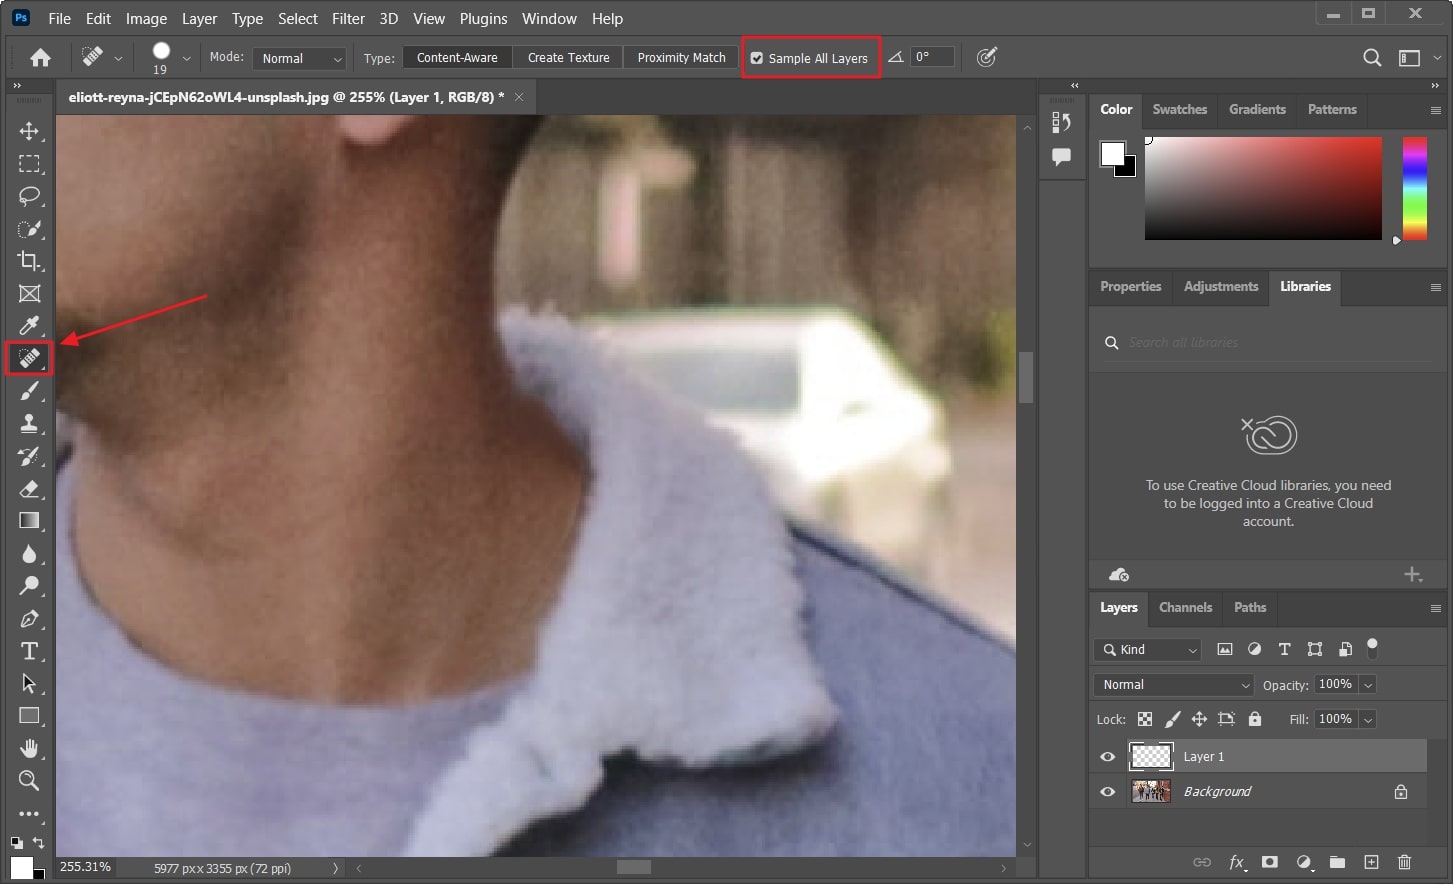
Step 2
After renaming, press "Command/Control +" to zoom in. Select "Spot Healing Brush" and customize it by changing its type and size. Locate the "Sample All Layer" box and enable it. Afterward, click "Blending Mode" and move the spot healing brush over the unwanted object.
Way 3: Patch Tool
With this tool, you can remove large-sized unwanted objects in an image without compromising its quality. It does this professionally by replacing the area with unnoticeable patches. Moreover, you can get a higher ratio of selection over the area with it. To know the answer to how to erase part of the image in Photoshop with Patch Tool, look underneath:
Step 1
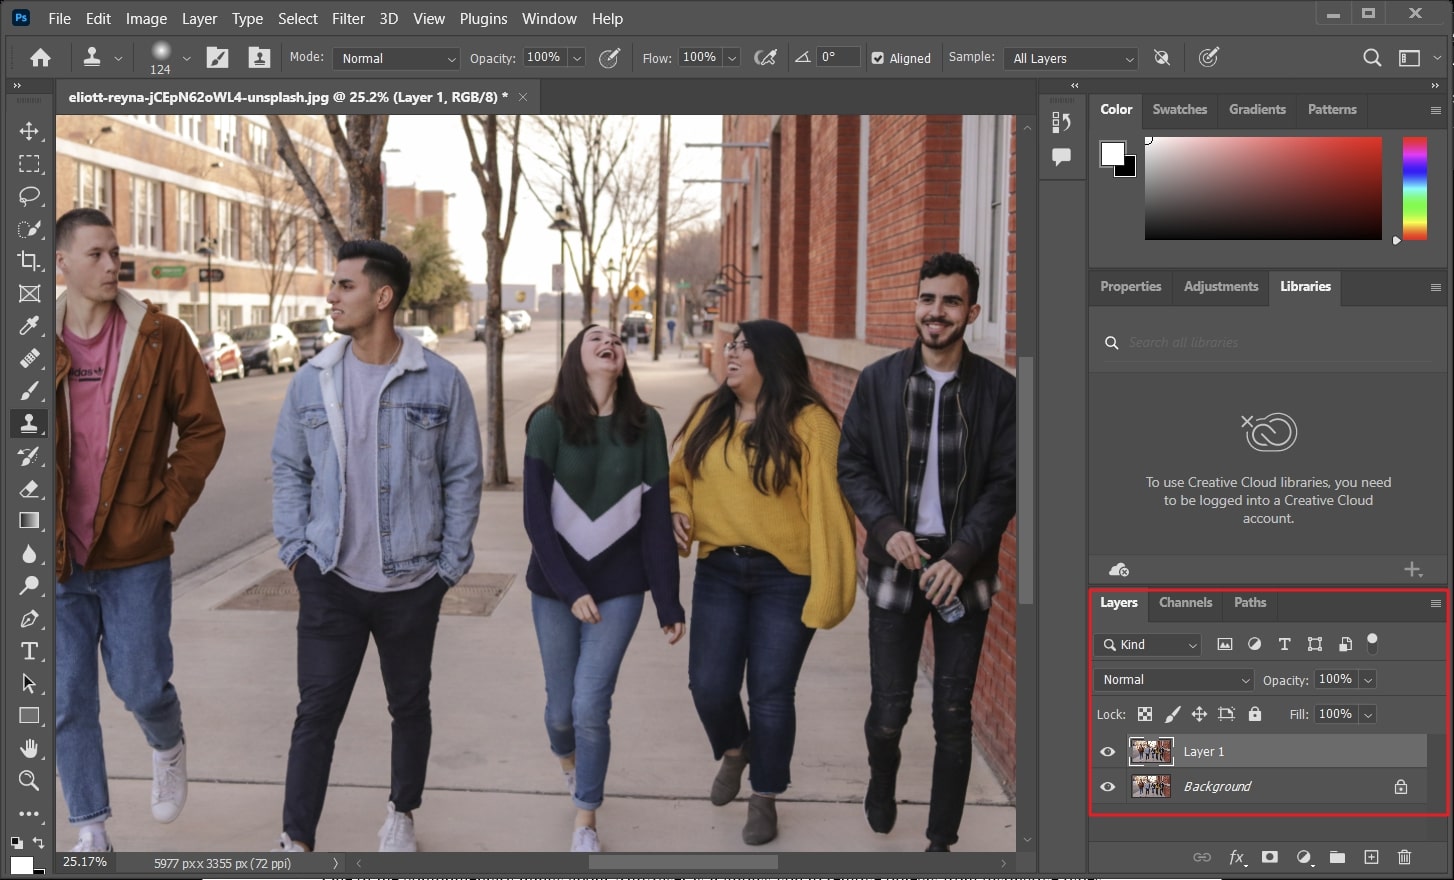
Open the image in Photoshop and create a duplicate layer by pressing "Command/Control + J." After this, right-click on "Spot Healing Tool" and select "Patch Tool" from its option.
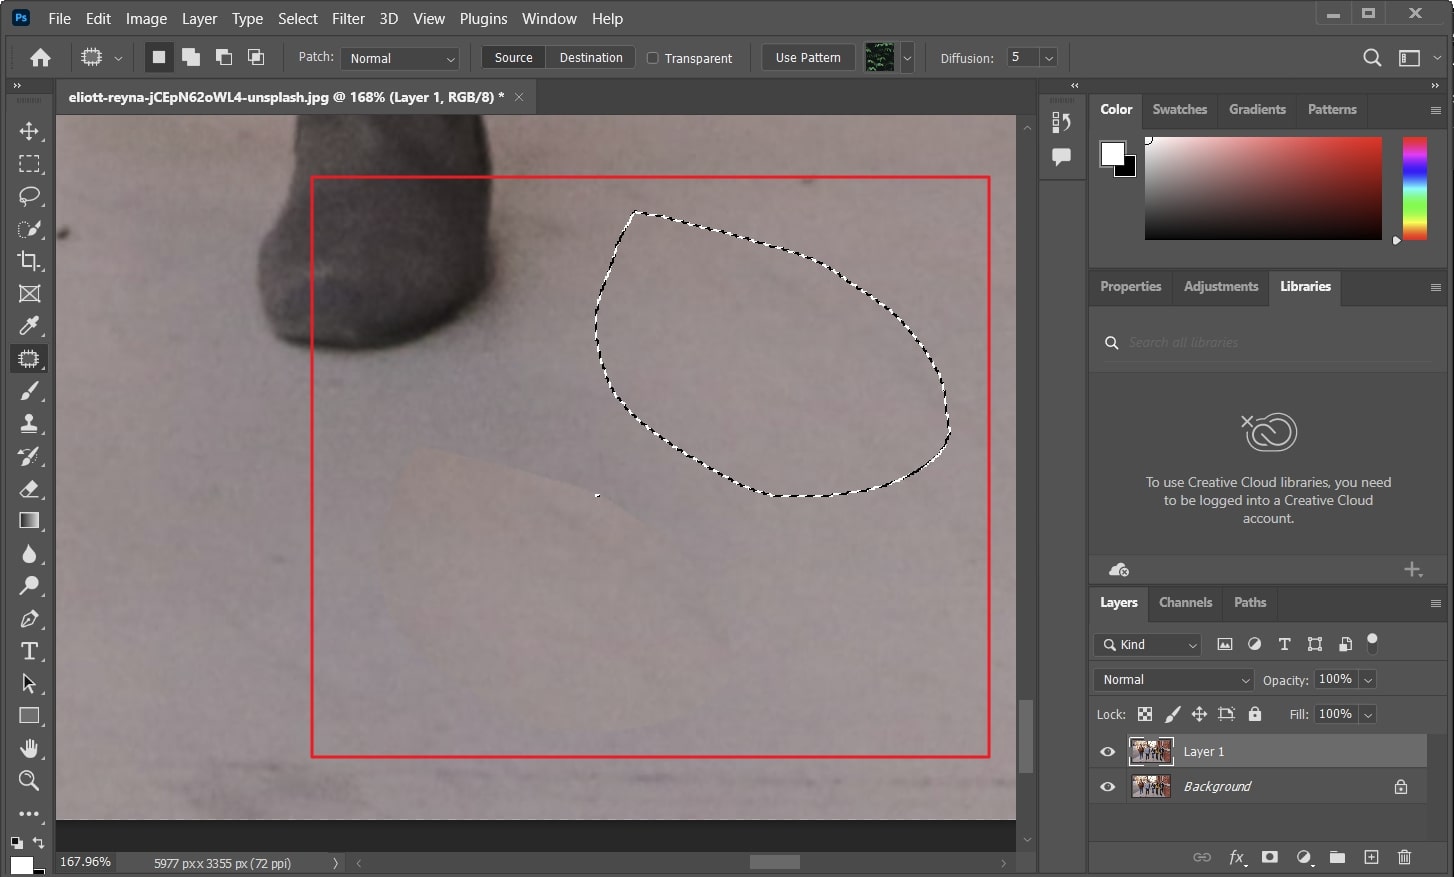
Step 2
Now, select the object you want to remove and move it to the point with which you want to replace the object. To complete the process, press the "Command/Control + D" button.
Part 3: What's the Best Alternative for Beginners to Remove Part of an Image
If you are a beginner and want to erase part of an image in Photoshop, it can be challenging. Photoshop has a complicated procedure, and you have to put lots of effort into deriving desired results. Yet, you can use an easy-to-use like Wondershare AniEraser. With this tech-friendly tool, you can customize the productivity of your image in a limited time.
Moreover, the process of removing unwanted objects from photos is straightforward. Even a person without editing skills can use this exclusive tool. Other than this, there are no data commitments in it, so you can even work on your private pictures with AniEraser.
Exclusive Key Features of AniEraser
- The interface of AniEraser is well-established and tidy. You can find all the required stuff, from buttons to other features, without hassle.
- It supports various platforms like Mac, Windows, Online, and iPhone/iPad. You can operate all these platforms with just one license, which is a great deal.
- No matter if you want to remove one object or more than one. AniEraser allows you to remove multiple objects with precise modifications from photos and videos.
How Can You Remove Unwanted Objects in Photo with AniEraser
Want to remove unwanted objects but don't have time to learn Photoshop? Read these straightforward instructions to eliminate unwanted objects from pictures:
Step 1Add Image in AniEraser and Remove Object
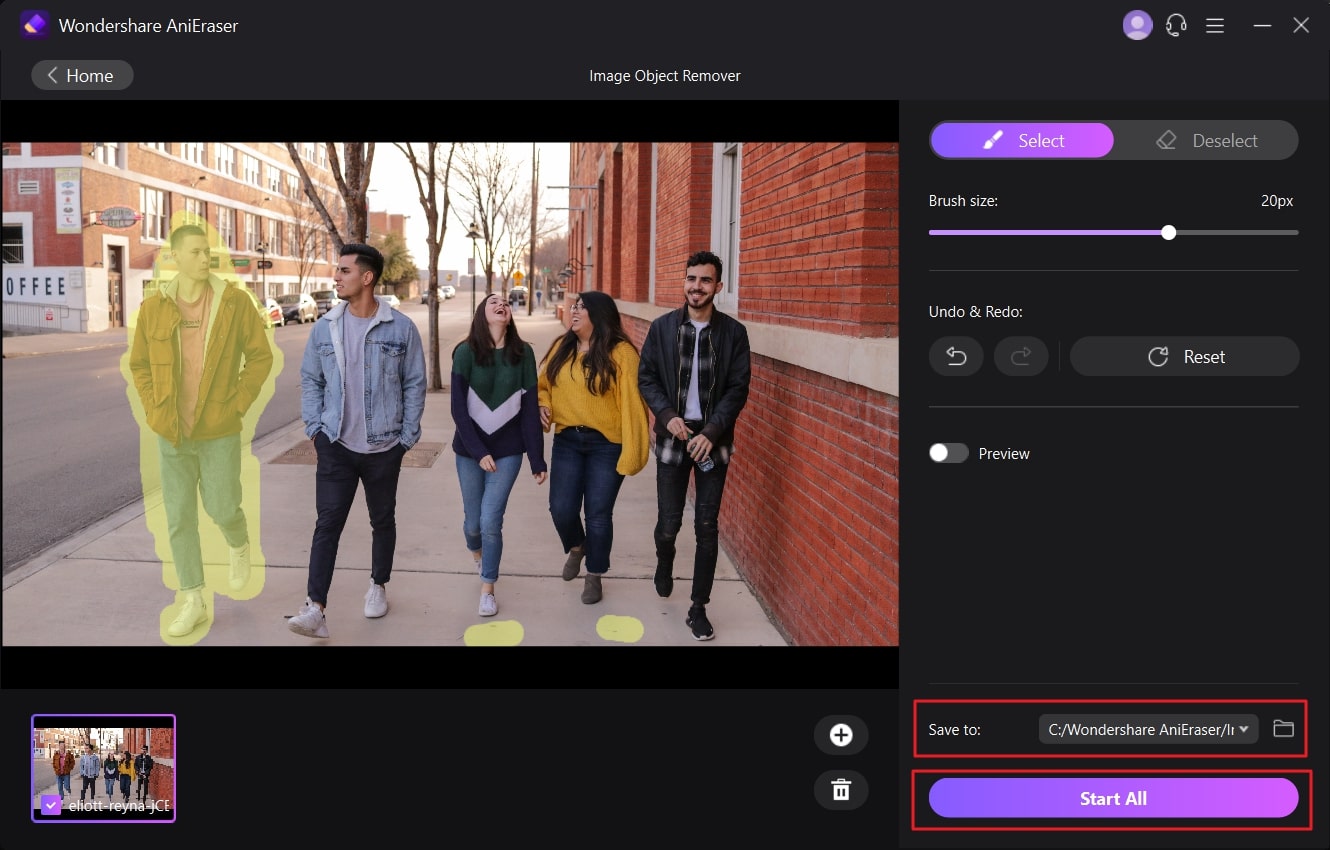
Open AniEraser on your device and click on "Image Object Remover." After this, highlight the object you want to remove and toggle the "Preview" option to analyze results. Next, turn off the "Preview" option checking the AniEraser results.

Step 2Save the Image in the Device
If you are satisfied with the results of this AI tool, click on the "Save To" drop-down menu and choose the destination location. After this, click on the "Start All" button to activate the AI technology of AniEraser to remove the selected object.
Part 4: Reasons to Choose AniEraser Over Photoshop for Removing Objects in an Image
No doubt that Photoshop is a popular tool, but some drawbacks show the downside of its functionality. In comparison, AniEraser is known to be a more seamless and reliable tool. The understated points will help you to understand why you choose AniEraser over Photoshop:
- AniEraser is a swift software. You can use it at a lightning-fast speed. However, Photoshop is a heavy software that requires a high-speed internet connection or a high-quality graphic card to run. It shows the limitations of Photoshop.
- As mentioned previously, Photoshop is complicated to use. It is not recommended for those who are just at the beginning of their photography journey. On the other hand, AniEraser is easier to use, and you can use it without mastering any skill.
- To use Photoshop, you have to spend lots of money. The subscription plan for Photoshop is a big burden on any middle-class man's pocket. In comparison, AniEraser is a very cost-effective tool. You can use this tool on several platforms, even with one license.