Remove Snapchat Filters from Photos Online for Free
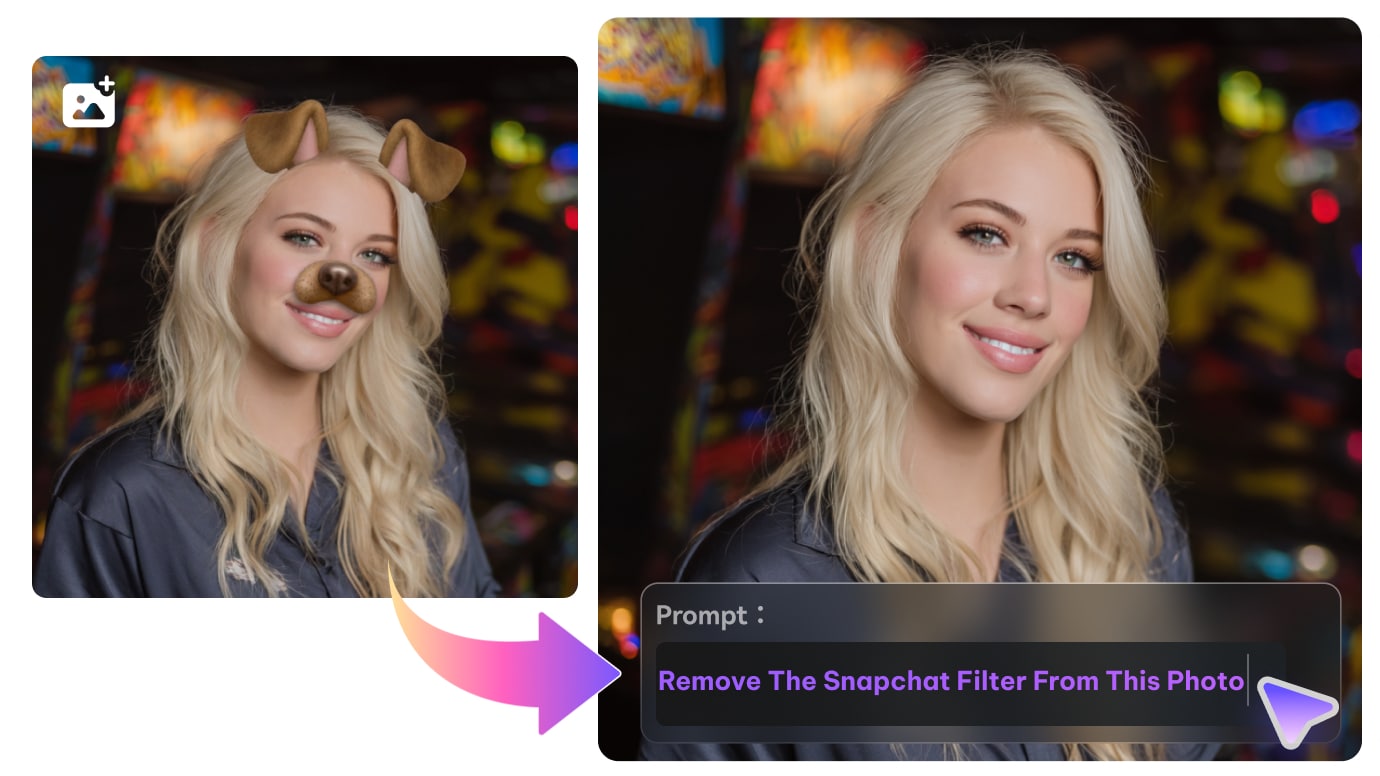
Instantly edit out Snapchat filters like dog ears, text captions, and stickers from your saved photos. Powered by AI to erase lenses and reconstruct your real look naturally.
How to Remove Snapchat Filter from Saved Photo
-

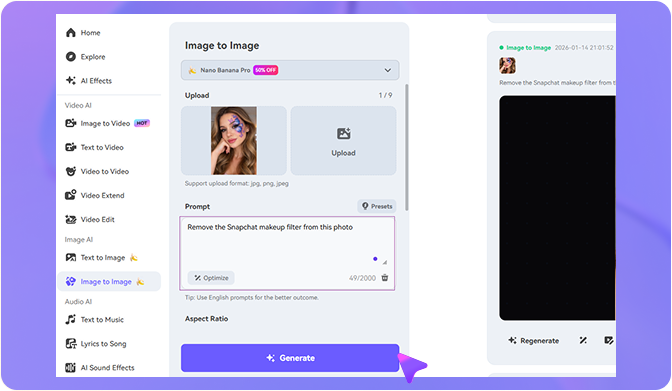
Step 1. Open Media.io Image to Image
Go to Media.io Image to Image — your Snapchat filter remover online. Upload the saved photo you want to restore.
-

Step 2. Describe the Filter to Remove
Use the text prompt to tell AI to edit out the Snapchat filter. For example: "remove dog ears, restore original face".
-

Step 3. Generate & Save Photo
Click Generate. The AI will remove the snap filter and reconstruct the image. Preview and download your clean photo.


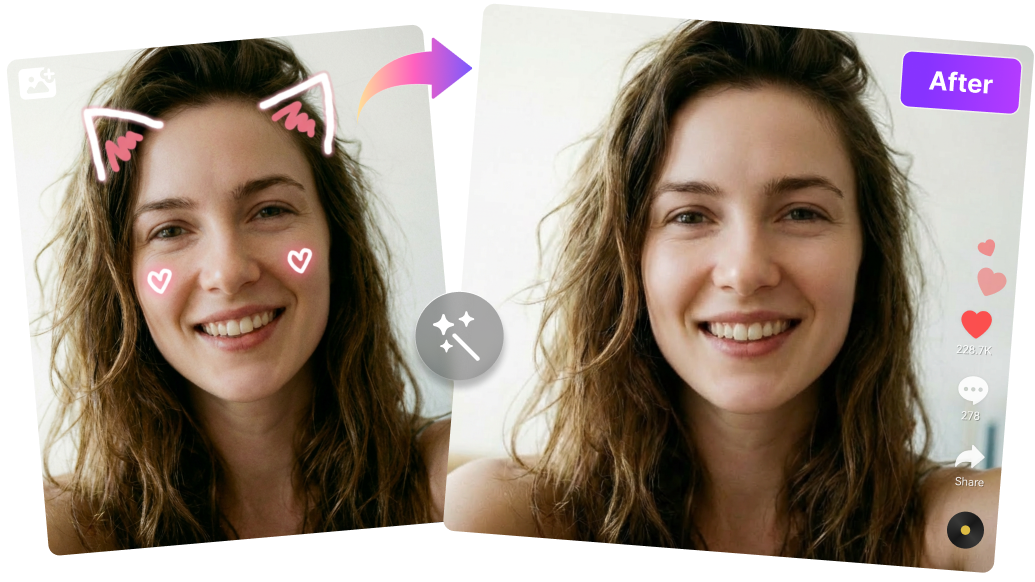
Remove Snapchat Dog Filter & Face Stickers
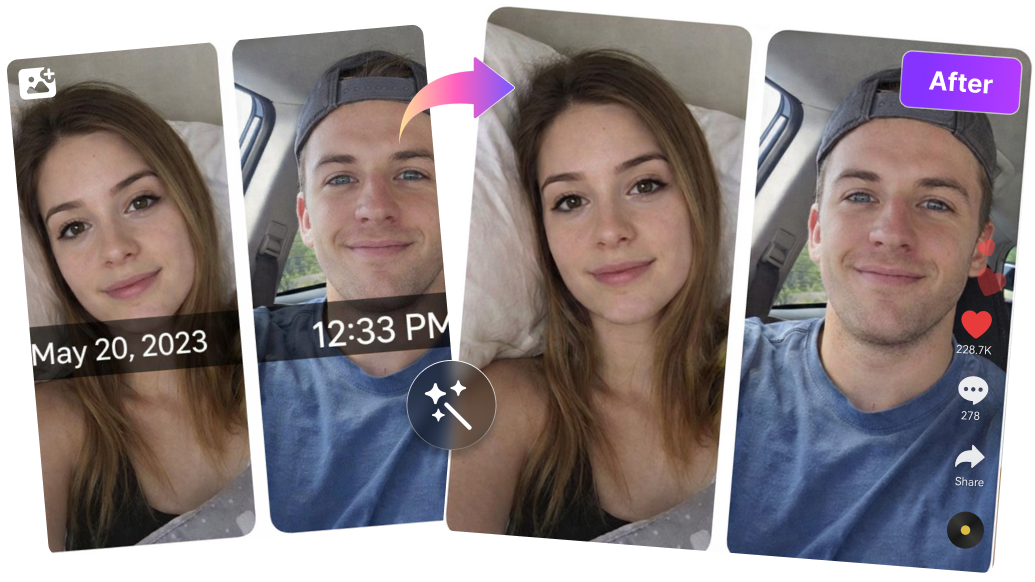
Edit Out Text Captions & Banners
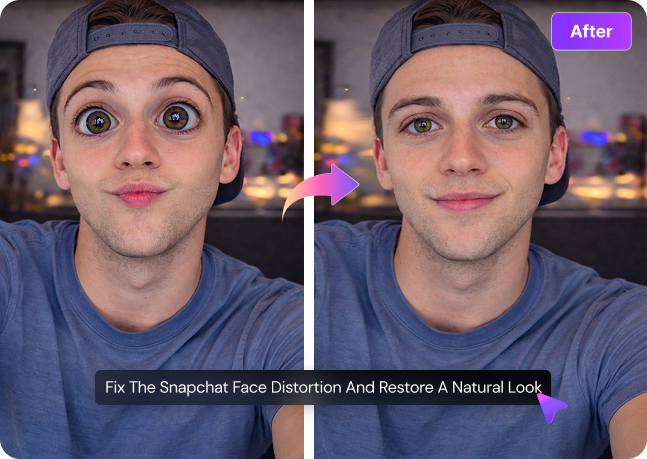
Fix Face Distortions & Lenses
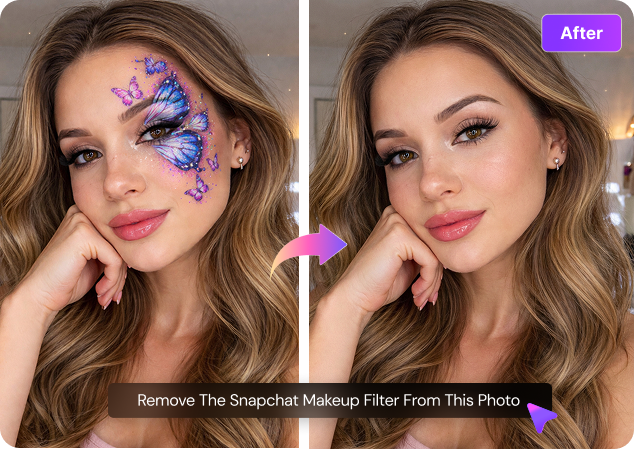
Restore Natural Look (Remove Makeup)
Why Use Our Snapchat Filter Remover?

AI Reconstruction
We don't just blur; we reconstruct. Perfect for when you need to remove snap filter from photo and keep realistic skin texture.

No App Download
Looking for a Snapchat filter remover app? Save your storage space. Our tool works 100% online in any browser.

HD Quality Support
Remove snapchat filters from a photo without losing quality. We support high-resolution JPG and PNG downloads.

Secure & Private
Your saved photos are safe. Images are processed securely and deleted automatically after generation.


I had a saved picture with those annoying dog ears. This AI tool actually reconstructed my forehead perfectly! It looks like the filter was never there.
This is the best tool to edit out snapchat filters. It removed the black text bar from my memory without blurring the background. Highly recommend!
I was looking for how to remove snapchat filter from video, but found this photo tool first. For my selfies, the 'Image to Image' restoration is incredible.
What Users Say About Media.io Filter Remover

Frequently Asked Questions
 Can you remove a Snapchat filter from a photo?
Can you remove a Snapchat filter from a photo?Yes, absolutely! While Snapchat only allows removal before saving, Media.io allows you to upload any saved photo and use AI to remove snapchat filters post-capture, effectively restoring the original look.
How to remove a snap filter from a saved photo?
How to remove a snap filter from a saved photo?To remove a snapchat filter from a saved photo, upload your image to Media.io. Use the text prompt to describe the restoration (e.g., "remove dog ears"). The AI will erase the filter and fill in the missing details automatically.
Is there a Snapchat filter remover app?
Is there a Snapchat filter remover app?You don't need a specific app. Media.io is a Snapchat filter remover online free tool. It works directly in your web browser on iPhone, Android, or PC, saving you storage space.
How to remove filter from Snapchat video?
How to remove filter from Snapchat video?This specific tool is optimized for photos. If you are looking to remove snapchat filter from video (like text or stickers), please use our dedicated Video Object Remover which supports dynamic erasing.