With a clear interface and powerful editing tools, Adobe Lightroom is the best tool for photography enthusiasts. Color grading Lightroom is also very popular among professional photographers. With this, you can adjust all the details and overlays of an image. It has non-destructive tools along with an excellent cataloging system.
If you are impressed with Lightroom and want to know more about it, you are in the perfect place. In this article, you will learn the basics of both desktop and mobile versions of Lightroom. Above all, the bonus tip instructed here will greatly help you regarding color-correcting images.
In this article
Part 1: Why People Prefer to Use Lightroom
You must be wondering why color grading Lightroom is important. Why do people prefer to use Lightroom to make modifications to their photos? The understated points can satisfy your queries like this with ease:
- Undos and Controls: If you make any mistakes while editing your picture, Lightroom allows you to undo it to start from scratch. Moreover, it keeps the full history of the previous actions even if you close the program. No matter how crucial the detail is, Lightroom allows you to adjust it with sliders. You will experience full control over several metrics like brightness, contrast, and more.
- Non-Destructive Editing: One of the best things about Adobe Lightroom is it does not edit the original images. Instead of this, it imports it as a copy and edits it, so the overlays or pixels are not compromised. Moreover, with its healing and cloning feature, you can remove all the irritable blemish spots and wrinkles in a photo.
- Multitude Presets and Files: Instead of manual actions, Lightroom also works with presets, which can modify the appearance of images in a dramatic way. You can also create presets and modify them as per your need. Other than this, it also allows you to work with multiple files. You can also use the "Before" and "After" feature to compare new and old photos.
- File Conversion and Exporting Options: Lightroom supports camera-type files, so you can also convert different file formats. Moreover, this tool has many exporting options, and you can also manage the size and embed profiles of images while exporting. The book module inside Lightroom allows you to create interactive photo books.
Part 2: How to Perform Color Grading in Lightroom Desktop Version?
Do you want to do color grading in Lightroom on your desktop? The steps listed below will be granted to help you in this scenario:
Step 1
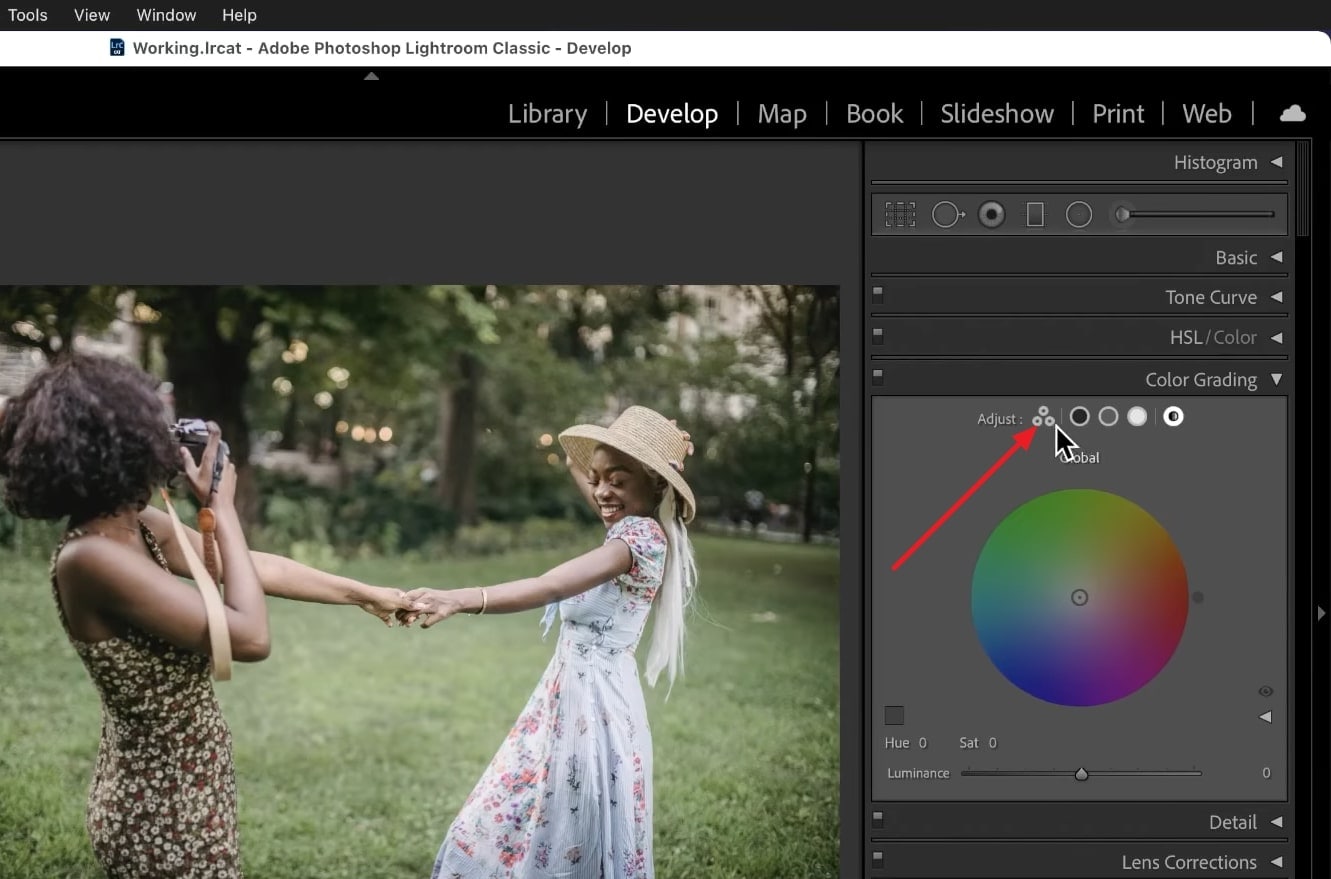
Import your image in Lightroom and hit "D" to access the Develop module. Expand the "Color Grading" menu, and by this, you will see "Three Up View." You can adjust mid-tones, shadows, and highlights. If not, click on the "Tri-Color" icon present next to "Adjust."
Step 2
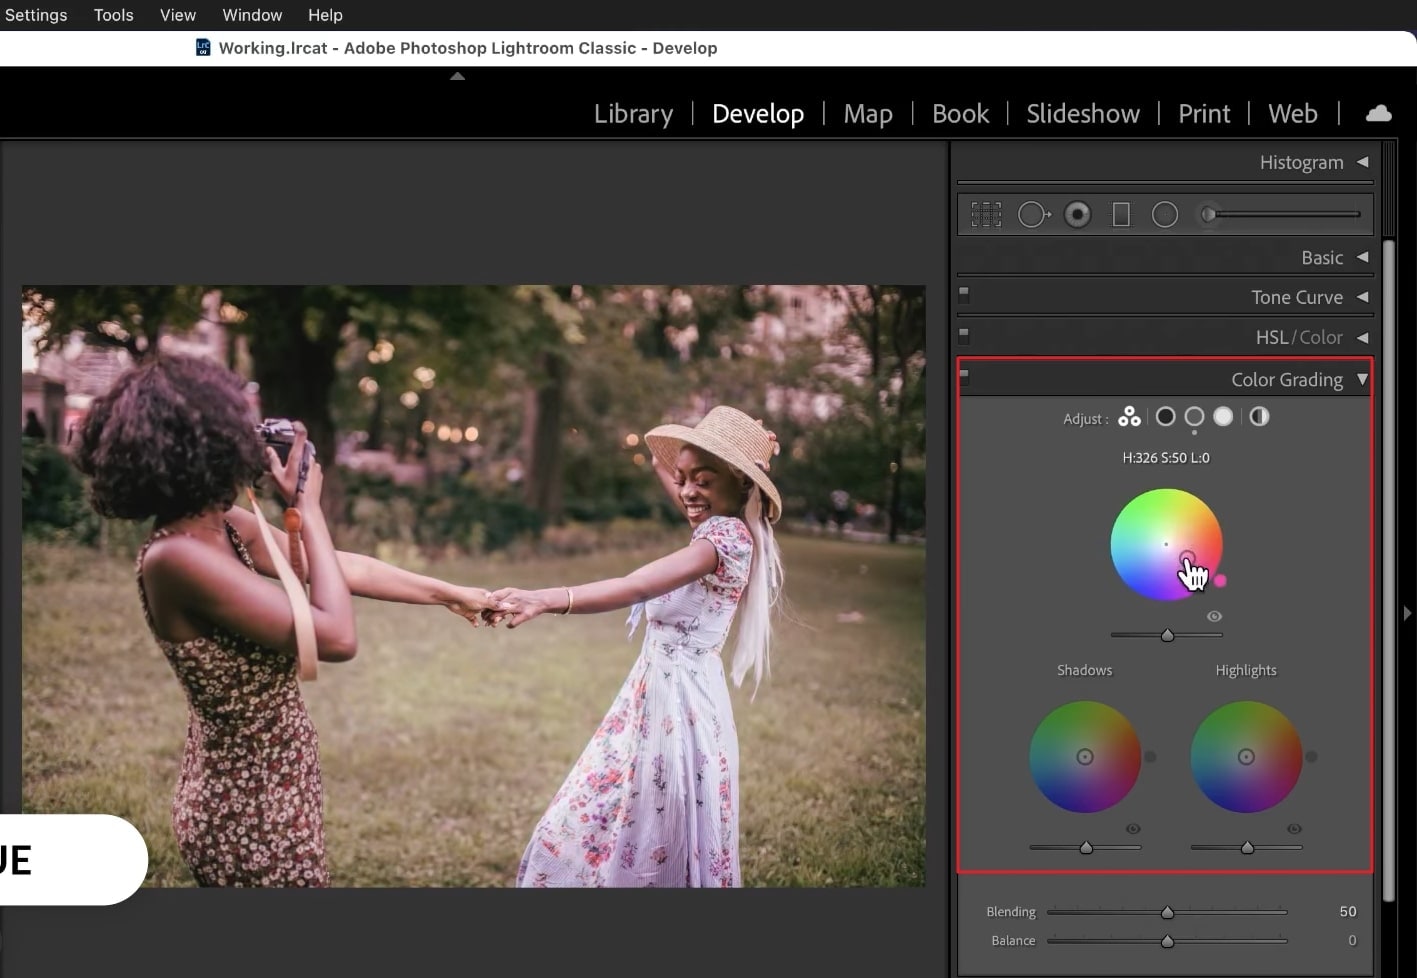
You can also press "Alt" or "Option" to reset the shadows, mid-tones, and highlights. Now click on the image and hold "Shift" to modify saturation. Click "Control/Command" to modify the hue without changing saturation. You can adjust the color grading by selecting the colors from three big circles from the right toolbar.
Step 3
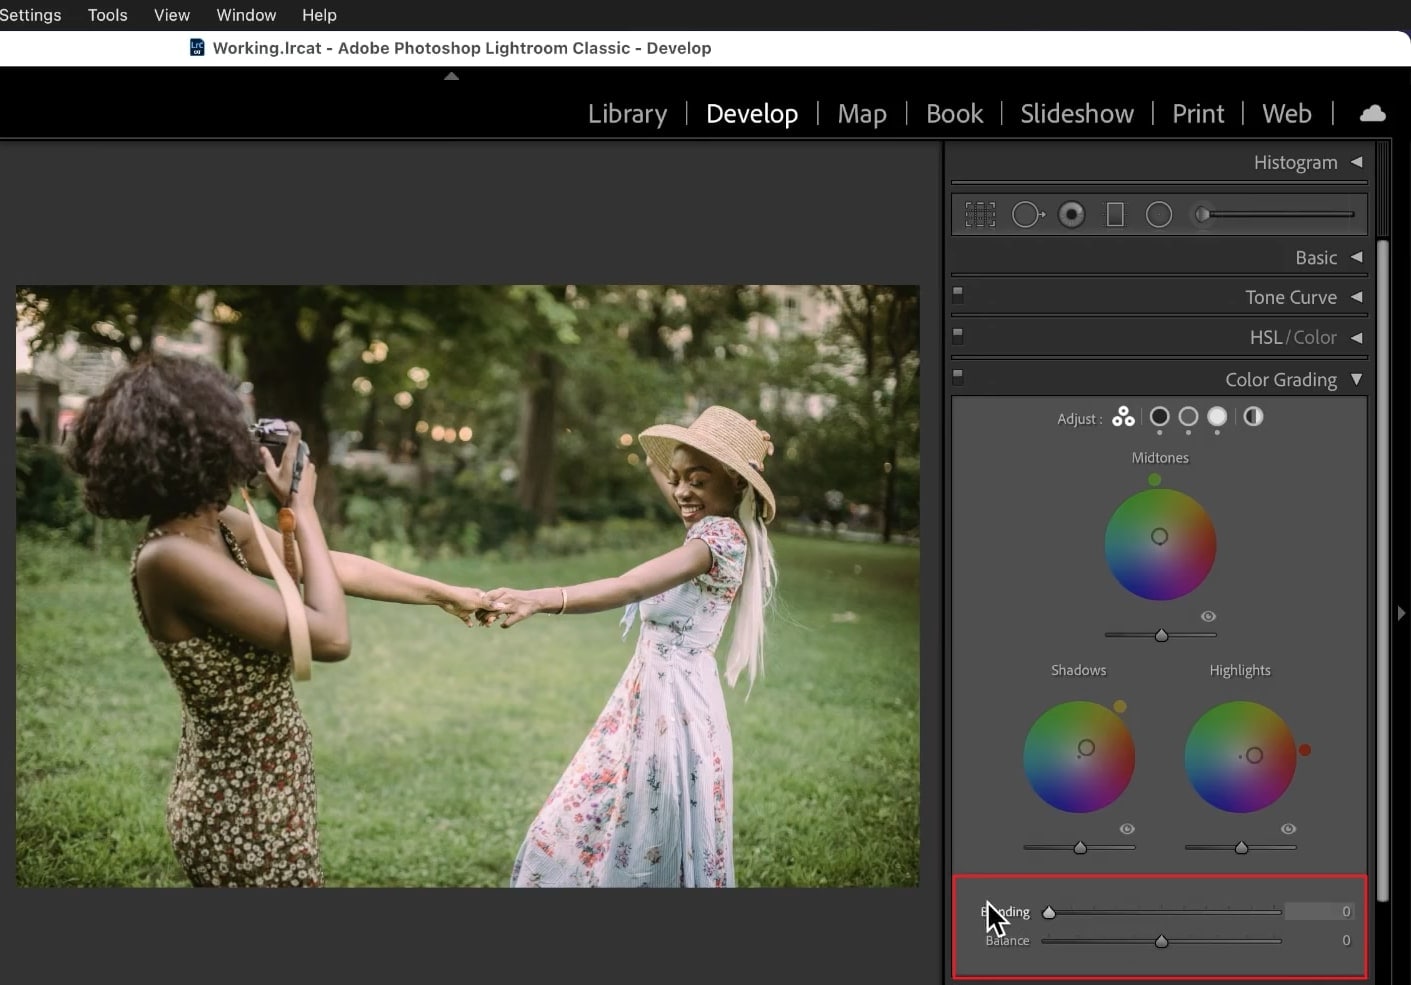
Go to "Blending" and manage the opacity of color grading from its sliders. Select the "Balance" sliders to manage the visibility of colors and highlights. After making all the edits to your picture, save your picture by accessing the "File" tab or using the "Command/Control + S" shortcut.
Part 3: How to Use the Color Grading Lightroom Mobile Feature?
Color grading Lightroom mobile is also a very reliable process. With this, you can easily adjust your photos' colors on your mobile. Feel free to follow the steps listed below to get the work done:
Step 1
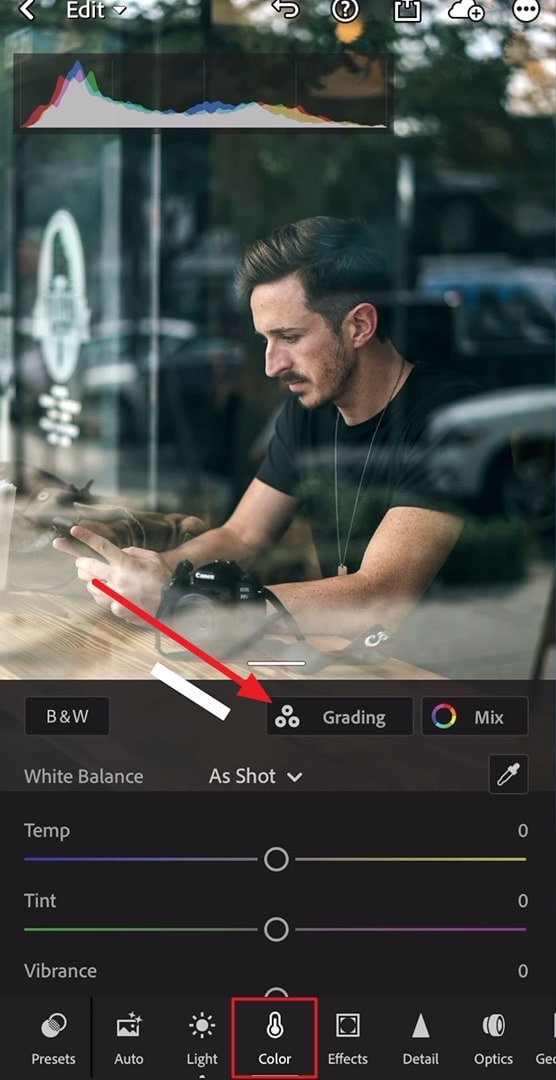
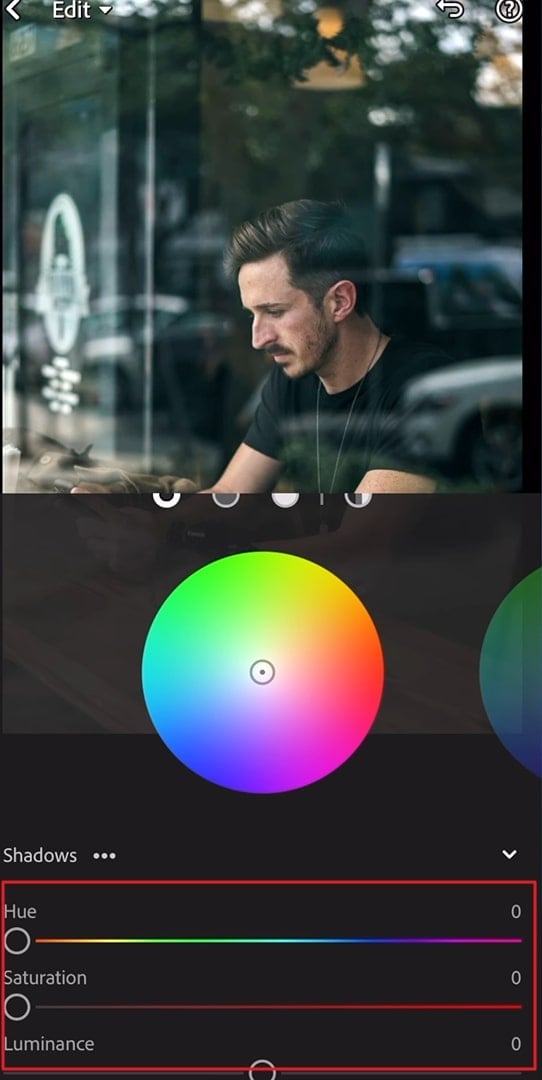
Open Lightroom on your mobile and import the picture that needs some color grading. Go to the bottom row of tools and select "Color." After this, click "Grading," and by this, the grading options will be displayed on your screen. The upper dots represent shadows, mid-tones, highlights, and global.
Step 2
You can click each option and manage the colors as per your needs. Other than this, you can also use hue, saturation, and luminance sliders to color grade the image.
Step 3
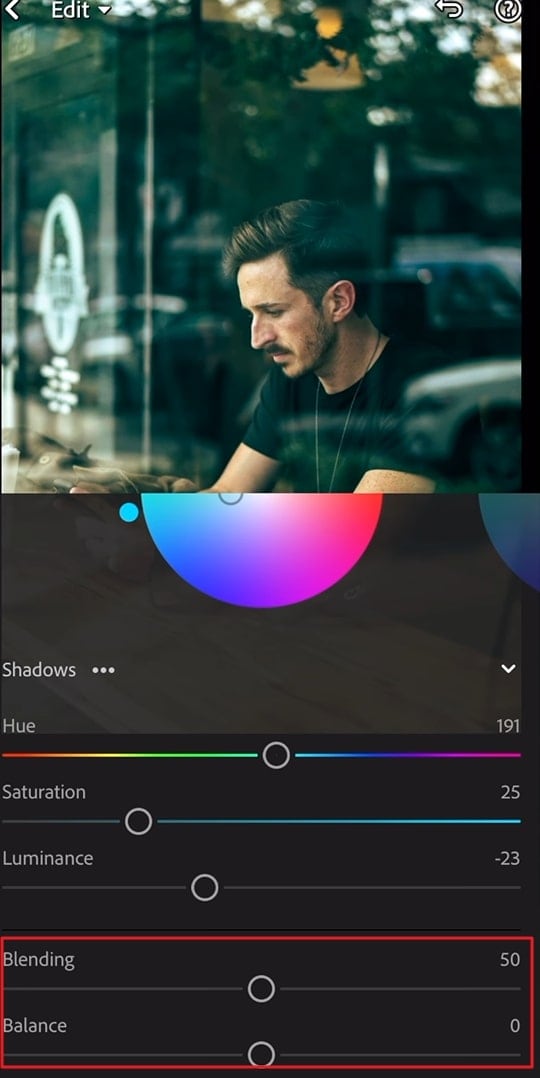
Go to the "Blending" sliders and customize the blending of saturation, shadows and highlight on the image. You can also manage the visibility of colors with "Balance" sliders.
Part 4: The Best Online and Free Alternative to Color Grading Lightroom
Baseline color grading in Lightroom leads to desirable results. However, as you can see above, you have to make lots of adjustments manually. It is not a reliable thing for beginners. For this reason, you need to use a tool with a simplified procedure. Luckily, Media.io - Auto Color can help you with this issue. The process of color correcting in Media.io - Auto Color is automated.
Moreover, unlike Lightroom, it can work on both photos and videos. The processing speed of this color corrector so you don't have to wait for an hour just to color correct the image. The intuitive interface of Media.io - Auto Color also makes it the best tool for beginners. In short, it is the perfect solution to treat all the color problems in an image.
Step-by-Step Guide to Color Correct the Images with Media.io - Auto Color
The instructions provided in this section will help you to color correct the images with Media.io - Auto Color:
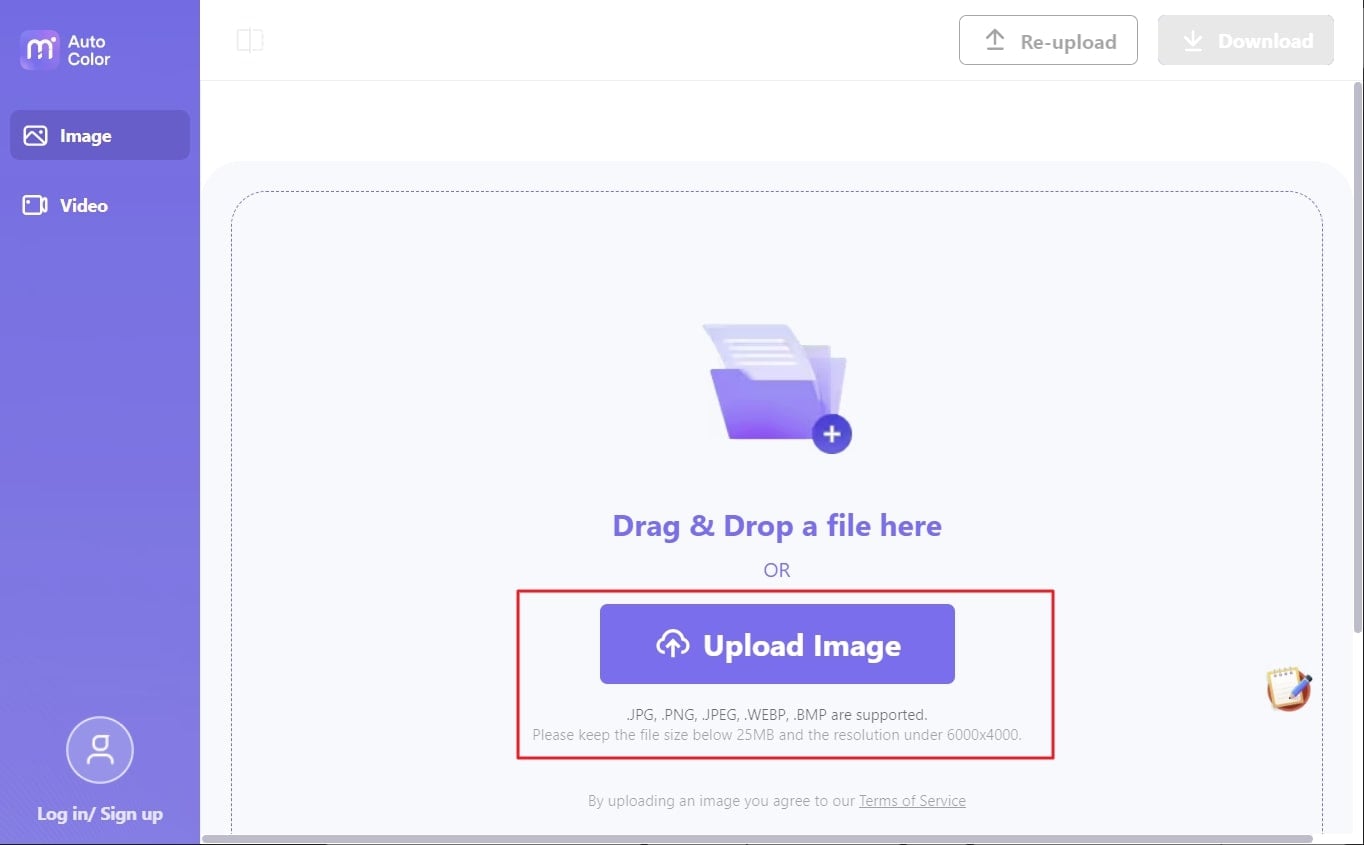
Step 1 Access Media.io - Auto Color and Import Image
Initially, search for "Media.io - Auto Color" on your browser, and from the main site, click "Upload Image/Video Now." After this, hit "Upload Image/Video" to import the photo or video you want to work on.
Step 2 Export Image/Video in Your Device
Following this, wait for the picture or video to get processed by Media.io. You can also click the "Compare" button to compare the original and the new image/video. Afterward, press the "Download" button and save the image or video on the device.