Color correction is a procedure of adjusting the color balance of an image or video in editing. It might be done to improve the overall look of the image or video or to resolve specific concerns like the color cast. Color correction is a necessary process, but doing it right is critical if you want a professional result.
Color correction can also correct image or video flaws, such as making a scene look overly bright or too dark. There are several methods for color-correcting a picture or video. The most typical way is adjusting the levels of each color space until the color appears balanced. The main purpose of this article is to guide users about numerous professional tools for creating accurate colors in clips and photos.
In this article
Part I: What is color correction?
The technique of modifying the color of a video to obtain a particular effect is known as color correction. It's often done for aesthetic purposes, such as making footage seem more "visually interesting," or for practical purposes, such as making a video appear more realistic.
Color correction is a way that will make that's usually used to enhance your photographs regardless of your purpose. Color temperature and white balance, exposure and contrast, and saturation and vibrance are the three primary factors of color correction.
Color temperature and white balance:
Color temperature and white balance are terms used to describe the overall color of a picture. This setting could be changed to make the footage appear warmer or colder. You should ensure that the color temperature of the movie remains consistent throughout. Another crucial part of color correcting is white balance. Your video or image should be white with a tinted effect of one or more colors.
Exposure and contrast:
You should ensure the video is correctly exposed and the contrast is appropriate. It may be modified to create an image brighter or darker. Increasing exposure brightens the image, while reduced exposure darkens it. Contrast is the difference in brightness and darkness between various portions of an image. The contrast is tweaked to enhance or remove information in the shadows and highlights.
Saturation and Vibrance:
Saturation and vibrance are two independent but related factors. Saturation modifies the intensity of all hues, whereas vibrance enhances the intensity of faded colors exclusively. When it comes to color correction, vibrancy is frequently a preferable option since it prevents oversaturating the image. Saturation can increase the vibrance of a photograph. If the sky is blue, saturation will make it more intensely blue.
Part II: What's the difference between color correction and color grading?
Color correction and color grading are frequently used in tandem, but there is a distinction between them.
| Color correction | Color Grading |
| • The technique of manipulating the colors of an image to achieve the ideal look is known as color correction. | • Color grading, on the other hand, is using a color filter in a photograph to produce a certain mood or tone. |
| • It is performed to rectify a color problem, like making a yellow image appear whiter, or to achieve a certain effect, such as giving an image a classic look. | • It is frequently used in films and television programs to create a specific mood, such as making a scene look more menacing or gloomy |
| • It may involve eliminating a color cast, correcting the brightness or contrast, or doing whatever else is necessary to make the colors appear natural. | • It may involve adjusting the white balance, adding a color tint, or anything else that would enhance the entire presentation of the video. |
Part III: Choosing the right color correction tool
Color correction is a crucial piece in any clip editing process. The best color correction tools can help you correct the colors in your photographs to seem their finest. Several color-correcting programs are available, so selecting the best one for your needs is critical.
When selecting a color-correcting tool, there are a few considerations to make. Initially, you must pick what kind of tool you intend to use. Color-correcting solutions come in a variety of forms, including software, plugins, and independent devices. Each has benefits and downsides, so you must select the one that is best for you. We will discuss some tools for video and photo color correction.
1.Media.io
If you've used a picture or video editing tool, you probably noticed that some of them include an auto color correction function. Media.io is a tool that advances automatic color correcting. You may get professional-looking results with Media.io even if you have no prior expertise or understanding of color theory. It is a useful tool that may assist you in saving time while editing photographs or movies.
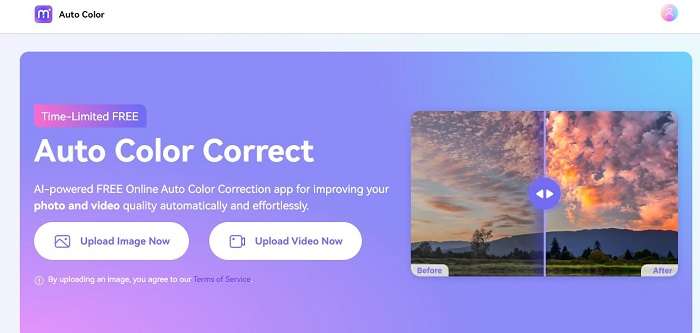
Color correction in Media.io is intended to instantly modify the colors in your video clip to maintain accuracy and reliability. It might be the best tool for photographers and video editors who want to make sure their movies look great.
Features:
Here's an overview of what are Media.io's color correction features:
- Due to its simple design, Media.io is a powerful online software for color correction.
- Adjustment layers in Media.io enable you to make color changes to specific parts of your photo or video.
- It lets you modify the picture and video with a single mouse click.
- Color correction of pictures and movies does not require any expert abilities.
How to make a color correction with Media.io?
As already stated in the prior topic. Media.io has several features. One of them is that it is both free and simple to use. With basic working knowledge, you may alter your picture or video. Using Media.io's color-correcting tool is as simple as three steps.
Step 1 Go to Media.io in your browser
Media.io is an AI program that can be used by just accessing its interface. To conduct photo color correction, you do not need to register. Open the web browser and navigate to media.io auto color adjust. You must either upload or drag & drop your image or video.

Step 2 Correction of colors in the image or video
When you upload a video to media.io, it will automatically adjust the color. You are not required to press any buttons or move the pointer. Color correction is done automatically in media.io. It examines your image or video before processing it. You must wait a little longer if the file size is large.
Step 3 Compare and save the video
After the video editing, a little comparison button will appear in the upper left corner. You may observe the difference between your before and after videos by clicking on them. When you've finished watching the movie, click the download option, choose the file format, and save it to your computer.

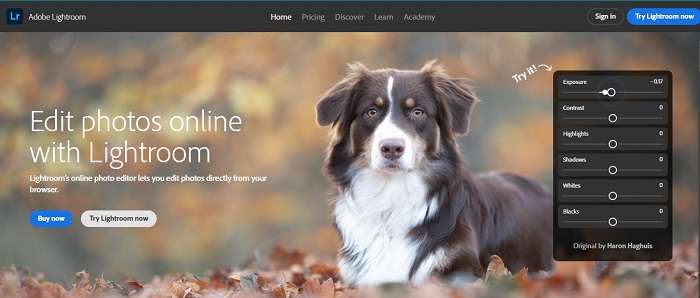
2.Lightroom
Adobe Lightroom is a specialized editing software that helps users make worldwide and local picture changes. Lightroom lets you tweak your images using various options, from simple color correction to more complicated features like curves and Hue. Presets are additionally created to rapidly apply your favorite looks to your images. In addition, Lightroom users can choose from a variety of color-correction prices.
Features of Adobe Lightroom:
Adobe Lightroom is a software tool created by Adobe Systems that makes it possible to browse, manage, and enhance digital images. Lightroom offers several features that make it an effective tool for digital photographers.
- It lets you import, organize, and manage photographs as well as edit and alter them.
- It also includes an in-built picture printing facility, making it simple to receive high-quality prints of your images.
- It is available on both desktop and mobile platforms. With a single click, you may modify the image.
How to make color corrections in Lightroom?
Adobe Lightroom is a great tool for achieving flawless color correction in your pictures. We will show you how to apply color correction in Adobe Lightroom to create a great, consistent photograph.
Step 1 Open the color correction lightroom
Go to google and search for Lightroom after signing up by using our google or Facebook account. Select the location where you want to retrieve images and videos.
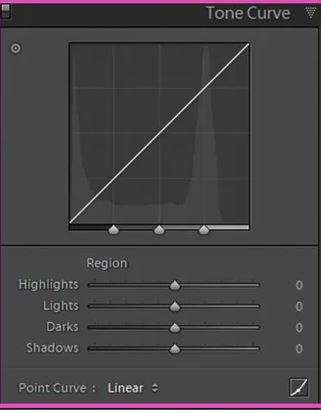
Step 2 Choose the Tone curve panel at develop module
To change the tones in your image or video, you can click on the tone curve. The RGB channel is displayed. Highlights, shadows, and darks may all be tweaked. You must pick one color at a time by clicking on the bottom button next to the point curve.
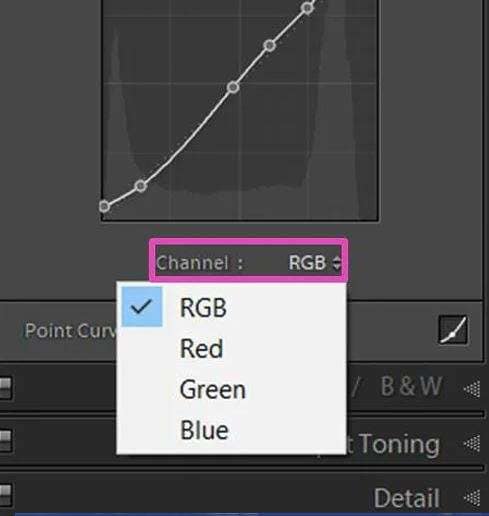
Step 3 Select a color from RGB
When you click on the RBG arrows, a drop-down menu will appear with three alternative colors ( red, green, and blue). Choose the color to be corrected.
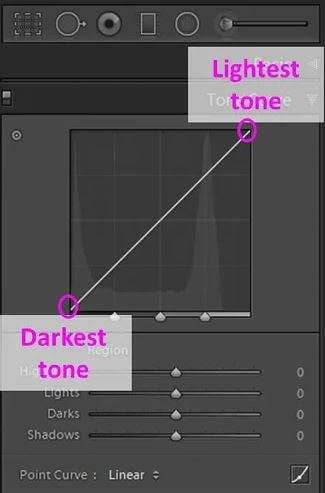
Step 4 Adjust the tone curve areas
The tone curve is made up of shadows, dark and light mid-tones, and highlights. Drag the diagonal line up or down to change the brightness of different regions. It will get darker if you move it down.
3.Adobe After Effects
Adobe After Effects is creative visual effects and keyframe animation computer program. It is mostly used to make personal or professional films, movies, advertisements, and graphics. Users may use the software to add realistic effects and animations to their projects, making them more engaging and entertaining.

Features of After Effects:
- After Effects offers a free trial and begins with the most basic costs. Its free trial allows you to utilize all of the tools.
- You can edit your images and movies in less time and with less effort.
- After Effects has just released a new feature. It supports OpenColorlO for stability and performance improvements.
How to use color correction in After Effects?
Step 1 Install Adobe After Effects and open it
Install Adobe After Effects from your browser and open it on your desktop. You can either purchase it and can also start editing with a free trial. When the interface is open, click on the file button and then open the video clip.
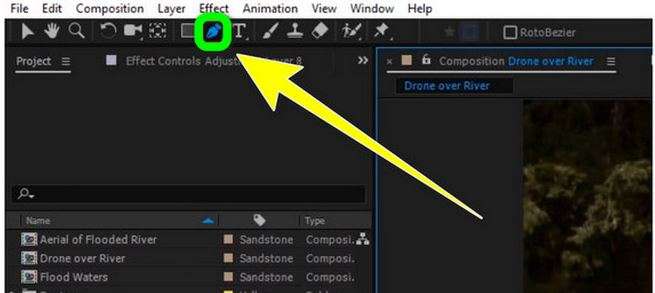
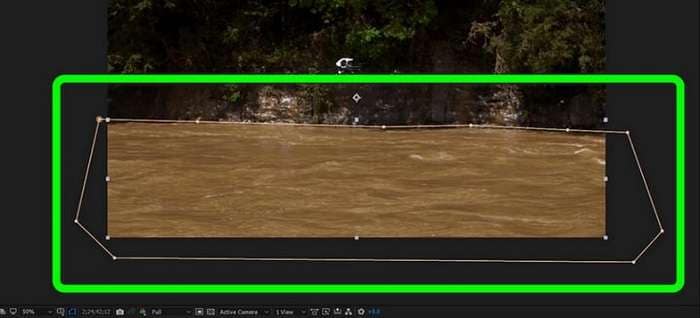
Step 2 Select the area you want to recolor
Select the part of the clip that you want to edit. After that, copy that area and paste it into a new layer.
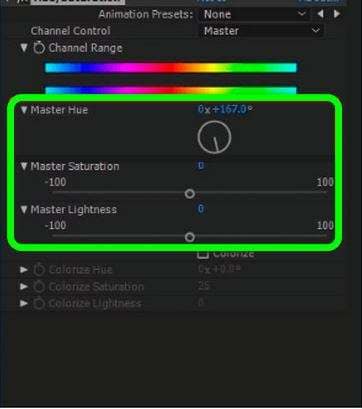
Step 3 Adjust the hue/saturation of an image
Click on the color correction then a drop-down appears. Select the Hue/Saturation from the list. In the end, modify the Master hue, master saturation, and master lightness, and export your video.
4.Avid color correction
Avid is a flexible media editing tool used by post-production pros. It contains several features that make it suitable for color correction, such as a built-in color grading system and a wide variety of color correction presets. Avid is particularly well-known for its video editing skills, which make it an excellent choice for both professionals and beginners.

Features of Avid color correction
Avid video editing software provides a plethora of features that make it an effective tool for pros. Among the key features are:
- Avid has a collection of tutorials and training materials to help you get started with video editing.
- Color correction, green screens, and motion graphics are examples of sophisticated functionality.
- Avid provides 4K, multi-cam editing, and high frame rate editing.
How to use color correction in Avid?
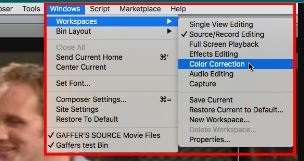
Step 1 Create an account and start editing
After obtaining Avid's professional tools, double-click the program on your desktop. Choose the workspaces by clicking the windows button. For selecting the color correcting tool, several alternatives will show.
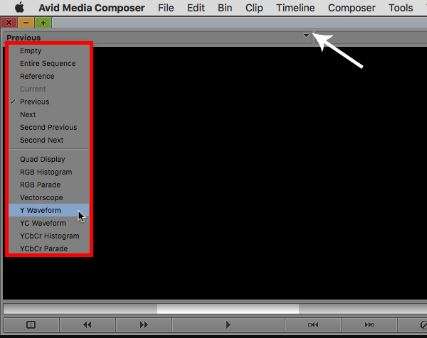
Step 2 Add a scope to the video
To add scope, click the arrow that appears beneath the menu bar. Next, choose the scope.
Step 3 Add color wheels and saturation
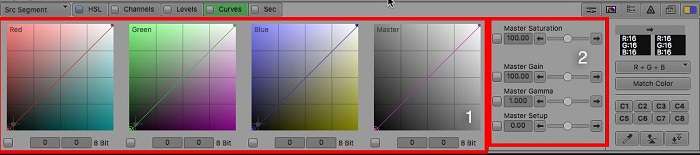
Move to the HSL and choose Hue offset. Drag the center point of each wheel to adjust the video. You can also adjust the saturation by clicking on the HSL tab. Click on Controls and then select Master. You can also remove extra corrections and then click on remove the effect.
Part IV: Best practices for color correction
Color correction matrix
A color correction matrix improves the appearance of an image's colors. Color correction matrices are divided into three types: RGB, CMYK, and Lab. A screen like a computer monitor or television will display RGB color correction. CMYK color correction matrices serve the purpose of images that are printed in color. Lab color correction matrices are necessary for pictures in black and white, such as line art or fax.
Tips for Achieving the Best Results in Color Correction
Color correction in a picture is a way to correct for color casts, balance colors or enhance colors. The following color-correcting strategies can help you obtain the best results:
Use a calibrated monitor:
Buy a calibrated monitor to guarantee that the colors on your screen are true. It will display your modified movies and photographs in the highest resolution available.
Use reference image:
Using a reference picture allows you to more readily discover colors that need to be modified by comparing your image to a recognized reference. It is critical to utilize a reference image in the same color space as your target image so that the colors line up properly.
Use the right software:
You should select the best color-correcting software for your footage. Ensure that the software will not decrease the quality of your photos or videos. Don't purchase highly paid software; instead, look for free and budget-friendly software.
Common mistakes to avoid in color-correction
There seem to be a few typical color-correcting blunders that might damage your chances of capturing the desired photo. These are two instances of frequent errors to avoid:
Failing to correct for white balance:
White balance is a critical part of color correction that is frequently missed. Always examine and adjust for white balance before beginning your color-correcting procedure.
Not checking the image on different devices
What appears attractive on your computer display may not look so well on your phone or tablet. Check your color-corrected photographs on a range of devices to ensure that they appear acceptable on all of them.
FAQs
How do you color correct underwater?
Underwater Coloring correction might be hard to do. The water can give your video a blue or green color, and lighting can also generate patchy coloration. With a few easy steps, you can make your clip appear fantastic.
Use a white balance card to adjust the color of the water. Next, using color grading, you may balance out the coloring in your video. Lastly, some simple color corrections might assist the overall appearance of your movie.