Color grading is a crucial step in video production that can make a significant difference in the visual quality of your final product. From setting the mood and tone to enhancing the overall aesthetic appeal of your footage, it is an essential tool for any video editor or filmmaker.
In this blog post, we'll cover the basics of color grading, from pre-production planning to post-production techniques. So, whether you're a seasoned video editor or just getting started, this post will provide valuable insights and techniques to take your video production to the next level.
In this article
Part I. What is color grading?
Color grading is the process of adjusting and enhancing the color and tone of video footage to create a specific look or mood. It is an essential part of the filmmaking and video production post-production process. It can significantly impact the overall quality and style of the video by improving its aesthetic appeal, setting the mood, and drawing attention to specific elements within the frame.
Color grading involves various techniques and tools to balance the color of the footage, adjust the brightness, contrast, and saturation, and apply creative color grading effects to achieve the desired look and feel.
Part II. Pre-production before color grading
Importance of planning and preparation
Before you start color grading, it's essential to plan and prepare by understanding the desired look and feel of the footage. You should also consider the lighting conditions, camera settings, and any visual effects used.
Understanding the desired mood and tone of the footage
The mood and tone of the footage should guide your color-grading choices. For example, warm tones can create a cozy or nostalgic mood, while cool tones can create a more futuristic or eerie feel.
Selecting appropriate color palettes
Once you understand the desired mood and tone, you can select a color palette to enhance those feelings. For example, a muted or desaturated color palette can create a moody or melancholic atmosphere, while bright, bold colors can create a fun and lively tone.
Part III. 3 Methods to color grading your videos
Color grading is an essential aspect of video post-production that can greatly enhance the visual appeal of your footage. In this section, we'll explore three common methods used to color-grade videos.
Method 1- Using LUTs for color grading
LUT stands for Look-Up Table, which is a mathematical table used to transform one set of color values into another set of color values. In color grading, LUTs are used to adjust the color of digital images or video footage.
LUTs work by mapping input color values (such as those captured by a camera) to output color values (such as those displayed on a monitor). They are often used to create a specific look or color grading style for a film or video project, and to ensure consistency across different shots or scenes. So, they can be used to adjust the footage's overall color balance, contrast, saturation, and other color parameters.
LUTs are particularly useful in color grading because they provide a fast and efficient way to achieve a desired look or style. Instead of manually adjusting individual color parameters, a LUT can be applied to achieve the desired color grading in one step. They can also be shared and reused across different projects, making maintaining consistency across different productions easier. The following are some common LUTs:
- CineStyle LUT
his LUT is designed to be used with footage shot in Canon's Technicolor CineStyle picture profile. It increases contrast, saturation, and sharpness, creating a more cinematic look.
FilmConvert is a suite of LUTs designed to emulate the look of various film stocks. It includes LUTs for Kodak, Fuji, and other popular film stocks, allowing filmmakers to achieve a wide variety of film looks in post-production.
- Teal and Orange LUT
This LUT is a popular choice for action movies and blockbusters. It adds a blue-green tint to the shadows and a warm orange tint to the highlights, creating a high-contrast, vibrant look.
In general, these LUTs can be used in common video editors. When selecting your favorite LUTs, just make sure they suit the tools you use.
- Day for Night LUT
This LUT is designed to simulate a night scene shot during the day. It desaturates and cools down the footage, making it look like it was shot at night.
Arri Alexa cameras are widely used in the film industry, and the camera's LUTs are often used to achieve a consistent look across different shots and scenes.
Method 2 - Color grading manually
Color grading manually is the process of adjusting the color and tone of video footage using various techniques and tools without relying on automated or preset adjustments. This approach allows for greater control over the final result, as the colorist can make precise adjustments to different areas of the image and achieve a custom look that suits the specific project's specific needs.
And it typically involves using professional color grading software, such as DaVinci Resolve or Adobe Premiere Pro, to adjust the color and tone of the footage. The colorist requires a high level of skill and experience and uses a combination of tools, such as curves, color wheels, and masks, to adjust the image's color and create a specific mood or look. Next, we provide you with several possible modifications to help you better complete color grading:
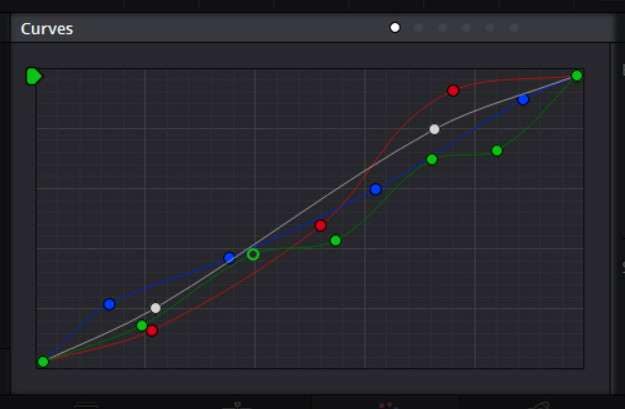
Curves Adjustment
This method involves adjusting the curves of the color channels (Red, Green, and Blue) to alter the brightness and contrast of the footage. Curves adjustment can help you selectively adjust different tonal ranges of the image, such as shadows, mid-tones, and highlights.
Hue/Saturation Adjustment
This method allows you to adjust the hue and saturation of specific colors in the footage. You can use this method to create a more colorful or desaturated look or shift the footage's colors to create a specific mood.
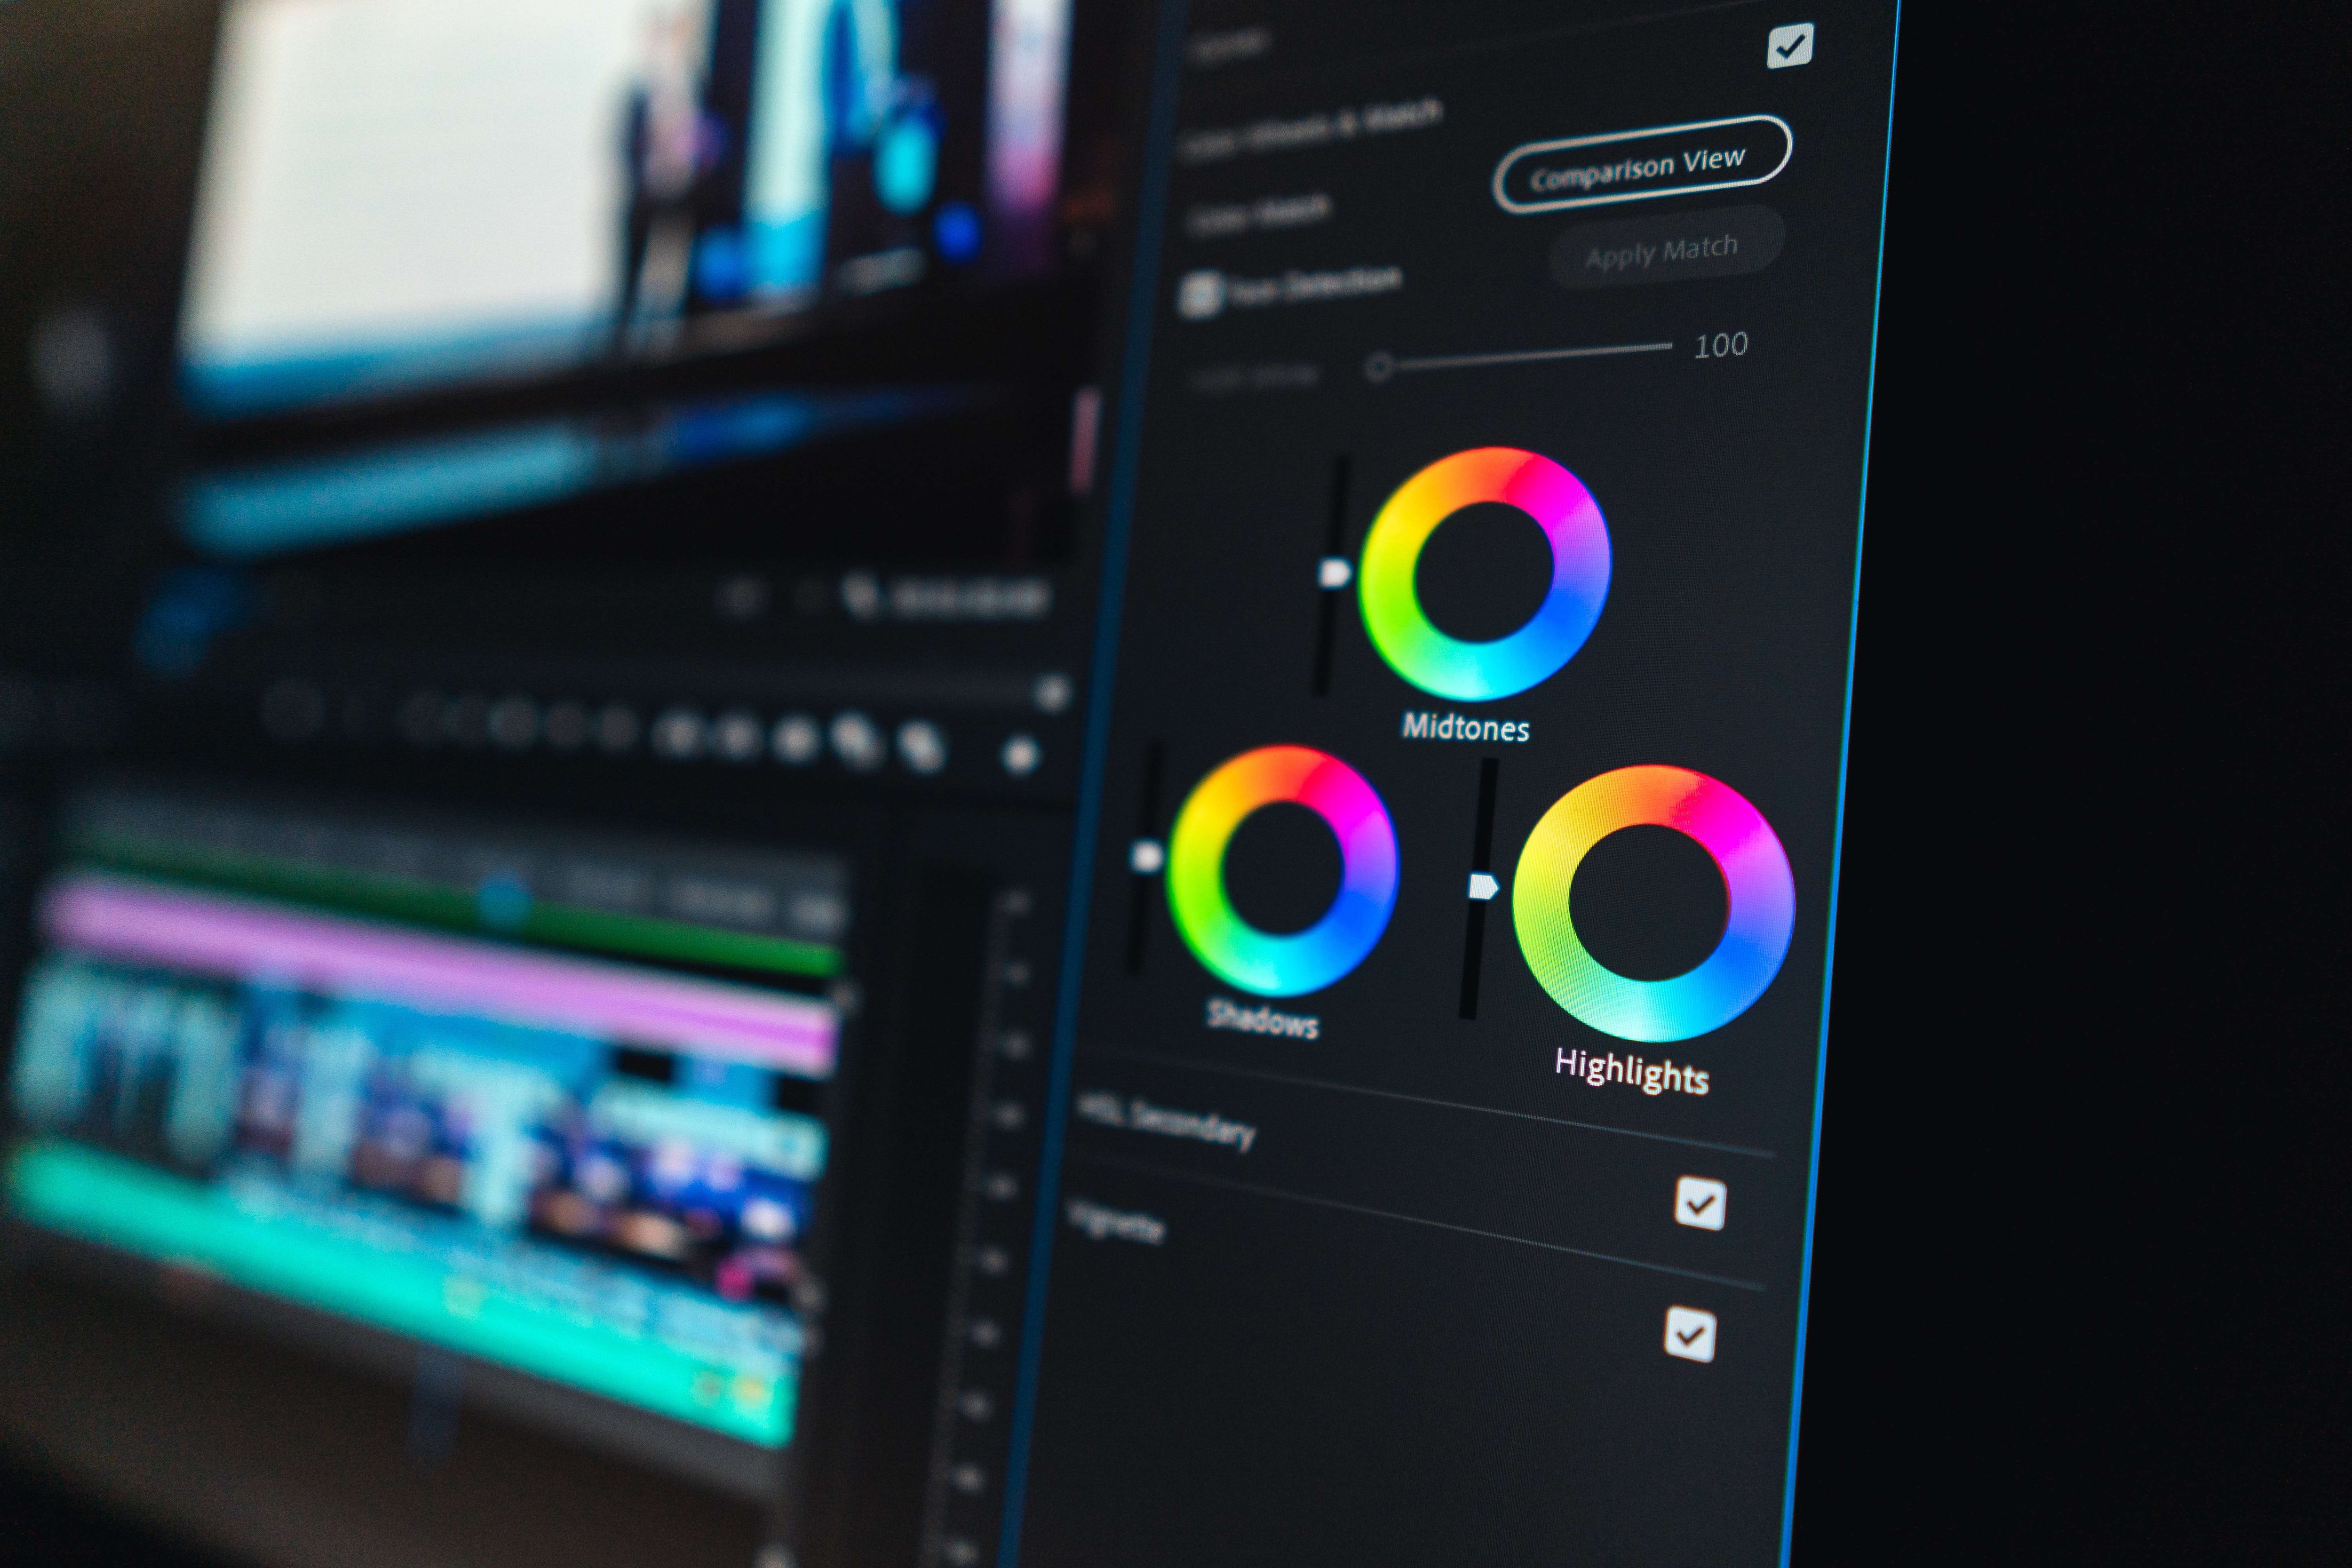
Color Wheels
Color wheels allow you to adjust the footage's color balance by manipulating the image's highlights, mid-tones, and shadows. You can use this method to add warmth or coolness to the footage or to achieve a specific color cast.
Gradients
Gradients allow you to selectively adjust the color or tone of a specific part of the image. For example, you can use a gradient to darken the sky in a landscape shot without affecting the rest of the image.
Masks
Masks allow you to selectively adjust the color or tone of a specific part of the image. For example, you can use a mask to adjust the color of someone's clothing without affecting the skin tone.
Method 3 - Using professional color grading tools
The fundamental requirement for the above two solutions is a professional color grading tool. Therefore, we recommend the best color grading tools for different platforms to meet various needs.
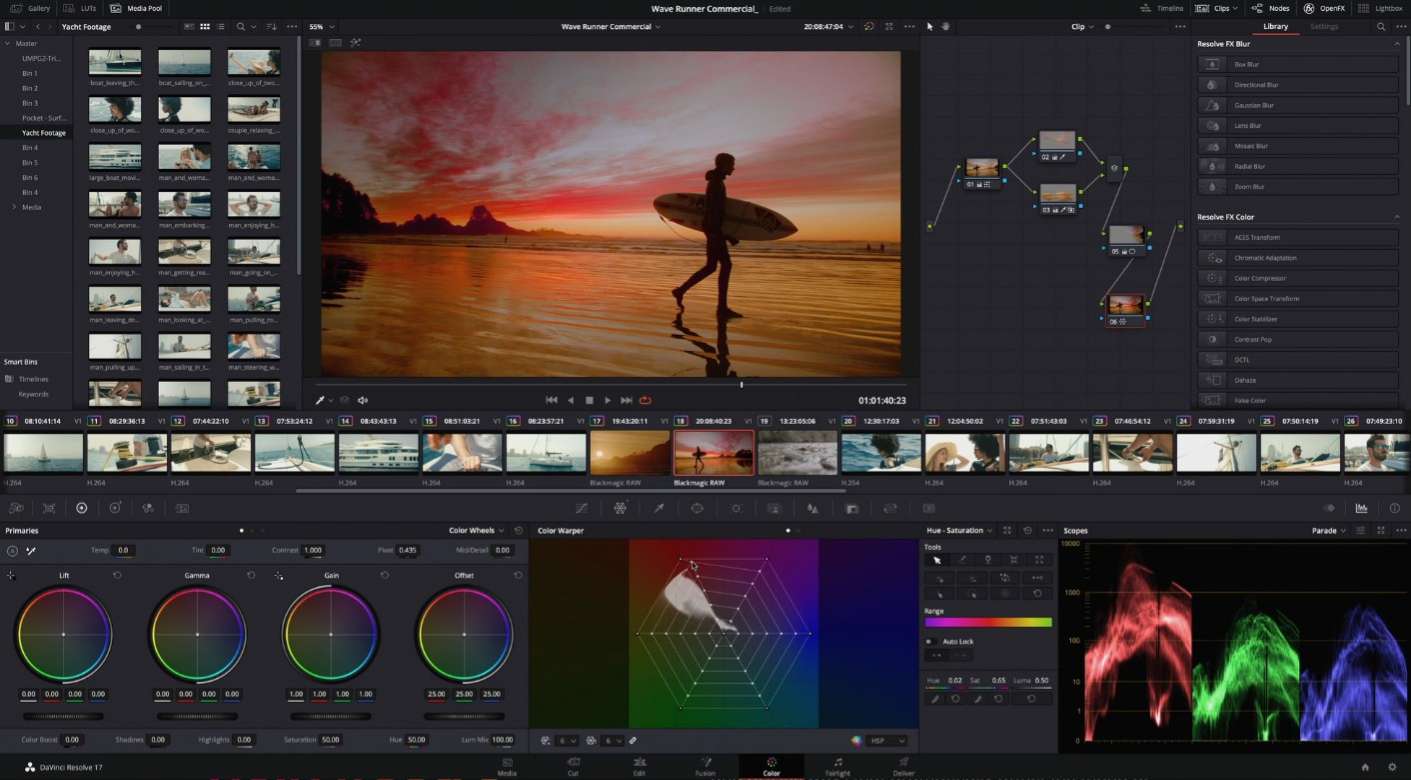
DaVinci Resolve is a professional-grade video editing software with comprehensive color grading features. Its color grading feature includes various tools and options for adjusting the color, contrast, saturation, and other aspects of the footage, allowing users to manipulate the colors and tones of their footage to achieve a specific look.
What's more, DaVinci Resolve's color grading feature is known for its precision and flexibility, and it is widely used in the film and television industry. The software also includes a range of pre-built color grading presets, which can be used as a starting point for a specific style.
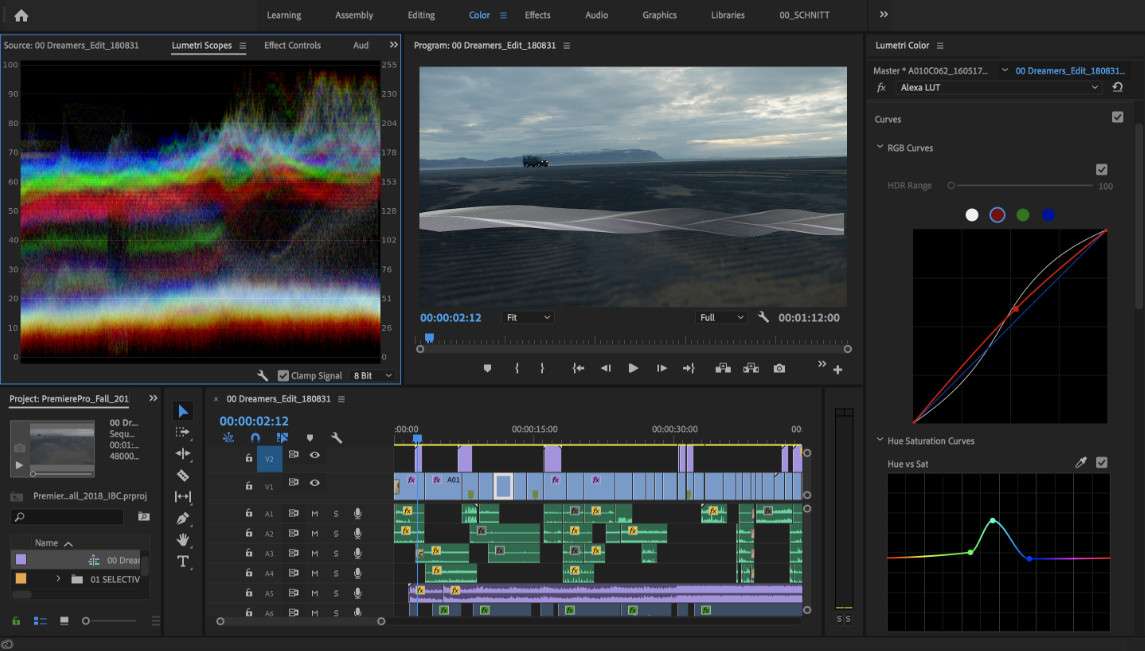
Adobe Premiere Pro is a professional video editing software that provides a robust set of color-grading features to help filmmakers and video editors achieve their desired look and style.
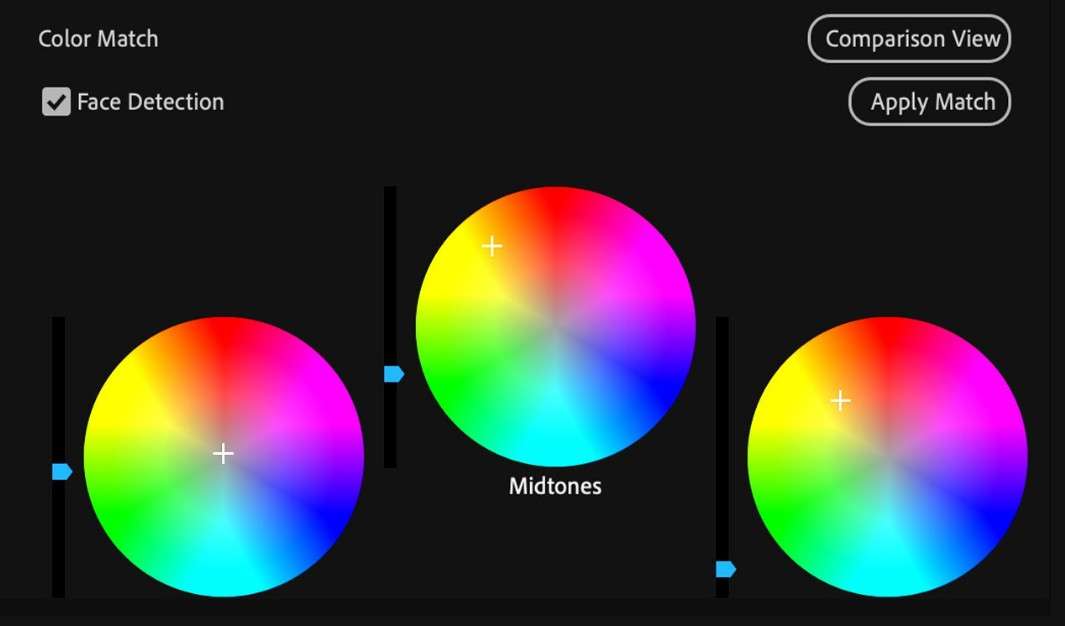
These features include the Lumetri Color Panel, which offers a range of tools and presets for adjusting the exposure, contrast, color balance, and other aspects of the footage, as well as color wheels and curves for more precise color adjustments. Additionally, the HSL Secondary tool allows users to select specific colors in the footage and adjust them independently, while the color match feature can be used to match the color and tone of footage from different sources. These tools allow users to create a consistent and polished look across their footage and are essential for achieving a professional-quality result in post-production.
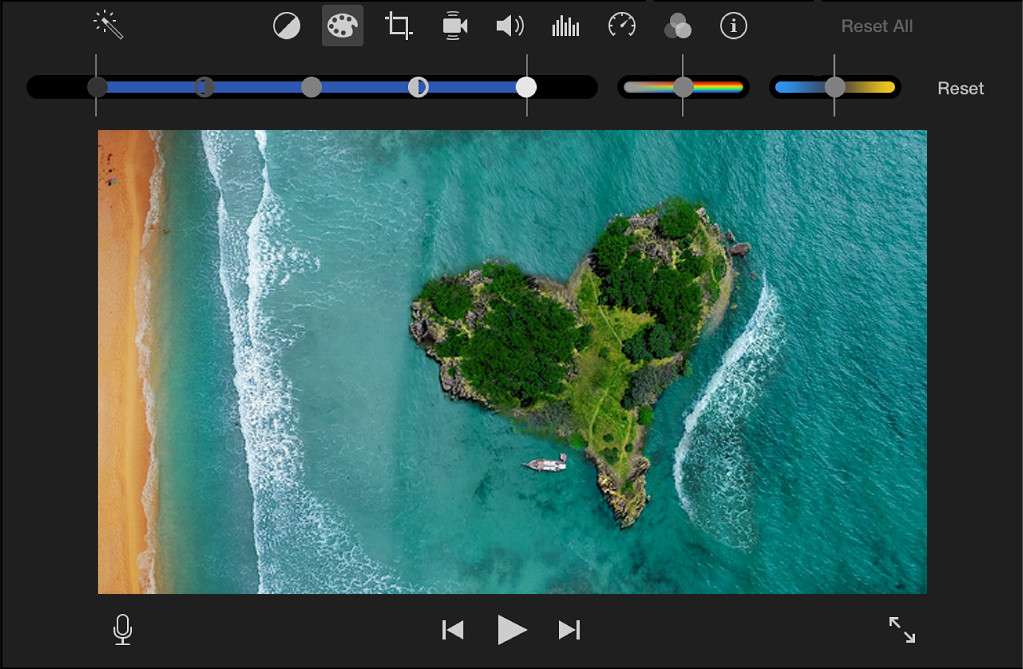
- iMovie
The color grading feature in iMovie is relatively limited compared to professional color grading software. While it does offer a range of presets and manual adjustments for basic color grading, it doesn't have the advanced features or precision control of professional software.
That being said, iMovie's color grading feature can be useful for making basic color adjustments or adding a simple color grade to footage. It's also a good option for users just starting with color grading and experimenting with different looks.
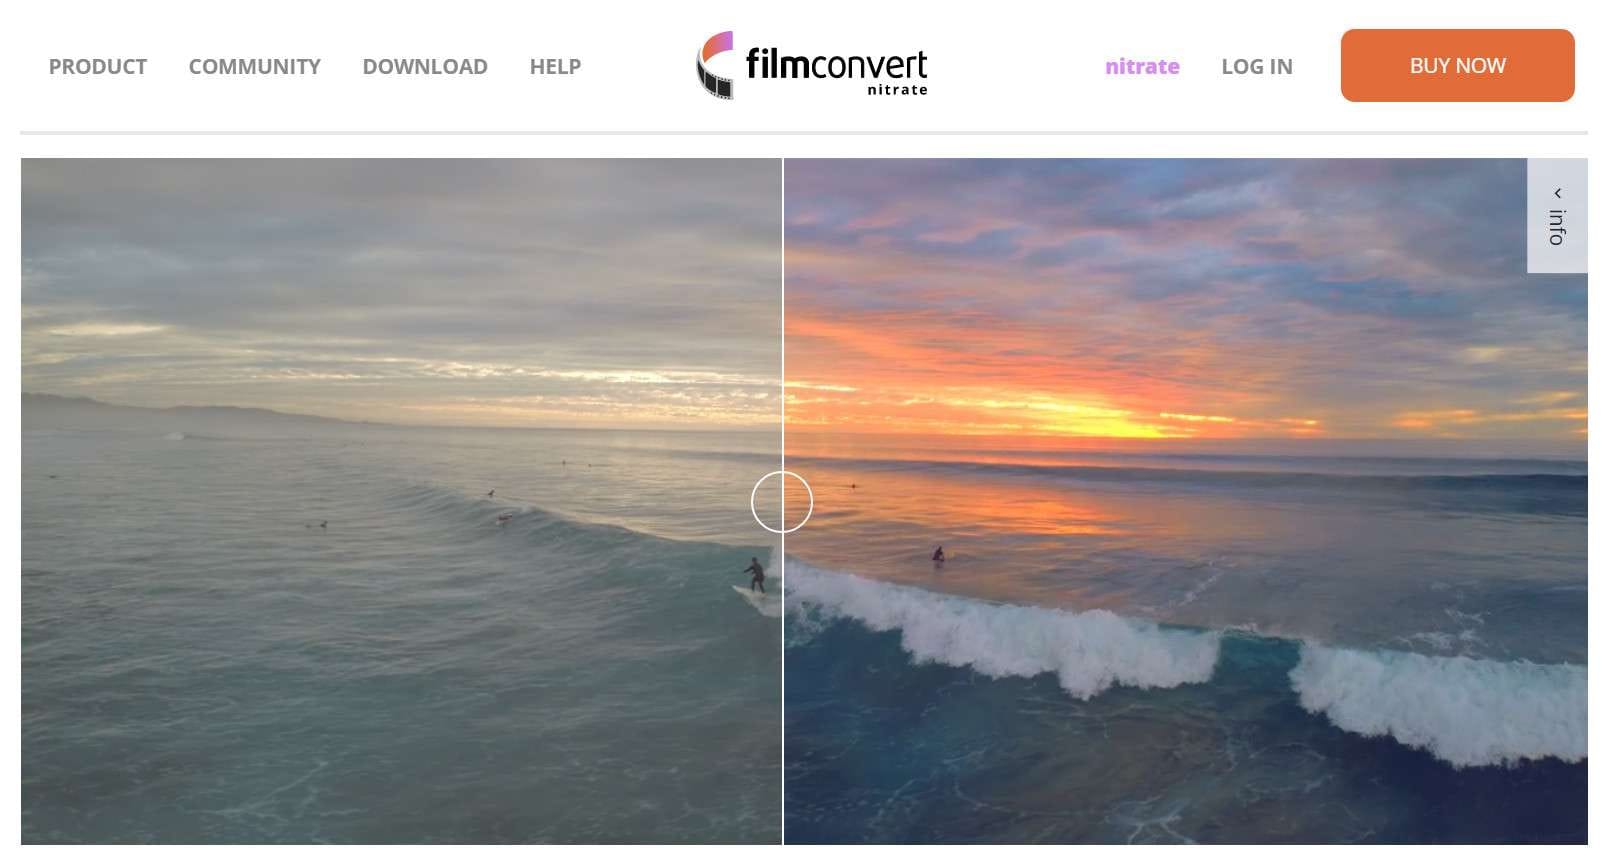
FilmConvert is a software plugin that includes a wide range of LUTs and other tools for emulating the look of various film stocks and achieving a cinematic look in post-production.
Lutify.me offers a wide range of LUTs that can be used with various software applications. In addition to LUTs, Lutify.me also offers other color grading resources, such as Lightroom presets, video tutorials, and more. The resources in Lutify.me are designed to help filmmakers and video editors achieve professional-quality results in their post-production workflows.
Part IV. Examples of Successful Color Grading in Films
The examples below demonstrate how color grading can be used to enhance a film's visual style and convey a particular mood or atmosphere. Effective color grading can create a cohesive and immersive visual experience for the viewer and can help to elevate a film from a technical standpoint.
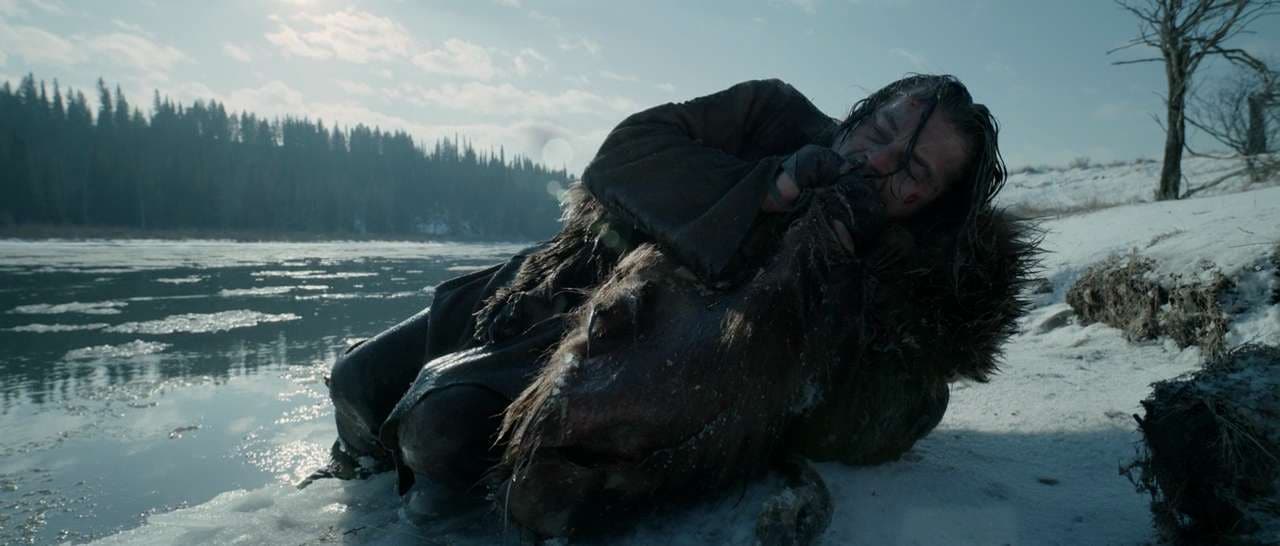
- The Revenant (2015)
The color grading of the film by colorist Steven J. Scott was instrumental in achieving the movie's unique and immersive visual style. It was designed to emphasize the natural beauty of the locations where the film was shot and to give the footage a sense of realism and authenticity. As a result, the film's color palette was mostly desaturated, with a heavy emphasis on greens and blues to create a cold and lonely atmosphere.
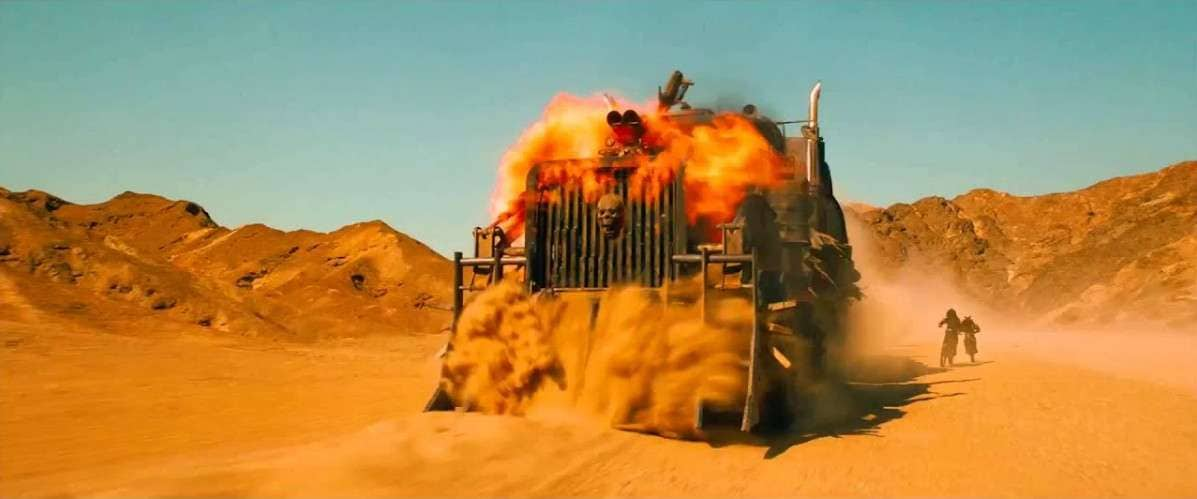
- Mad Max: Fury Road (2015)
The film's color grading, done by colorist Eric Whipp, was an integral part of its over-the-top and hyper-saturated visual style. The film's color palette was designed to create a sense of chaos and intensity, with bright yellows, oranges, and reds used to convey the harshness of the desert setting. The color grading also helped to enhance the film's fast-paced action sequences, making them even more dynamic and exciting.
- The Matrix (1999)
The film's color grading, done by colorist Janusz Kaminski, played a crucial role in establishing its futuristic and dystopian world. The film's color palette was heavily influenced by the green hue of computer screens, with an overall green tint applied to the footage to give it a digital and artificial look. The color grading also helped to create a contrast between the bleakness of the real world and the hyper-real and stylized nature of the Matrix.