ChatGPT
 Perplexity
 Gemini
 Claude
 Grok
Grok
The visual noises can lead to the accumulation of grainy effects in the video. This automatically lowers the quality of your video, and it is not acceptable, especially for professional videos. Yet, if you somehow get grains in your cherished video, there is a way to remove grain from the video without complication. The best way is to use the video tools.
By the end of this article, you will know the most premium-level tools to help you remove the grain. One of them is Premiere Pro, and the second one is Media.io – Video Enhancer.
In this article
Part 1: What are the Reasons Behind Grainy Videos
It is important to know the reasons for the problem so you will not face the problem again. Here are some of the common reasons that can lead to this issue:
- Low Light and High ISO: When you shoot in low light, it adds noise to the video. It can further lead to grains in videos. The settings of the sensitivity of the camera to the lights are ISO settings. If your ISO settings are high, you can get grain in the videos.
- Slow Shuttering of Camera: You need to master the shutter speed to get the best results. If, somehow, your shutter speed is slow, you will see that the video you got with that speed has grains in it. Moreover, you also need to improve your digital zoom settings.
- Quality and Compression: If you highly compress the video with an unauthenticated tool, it will mess up its bitrates and codecs. This leads to quality and compression issues which can add grains to the video.
- Post-Processing Issues: Some people try implementing master edits in the videos even if they do not know about it. Moreover, when you add the wrong edits in the original video file, and it has grains in it, you can lose your video.
Part 2: How to Remove Grain From Video Using Premiere Pro
Premiere Pro is the most known platform for fixing the issues that can impact the quality of the video. The grain removal Premiere Pro can help you to make your videos more professional grade. You can also customize the video by editing, trimming, or crafting it. Besides removing grains, you can add unique transition effects and colors to the videos.
Moreover, it also lets you add custom captions in the video to boost your engagement ratio. You also have a choice to mix the music and audio to get the perfect and personalized soundtrack for your video. After removing grains from the video, you can also share it directly on social media platforms such as Facebook or Instagram.
What is the Procedure for Removing Grains from the Videos with Premiere Pro
If you are a beginner and want to remove grain from the video using Premiere Pro, here are the steps by which you can remove grain Premiere Pro:
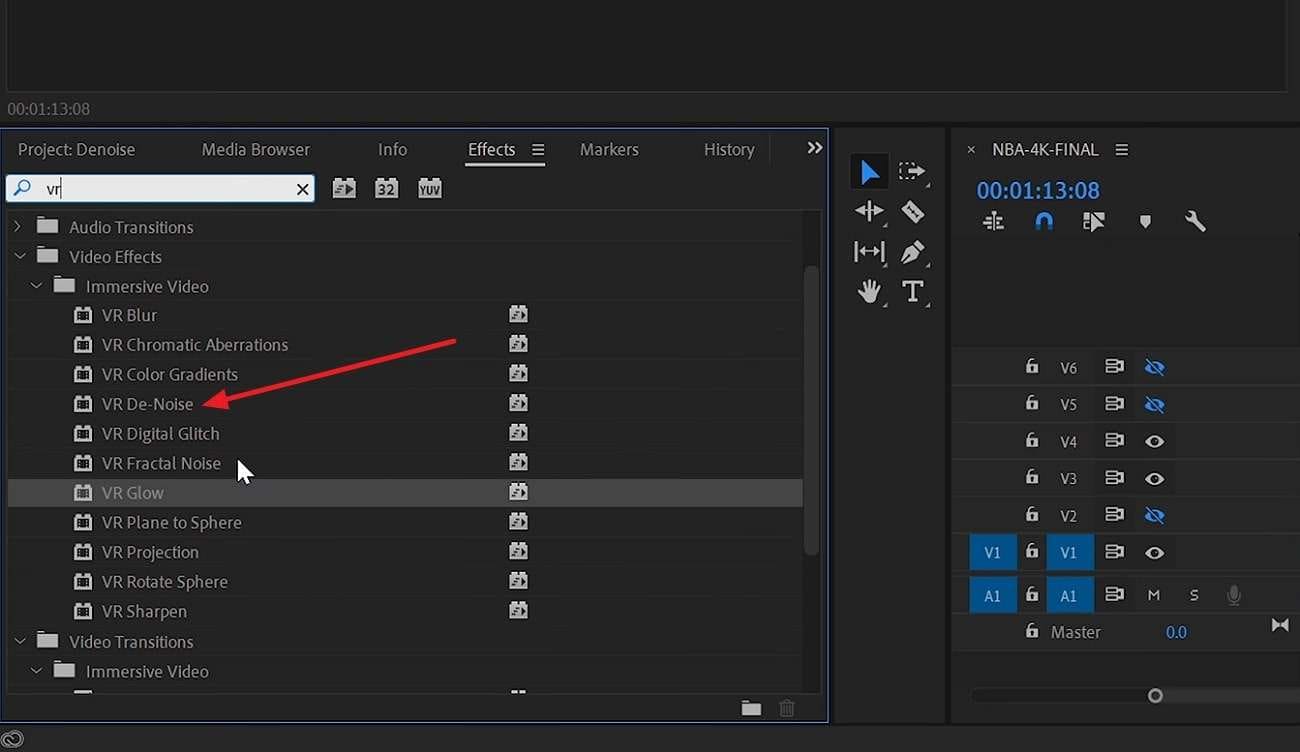
Step 1: Open Adobe Premiere Pro and import the video from which you want to remove grains. Afterward, go to the "Effects" tab and select "VR De Noise" by searching for "VR Effects" in the search bar.
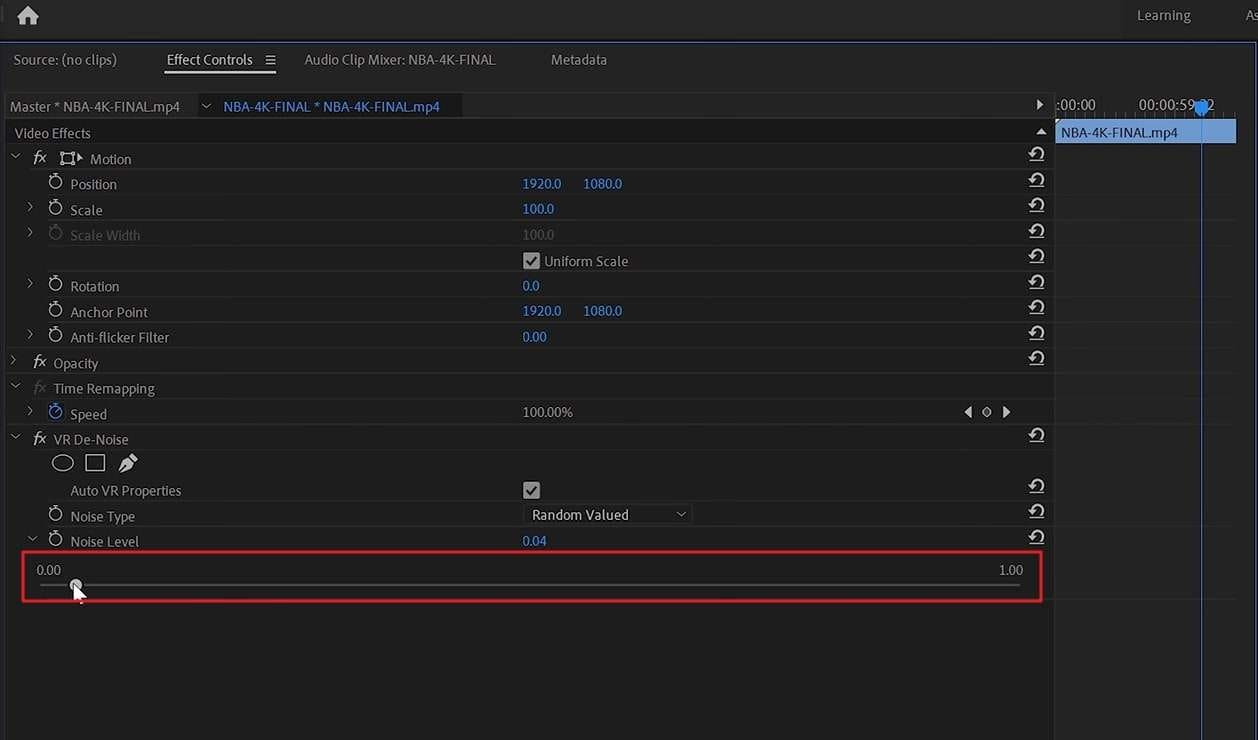
Step 2: Drag the effect on the “Timeline," and from the left panel, select the "Dropdown Arrow." To proceed, manage the intensity of the effect using the "Sliders."
Part 3: How to Remove Grain from Video Online Free
Sometimes, users are very short on the device's space and look for an online solution. If you also have a lower device space but want to enhance video at the same time, use the online tool. The best tool to remove grain from video online free is Media.io – Video Enhancer With this exclusive tool, you can convert low-resolution videos into 4K-resolution videos.
Moreover, it also allows you to enlarge the video to a 4X ratio. The interface of Media.io – Video Enhancer is very well structured and tidy, so there is nothing to worry about. As for the processing speed, this tool has ultra-fast processing speed, so you can convert the quality of videos in no time.
Prominent Key Features of Media.io – Video Enhancer
- It supports the feature of batch processing so you can enhance the quality of multiple videos. You will only have to upload them on the tool, and it will process them in sequence.
- You can also preview the first 45 frames of the video to see if the results are good or not.
- It supports a wide array of video file formats, so you will not face any problems while working with it.
How to Remove Grains from Videos with Media.io – Video Enhancer
Want to learn the easiest instructions to remove the grains from an old or new video? By following the instructions listed here, you can remove grain from video online for free:
Step 1: Open Media.io – Video Enhancer and Add File
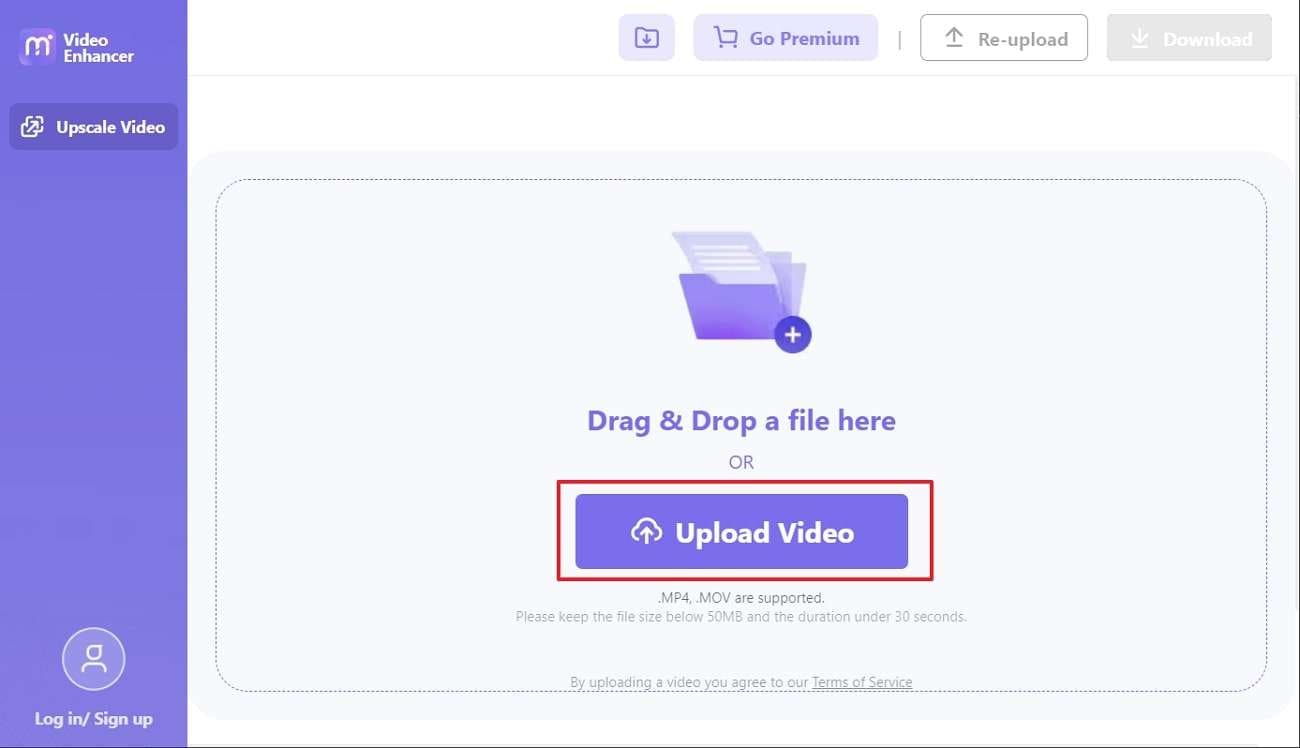
To start, open your browser and search "Media.io – Video Enhancer." Once on the main page, click "Enhance Your Video Now" and press the "Upload Video" button. After this, import the video of your choice.
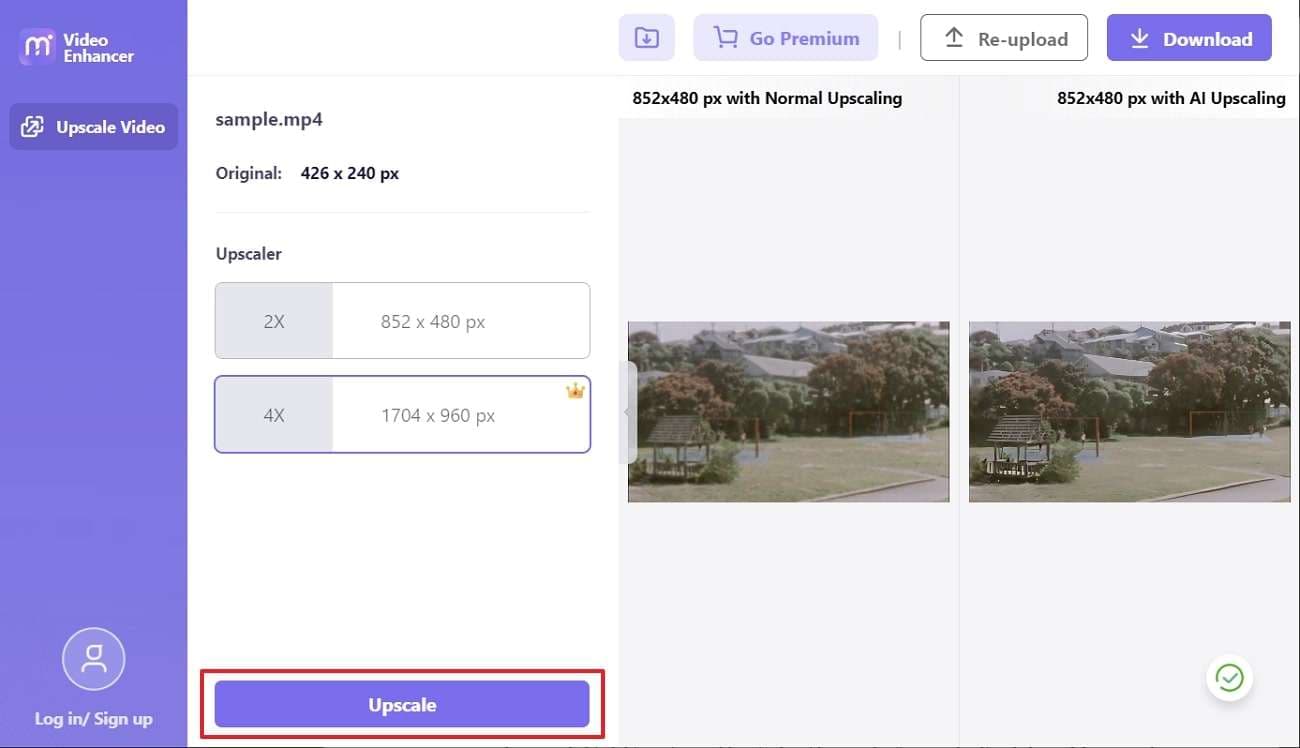
Step 2: Remove Grains and Download Video
Once the video is uploaded, go to the more upscale section and select "Resolution" from the 2X and 4X options. Afterward, hit the "Upscale" button to start removing the grains from the video clip. You can also see the results in the "Preview" section. To proceed, click the "Download" button and change the "File Name." Hereafter, hit the "Download" button again.