

High-quality sound recordings and videos require removing background noise. By doing this, you raise the overall standard of your material and provide your audience with a better experience. You cannot let unwanted background noise distract them from your message, whether you are a content creator, podcaster, or filmmaker.
The good news is that you do not have to put up with background noise from microphone placement, hiss, and echo, in your audio or video recordings. Make your content clear with these tools to remove wind noise from video and sounds. These can be useful for different types of background noise as well. Keep reading to learn and discover which tools work best for your needs in post-production.

In this article
Part 1. Media.io Noise Reducer - Your Best All-in-One Noise Reducer
Any unwanted sound like wind, traffic, or crowd noise will show up in a recording as background noise. It makes it difficult to understand the intended message. It's sometimes impossible to rerecord in a better environment for optimal results. You should try a web application if you want a more efficient way to reduce background noise from microphone placement on Windows 10.
Media.io Noise Reducer is an all-in-one online tool that uses AI to help remove hiss from audio recordings and other background noise from your content in just a few clicks. You can also use this app to remove echo from audio recordings in your online meeting or presentations while boosting your audio content quality.

Key Features
Here are the main characteristics of this web application that you will find enjoyable.
- Accessible anytime. Since it works on the web browser, if you have access to the internet, you can edit instantly on your mobile phone or computer.
- User-friendly interface. A simple working layout makes it easy for beginners or pros to edit and create professional sounds.
- Multi-purpose feature. The program can remove wind, static, keyboard clicks, fans, and more. In addition, it supports MP3, MKV, MOV, and other file formats.
Pricing Plan
A free trial of Noise Reducer Media.io is available to registered users. You can preview the audio output before downloading it. The initial output download is free of charge.

How To Use Noise Reducer To Remove Background Noise
Here's how to use the tool to reduce background noise caused by microphone placement on Windows 10 and other unwanted sounds.
Step 1
Visit Noise Reducer's official website. Next, click Upload to import your audio recordings or video file.
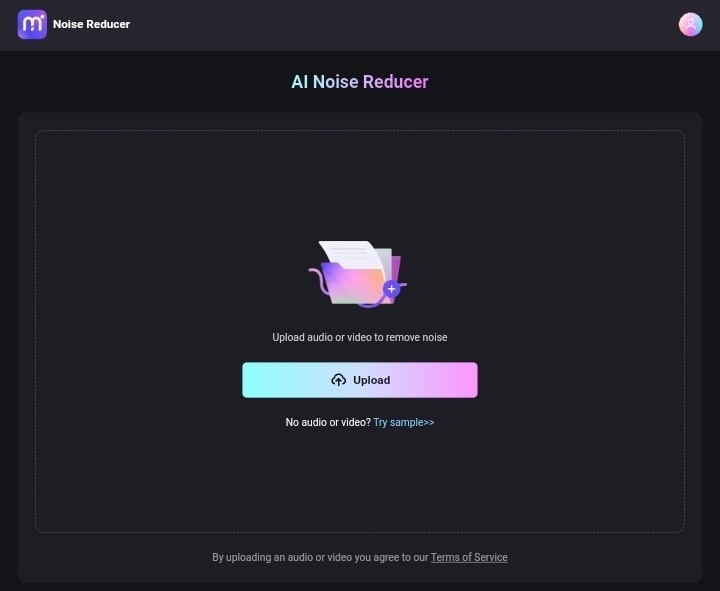
Tip:
You can explore more noise-reducing options and use a sample audio file they provide if you are new to this AI software. To do it, click Try sample below Upload.
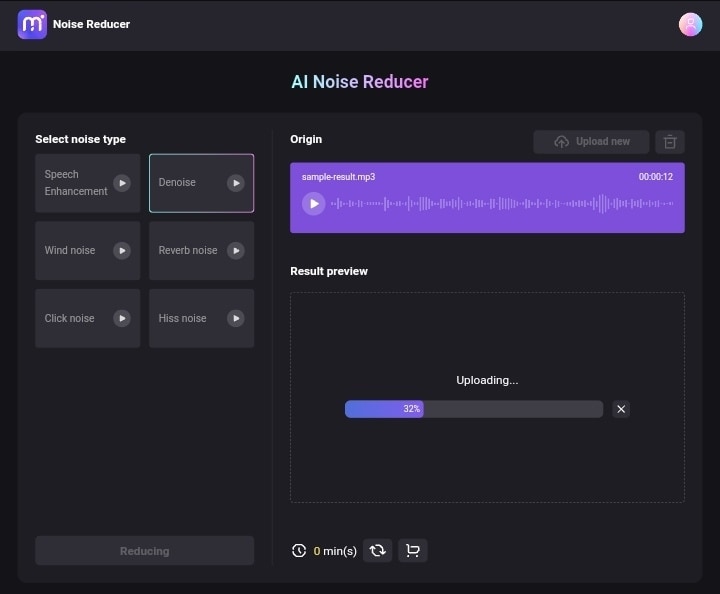
Step 2
Choose the noise type you want to remove or reduce on your recordings below the Select noise type selection from the left side navigation menu.
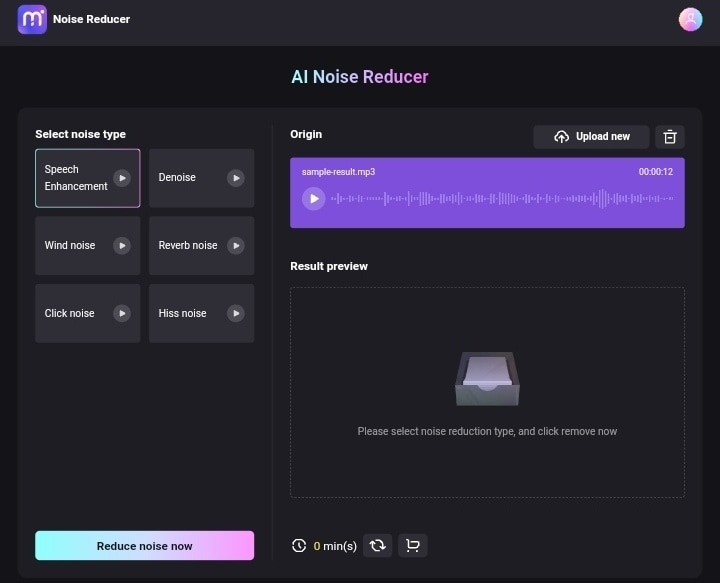
Step 3
Click Reduce noise now and wait for your edited it to be uploaded and processed.
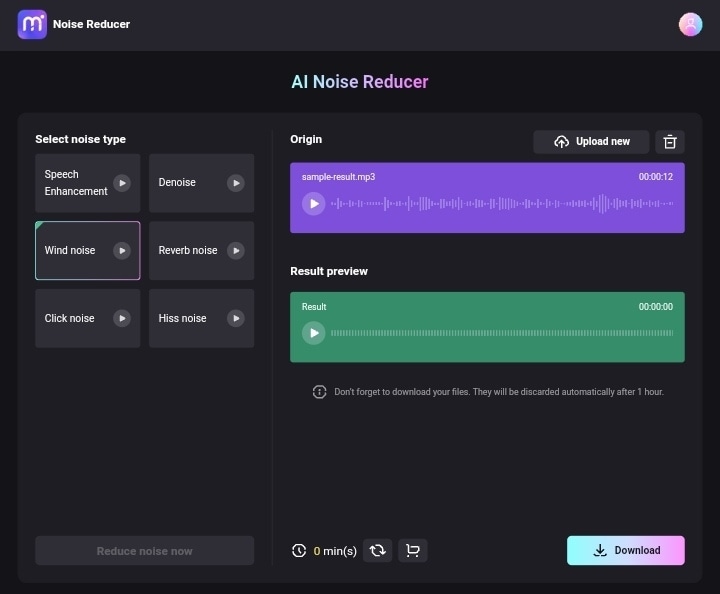
Step 4
Preview the clean audio file and click Download to export it in MP3 format.
Part 2. How To Remove Wind Noise From Video?
Wind noise happens when air moving over a microphone gets picked up by the microphone. It has a low-frequency rumbling or hissing sound that may come from fans. In some circumstances, wind noise may drown out the audio recordings making them useless.
If you don't have a windscreen when recording, you can use a video editor to remove wind noise from the video. The Wondershare Filmora video editor helps creative novices and professionals achieve their video editing goals in one click using advanced features.
Key Features
Enjoy the essential features of this video editor.
- Cross-platform experience. You can use this video editor to remove reverb from the audio recordings on a computer (Windows 11 and below / MacOS V.10.14 and latest, Mac OS X 10.12 to 10.13).
- Easy to use. You can process a video or audio file of any length using AI Audio Denoise through an intuitive interface. It also has a switchable workspace layout you can use depending on the size of your monitor.
- Support multiple files. Windows Media and HTML5 video files are just a few video formats you can import into Wondershare Filmora. It also supports several audio formats such as .mp3, .ogg, and more, enabling you to edit your audio tracks effortlessly. After editing, Filmora lets you export your output in various formats or share it directly on social media.
Pricing Plan
You can use the trial version of Wondershare Filmora for free, but the software will add watermarks to your output files. Subscriptions give you access to more features.
| Plan Type | Price |
| Individuals | |
| Monthly | $19.99/month |
| Annual | $49.99/year |
| Cross-Platform | $59.99/year |
| Perpetual | $79.99 (one-time) |
| Teams and Business | |
| For Team | $155.88 |
| For Business | Contact sales team |
| Educational (For Student) | |
| Filmora monthly plan | $19.99 |
| Filmora annual plan | $4099 |
| Filmora perpetual plan | $40.99 |
How To Use Wondershare Filmora To Remove Hiss From Audio and Video
Here's how to remove hiss from audio recordings and other distracting sounds.
Step 1
Download and install Wondershare Filmora. Then, import your video file.
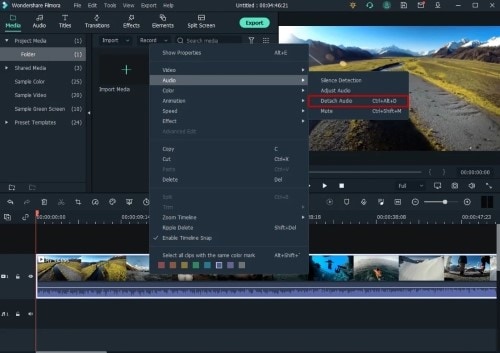
Step 2
Right-click the video timeline and choose Audio > Detach audio.
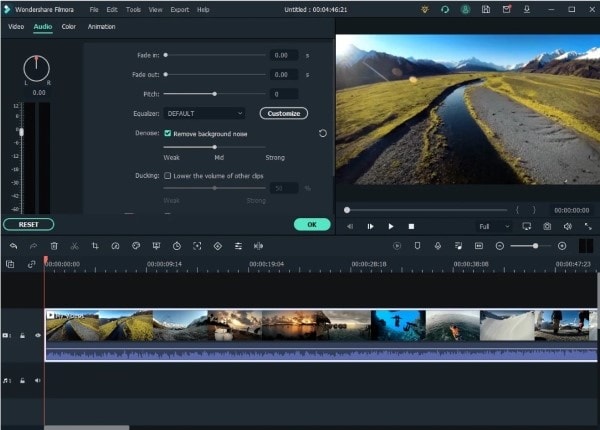
Step 3
Click the Audio tab on the top navigation pane, then select Remove background noise in the Denoise selection.
Tip:
Optimize Denoise level to Weak, Mid, or Strong based on your needs.
Step 4
Click OK after setting all changes. After checking the outcome, click Export to download the noise-reduced video to your computer or instantly share it on YouTube or Vimeo.
Tip: You can use the Equalizer tool to get a more realistic sound. Sync the audio sound frame-by-frame to match the film as closely as possible.
Part 3. How To Remove Reverb From Audio?
Reverb adds depth, ambiance, and distance to your mix. Audio recordings performed in big rooms frequently have excessive reverb issues. It can make your audio sound far away, muddy, and artificial.
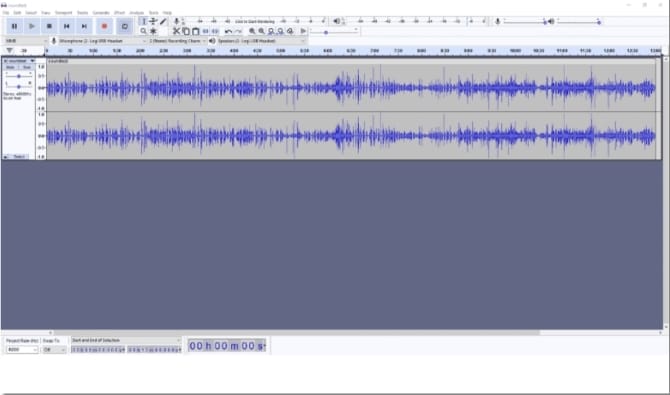
You can remove unwanted background noise using Audacity, an open-source audio editor. Audacity is a multi-track audio editor that can help you remove reverb from audio recordings using its noise-reduction feature. Audio files recorded in bad acoustics or with too much reverb might benefit from this.

Key Features
Appreciate these indispensable features of this audio editor.
- Cross-platform access. It is a very adaptive and flexible software application that runs on a variety of platforms, including Windows (32 and 64-bit), Mac (64-bit Intel), and Linux (64-bit AppImage). It suits those who prefer to customize their experience since you can download the software's source code, allowing for personalization and modification to suit individual needs.
- Wide range of features. The feature-rich interface of Audacity makes it easy to batch process, record, and edit audio files. You can also manipulate tracks and selections with keyboard shortcuts. For picking and viewing frequencies, it also provides spectrogram view mode.
- Multiple file formats. You can import and export audio files in WAV, MP3, AIFF, and other popular audio sound formats with Audacity.
Pricing Plan
It allows you to remove reverb from audio files for free. You may put this application on as many computers as you like and use it to remove other background noise for personal, professional, or educational purposes.
How To Use Audacity To Remove Reverb From Audio
This section will walk you through using Audacity to remove reverb from audio recordings and other undesirable noises that interfere with your recordings.
Step 1
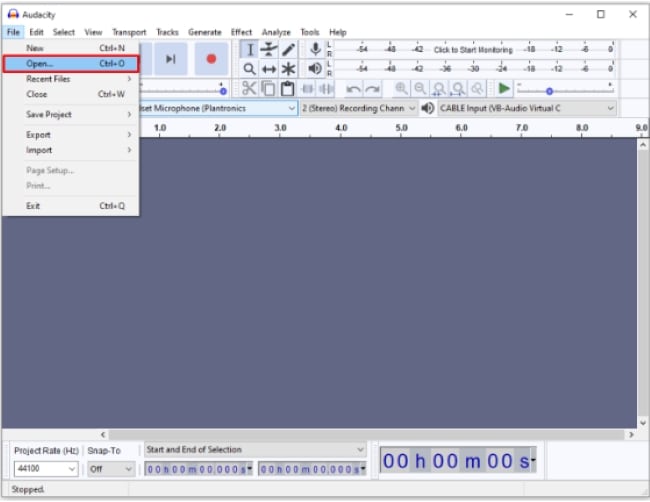
Install and launch Audacity on your desktop.
Step 2
Choose File > Open to import the sound.
Step 3
Next, highlight the portion of your audio clip that has background noise. Select it by doing one of these:
- Click and drag the mouse from one segment to another to select the desired section to edit only a specific portion.
- Click the shortcut keys Ctrl+A (Windows) or Command + A (MacOS) to edit the entire track.
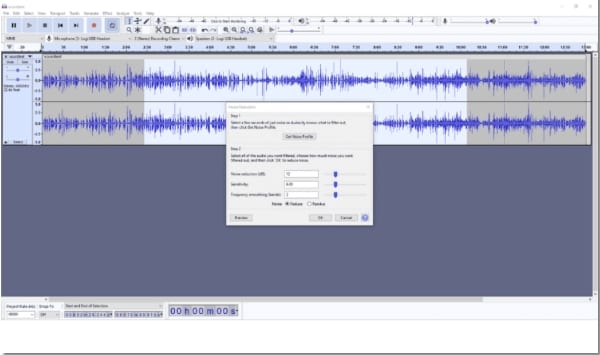
Step 4
Choose Effect > Noise Reduction in the top navigation menu. Click Get Noise Profile, then adjust the noise level by moving the slider left or right for Noise Reduction, Sensitivity, and Frequency Smoothing, and click OK.
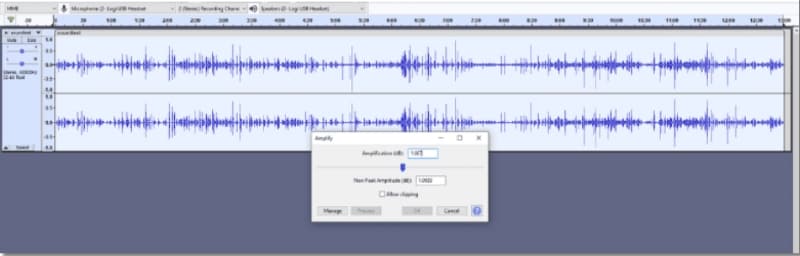
Step 5
Select the track using similar shortcut keys above. Next, choose Effects > Amplify, then move the Amplification (dB) slider left or right to decrease or increase the amplification level, respectively. Next, click OK in the Amplify dialogue box.
Tip:
Minimize the impact of reverb in your recordings with the help of high-pass and low-pass filters and other techniques that remove reverb from the audio sound. This filter will assist in lowering any extra frequencies that are contributing to the reverb. Choose Effects > High-Pass Filter or Low-Pass Filter and experiment with the setting.
Step 6
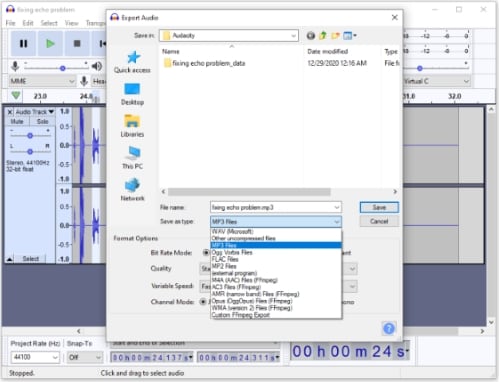
Choose File > Export Audio to save your output.
- Export as a WAV file. Select WAV (Microsoft) signed 16-bit PCM from the Save as type drop-down list, then click Save in the Export Audio dialogue box.
- Export as an MP3 file. First, select MP3 Files from the Save as type drop-down menu. Next, set bit rate mode and other settings in the Format Options section, then click Save in the Export Audio dialogue box.
Part 4. How To Remove Hiss From Audio?
Hiss is a persistent, high-frequency white noise that can occur in audio recordings at any point during recording and playing. It might make the recording sound flat and less dynamic. Several noise reduction techniques can remove hiss from audio recordings and video recordings.
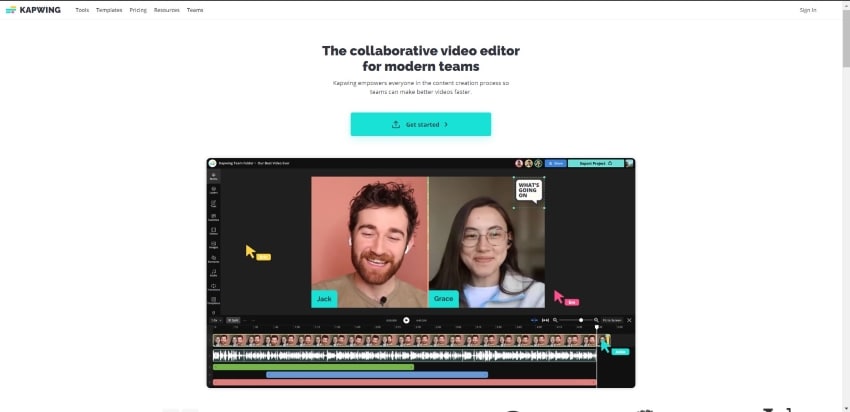
Kapwing is a collaborative online video editor that helps you streamline your work process. It can help to remove hiss from audio files using machine learning algorithms to identify and remove noise from the recording, making it a quick and easy solution for improving audio quality.
Key Features
The robust noise reduction techniques provided by Kapwing will make your audio recordings sound crystal clear. Aside from the ability to remove hiss from audio recordings, you'll find other editing features.
- Cloud-based. Kapwing is accessible on any web browser on desktops or mobile phones. You can edit content materials anywhere with an internet connection. It also allows you to edit files with your team simultaneously, updating everyone in real-time.
- Intuitive interface. It is simple to navigate and even has an in-app tutorial. You can easily remove hiss from audio recordings in a few steps. It also supports MP3 file format in exporting.
- Video editing tools. Kapwing offers a variety of editing tools to help you edit your videos online. These include tools for trimming, waveform generator, resizing, adding text, and more.
Pricing Plan
Kapwing lets you try out its tools for free before you upgrade. However, while you can experiment with all of Kapwing's tools at no cost, there is no free trial option for Kapwing Pro.

How To Use Kapwing To Remove Hiss From Audio and Video Recordings
Remove unwanted hiss from your audio recordings and video using this user-friendly online tool. Here's how to do it:
Step 1
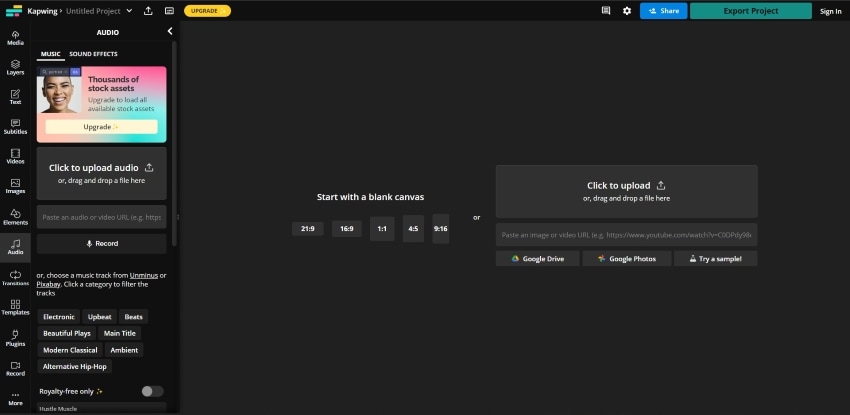
Visit Kapwing's official website, click Audio on the left-side navigation pane, and Upload the audio recordings or video file.
Step 2
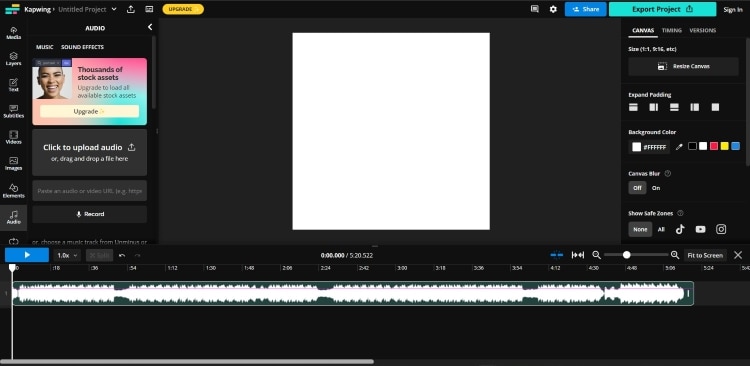
Click Clean Audio from the AI Tools section in the Edit tab on the right-side navigation menu.
Step 3
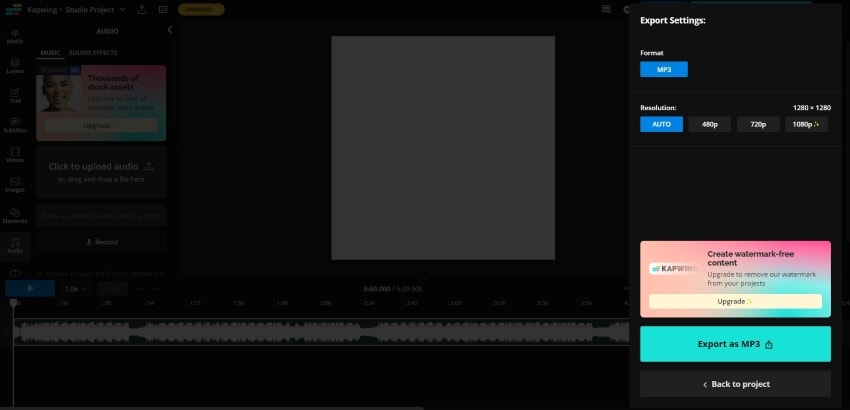
Click Export Project on the upper navigation bar. Select your preferred resolutions, then click Export as MP3.
Step 4
Click Export Audio in the Export as MP3 dialogue box.
Part 5. How To Remove Echo From Audio?
Echoes are noises that have been sufficiently delayed in time that you can distinguish them from each other. You may have experienced difficulty hearing the desired sounds due to reverb and echo when recording in big spaces.
The good news is that it is possible to remove echo from audio recordings using Adobe Audition. You may combine Adobe Audition's multiple noise reduction effects to remove echo from audio recordings. This comprehensive tool can assist you in finding and eliminating any other unwanted background noise, giving it a more precise and professional sound.

Key Features
Familiarize yourself with the most significant features of Adobe Audition's echo removal function.
- Professional editing features. Adobe audition has different tools that you can combine to cut unwanted background distractions in audio files, including reverb, echo, hums, fans, and more. You can choose from different effects such as the Noise Reduction effect, Sound Remover effect, Automatic Click Remover effect, and DeReverb effect.
- Desktop compatible. It operates on Windows (Microsoft® Windows 10 (64-bit) V20H2 or later) and MacOS (macOS Big Sur v11.0 or later). It also supports multiple languages, like English, German, and Spanish.
- Multiple file formats. It supports audio recordings (MP3, WAV, AIFF, etc.) and video files (AVI, MOV, MPEG-1, etc.)
Pricing Plan
You can use the Adobe Audition echo removal feature on a free trial. Check out their price offers if you want more features.

How To Use Adobe Audition To Remove Echo From Audio Files
Here's how to remove echo from audio recordings in just a few easy steps with Adobe Audition.
Step 1
Download and launch Adobe Audition. Next, choose File > Open to upload the audio recordings.
Step 2
Choose Edit > Select > Select All to select the entire audio part or double-click the track.
Tip:
To apply the effect to a portion of the audio recording, left-click the mouse at the beginning of your selection and drag it there.
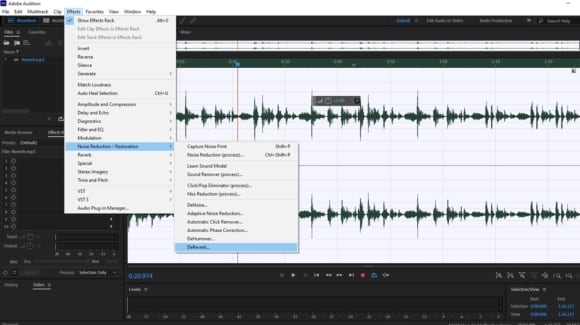
Step 3
Choose Effects > Noise Reduction/Restoration > DeReverb effect.
Note:
This effect aids in reverberation quantity adjustment by estimating the reverberation profile. The numbers ranging from 0% to 100% determine the amount of processing done to the stream.
Step 4
To get the sound right, in the Effect-Reverb dialogue box and tweak the Amount slider at the bottom while the sound is playing until you reach your desired result.
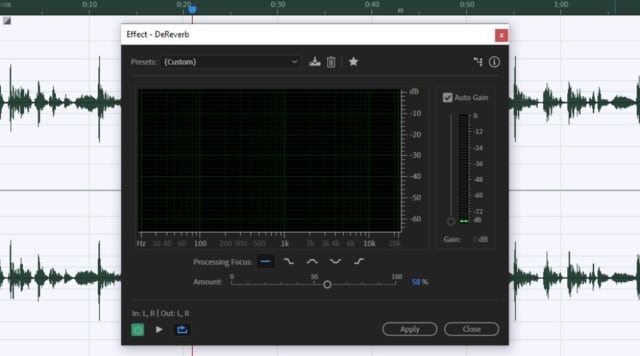
Tip:
Adjust gain manually using the Gain slider at the left side navigation pane. Alternatively, select Auto Gain to enable automatic gain adjustment.
Step 5
Click Apply after fine-tuning all the settings to remove echo from the audio recording.