If you’ve opened this article, it’s apparent that you’re looking for some good news about how to trim audio. Although there are a plethora of audio trimmers over the internet, very few can give you quality results. Worse still, most audio trimming apps come with complicated UIs. Luckily, you can use Audacity and some other top-class audio editing apps. So, today, we want to learn some simple Audacity trim audio methods to help you make quality audios seamlessly.
Part 1. How to Trim Sound Clips Using Audacity
Audacity is a popular sound editing app for desktops. It’s available to Mac, Windows, and Linux computers for free. It’s lightweight, straightforward, and supports the editing of audio formats like FLAC, MP3, AAC, and MKV. With this desktop app, users can cut, compress, mute, speed up, and many other audio editing functions. So, without dilly-dallying too much, let’s dive in and see how to trim a sound clip using Audacity.
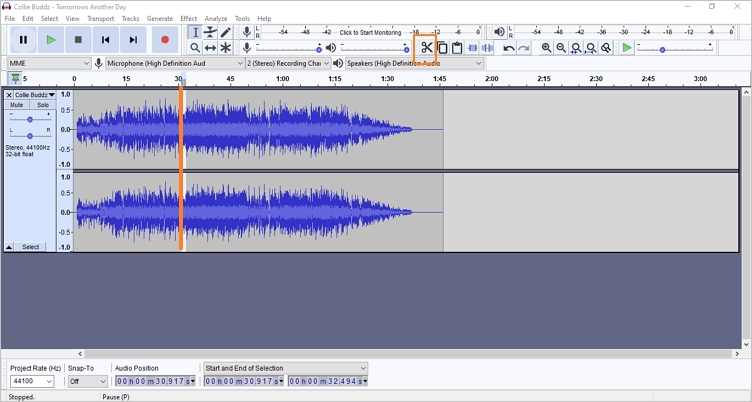
Step 1: Download, install and run Audacity on your computer. After that, tap the “File” tab at the top menu toolbar and then choose “Open” to add your local audio file.
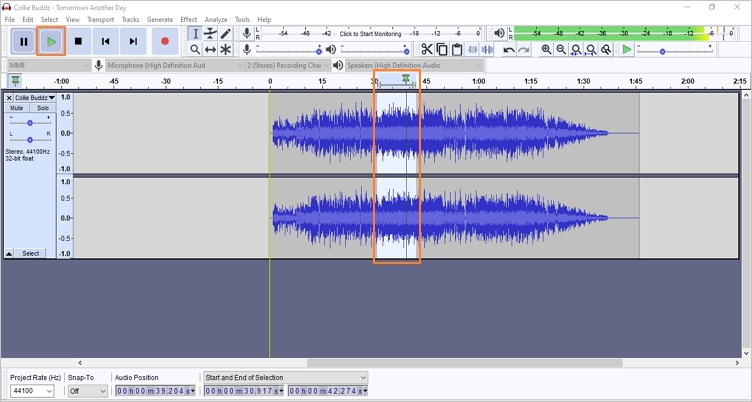
Step 2: Now drag the audio timeline to your preferred start point and click the “Trim” icon. It is the scissors-like icon on the top menu bar. Do the same to set an end time.
Note: You can drag the audio timeline and tap “Play” to preview your start or endpoint. Using this feature should help you cut the audio professionally.
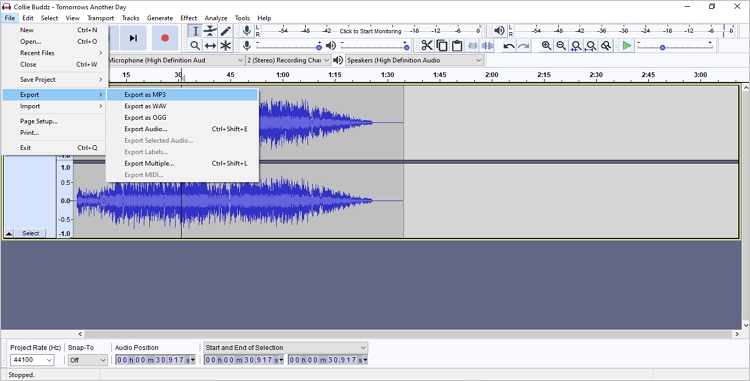
Step 3: If you’res satisfied, click the “File” button, choose “Export” and then click “Export as MP3”. You can also export files as WAV or OGG.
Step 4: Last but not least, on the resulting “Export Audio” window, enter a file name, bitrate mode, quality, variable speed and channel. Finally, click “Save”.
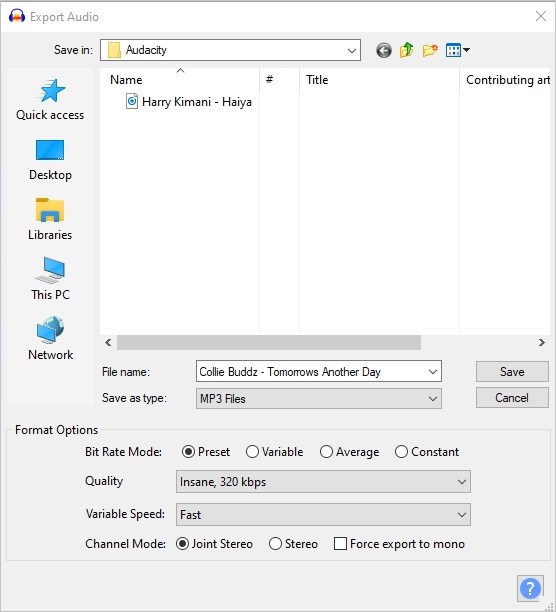
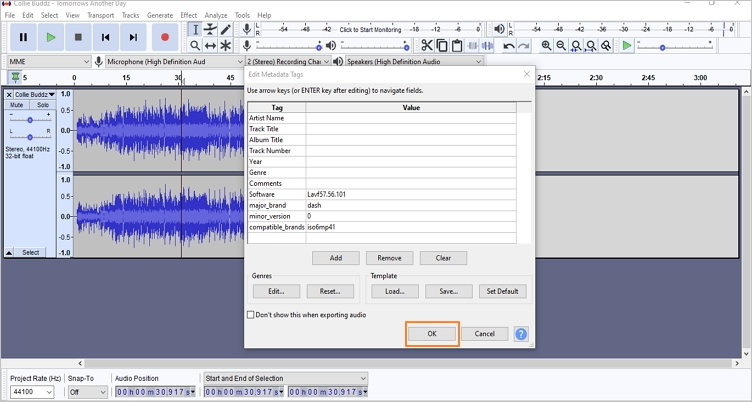
Step 5: Choose whether you want to add metadata or not before tapping “Ok” to save your trimmed audio.
Part 2. Audacity Trim Audio Online Free Alternative
Although Audacity offers some excellent audio editing functions, it’s a bit complicated to use, especially for first-timers. Fortunately, with just your browser and a few mouse clicks, you can trim any audio file easily using Online UniConverter (Originally Media. Io). Because it’s a website, you don’t need to download and install anything on your computer. Also, unlike Audacity, which supports a limited number of formats, this website supports 10+ standard audio formats. You can edit FLAC, OGG, WAV, WMV, AU, MP3, you name it! And of course, it also enables the editing of video and image formats.
- Supports trimming of standard audio formats like FLAC, OGG, AAC, MP3, etc. with preset fade effects.
- Transcodes between standard audio formats easily and quickly.
- Converts and edits popular video formats such as MOV, VOB, MP4, FLV, and much more.
- Can convert and compress standard image formats like BMP, JPEG, TIFF, and PNG.
- Robust Audacity trim audio alternative for Apple Safari, IE, Google Chrome, Firefox, etc..
Below are the steps to trim audio online with Online UniConverter:
Step 1. Load your audio file
Visit this audio trimming website and then click the + icon to import your audio file. A more natural way is to drop it on the converter. Online UniConverter will begin loading your audio in seconds.
Note: You can also cut a YouTube video, which is a significant plus. To import a YouTube file, just paste a video URL in the provided space.
Step 2. Choose the start/endpoint
On your audio, you’ll see the trimming handles on the start point and endpoint of your sound. Drag them to your favorite start and endpoints. If you like, you can also preset the fade-in and fade-out effects.
Step 3. Save and download trimmed audio
After confirming that everything is neat and polished, tap Save To to choose a target format. I prefer MP3 because of its superior compatibility with devices. Lastly, click CUT to start trimming your audio.
When the trimming process is over, you’ll see a DOWNLOAD button where you can save the file to your local drive or Dropbox. It is that easy, honestly!
Part 3. Detailed Comparison Between Audacity and Other Free Alternatives
Up to this point, I’m confident that you’re pretty confused about which audio trimming app to use. That’s maybe because both of these audio trimmers are fast and provide high-quality results. So, to help you out, I’ve prepared a detailed comparison table with all that you need to know:
| App features | Audacity | Online UniConverter |
|---|---|---|
| Supported OS platforms | Linux, Windows, and macOS | Online, e.g. Google Chrome, Firefox, Apple Safari, Internet Explorer, and more |
| Supported audio formats | AU, OGG, AAC, MP4, M4A, M4R, FLAC, WMV, and more | MP3, FLAC, AAC, AIFF, and MKV, AAC, OGG, and more |
| Supported video formats | N/A | MP4, AVI, MOV, VOB, 3GP, MTS, DV, FLV, and more |
| Customer Support | N/A | 7/24 customer support |
| Editing features | Trimming, Compressing, Converting, Adjusting Fade Effects. Etc. | Converting, Compressing, Trimming, Rotating, Etc. |
Summary
It is undoubtedly a close tie between these two beautiful apps. However, I prefer Online UniConverter because it is fast, feature-rich, and available on any device, including smartphones and tablets. Also, the user interface is pretty easy to navigate. But that aside, you can always use both apps.