

Is your iCloud storage almost full? This article will furnish you with some tips to manage your iCloud storage like a pro. That aside, iCloud gives users free 5GB of cloud storage to sync data across devices. But considering that your device contains more than basic documents and photo files, the 5GB is just too small. Therefore, upgrading your iCloud plan is the smarter option, although that will cost you money. So to avoid iCloud’s monthly subscription charges, apply these iCloud storage management tips and tricks.
Part 1. How to Record Your Screen on iPhone 11
Taking a screenshot on an iPhone is as simple as 1,2,3. While third-party apps offer more customization tools, you can also record iPhone’s screen natively and save or even upload it on social media and email. You can also add voice narrations, making this method perfect for video tutorials.
But, first of all, there are a few key things to remember. Firstly, you need to enable the screen recording feature in the Control Center. And secondly, the steps for recording screen depends on your iOS version. So, let’s dive in and learn how to capture the screen on iPhone 11.
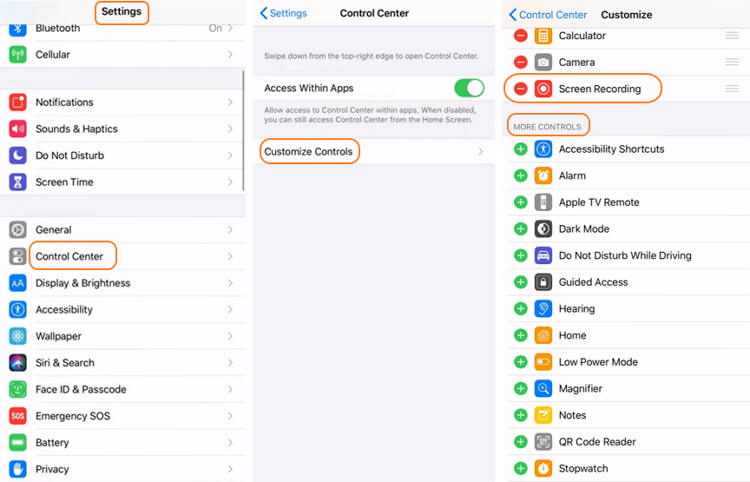
Enable the screen recording feature in Control Center and Record Screen:
- Open the Settings app and then click Control Center before tapping the Customize Controls button. Ensure that the Access Within Apps toggle in the Control Center is enabled.
- Tap the + icon next to Screen Recording in the MORE CONTROLS section.
- The Screen Recording function will move to the INCLUDE part in the Control Center.
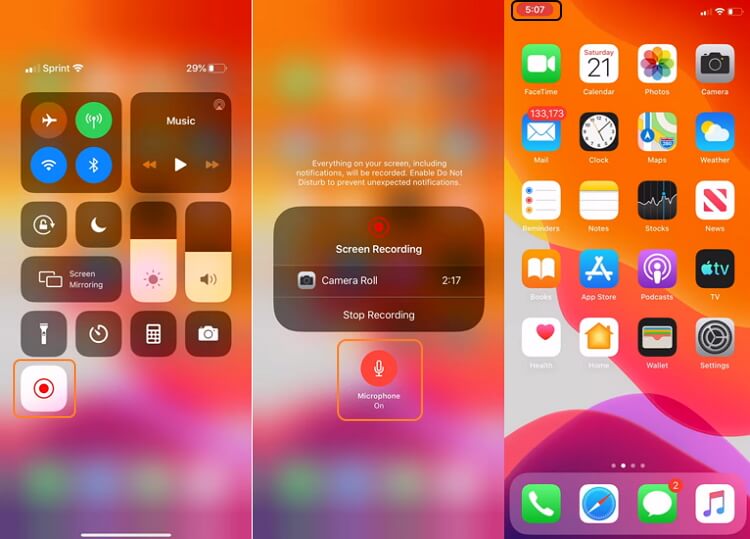
- Proceed to launch the app or screen that you wish to record.
- Swipe the screen down from the top-right corner to open the Control Center. If you’re using iOS 11 or before, swipe up your screen from the bottom to open the Control Center.
- Tap the gray Record button and wait for the three-second countdown to begin recording. The icon will turn red while you’re recording.
- If satisfied, press the red Timer on the top-left corner of your screen and then hit Stop. Alternatively, open the Control Center and tap the red Record button to finish recording.
Part 2. How to Take a Screenshot on iPhone 11
Of course, learning how to screenshot on iPhone 11 or any other iPhone model is easier than the screen recording method. However, you should first know how to screenshot on varying iPhone models. Below is how to do it:
How to take a screenshot on iPhones with Face ID iPhones:
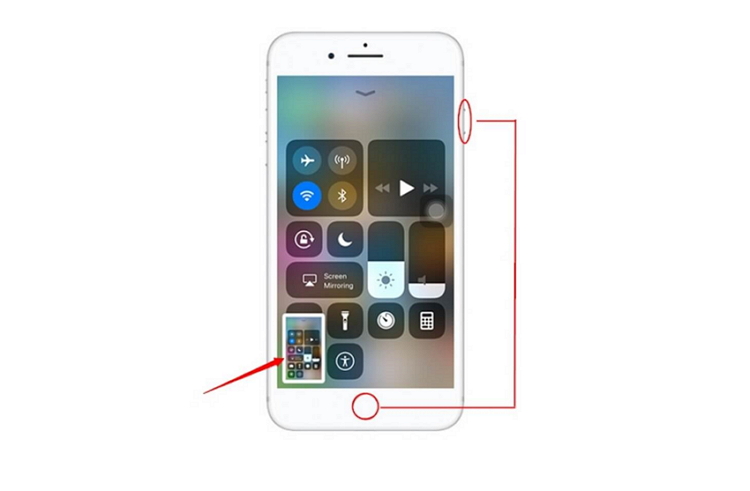
- If you’re using a Face ID iPhone like iPhone 11, concurrently click the Volume Up and the Slide buttons.
- Release the controls quickly.
- You’ll see a temporary thumbnail on the lower-left part of your screen. Click it to view.

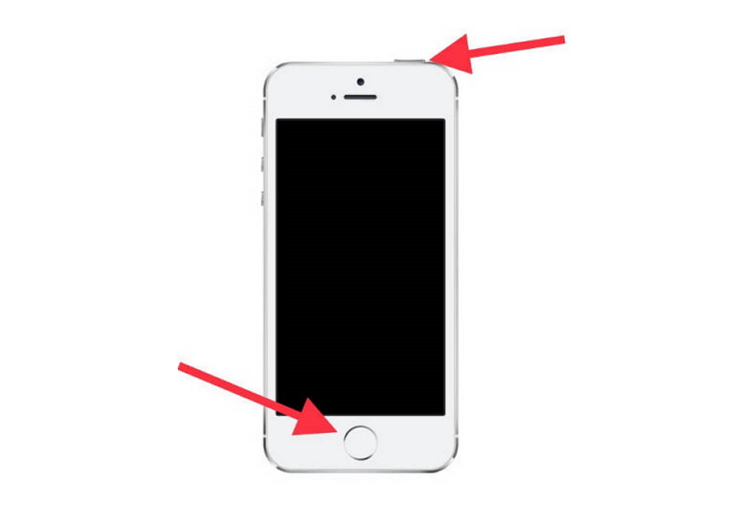
How to screenshot on iPhones Touch ID but no Top button:
- For those with Touch ID iPhones with no Top button like iPhone 8 and 8 Plus, click the Home and Slide buttons simultaneously.
- Release the controls quickly.
- You’ll see a temporary thumbnail on the lower-left part of your screen. Click it to view.
How to Screenshot on Touch ID iPhones with Top button:
- For iPhone SE (first generation) or earlier versions, concurrently press the Home and Top buttons.
- Release the controls quickly.
- You’ll see a temporary thumbnail on the lower-left part of your screen. Click it to view.
To locate your screenshot images on iPhone, open the Photos app and then click Albums. Next, open the Screenshots folder to find your pictures.
Part 3. Record Video/Audio with Wondershare UniConverter
Although Mac and Windows come with native voice and screen recording functions, the results aren’t professional. These functions don’t come with extensive customization tools to set the output quality, apply watermarks, change effects, and so on. That’s why you need a professional program like Wondershare UniConverter. With it, you’ll not only record high-quality voices and videos but also convert them to any audio or video file format. Plus, you can choose to either record using an internal or external microphone.
Recording desktop audio:
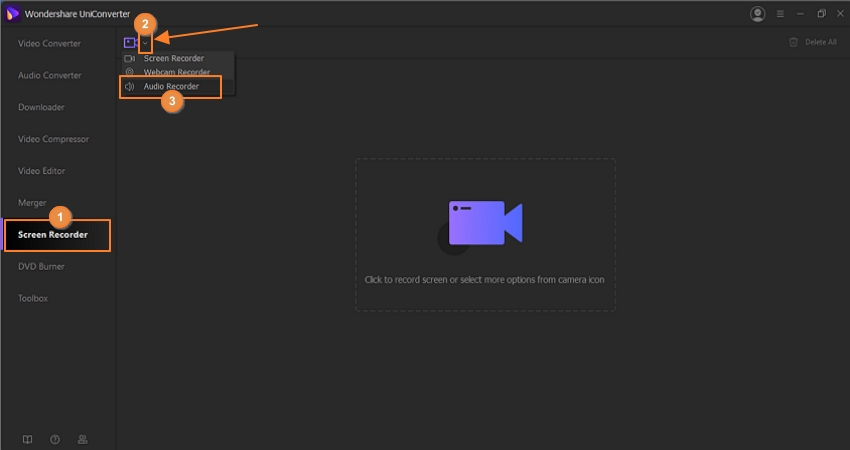
Step 1: Open the Audio Recorder
Open Wondershare UniConverter and then click the Screen Recorder tab. Next to the Camcorder icon, open the drop-down menu and choose Audio Recorder.
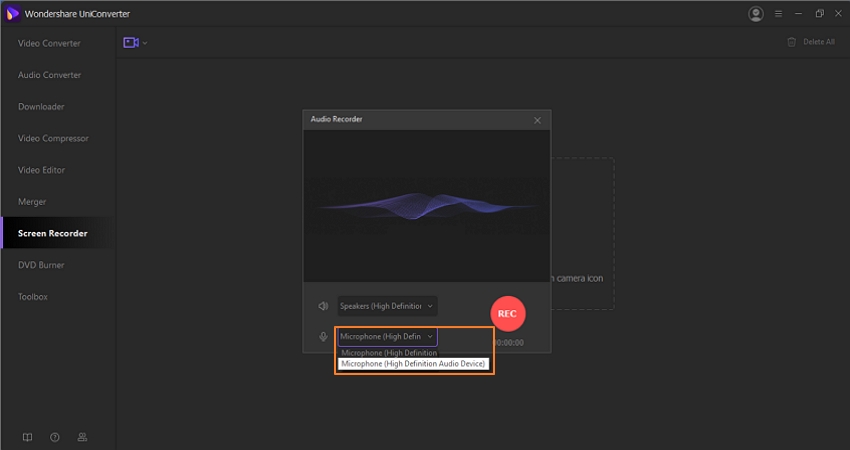
Step 2. Choose a microphone
Plug in a microphone on your computer and then choose it from the Microphone menu. You can also use your computer’s inbuilt microphone.
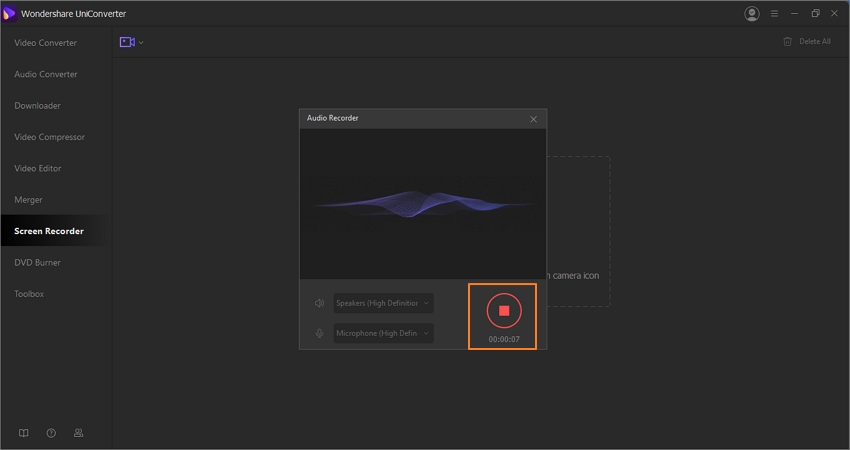
Step 3. Start recording
Finally, click the red REC button to commence recording sounds on your desktop after a 3-second countdown. If you’re satisfied, click Stop and then press the Open button next to your audio to listen.
Recording desktop screen:
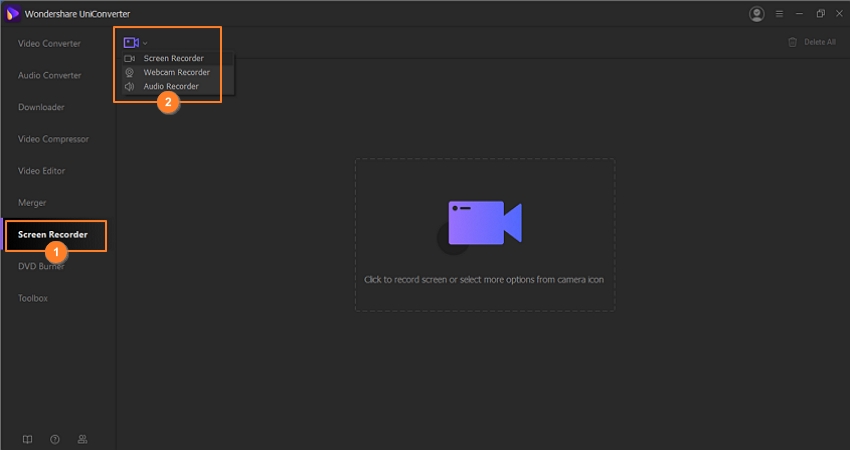
Step 1. Open Screen Recorder
After launching Wondershare UniConverter, tap the Screen Recorder tab and then choose the Screen Recorder function under the drop-down menu next to the Camera icon. An easier way is to click the Camera icon on the top-left corner.
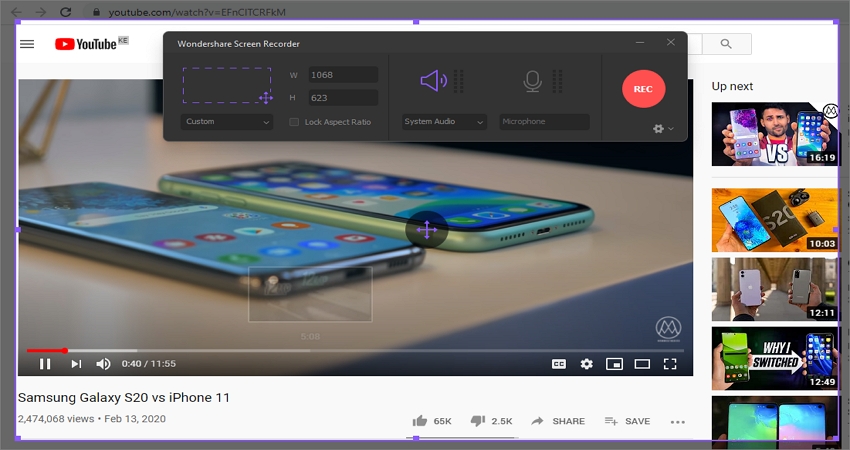
Step 2. Choose a capture area
Now open the app or window that you wish to record and then use the cropper to set the recording area. You can even set it to record the whole screen.
Step 3. Set recording preferences
If you want to add narration to your video, plug in a microphone and then choose it on the Microphone list.
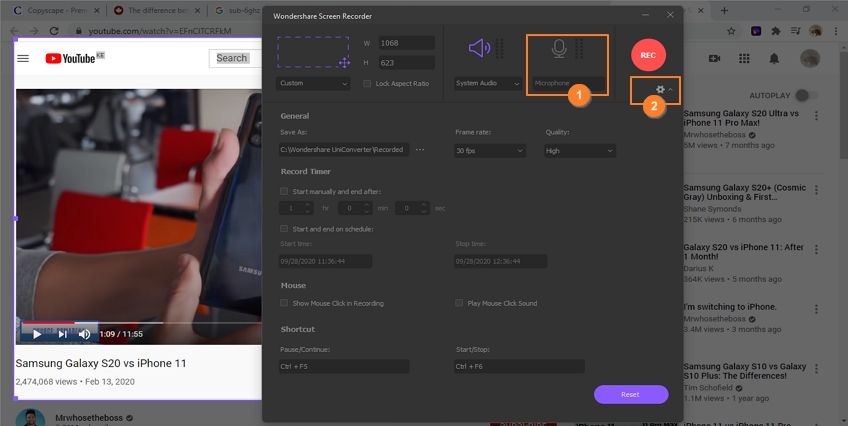
You can also click the Settings icon below the REC button and adjust the following:
- Frame rate
- Video quality
- Duration
- Destination path/folder
Click the Settings icon once again to close the window.
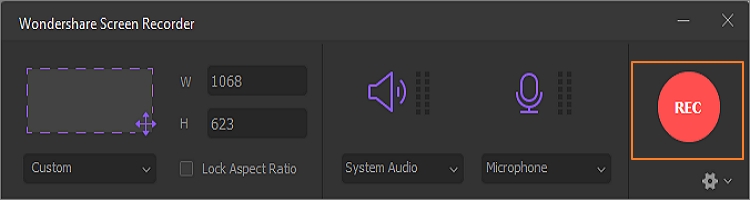
Step 4. Begin recording
Press the REC button to begin recording the screen on your desktop. If satisfied, click the Stop button and then press Open to view your video. You can also share it directly to YouTube or Vimeo by pressing the Share button.
Summary
I’m confident you now know how to screen record on iPhone and desktops quickly and professionally. While recording or screenshotting on iPhone, makes sure that you’re using the correct method, depending on your phone’s model. Another tip; you can transfer screenshots and recorded videos to your computer and edit them professionally with Wondershare UniConverter.
- Directly convert videos to MP4, AVI, MKV, and other 1,000 formats without quality loss at 30X faster speed.
- Convert videos to devices such as iPhone, iPad, iPod, and Android phones directly.
- Edit videos with advanced video editing functions, like trimming, cropping, adding watermarks, subtitles, etc.
- Download/record videos from YouTube and other 10,000+ video sharing sites.
- Burn videos to DVD or Blu-ray disc to play with your DVD player.
- Support additional functions like Video Compress, VR Converter, GIF Maker, Fix Video Metadata, etc.