

The need to record the Mac screen arises in several situations, like creating tutorials, capturing videos from the streaming sites, recording Skype video calls, recording gaming activities, and others. To get the task done, a good Mac screen recorder with audio is required. There are different tools and programs available for the same, which can be used depending on your requirements. Thus, if you are looking for options on how to record screen on Mac with audio, below listed are the solutions for you.
Part 1. Built-in Feature Mac Screen Recorder with Audio
If you wish to record your Mac screen with audio without installing any third-party software, QuickTime player works as a decent choice. There is a built-in screen recording feature in the QuickTime Player X app that facilitates recording whatever is displayed on the Mac screen along with the audio from the built-in microphone. With a lack of additional features and limitations for audio recording, the QuickTime Player app is suitable for recording when the duration of the video is short, the screen area is small, and there is no requirement for the system audio.
Steps on How to Screen Record on Mac with Sound using QuickTime Player
Step 1. On your Mac system, launch the QuickTime Player app and from the File menu choose New Screen Recording option.
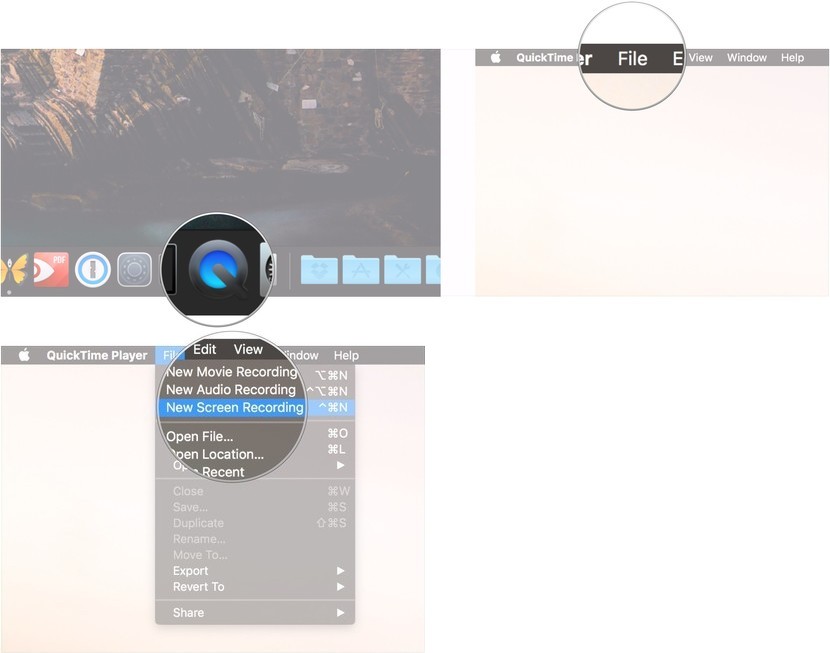
Step 2. A recording window will open where click on the Record button.
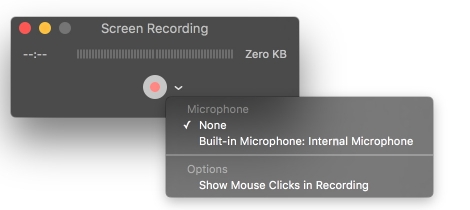
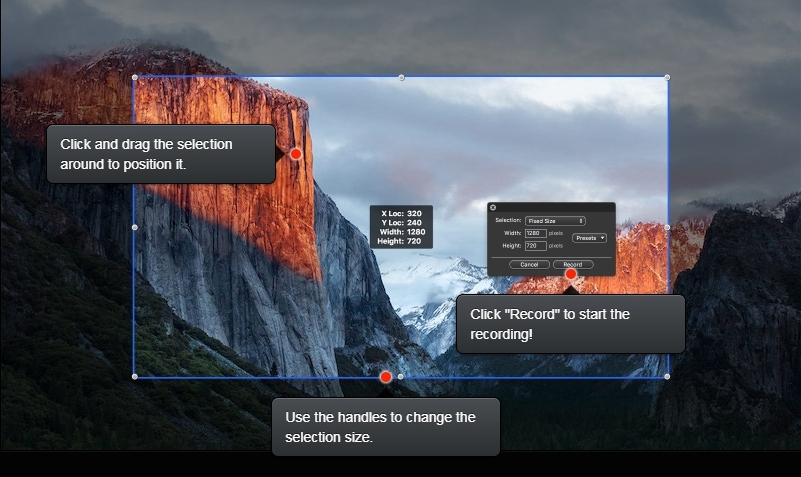
Step 3. A new pop-up screen will appear with additional instructions. Select the area (full screen or a part) that you want to record and choose to Start Recording.
Step 4. On the Menu bar, click on the Stop Recording button when you are finished with the recording.
The recorded video can be saved, shared on the social network, edited or imported into iMovie as needed.
Part 2. MacBook Screen Recording Software with Audio
QuickTime is a fundamental solution to Mac record screen and audio but with limitations on the sound being recorded only from the microphone. So if you are looking for a method on how to record screen and audio on Mac without any limitations, software called Screenflick works as a great choice. This Mac-based tool support is recording your whole, section, or a specific window of the screen along with the audio from the system, microphone, or an external mic. You can also record the webcam to have it as an overlay on the video. For long projects, an option to create time-lapse screen recordings is also available. You can set a delayed start to prepare for the record. Coming with a simple interface, the software offers flexibility along with a wide range of features.
Steps on How to Record Video and Audio on Mac using Screenflick
Step 1. Launch the app on your Mac and from the app interface; select the recording settings from the Record section. You need to choose the area, capture frame per seconds, an audio option, and option to record from the camera.

Step 2. Once the recording settings are selected, next, you need to select the recording area. To record the active window, click on the window’s area. The rectangle area can be selected by dragging it. Alternatively, you can also enter the specific area to be recorded along with the aspect ratio.
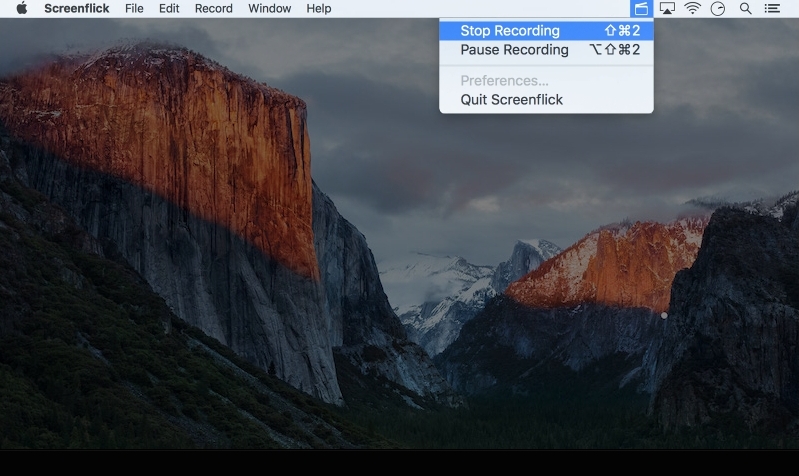
Step 3. Start recording the video. During the recording process, you can pause, resume, as well as stop the recording as needed from the menu at the top-right corner of the menu bar or using the keyboard shortcuts for the same.
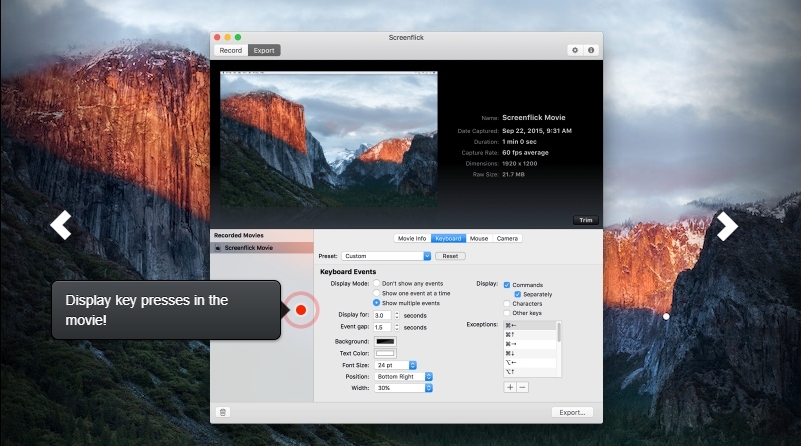
Step 4. The video recorded using the Screenflick app can be edited in several ways using different functions of the program.
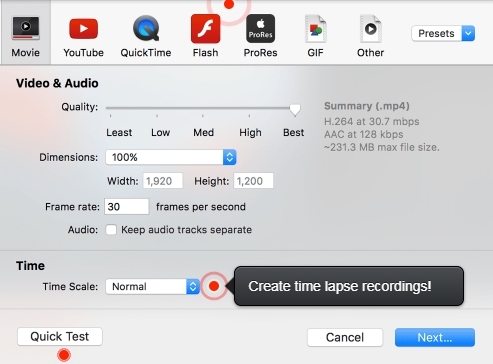
Next, save the video in the desired format, and an option to export it to YouTube is also available.
Part 3. QuickTime vs. Screenflick
Above we have discussed QuickTime Player and Screenflick as two popularly used methods to screen record with sound Mac. Both these methods have their pros and cons.
1. Why Choose QuickTime?
QuickTime is a built-in application for the Mac devices, and using this app makes recording tasks easy and quick for the users as no third-party software installation is required. If you have a small area to be captured, which is less in duration and does not need system audio, QuickTime works as the best solution.
2. Why Choose Screenflick?
Screenflick is a professional Macbook screen recording with an audio program that not only supports screen recording but an array of supporting features like editing, exporting, sharing, and others. Using the tool, any area of the screen can be recorded in high quality, and the audio can be also be recorded from the system’s microphone or an external mic. The advanced features of the app like lapse screen recording, tweaking videos, remote app control, and others further helps in creating professional-looking videos.
Your queries on how do I record my screen with audio on Mac must surely resolve using one of the above-listed tools.
Wondershare UniConverter is another one screen record in Mac with audio and sound. You could try it for a more depth feeling.
- · Wondershare UniConverter is the most accessible application to help you record screen with audio in Mac and Windows.
- · With UniConverter, you can convert video, image, and audio files to more than 1000+ format.
- · It allows you to transfer videos from computer to iPhone or Android mobiles without using iTunes.
- · UniConverter has a Toolbox, which includes converting images, create GIFs, burn CD, rip CD, cast to TV, and fix Meta tags.
- · UniConverter creates an Online UniConverter for people who don't want to install software to use, free to use now.