

Either you wish to capture the whole screen or the specific part of the screen, screen capture on a mac gives you the facility to do so. Are you wondering about the ways to screen grab on a Mac? This article is going to help you because our primary focus is to inform you how to screen capture on mac. Are you excited to know? Let’s dive into the article.
How to Screen Grab on a Mac?
We are going to elaborate on several ways for screen capture iMac. Keep on reading the article to find out the quickest and easiest ways to do so at the same place.
Part 1. Use Shortcut Button to Screengrab on Mac
Using shortcut buttons are the easiest way for ios screen capture. One can quickly capture Mac’s screen by these keyboard shortcuts. These built-in screen capture features are by default and are quickest ways for the best screen capture of mac. After using the keyboard commands, the screenshot will be saved on the desktop of your mac. It will be appropriate to hold on the Control Key with this combination keys if you wish to copy the mac screen capture to the clipboard.
How to Take a Screen Capture on Mac using Shortcut Buttons of Mac?
Let us inform you how to capture screen on MacBook by step by step guidance:
Option 1. Capturing the Entire Screen of Mac
Step 1. Press Command + Shift + 3 keys at the same time.
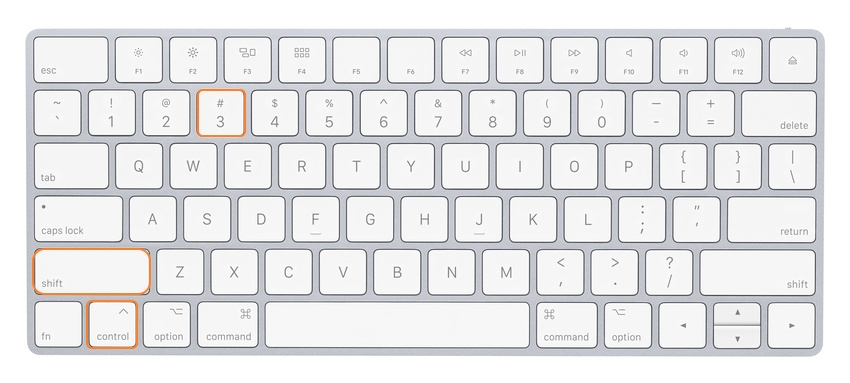
Step 2. By pressing these keys, the screenshot will be automatically saved on the desktop of mac.
Step 3. Apply the same combination of keys as in Step 2, and now, there is only a need to add additional Control Key with these combination keys. This step can save your screenshot to the clipboard.
Option 2. Capturing the Selected or Particular Area of Mac
Step 1. At the same time, press Command + Shift + 4 keys.
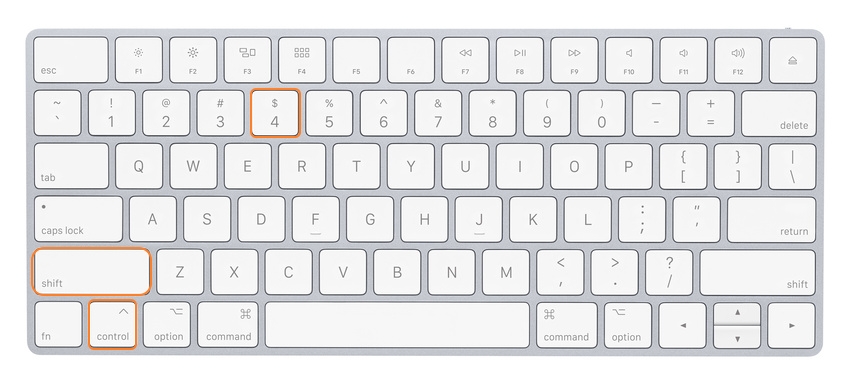
Step 2. After pressing these keys simultaneously, your cursor will appear as a crosshair.
Step 3. Through your cursor, drag and drop the area which you want to save as a screenshot.
Step 4. After selecting the area, when you will leave the mouse button, the screenshot will be automatically saved on desktop of MacBook.
Part 2. How Do You Screen Capture on a Mac with macOS Mojave?
Before the discussion, how to do Screen Capture on a Mac with macOS Mojave, one must know what macOS Mojave is? Mac has gained much popularity because of its frequent new releases. macOS Mojave is their fifteenth best and significant announcement that was released for public use in September 2018.
For mac screengrab on this latest version, someone can use ios screen capture app. Let’s discuss, few more steps to take screenshot on a Mac with macOS Mojave.
Capturing the Entire Screen on a Mac with macOS Mojave
Step 1. Through your keyboard, press Shift-Command-5.
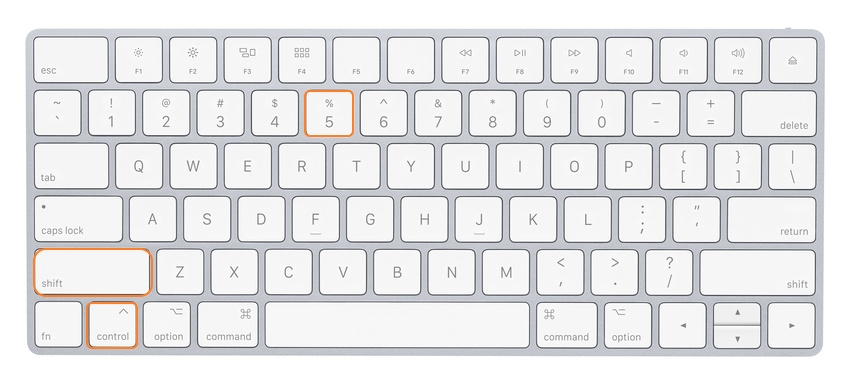
Step 2. OnScreen Capture Controls will appear.
Step 3. At the left most corner, select the Capture the entire screen icon. After selecting, the pointer will change into a camera.

Step 4. To take the screenshot, Click anywhere on the screen.
Step 5. Look at the corner of screen, the thumbnail of screenshot will start to appear.
Capturing the Selected Portion of the Screen
Step 1. Through your keyboard, press Shift-Command-5.
Step 2. OnScreen Capture Controls will appear.
Step 3. Click on Selected screen capture icon.

Step 4. Drag the selected area to capture in screenshot.
Step 5. At the corner of the screen, the thumbnail of screenshot will appear after selecting the area. Wait for a while to see the screenshot on your Mac’s desktop.
Part 3. Using Preview to Capture Screen on Mac
As other screengrab options of Mac, Preview is also the quickest and easiest way of capturing the mac screen. Command-Shift-3 was used before the Preview. You can easily find the Preview in the Dock. If you don’t see it, you can search in the Application folder.
Let’s inform you how Preview is helpful to capture Mac screen.
Step 1. Launch Preview. Click on File.
Step 2. Select the option take screenshot; here you can see three options.
- i. From Selection
- ii. From Window
- iii. From Entire Screen
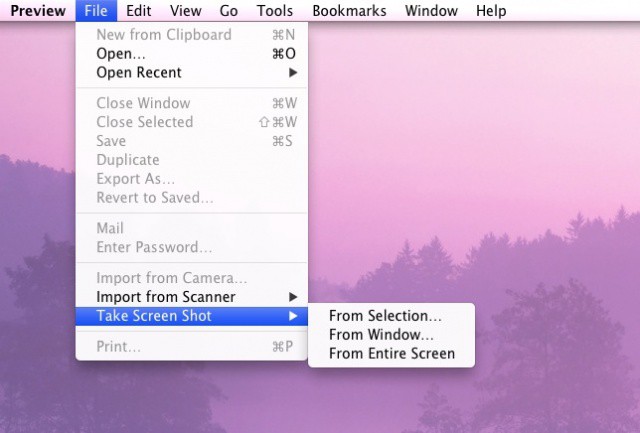
Step 3. If you want to capture any portion of the screen, select From Selection option.
Step 4. From Window option is used when you wish to capture the whole window.
Step 5. On the contrary; the third option is used to capture the whole screen. When you select this option, a countdown will start. In that time, you need to adjust the overall screen and remove the unnecessary folders and files that you don’t want to see in the screenshot.
Part 4. Third-Party Screen Capture Software for Mac
Are you looking for the open-source screen recording software for mac? We have suggestions for you. Let us inform you what the best Third-Party Screen Capture Softwares are for Mac.
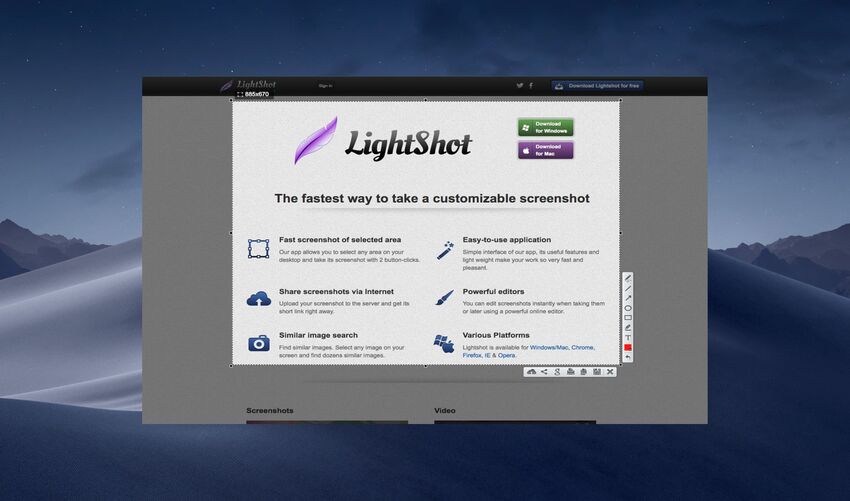
Lightshot Screenshot
URL: https://apps.apple.com/us/app/lightshot-screenshot/id526298438
Lightshot Screenshot allows you to grab the Mac screen by few clicks. This software will enable you to share your Mac’s screen by using Facebook or Twitter. Do you wish to add lines, text and arrows annotation to the screenshot, this software allows you to do so.
What We Like:
- This App is easy to use as it provides drag and drop options.
- The quickest way to take a screenshot on Mac.
What We Don’t Like:
- Once the screenshot is saved, you can’t change its location.
- It doesn’t provide the facility to copy the screenshot to the clipboard.
Monosnap Screenshot Editor
URL: https://apps.apple.com/us/app/monosnap/id540348655?mt=12
Are you looking for the software that provides enough features to take mac screenshot fast? Monosnap Screenshot Editor is one of your best choices. It provides you with options to capture and edit the screenshot. It is used for non-commercial purposes.
What We Like:
- Faster software to capture mac screen。
- Easy to use.
What We Don’t Like:
- Corner magnifiers are missing.
- It doesn't allow you to add the location or destination of the saved screenshot.
Summary
There are several ways of apple screen capture, including iOS screen capture app, screengrab tool mac, free screen capture software mac, screen capture Netflix mac, and much more. We believe this article is helpful in knowing how to do a screen capture on a mac. Keyboard shortcuts for osx screen capture are preferable because these are time saving and quick methods for apple screen capture. The preview method has its advantage as one can choose the ending point of screenshot. We have informed you how to do a screen capture on mac, the choice is yours, choose the method according to the type of iOS screen capture you want.
If you want a multi-functional software which can screen record and edit your recorded video, Wondershare UniConverter is one of your right choices.
- · It allows you to transfer videos and images from computer to iPhone or Android mobiles without using iTunes.
- · It has a 30x faster speed without quality loss while convert and compress files.
- · Wondershare UniConverter is the easiest to use software because it has a simple and intuitive application interface.
- · Using UniConverter Toolbox function, includes convert images, create GIF, burn CD, rip CD, cast to TV, and fix Meta tags with just a few clicks.
- · Wondershare UniConverter supports Windows and Mac operating systems.