While playing your favorite game on your Xbox One, there might be instances when you want to record and share some exciting moments with your friends. At times you may also want to prepare walkthroughs or instructional videos as to how to clear a particular level of a game.
In this section, you will learn some of the most effective ways to record your Xbox One’s gameplays and to share them on your preferred sharing platform. After going through this tutorial, you will be able to select the best method as per your requirements and use it to record and share your gameplay footage with ease.
Part 1. Use Xbox One DVR Feature to Record a Long Game Footage
The Game DVR app on your Xbox One can record the game footage of up to 5 minutes. You can initiate Game DVR capturing either from the Xbox controller or via your voice command.
You can follow the below steps to record Xbox One’s extended game footage using the Game DVR app:
Step 1. Launch and begin playing the Xbox game you want to record the footage for.
Step 2. Double-tap the Xbox button on the controller.
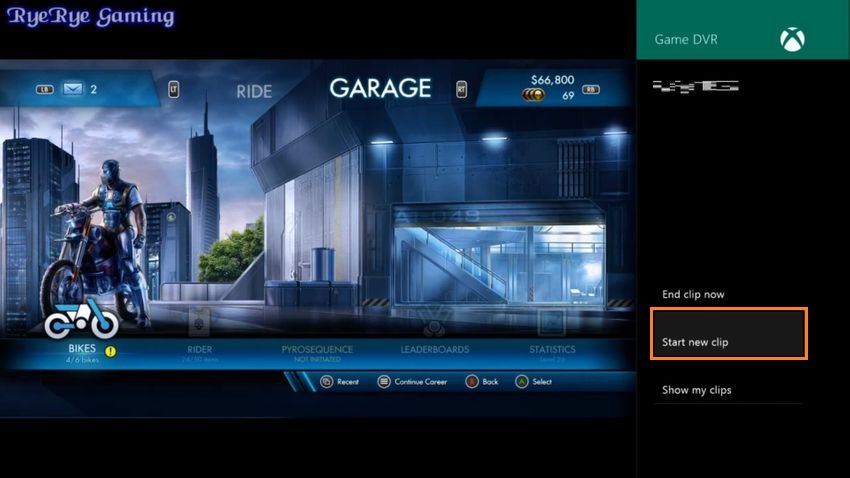
Step 3. Select Game DVR from the side menu to open the Game DVR options in a new sidebar in the right.
Note: If you’re using Xbox with Kinect and are familiar with the voice commands, you can say Xbox Snap Game DVR to jump directly to the Game DVR sidebar in the right with all the available options.
Step 4. Select Start new clip from the available options in the sidebar, and double-tap the Xbox button on your controller again to continue with your game.
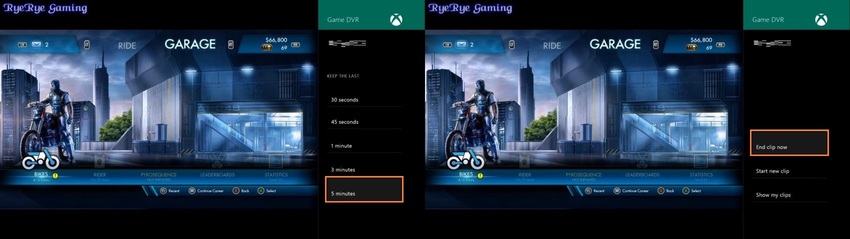
The above method begins recording the gameplay right from the instance you selected the Start new clip option and continued playing the game. The recording automatically stops after 5 minutes, and the footage is saved in the default storage location.
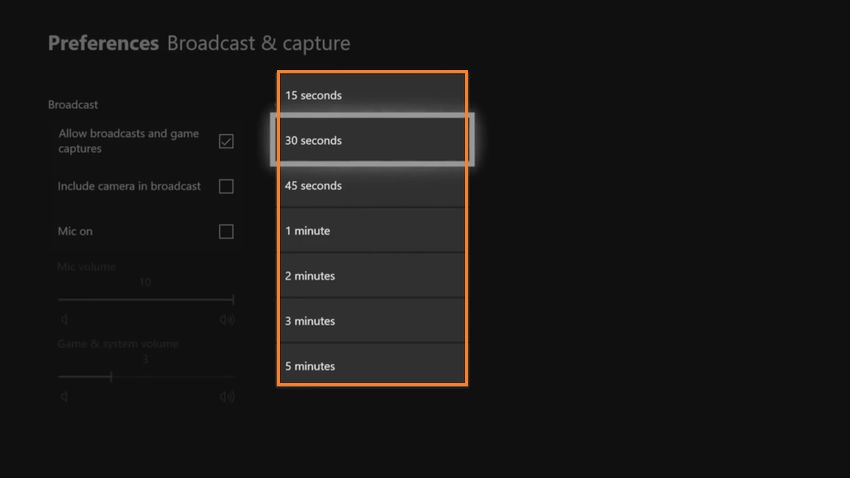
Note: You can pre-define the duration of the Game DVR recording by going to End clip now from the side-bar in the right, and selecting your preferred length from the list. The options you have here are 30 seconds, 45 seconds, 1 minute, 3 minutes, and 5 minutes.
Part 2. Use Xbox One Built-In Capture Feature to Record Gameplay
By default, the built-in Xbox screen recorder allows you to record up to 30 seconds of the gameplay that you can further upload to your preferred streaming platform. Xbox One continuously records all your gameplays in the background and automatically deletes them when you quit, unless you tell it otherwise.
Simple steps given below explain how to screen record on Xbox One:
Step 1. Launch and start playing your favorite game on Xbox One.
Step 2. When you’re at the instance you want to begin recording from, tap the Xbox button on the controller, tap the View button (left button right below the Xbox button), and select Record from now.
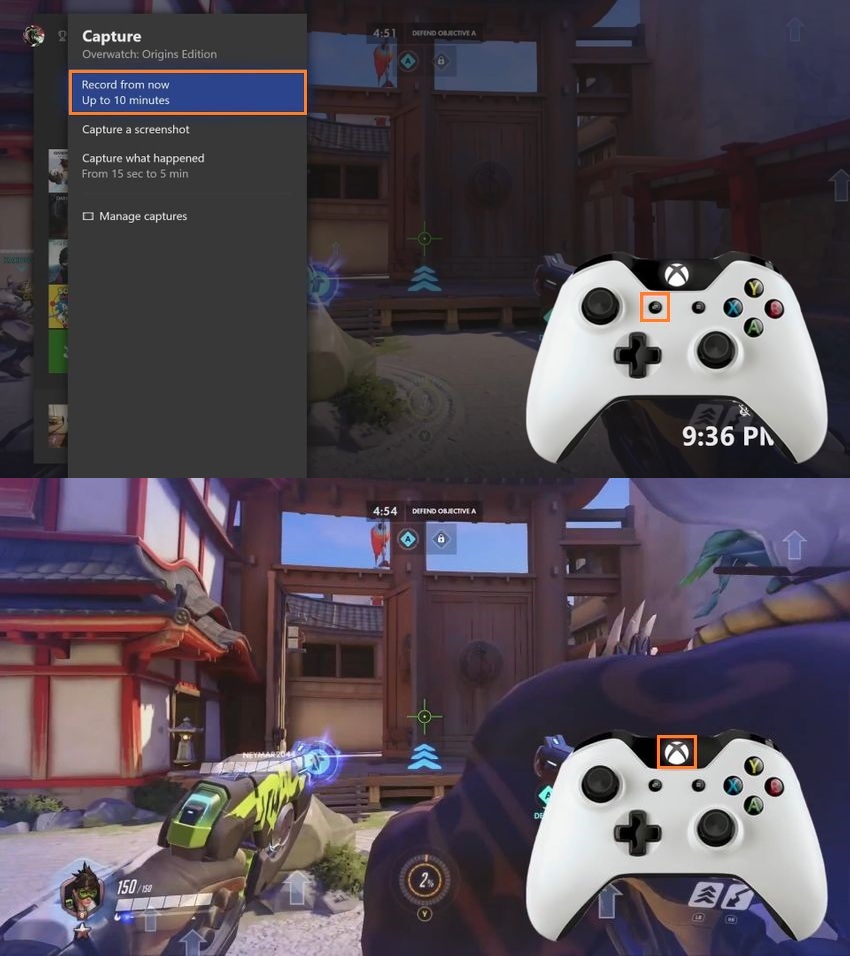
Step 3. If you weren’t already recording and you missed something interesting that you believe is worth sharing, you can double-tap the Xbox button, and then press the X button on your controller (or simply say, Xbox Record That) to save the last 30 seconds of your gameplay.
Note: You can change the capture duration by going to Advanced settings > Preferences > Record that duration menu.
Part 3. Record Xbox One Gameplay Using a Capture Card
Using an external capture card gives you more control over the Xbox One gameplay recording preferences, such as capture duration, screen resolution, etc. Since a capture card is a dedicated device, especially manufactured for the purpose, the output quality is way above what you get while using the console’s built-in features.
a. What You Need?
You need a couple of tangible things to record your Xbox One gameplay with a capture card, including:
- Capture Card (Elgato Game Capture HD is used here. You can use any card of your preference.)
- Windows or Mac computer
- HDMI-enabled output device (TV or monitor)
- USB cable (Generally ships with Elgato Game Capture HD)
- 2 x HDMI cables (for Xbox One Capture Card Output Device)
b. How to Record Xbox Gameplay Using a Capture Card?
Step 1. Set up the Hardware
1. Connect one end of the first HDMI cable to the Xbox One Console’s Output port and connect its second end to the Elgato Game Capture HD card’s Input port.
2. Connect one end of the second cable to the capture card’s Output port and connect the second end to the HDMI port of the output device.
3. Use the USB cable to connect Elgato Game Capture HD to your Windows or Mac computer.
Step 2. Get to the Computer You Have Connected Elgato Game Capture HD to
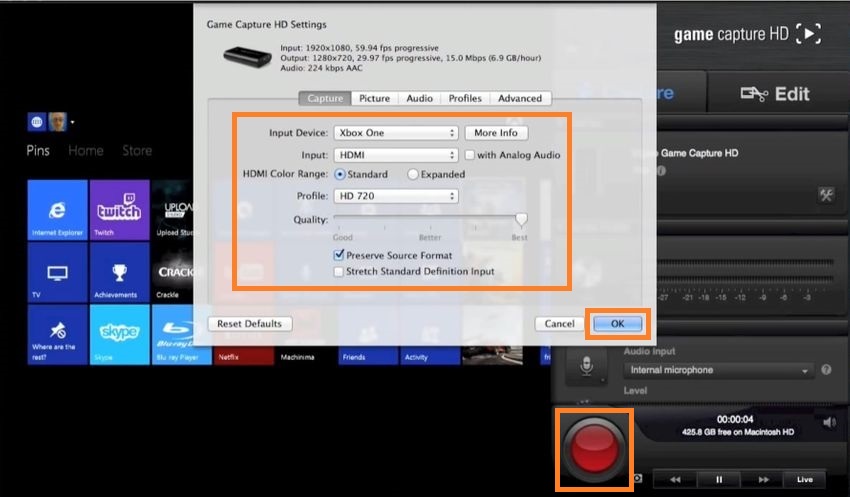
Step 3. Launch the Elgato Software and Go to Settings
Select Xbox One as Input Device.
- a. Select HDMI as Input.
- b. Select Standard for HDMI Color Range.
- c. Select HD 720 or HD 1080 for Profile.
- d. Click OK.
- e. Click the Record button (big Red button in the right) to begin recording.
Step 4. Go to Edit on Your Elgato Software
1. Position the Playhead on the Timeline where you want your clip to begin from, and click the Split button (with the scissors icon) to split the clip.
2. Position the Playhead on the Timeline where you want your clip to end, and click the Split button again.
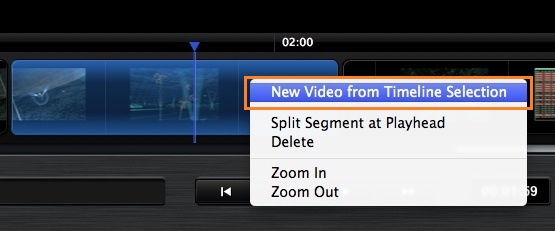
3. Select the segment of the clip you just split, right-click the selected segment, and click New Video from Timeline Selection to save the clip to the default video library. (Optional)
4. Go to the video library and choose your preferred platform to share your gameplay to.
Note: Some UI have the Share section with links to some of the most popular platforms like Facebook, YouTube, etc. within the Edit window of the capture card’s software itself.
Part 4. Tip on How to Share Recorded Game Video to YouTube
Both built-in Xbox game capture tools and the Elgato Game Capture HD’s software allow you to record Xbox gameplay and edit and share the footage without using any additional program. However, because the tools these two methods offer are complementary (or sometimes optional), they are not as robust and feature-enriched as the other dedicated third-party programs are.
That said, if you are more into gaming and share the captured footage just for fun, Xbox One’s built-in tools would be quite sufficient for you to work with.
On the other hand, if you are a professional and are into preparing walkthroughs and tutorials, it would be a good idea to export the footages to your Windows or Mac computer. Use a professional video editing program, such as Wondershare Filmora, Final Cut Pro, Adobe Premiere Pro, etc. to edit the recordings, add narrations or other effects, and publish the final output using their sharing options.
Conclusion
There are several ways you can record Xbox One gameplay and edit and publish them to your favorite streaming platform. Depending on the level of precision and accuracy you want in the recorded footages, you can choose the console’s or external capture card’s tools for capturing and then either use the built-in or third-party programs to edit and share the output to your favorite streaming platform.
If you want to record gameplay on pc, Wondershare UniConverter is one of your best choices. Free download and try it now.
- · It is an all-in-one solution for all your multimedia files needs.
- · You can also edit the recorded xbox using the program.
- · It is mighty and offers you high-quality recording for you.
- · Using UniConverter Toolbox function, includes convert images, create GIF, burn CD, rip CD, cast to TV, and fix Meta tags with just a few clicks.
- · Wondershare UniConverter allows you to burn video and other media files to DVD as well.