

Are you looking for how to record a Facetime? Well, you are in the right place. This article contains extensive information on how to screen record Facetime with sound. We will also discuss some best apps available to help you out in the process. All the apps researched comes with an easy user interface and affordable features.
Facetime video calls are one of the special moments ever created with your loved ones. Recording them is not only an exciting aspect but also throws a great impression on our established history. We would always love to embrace it. However, recording Facetime videos may have some repercussions, too, because of which IOS devices don’t have the feature to record Facetime with audio. But such a feature would not just be useful for special moments, but it’s also an effective and convenient way to make podcasts if your co-host and you are not present in the same room.
For this reason, we have decided to find some best apps or even inbuilt features in these iDevices to help you record Facetime with audio. So, make sure to connect with the whole article.
Part 1. How to Record a Facetime on Your Mac?
QuickTime Player
Screen record special moments with Mac is the most significant advantage QuickTime Player. It is especially helpful when you don’t have macOS Mojave. QuickTime Player can be used to record, play, share and edit video and audio files on your macOS. The feature is accessible from the Applications folder.
How to use QuickTime to Record Facetime?
See the steps given below to record Facetime on QuickTime.
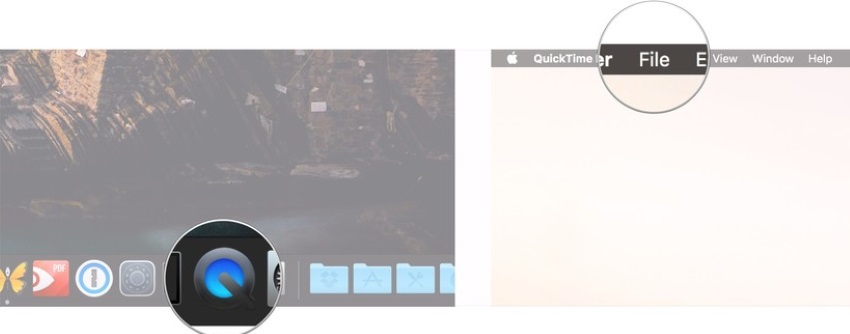
Step 1. Open QuickTime Player
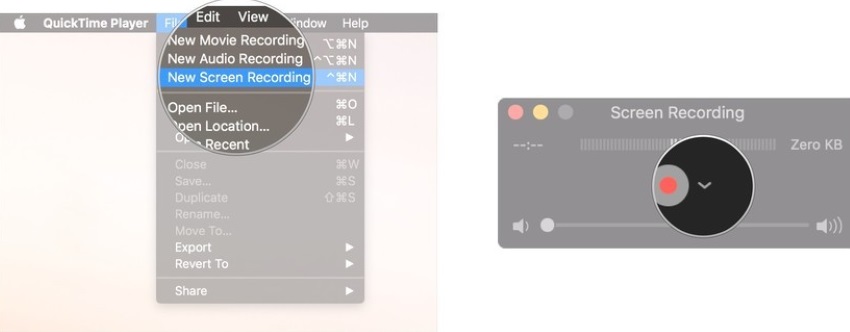
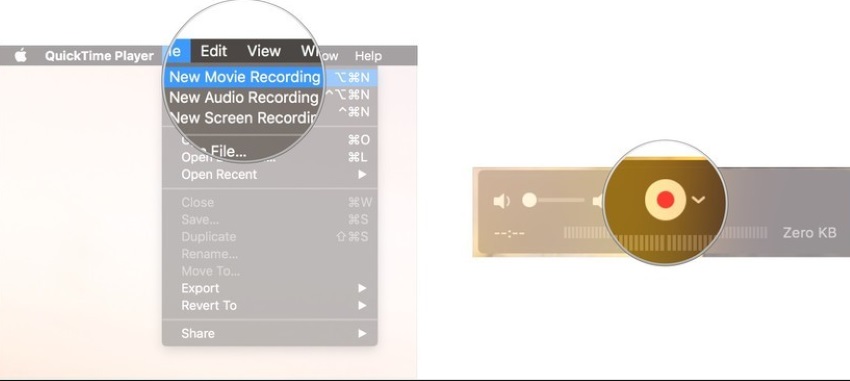
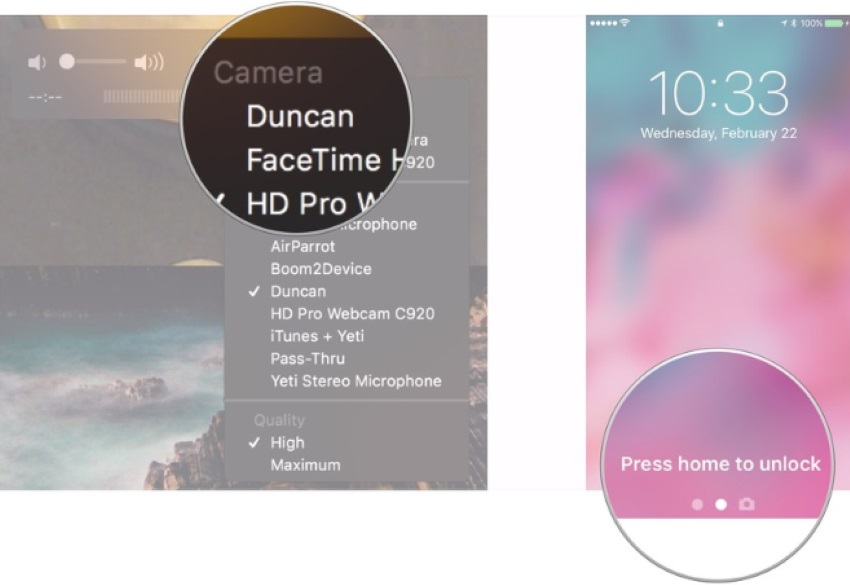
From the Applications folder, open the QuickTime Player. Then, click File. In the next level, go to the menu bar and click New Screen Recording. A window to record the screen will open.
Step 2. Change Settings to Record
You can adjust different settings in this step that you want to have while recording the screen on Facetime. Now you need to go to the arrow next to the red record button to have several options for settings. Select Internal Microphone if you want to capture your audio simultaneously with the screen recording.
You can also select Show Mouse Clicks in Recording to have a black circle around the pointer.
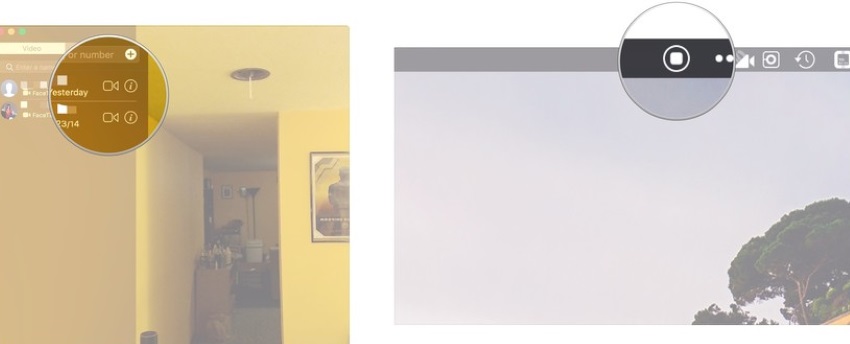
Step 3. Click Red Record Button
First, you need to click the red circle button for recording. After that, you will have two options. Either you can click anywhere on the screen and start recording, or you can drag and select an area to click Start Recording in that area.

Step 4. Stop the Recording
Stop recording by pressing the black square button in the menu bar. Or, you can also go for Command-Control-Esc (Escape) to quit recording.
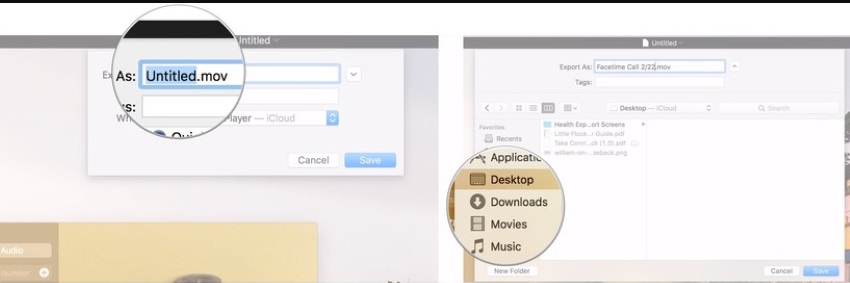
Step 5. Open Recording Location
After the recording is over, it will automatically open in the QuickTime Player, which you can edit, play, or share.
Part 2. Record Facetime Call on iPhone or iPad
Compared to Mac, Facetime calls are mostly on iPhone or iPad. Well, for recording screen on iOS devices, you will have two options. Either you can record the screen through inbuilt Control Centre iOS 11, or you can record it from Mac.
The steps given below will assist you in recording the screen through both methods.
Facetime Screen Recording on iOS
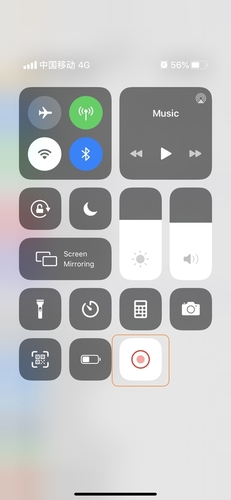
Step 1. Open Control Centre
Direct towards Control Center and then swipe down from the top right corner without using a Home button.
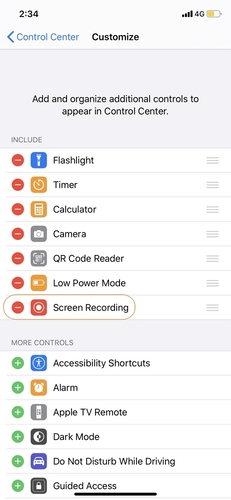
Step 2. Tap Button to Screen Record
Tap the button to screen record indicated as two circles. As you tap, it will start recording the screen in just three seconds.
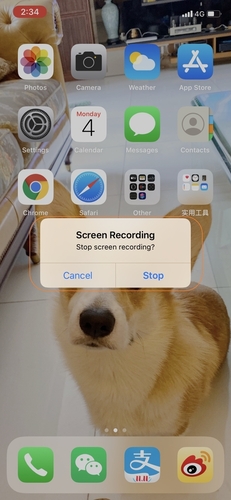
Step 3. Stop Recording
To stop recording, you can either click on the red circle button given on top or use the Stop Recording button in the Control Centre. Then, you will receive a little notification for the screen recorded on your iDevice.
You can record audio through iOS because of some legal reasons.
Facetime Screen Recording on iOS through Mac
Step 1. Connect Your iDevice with Mac and Open QuickTime
The first step is to connect your iPad or iPhone with Mac through a cable and then open QuickTime from the Applications folder in your Mac.
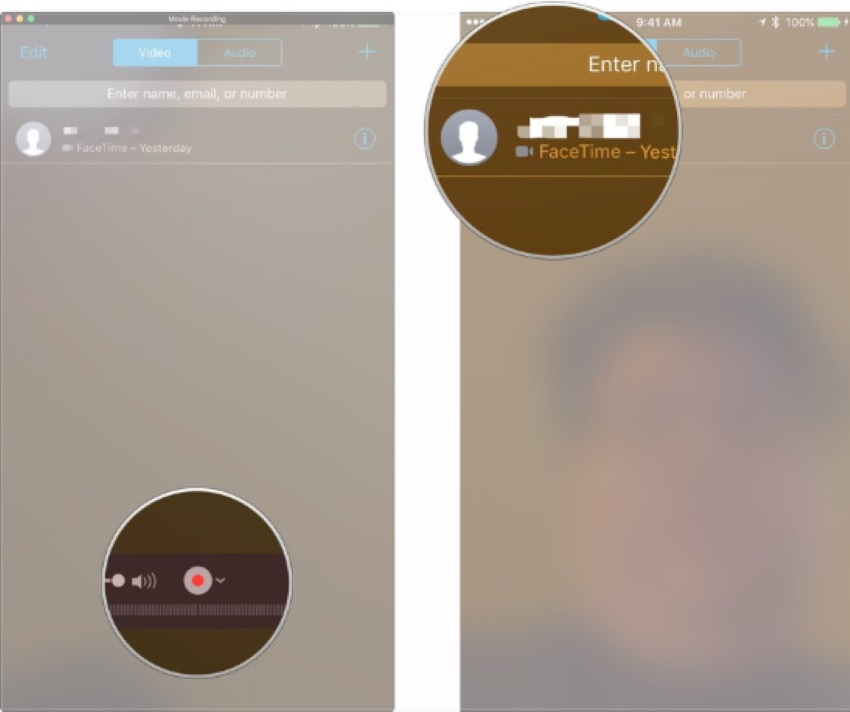
Step 2. Start Recording in Mac
Follow the steps to record the screen on Mac. Click File> New Movie Recording> and the arrow beside the record button.
Step 3. Record iPhone or iPad Screen
From the list of cameras available, choose the iPhone or iPad. Make sure to unlock the targeted recording device to have its screen on Mac QuickTime.
Step 4. Place Facetime on iPhone or iPad
After turning your volume bar, you can now place Facetime call on iPhone or iPad.
Step 5. Start Recording Facetime Call
Click the Record button on Mac and start recording your Facetime call. Click the Stop button to quit recording and save it after giving a name.
Part 3. Third-party Applications for Mac and iPhone – Record Facetime
Wondershare Uniconverter
URL: https://www.media.io/video-converter-desktop.html
Support Platform: Windows & Mac
Wondershare Uniconverter, being an ultimate video converter, also helps to record your video calls or desktop screen. The steps to complete the process of screen recording are simple. It’s an all-in-one software that also supports other functions such as CD burning, image conversion, video compression, CD ripping, etc.
- · It supports thousands of audio, video, and image formats.
- · It can rip media from both CD and DVD.
- · The screen can record voice as well.
- · The software has a simple and intuitive user interface.
- · The software can also be set up to high-speed conversion mode.
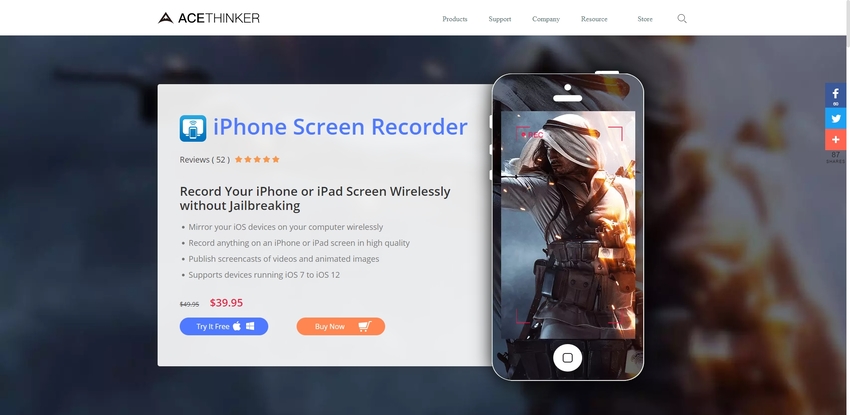
AceThinker iPhone Screen Recorder
URL: https://acethinker.com/iphone-screen-recorder
Support Platform: Windows and iOS
AceThinker iPhone Screen Recorder is another renowned app for the purpose. Record Facetime with iPhone Screen Recorder even in HD resolution. With the app, it is simple to connect your iPad or iPhone wirelessly and start recording the screen. You need a single click to record the whole screen. So, you can capture any video call, gameplay, or anything else on your iPhone or iPad.
Key Features:
- As it’s a specific platform for recording iDevice screen, so the app uses a much simple interface.
- It also contains a feature of sharing your screencasts directly with the world through different media.
- The app is based upon AirPlay, so no need for any cables.
- To have a better experience, configure different settings within the app.
- You do not need to jailbreak your IOS device for the recording screen.
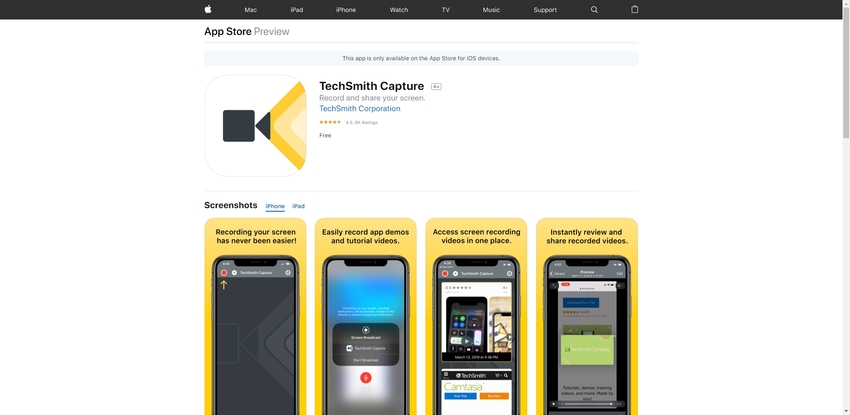
TechSmith Capture
URL: https://apps.apple.com/us/app/techsmith-capture/id1266321056
Support Platform: iOS
TechSmith can capture impressive and pro-how-to and mobile demos by its screen recording function. With the software, you can also send direct videos to Snagit and Camtasia. It is also simple to record the screen with the app by clicking its red record button. Along with TechSmith tools, you can share your recorded video with other social apps.
Key Features:
- The app is compatible with IOS devices running 12.1 or later.
- It also records video tutorials and app demos for your ease.
- After recording the screen, you can access all in one Capture library.
- You can even instantly share and review recorded videos on the app.
- Along with other social apps, it is also easy to share videos with all TechSmith tools such as Snagit, Camtasia, and TechSmith Relay.
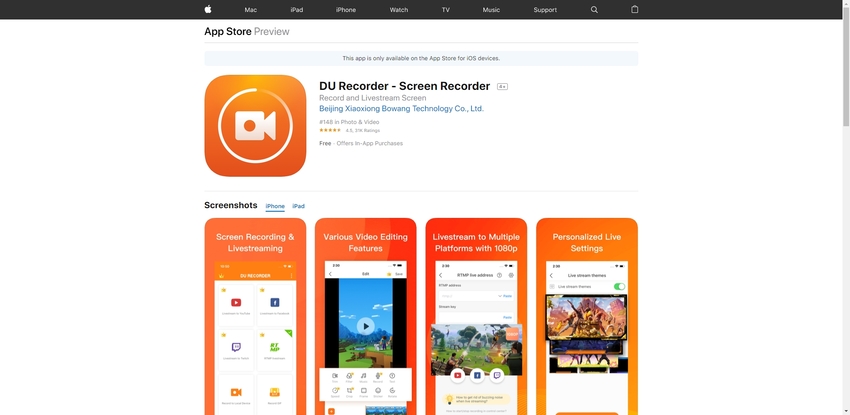
DU Recorder – Screen Recorder
URL: https://apps.apple.com/us/app/du-recorder-screen-recorder/id1295647284
Support Platform: Android, iOS
DU Recorder is a stable, free, and high-quality screen recorder for Android and IOS devices. It contains several features such as video recorder, screen capture, and video editor without any requirement of rooting. DU Recorder provides fluid screen recording where you can easily record your video calls with friends and family.
Key Features:
- The app is free and provides high-quality screen recording at 1080p at 12mbps.
- It also records various programs on live apps.
- The app supports many frame rates, resolution, and bit rates along with HD video support.
- It contains a lot of video editing functions such as merge, trim, add subtitles, background music or changing the speed, etc.
- DU Recorders consists of a Live Creator to stream your live videos directly on Facebook, YouTube, and Twitch.
Summary
Now, you can quickly answer the question, can I record Facetime? This article has given you some of the best ways to screen record your Facetime moments with audio on both Mac and iPhone. Facetime hasn’t offered any on-screen recording, so it’s better to look at other convenient methods discussed widely in this article. Thus, record Facetime effortlessly and happily!
If you're still interested in Wondershare UniConverter, here is the free download place for you to try it now for Windows and Mac.