Today, most desktops and mobile devices feature an inbuilt microphone to help you record audio from computer easily. With this critical feature, you don’t need to connect an external microphone to record sounds. So in this post, we’ll be looking at how to record computer audio directly. Note, however, that the third option requires you to download the capable Wondershare UniConverter app.
Part 1. How to Record Audio from Windows Easily
Windows is undoubtedly the most popular computer OS. It’s sleek, efficient, and of course, has lots of hidden features, including the built-in microphone. Although you might need to use a third-party app to record and edit audios on PC professionally, you can also use the Voice Recorder feature to get the job done. So, without much time-wasting, let’s learn how to record audio from computer Windows 10 easily.
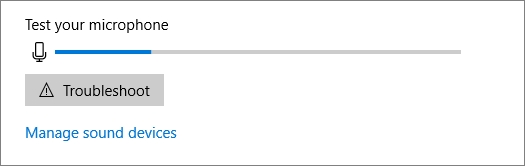
Step 1: The first and most important thing to do is to test your microphone. To do that, click Start, choose the Settings icon, tap System, and then click Sound. Now select your mic under the Choose your input device option. Next, speak to your mic and see if it’s working.
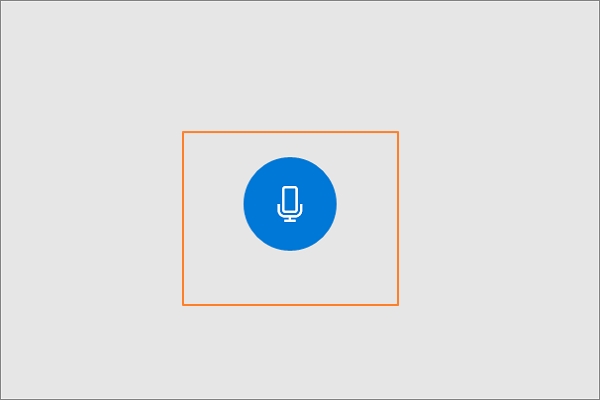
Step 2: Go back to the Start menu and enter Voice Recorder in the search box. You’ll see a microphone-like app which you’ll open.

Step 3: On the pop-up window, tap Yes to allow the app to access your inbuilt microphone.
Step 4: Finally, tap the blue microphone icon to begin recording. You can now start recording sounds. To stop recording, simply click the Stop button.
Part 2. How to Record Audio from Mac
Now let’s learn how to record audio from computer Mac easily. In this case, you will need to use the QuickTime Player. Here’s how to go about it:
Step 1: Launch the QuickTime Player, click the File, and then choose New Audio Recording.
Step 2: Now hit the Options menu and then choose either the Microphone or Quality options. However, the Quality option will give your large, uncompressed files.
Step 3: Next, adjust the volume bar to hear what you’re recording.
Step 4: Hit the Record icon to begin recording and click the Stop when you’re done. You can even pause recording by option-clicking the Record button.
Step 5: Lastly, tap the File tab and then click the Save option to name and export your audio recording.
Part 3. Easiest Way to Record Audio from Windows and Mac
Although the Windows Voice Recorder and Apple QuickTime Player are free options, they are device-specific. That is, you’ll need to have their respective devices to use these options. Luckily, you can use the Wondershare UniConverter to record audio files on both platforms. This downloadable app is lightweight and straightforward to understand. With it, you can record streaming videos, live video calls, and even external sounds. And after recording your video, Wondershare UniConverter allows you to export the sound recording in any audio format of your choice.
- ·Record audio from computer Windows and Mac easily and quickly.
- ·Customize your recordings by choosing the capture area, frame rate, quality, record timer, and more.
- ·Convert your sound recordings to MP3, M4R, AU, OGG, AAC, and other audio formats.
- ·Edit audios by cutting, compressing, applying effects, and more.
- ·Edit all standard video formats such as VOB, MP4, MOV, WMV, and others.
- ·Compatible with all macOS and Windows versions..
Now apply these detailed steps to record voices using Wondershare Voice Recorder:
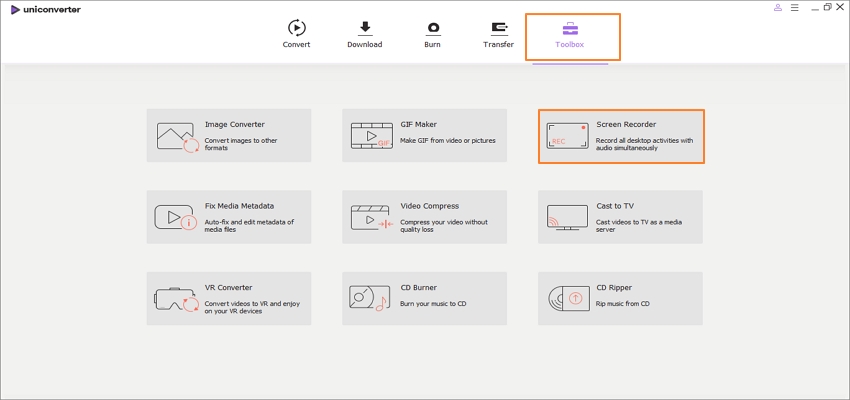
Step 1: Launch the App
After downloading and installing Wondershare Screen Recorder successfully, launch it, and then open the Toolbox tab before selecting the Screen Recorder .
Step 2: Optimize Your Recording Settings
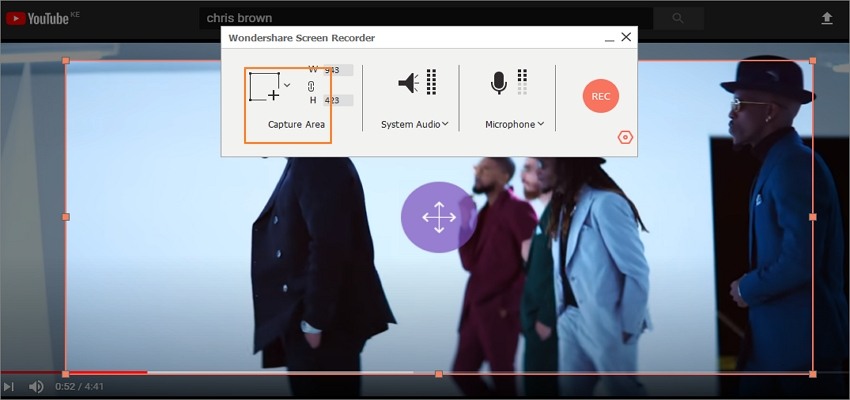
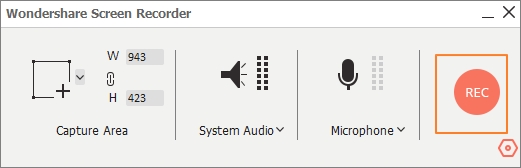
- On the Screen Recorder tool, you can crop the capture area by clicking the Capture Area section. This feature can come in handy, especially if you want to record live video calls or files from YouTube and other video streaming platforms.
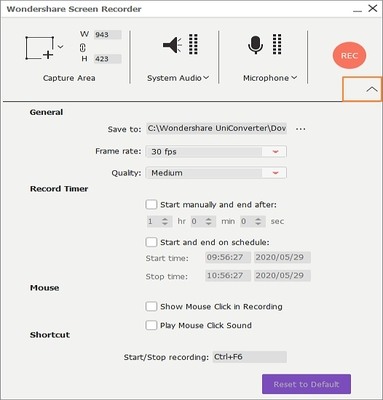
- You can also click the settings icon below the red REC button to customize your recording by changing the frame rate, destination path, shortcut keys, and mouse settings. You can undo the changes by merely clicking the Reset .
Step 3: Start Recording
If you’re satisfied with the customizations, click the REC button to begin capturing the screen. You’ll have a 5-second countdown before you start recording your desktop screen. Also, hit the Stop button to finish recording your screen. Wondershare UniConverter will automatically save it in the specified destination path.
Note: You can convert your video recording to any audio format using this app. You can transcode video to MP3, M4R (iPhone), OGG, AU, M4A, and many more. Just click the Convert tab, and the rest is a cakewalk.
I hope that you can now record audio from computer quickly and professionally. Although Wondershare UniConverter will record your sounds in video format, you can still use it to convert and edit your recordings accordingly. Overall, it’s the best option among the trio.