When it comes to video editing Adobe Premiere Pro/CC is a popularly used program. Removing audio from the video to create a mute file is one of the many features supported by the software. When you want to create a customized file by adding your choice of background music, voice-over, sound effects or create a slideshow, the need to remove the audio arises. Read the following parts to learn how to remove audio from video in Premiere Pro.
Part 1. Best Premiere Pro Alternative to Mute Video with One-Click
Premiere Pro CC is a professional editing tool and requires technical-know how. If you do not have the experience of using the program then the process of removing audio might prove to be a difficult task. So if you are looking for a simple solution that is also free to use we suggest Online UniConverter as the best alternative.
Working from the browser of your system, the interface of the program is simple and allows adding the local files. You can also add the YouTube link to remove its audio. The program is safe and does not have any ads or watermarks.
Try It Now | Remove Audio from Video Online Free
Step 1: Hit on the + button from the page to add the a video present on your system. Or paste the online video link and click on the GO button.
Step 2: The video mute process will start automatically and finish in a very short time.
Part 2. How to Mute Video in Premiere Pro/CC
Compatible with Windows and Mac, Premiere Pro/CC is a professional editing tool by Adobe systems that supports a wide range of editing functions for videos, online files, commercial films, television, and other content. This is a timeline-based editing app that also helps you create a mute video by removing the audio content.
Steps on how to mute video in Premiere Pro
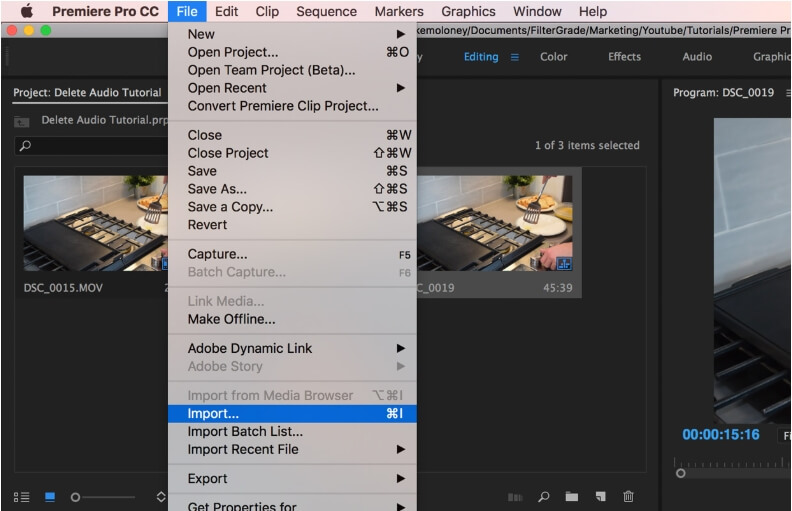
Step 1: Open the Premiere Pro CC program on your system and create a new project. Click on the File > Import button to browse and add the video to be processed. It is suggested to work on the Editing or the Assembly tab for removing the audio file.
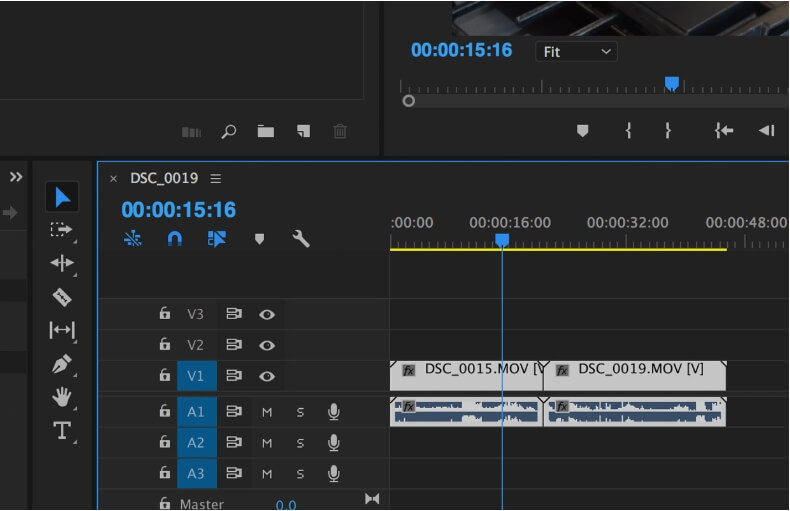
Step 2: After the file is added to the program drag it to Project Time. Next highlight the entire clip by clicking it in the timeline and dragging over the files.
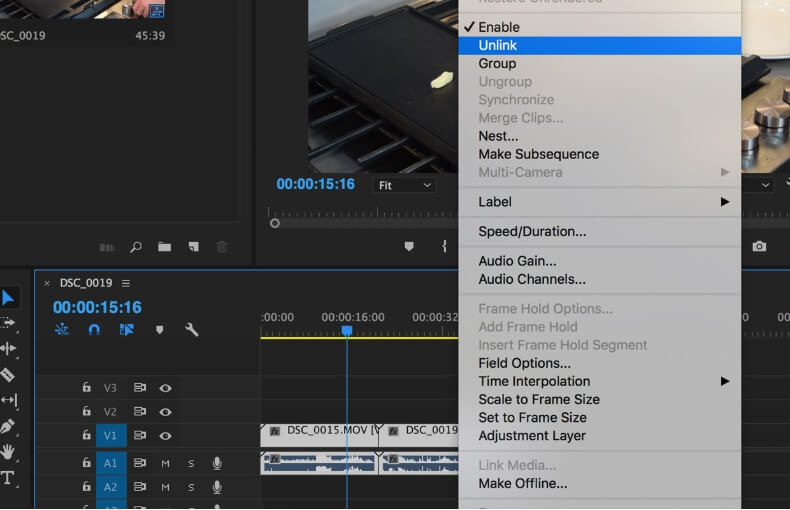
Step 3: Right-click the clip after it is highlighted and then select the Unlink option. The tool will unlink the audio content from the video for the clips which are highlighted.
Step 4: Next, choose the audio layer that you want to remove and then hit on the Delete Key. Alternatively, you can also right-click and choose the Clear option.

Finally, this will remove audio from video premiere added clips. The mute video can be used as it is or can be again dragged to the timeline to add new video or sound effects.
So, if you already have a subscription of the Adobe software you can use it to remove audio from video premiere pro. For simple, quick, and free solution, Online UniConverter works as an excellent tool.