When an image is digitized, the resulting file will have a certain number of pixels. The term “resolution” refers to the pixel density of an image or how many pixels there are within a given area. The higher the resolution, the greater the detail. Images with a low resolution will look pixelated, while those with a high resolution will appear smooth and clear.
If you're interested in ways to increase the resolution of an image, you've come to the right place. In this article, we'll show you a few effective methods to help you with it.
In this article
Part 1: What are the features of a high-quality image
When it comes to images, there are a few different factors you can use to determine the quality. First, it will be free of any blurriness or graininess. The colors will be vibrant, and the image will be sharp and focused.
Then, the lighting of a high-quality image should be well-done, and the shadows are soft and natural. There will be no distractions in the background, and the foreground is well-composed. Overall, the image will be aesthetically pleasing.
Therefore, when it comes to creating high-quality images, there are a few key features that a high-quality image comprises:
1. Resolution

Higher resolution generally leads to increase image quality. This is because high resolution creates more pixels per inch, leading to a more detailed image. More pixels also allow for more color depth, which can result in a more realistic image.
2. Sharpness

The sharpness of an image is an important factor in its overall quality. A sharp image will have clean lines and no blurriness, making it easier to see the subject matter.
On the other hand, a blurry image will have fuzzy lines and may be difficult to make out. Therefore, when taking pictures or choosing images, it is important to consider image sharpness.
3. Contrast
Image Link: Photo by Alvin Balemesa on Unsplash
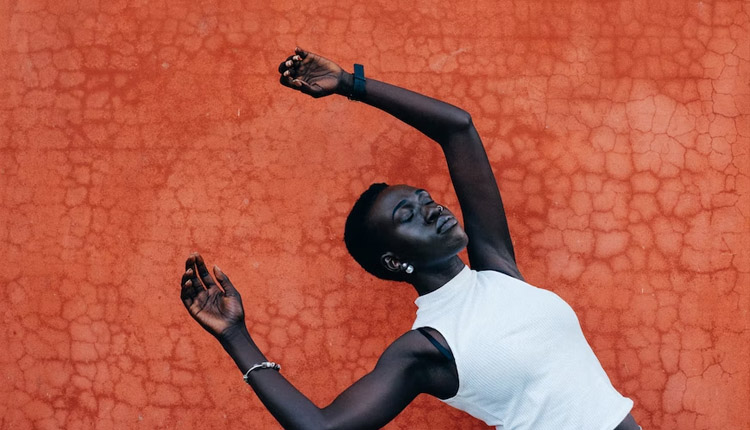
An image should have good contrast and be properly exposed. If the image has higher contrast, the better the image is. Good contrast means that the darkest parts of the image are as dark as possible, and the lightest parts are as light as possible. This makes the image easier to see and makes it pop.
Properly exposed means that the image is not too dark or too light. If an image is too dark, you won't be able to see all the details. If it's too light, the details will be washed out.
4. Color
Image Link: Photo by Daniele Levis Pelusi on Unsplash
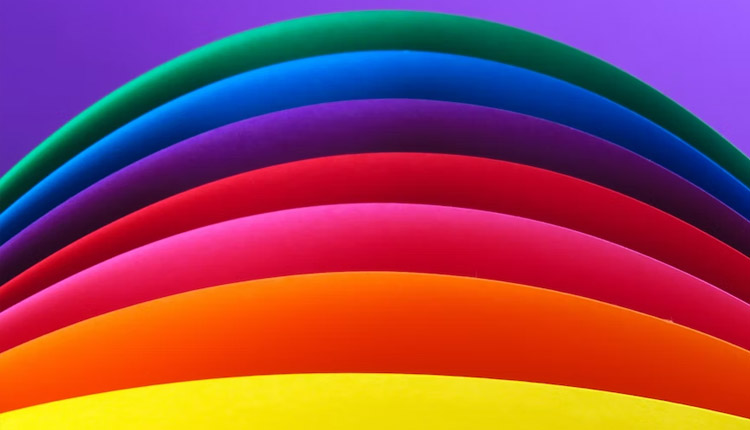
The colors of a high-quality image should be accurate and adequately balanced. You can achieve this through a number of methods, such as color correction and color grading. Ensuring that the colors in an image are accurate and balanced will improve the image quality and make it look more visually appealing.
Part 2: How to increase image quality to meet general public demand
Now, why do we need to make higher-resolution images? There are a few reasons to answer thus the question. It is no secret that the general public prefers high-quality images. Whether for personal or professional use, people are more likely to view and interact with content that is clear and easy on the eyes.
For example:
- You need to upload your product catalogs to your website. Of course, it is in your best interest to increase the image quality to meet the demands of the general public and make them look more professional.
- Poor-quality images can turn people away from your content if you are a content creator. Instead, high-quality photos will complement your content since people are attracted to images that look well done.
One of the most effective methods for this problem is to use an Image Upscaler like Media.io. By upscaling your images, you can easily enhance your pictures by adding details without compromising quality.

Moreover, Media.io has several impressive features that are not just limited to its Image Upscaler function, including:
- File Converter
- Video Editing (Trim, Crop, Merge, Change the speed)
- Image Background Remover
- Enlarge images without losing any quality or detail
How to increase image quality with Media.io:
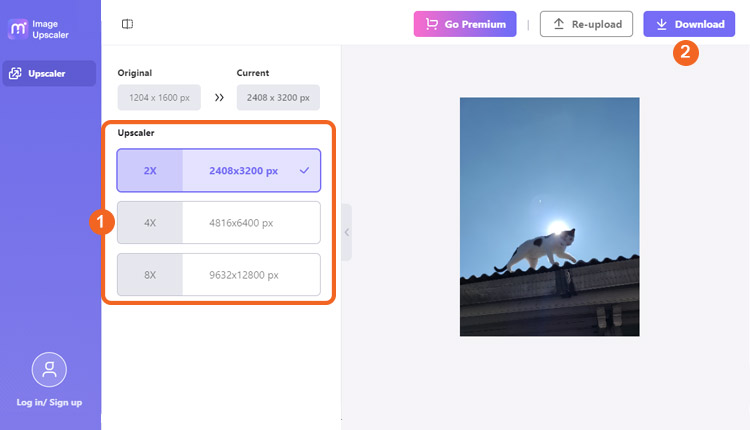
Step 1 Go to Media.io AI Image Upscaler website at https://imgupscaler.media.io/ and click Upscale Image Now.

Step 2 Upload your image to the interface.
You can do it by clicking Upload Image or drag-and-dropping the file to the interface.

Step 3 Select which scale you want to upscale your image, whether 2x, 4x, or 8x.
Then, it will start the enhancement process, which usually takes a few seconds.
Once done, you can click Download to save it.
Part 3: How to make higher resolution images for professional needs
It is often the case that you need images of a higher resolution than what is available. There could be for various reasons, such as wanting to print out the image at a large size or needing to use the image for professional purposes. In these situations, you will need to look for a way to get hold of high-resolution images.
So, if you're in need of some high-resolution images for professional purposes, you can use professional software like Adobe Photoshop. With Photoshop, you can create images that are print-ready, web-ready, and even ready for digital distribution.
Photoshop is an editing program that gives you a lot of control and flexibility. Besides enhancing image resolution, some of Photoshop's unique features including:
- Layer Masking for compositing images
- HDR Toning for creating more realistic images
- Color enhancement for making an image look more vibrant
- Filter gallery for creative effects or correcting problem areas
How to make higher-resolution images using Photoshop:
Step 1 Launch Photoshop on your computer.
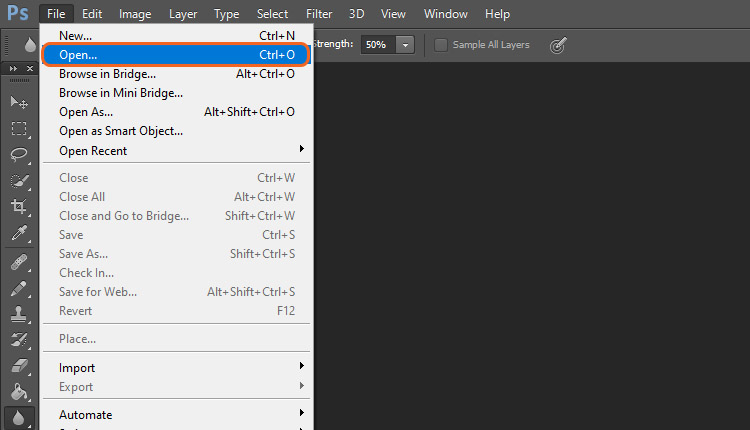
Step 2 Click File > Open and import the image file you want to edit.
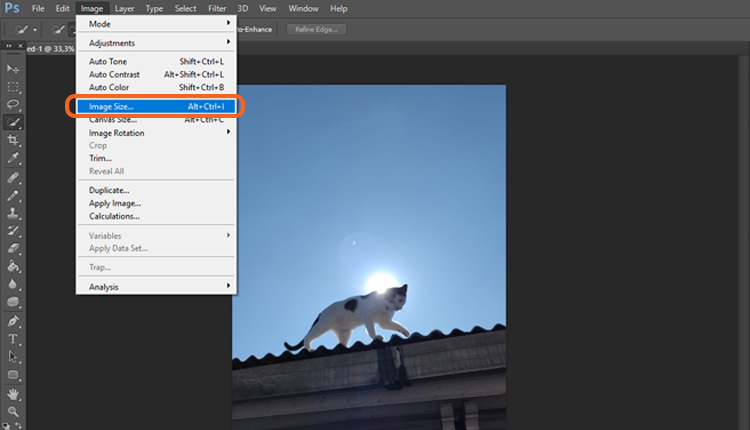
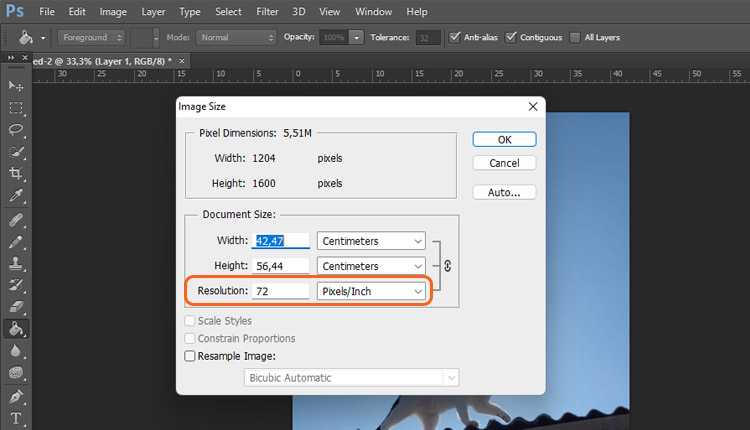
Step 3 Open the Image Size settings by clicking Image > Image Size.
Step 4 Set the resolution to your preferences.
If you don’t want to change the pixels, you can uncheck the “Resample Image.” Once done, click OK.
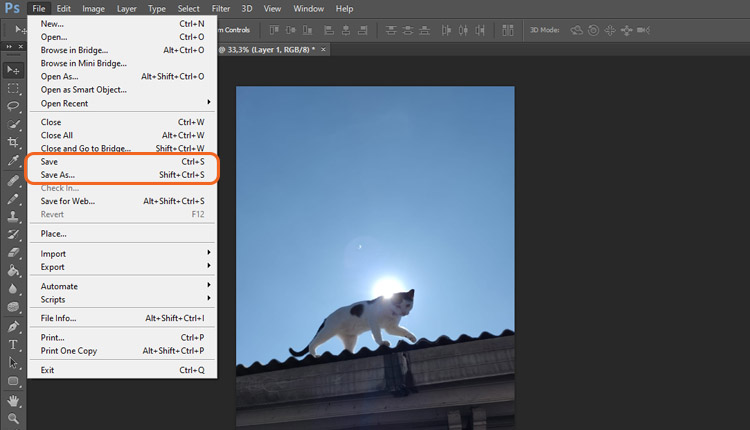
Step 5 Save your enhanced image by clicking File > Save/Save As.
