

With cloud-based photo editing services, you can create and customize an image in the way you want. By using Lightroom to remove the object, you can also make photos more aesthetically pleasing and clearer. Lightroom allows you to shape images in such a way that they can create transparency and share your vision with the world.
In addition to this, you can also perform several precise modifications on any image. Moreover, you can also use this tool on both desktop and mobile. By the end of this discussion, you will also know about a premium quality tool. That tool will help you in removing unwanted objects from photos.
In this article
Part 1: How to Remove Objects in Lightroom Desktop?
Initially, you need to know if you will be able to use Lightroom or not. Many beginners find it quite tricky. However, it is not as challenging as you think. You can use Lightroom on your desktop to remove objects in it. Above all, the interface of this tool is relatively user-friendly. You will not face any complications during your work.
Step-by-Step Guide to Remove Objects in Lightroom Desktop
By following the straightforward instructions listed below, you can remove objects in Lightroom:
Step 1
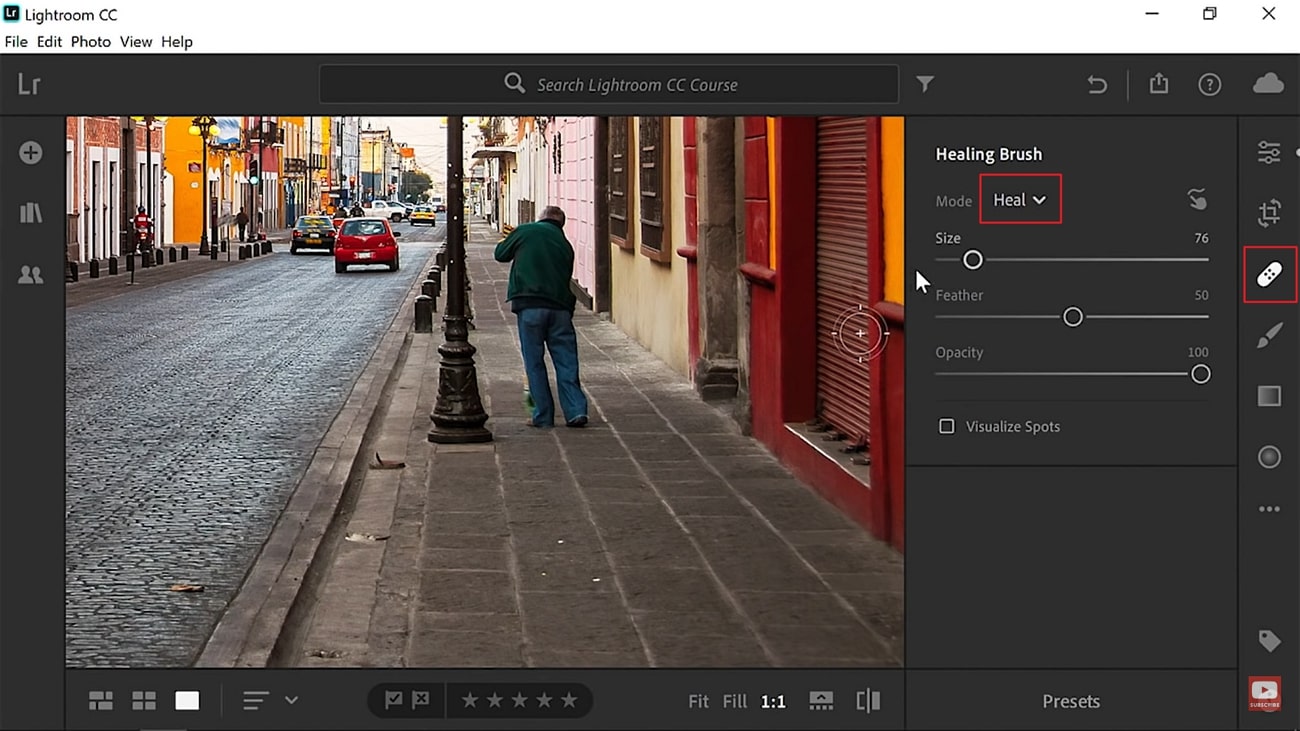
First, import the photo in Lightroom and click the "Band-aid" icon from the right toolbar. Once the healing brush controls are opened, zoom in on the unwanted object. After this, select "Heal" mode and manage the size of "Brush" with sliders.
Step 2
The sharpness of the brush can be controlled with "Feather." You can also customize transparency by adjusting the "Opacity" sliders. Following this, click on the object you want to remove and press "O" to hide the overlay. You can also enable "Clone" mode for better pixel replacement.

Part 2: How to Remove Object Lightroom Mobile?
If you don't want to use Lightroom on a desktop or have a laptop with you, don't fret because you can also use it on mobile. The Lightroom app can remove objects and also derive excellent and reliable results. You can also make quick edits on photos with 200+ preset filters. It also allows you to customize an image's exposure, highlights, and other settings.
Step-by-Step Instructions to Remove Unwanted Objects with Lightroom Mobile
Do you want to remove objects in Lightroom with mobile? Follow the steps below to do this with ease:
Step 1
Open the Lightroom app on your mobile and import the photo you want to edit. After this, select the "Band-Aid" icon to access the healing brush. Following this, adjust the brush size and highlight the unwanted object.

Step 2
After highlighting the object, you can move it over the area that you want to replace it with. You can also do this by selecting the cloning tool.

Part 3: The Best and Easy-to-Use Alternative to Lightroom Desktop and Mobile
If you want to remove all the unwanted objects without spending lots of dollars, Lightroom object removal may not be the best option. You can use a budget-friendly and powerful tool like AniEraser to derive the best results without demanding lots of money. With this highly reputable tool, you can remove unwanted elements like text, watermarks, or strangers from photos and videos.
Moreover, it has a very well-structured and easy-to-navigate interface, so you can use it without any complications. The processing speed is also very fast, so you don't have to wait hours to finish the work. One of the best things about AniEraser is you can use it on Windows, Mac, iOS, and Online with one premium account.
How to Remove Unwanted Objects with AniEraser on a Desktop
With the under-stated instructions, you can remove unwanted objects with AniEraser on your desktop:
Step 1 Access AniEraser and Import Image
First of all, download AniEraser on your device and launch it. After this, click on "Image Object Remover" and double-click on the image of your choice from the pop-up window.

Step 2 Remove Unwanted Objects
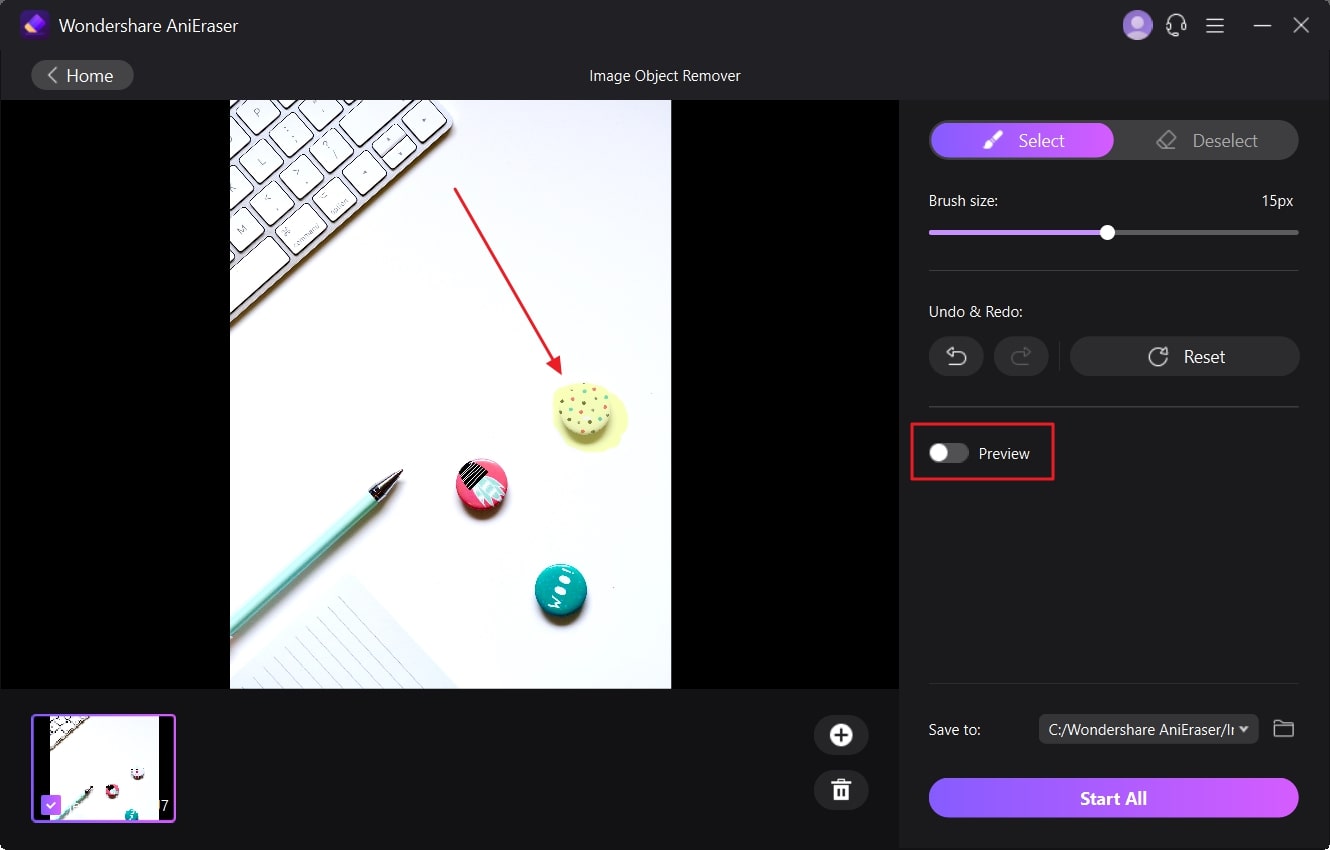
Then, highlight the unwanted object and toggle the "Preview" option. By this, you can check the results before saving the image on your system. Once satisfied, again toggle the "Preview" option to disable this feature.
Step 3 Start Removing the Unwanted Objects
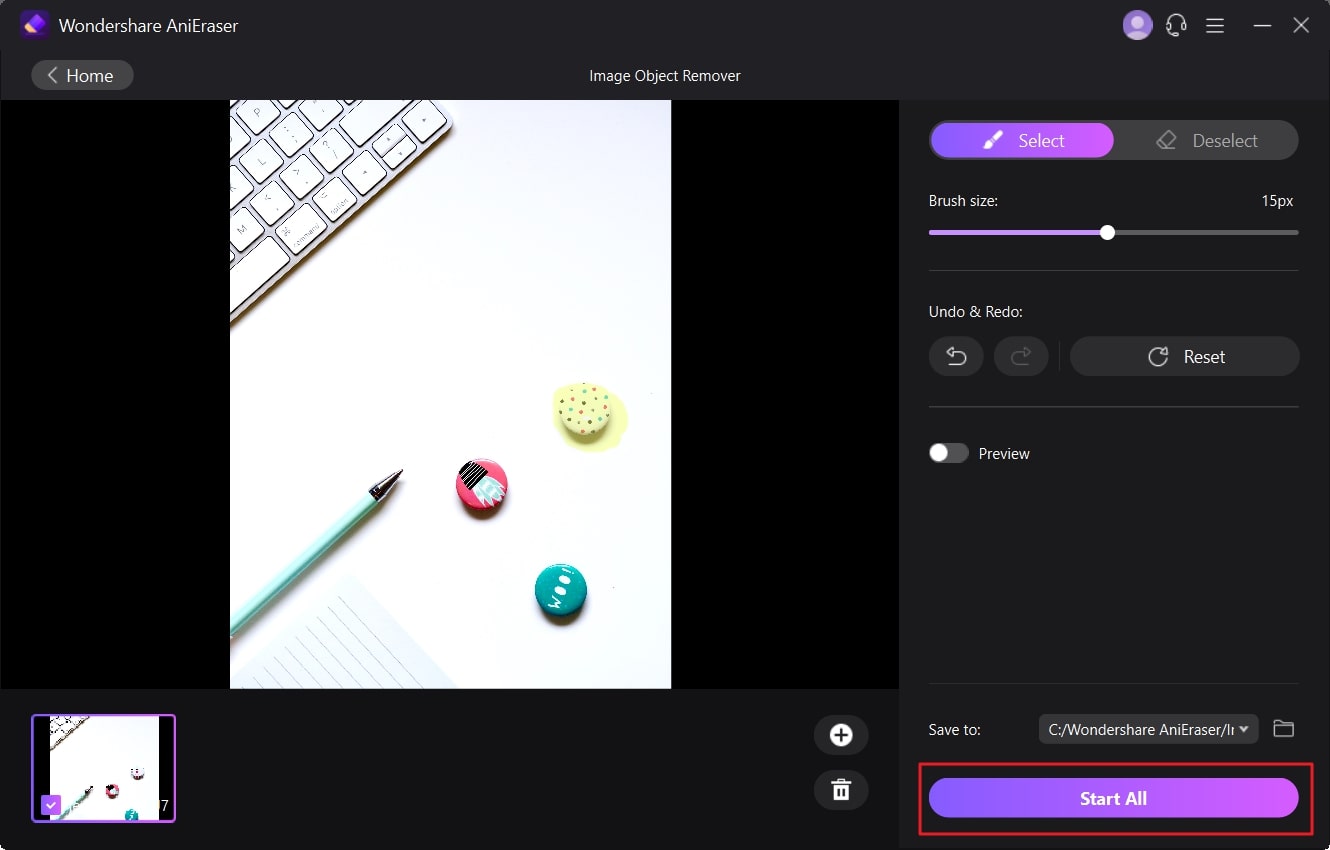
Click the "Save to" drop-down menu and select the destination from the "Select Path" window. After this, press the "Start All" button to initiate the object removal process.
How to Remove Unwanted Objects with AniEraser on Mobile
By following the instructions listed underneath, you can remove unwanted objects with AniEraser on mobile:
Step 1 Download and Launch AniEraser
Download AniEraser on your iOS device from the App Store and launch it. From the main interface, select "Image Object Remover" and import the picture consisting of unwanted objects.

Step 2 Remove Unwanted Objects
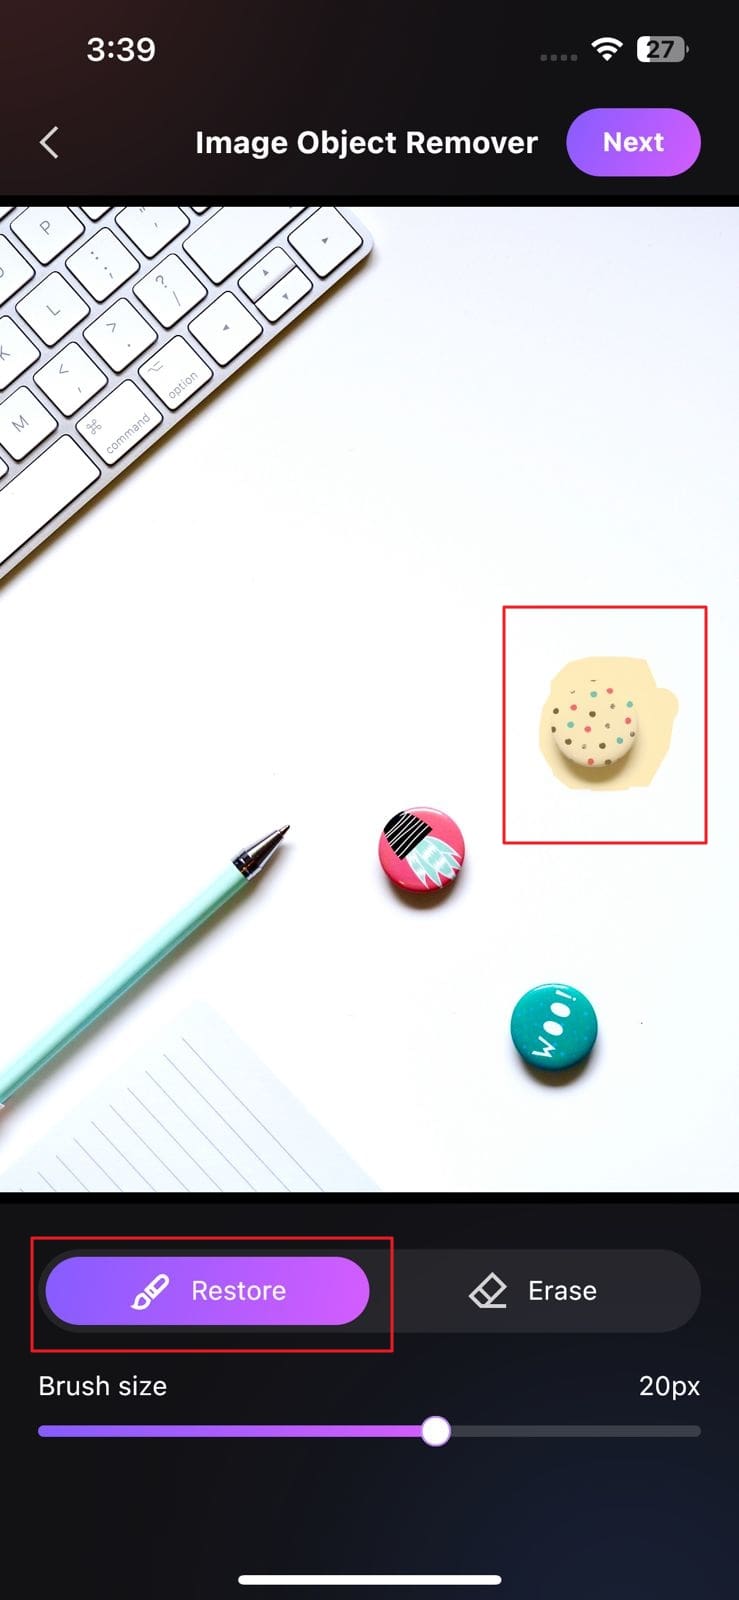
Following this, highlight the object you wish to remove using the "Restore" brush and tap on the "Next" button from the top right of the screen.
Step 3 Save the Edited Image
After this, check the processed image quality and tap the "Save image to camera roll" button to save the picture without unwanted objects.