
If you're already using OBS to record tutorials, stream gameplay, or host live webinars, you know how frustrating background noise can be. Keyboard clicks, fan hum, street traffic, or mic static can instantly lower the quality of an otherwise professional stream. So, how do you remove background noise in OBS without buying expensive audio gear or complicated software?
The good news: OBS has built-in tools that make background noise removal simple and effective. Whether you're a gamer, content creator, or remote presenter, you can quickly clean up your audio using the right filters and settings.
In this guide, you'll learn exactly how to remove background noise in OBS step by step—so your voice sounds clear, crisp, and distraction-free.
In this article
Why Choose OBS Background Noise Removal?

OBS background noise removal is popular because it offers powerful, real-time control without complicating your workflow. Here are some reasons or benefits why people choose OBS to remove background noise.
- Real-time processing: OBS background noise removal works live during streaming, with no need to export, edit, or re-sync audio.
- Seamless workflow: Everything happens inside OBS, so your performance isn't interrupted.
- Flexible filter control: You can stack multiple filters, adjust settings per microphone, and fine-tune based on your voice and room environment.
- Ideal for live creators: Streamers, gamers, podcasters, and educators benefit from stable, predictable audio control.
- Reliable for live sessions: When there's no second take, consistent noise reduction is more valuable than aggressive cleanup that may cause glitches, latency, or robotic sound artifacts.
How to Remove Background Noise in OBS (Built-in Filters)

OBS offers two native filters that handle most real-time noise problems: Noise Suppression and Noise Gate. If you use them correctly, they cover the majority of streaming and recording scenarios.
Method 1 – Use Noise Suppression in OBS
Noise Suppression reduces constant background noise while you are speaking. You basically turn it on, and it works all the time (when you're speaking and when you're not).
OBS provides two Noise Suppression algorithms:
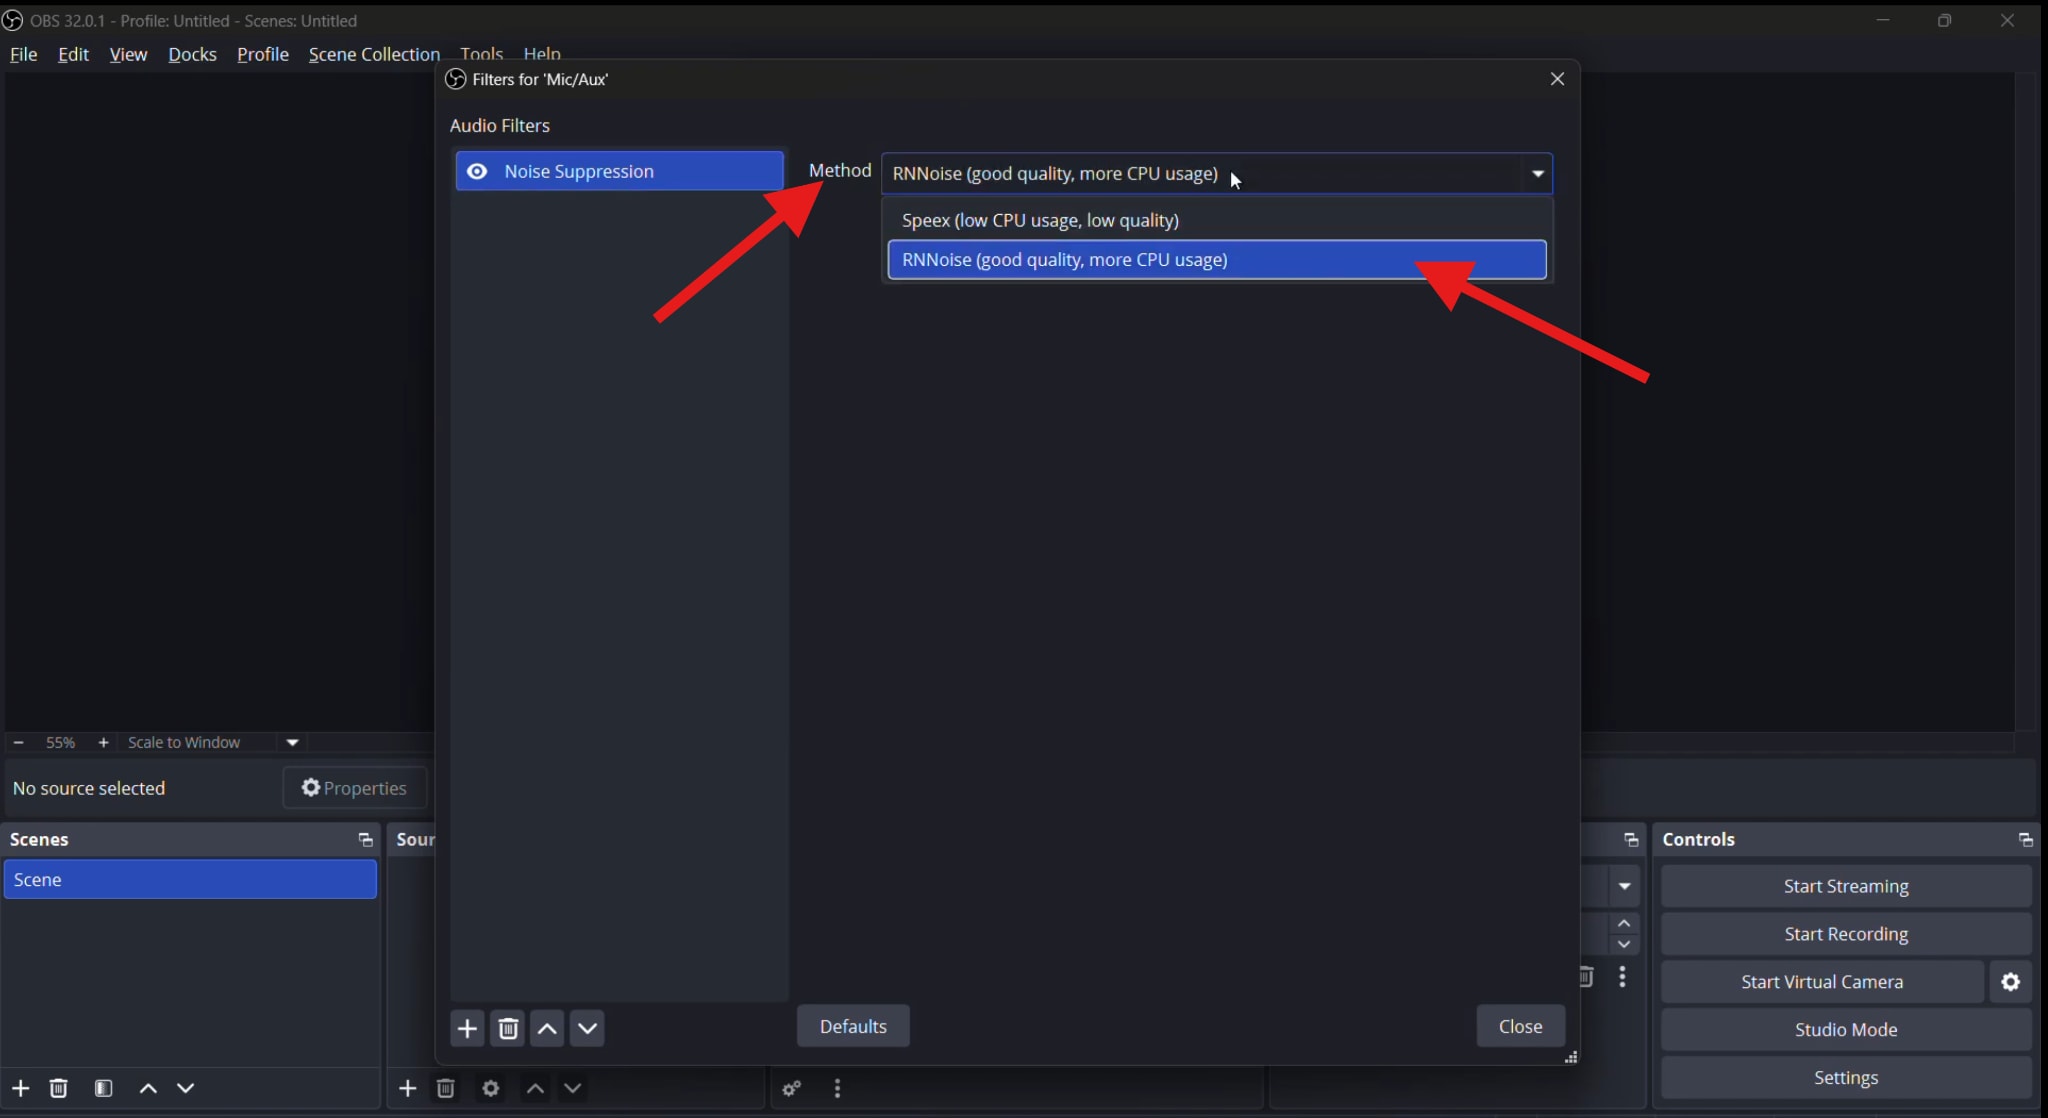
- RNNoise: This is the modern, AI-based option. It adapts to changing noise conditions and delivers better voice clarity with fewer artifacts. It uses more CPU, but on modern systems, the load is manageable.
- Speex: This is an older, lighter algorithm. It works well for stable environments but struggles with complex or changing noise. CPU usage is lower, but audio quality is lower as well.
RNNoise is the go-to choice for most users. Here's how it works.
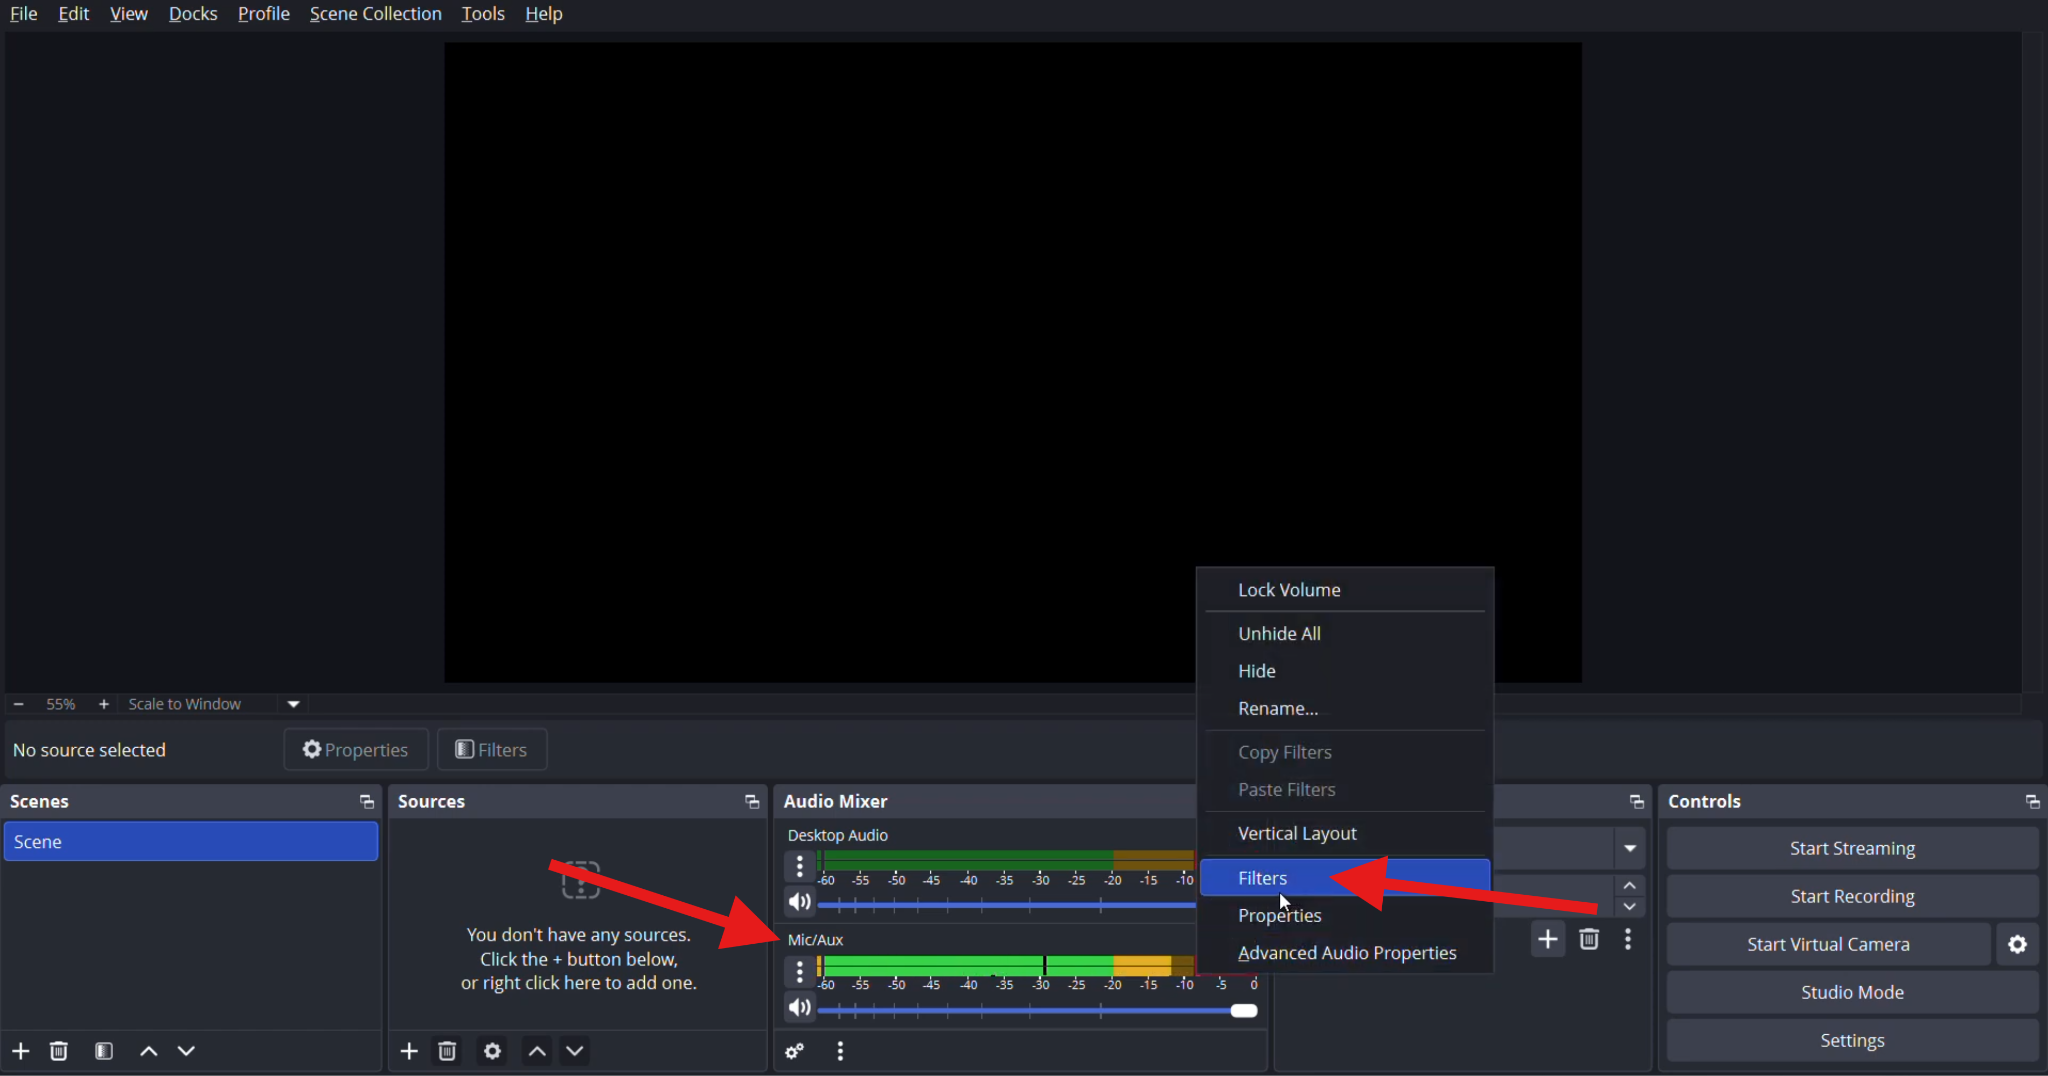
- Open OBS, right-click on the Mic/Aux control, and select Filters.
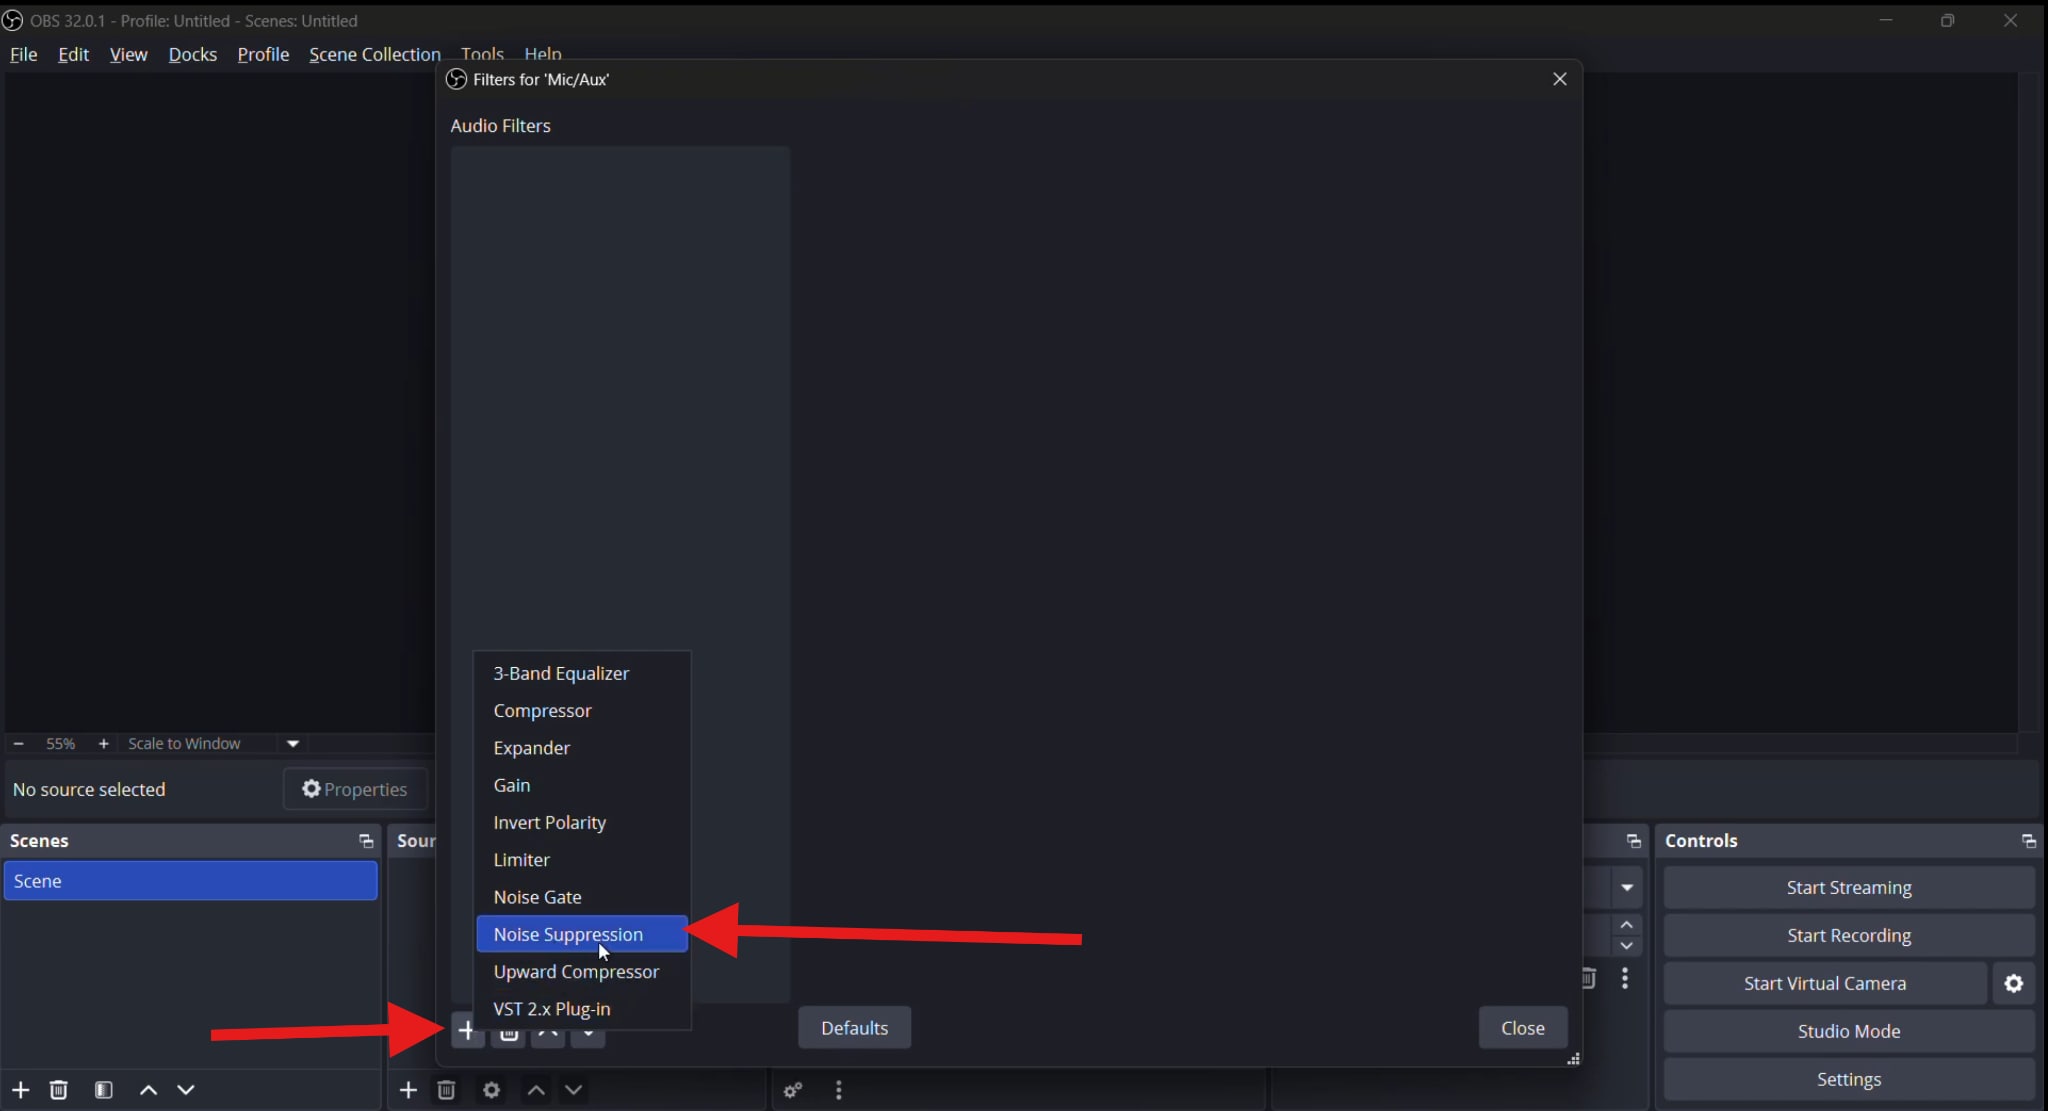
- Click on the + icon to add a new filter and select Noise Suppression.
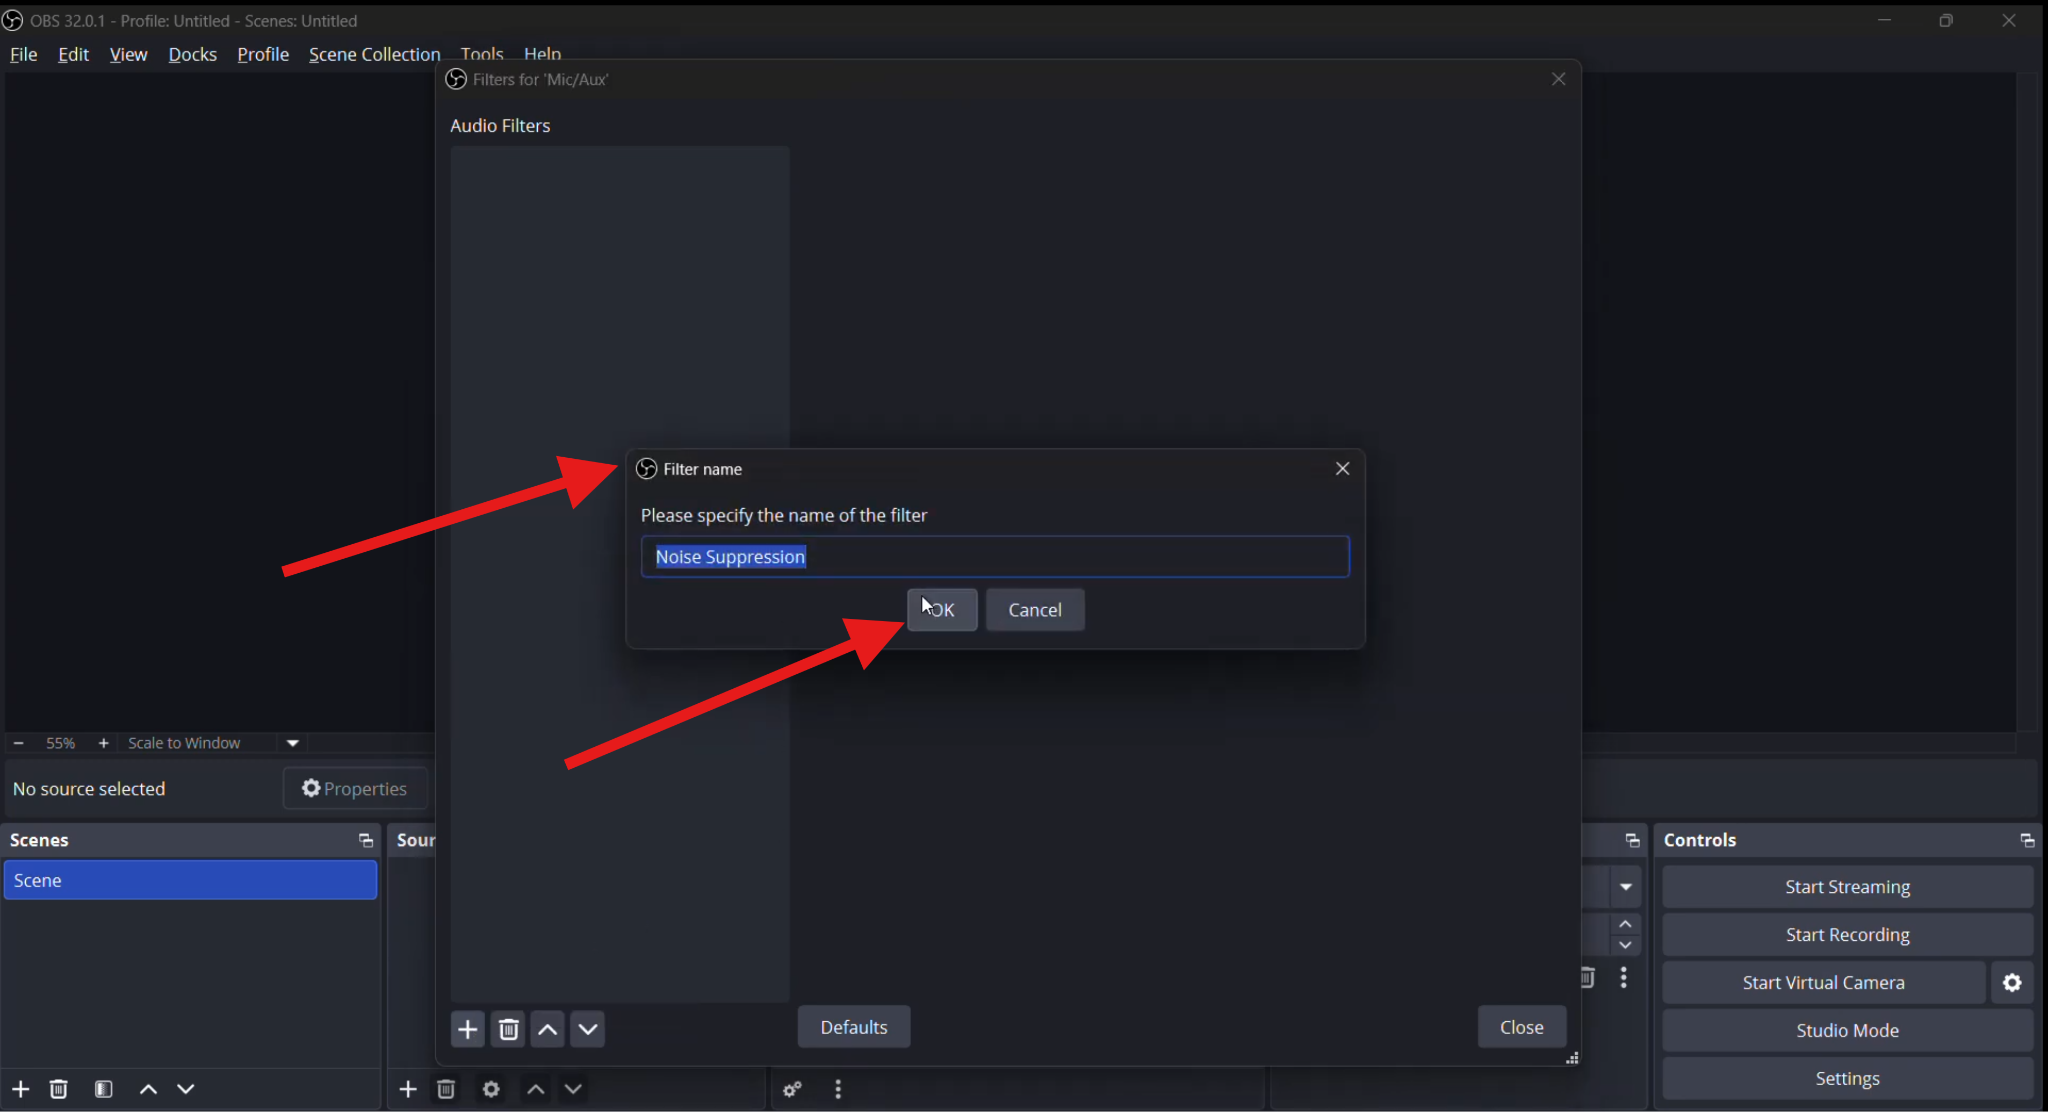
- Enter a name for your filter, then click OK.
- Finally, under Method, select RNNoise (or select Speex, depending on your CPU).
And that's about it. When the feature is active, it will remove background noise, and you can begin your stream.
Method 2 – Use Noise Gate to Reduce Background Noise
A Noise Gate works differently. Essentially, it does not reduce noise while you speak. Instead, it mutes the microphone when you are silent.
This is ideal for keyboard noise, mouse clicks, breathing sounds, and room noise between sentences.
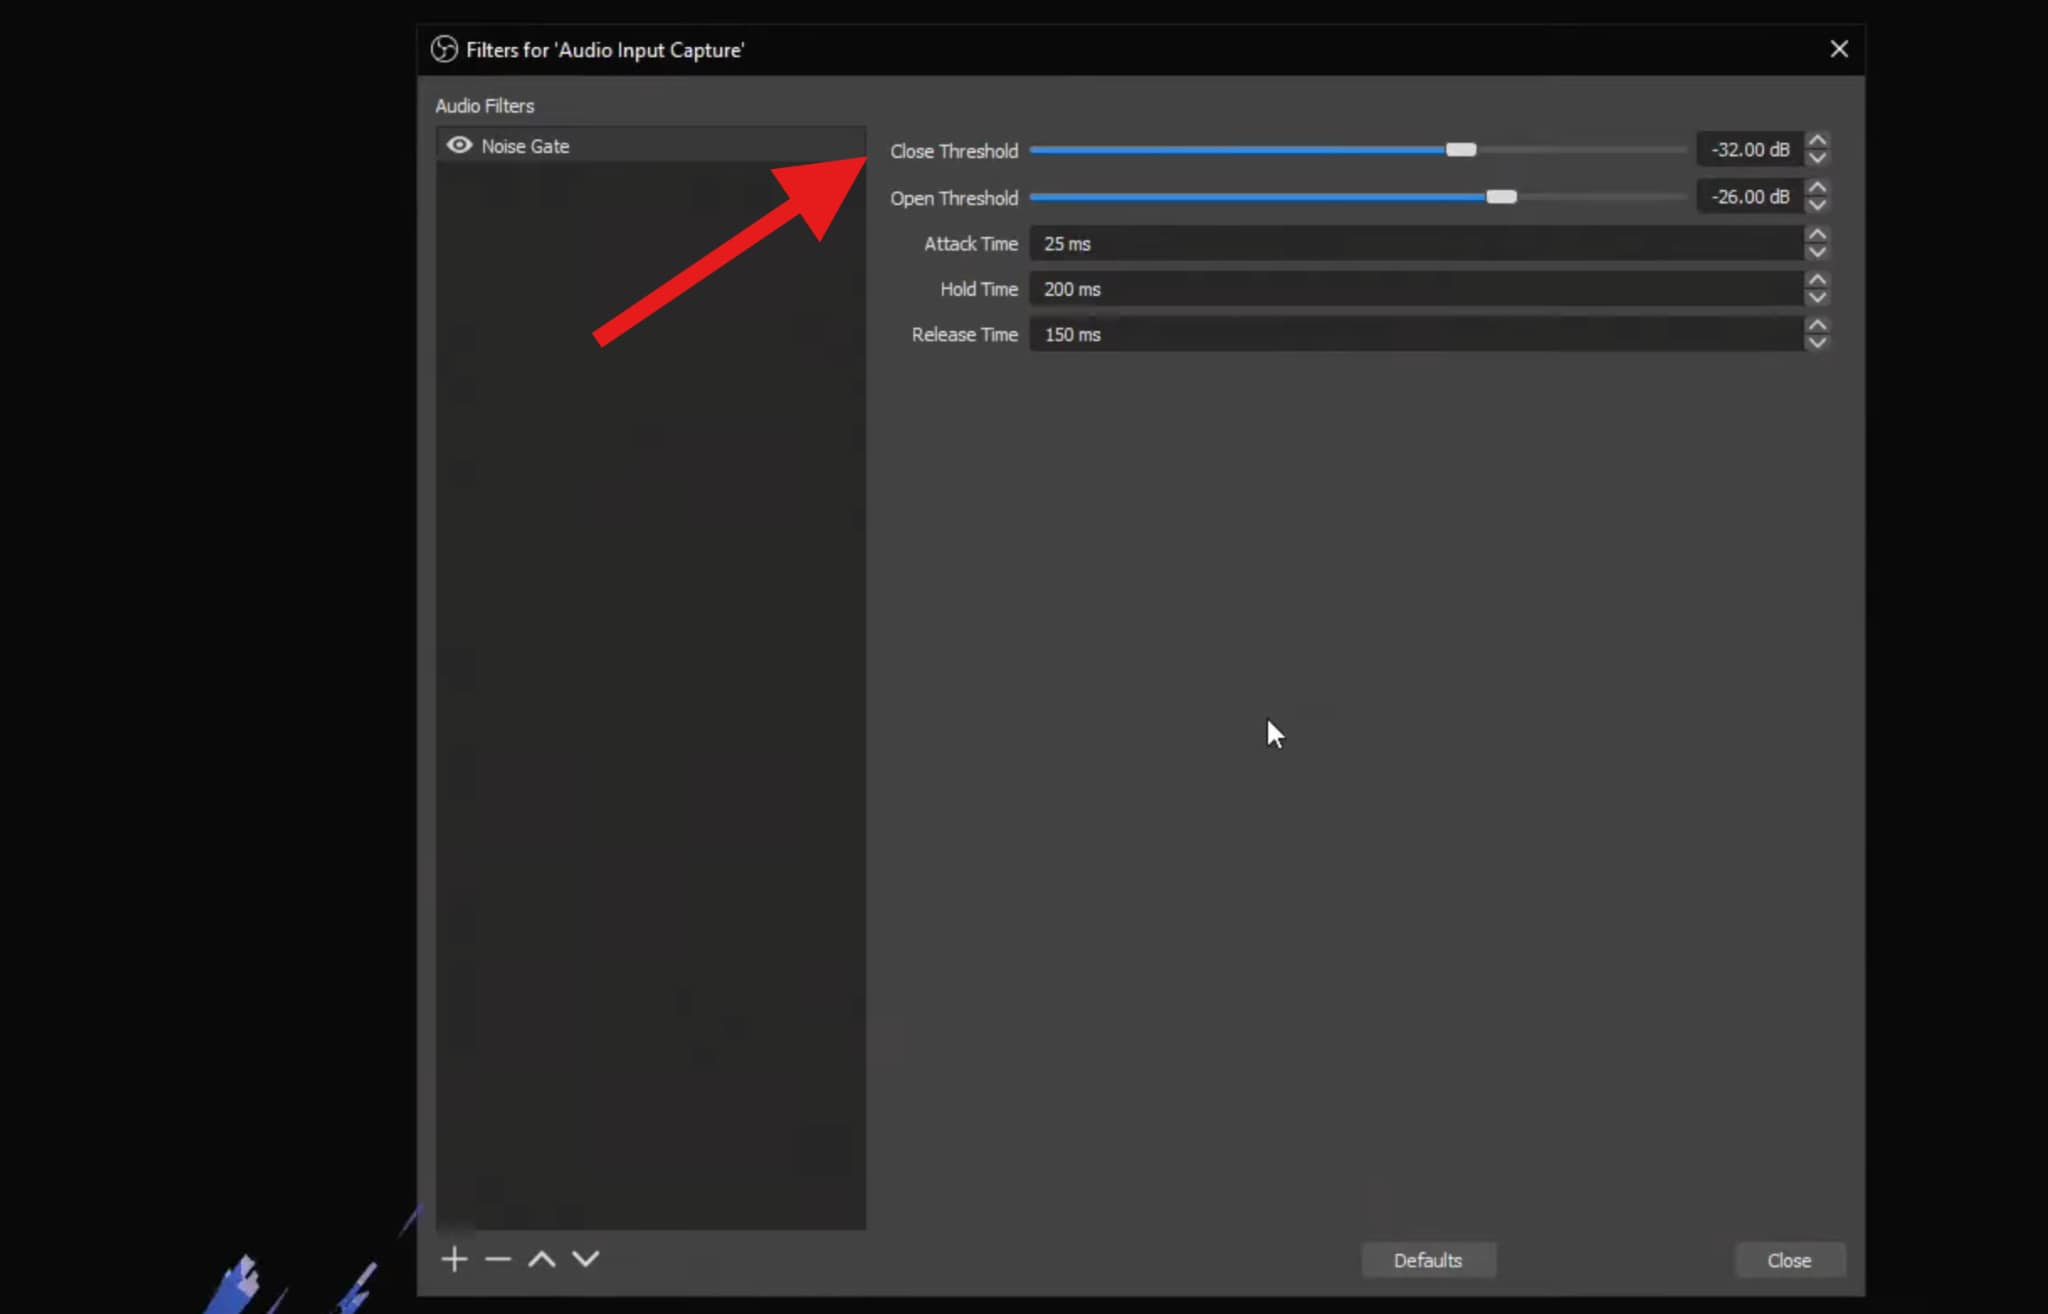
The gate is controlled by two thresholds:
- Open Threshold: The level at which your voice opens the mic.
- Close Threshold: The level at which the mic closes again after speaking.
When set correctly, your voice opens the gate cleanly, and background noise disappears during pauses.
Use a Noise Gate when noise is mainly present between phrases, not during speech. Mechanical noise and idle room noise respond well to gating.
Noise Gates should be subtle. If you can hear the gate working, you need to reduce the threshold amount.
To activate the Noise Gate, follow the same steps as before. When you click on the + sign, select Noise Gate.
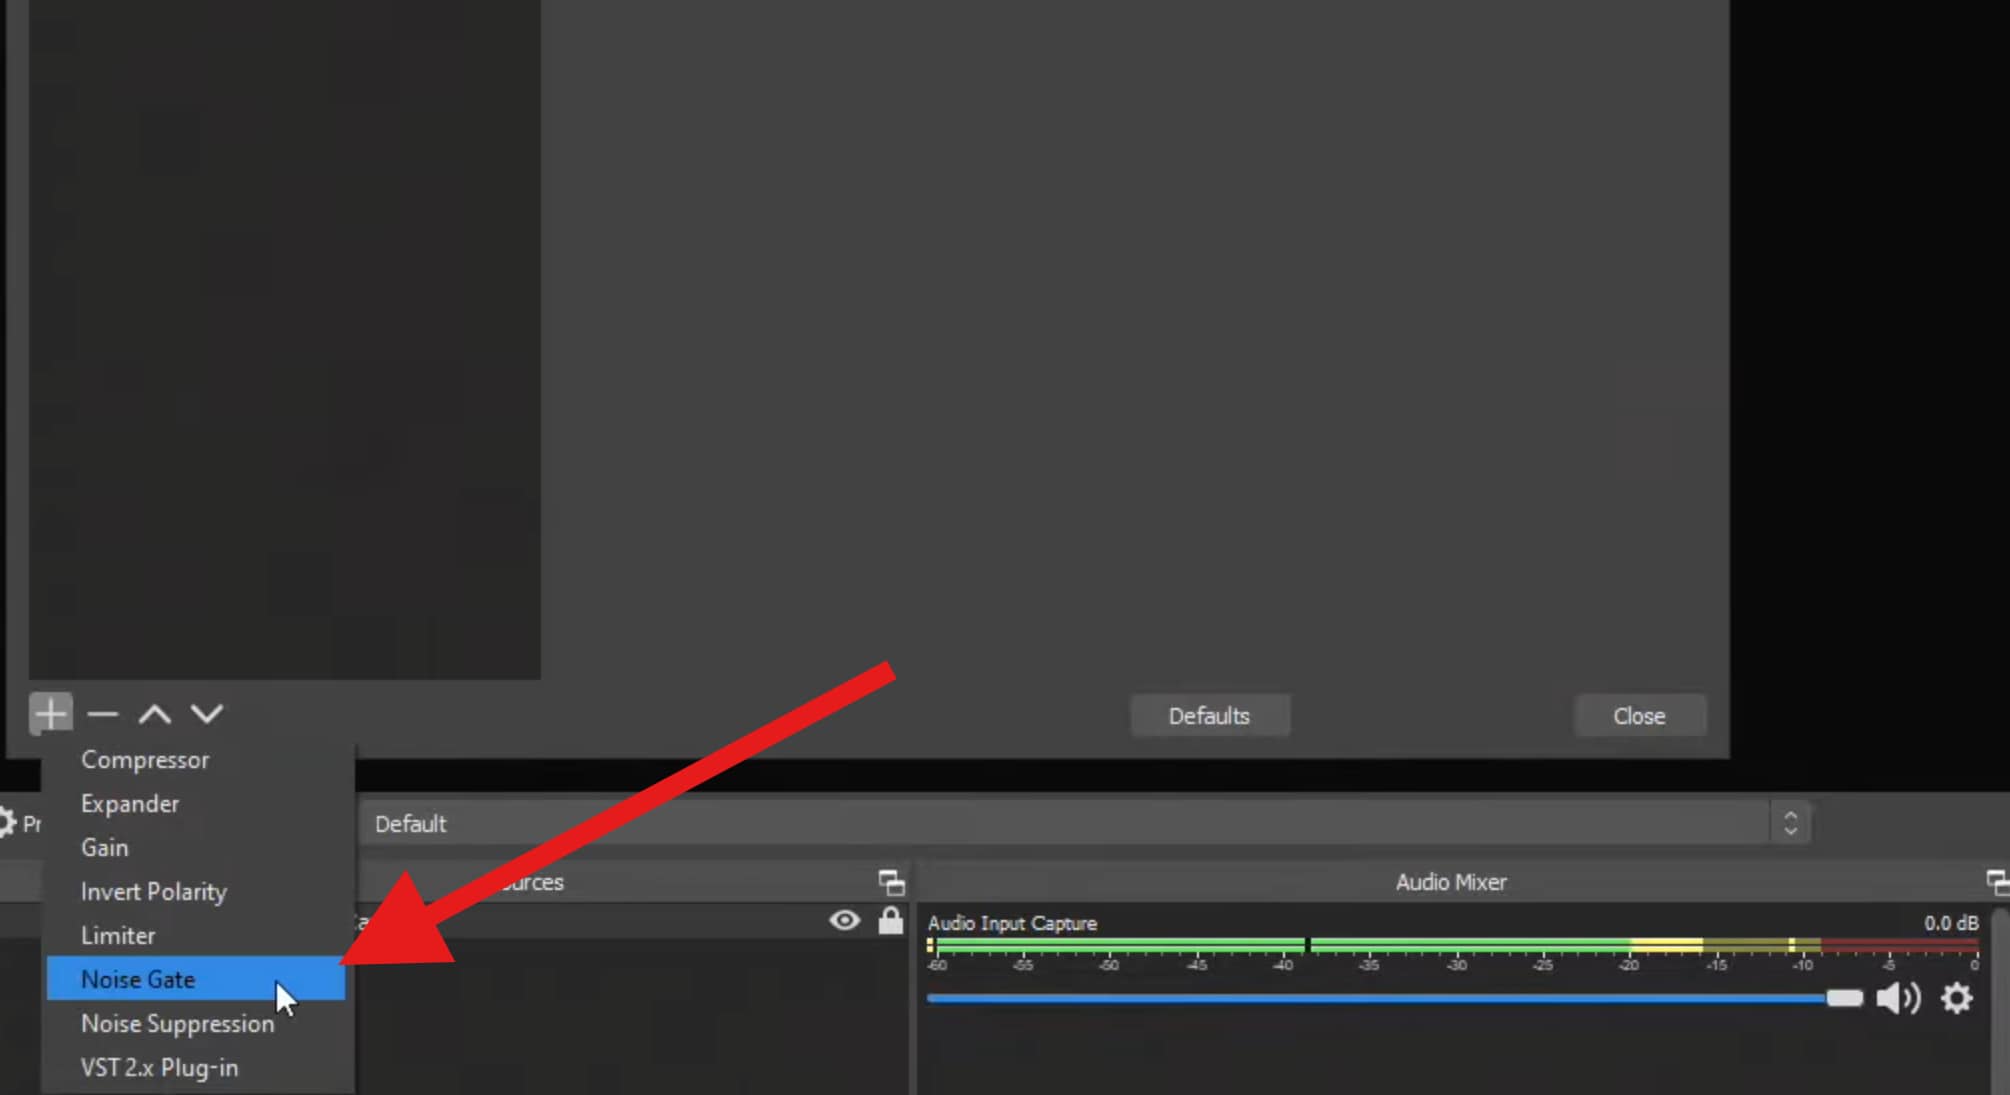
You can now experiment with different values until you get a result that works for you.
Noise Suppression vs Noise Gate in OBS
These two features solve different problems. One reduces noise continuously. The other removes noise during silence.
| Feature | Noise Suppression | Noise Gate |
| Works during speech | Yes | No |
| Removes noise between phrases | Partially | Yes |
| Risk of voice artifacts | Medium | High if misconfigured |
| Best for | Constant background noise | Keyboard, room noise |
| CPU usage | Higher (RNNoise) | Very low |
For most setups, use the Noise Suppression first, and the Noise Gate second. This combination keeps your voice clean while eliminating noise during pauses.
Best OBS Background Noise Removal Settings

So, as we have established, there are no fixed values that work for everyone. Instead, the settings you use should match your workflow and room setup.
- For live streaming: Use moderate Noise Suppression with conservative gating. Stability matters more than perfection. Avoid pushing filters to the edge.
- Podcast recording: You can be slightly more aggressive, but still prioritize a natural voice tone. Leave the room tone intact rather than forcing silence.
- Gaming commentary: Use Noise Gate to control keyboard and mouse noises, combined with light suppression to handle PC fans.
- Online classes or tutorials: Clarity beats silence. Keep suppression moderate and avoid hard gating that cuts softer speech.
- CPU considerations: RNNoise consumes more resources. If your system struggles, try to reduce the scene complexity before sacrificing audio quality.
Using OBS Plugins for Advanced Background Noise Removal
Third-party plugins and VSTs offer deeper control and smarter processing than built-in filters. Many use advanced algorithms or AI models. These plugins integrate directly into OBS and behave like native filters, but they come with trade-offs like higher CPU usage, setup complexity, and potential stability issues.
In any case, plugins are worth using when built-in filters can't handle your noise profile, but they should be tested carefully before going live.
Here's a quick video tutorial on how to install plugins for OBS.
And, here are the top three plugins for OBS background removal.
ReaFIR (via ReaPlugs VST)
ReaFIR is a powerful, free VST from the ReaPlugs suite that lets you build a custom noise profile and subtract it from your mic in real time. It's very flexible and effective when you take the time to train a noise profile for your environment.
Best for: Users who want adaptive noise profiling and hands-on control.
RTX Voice / NVIDIA Broadcast
NVIDIA's technology uses GPU-accelerated AI to remove background noise and echo from your voice in real time. It integrates with OBS via virtual audio devices, delivering clean results with minimal configuration.
Best for: Users with NVIDIA RTX GPUs who want top-tier AI noise suppression.
Krisp (VST or Systemwide)
Krisp is an AI-driven noise cancellation plugin that works as a VST in OBS or as a virtual audio driver systemwide. It excels at removing background noise like keyboard clicks, pets, and fan hum without making your voice sound processed.
Best for: Streamers and podcasters who need plug-and-play AI cleanup.
OBS Noise Removal Not Enough? Try an AI Background Noise Remover
OBS noise filters struggle with inconsistent noise, overlapping sounds, and heavily contaminated recordings. In these cases, AI-based noise removal works better because it analyzes the entire signal rather than reacting frame by frame.
AI tools usually offer one-click background noise removal, automatic (and better) voice separation, and overall cleaner results for recorded content. Now, there are many software options and online tools that can help with this, but today, let's talk about one of the best ones.
Media.io's Noise Reducer is designed for this exact scenario. It is not a live replacement, but a cleanup solution for prerecorded or recorded OBS audio.
You can use it before OBS, to clean prerecorded clips before importing, or after OBS, to clean recorded streams or podcasts. Here's how to use it.
- Open Media.io's Noise Reducer in your browser.
- Click on the designated area to upload your recorded audio file.
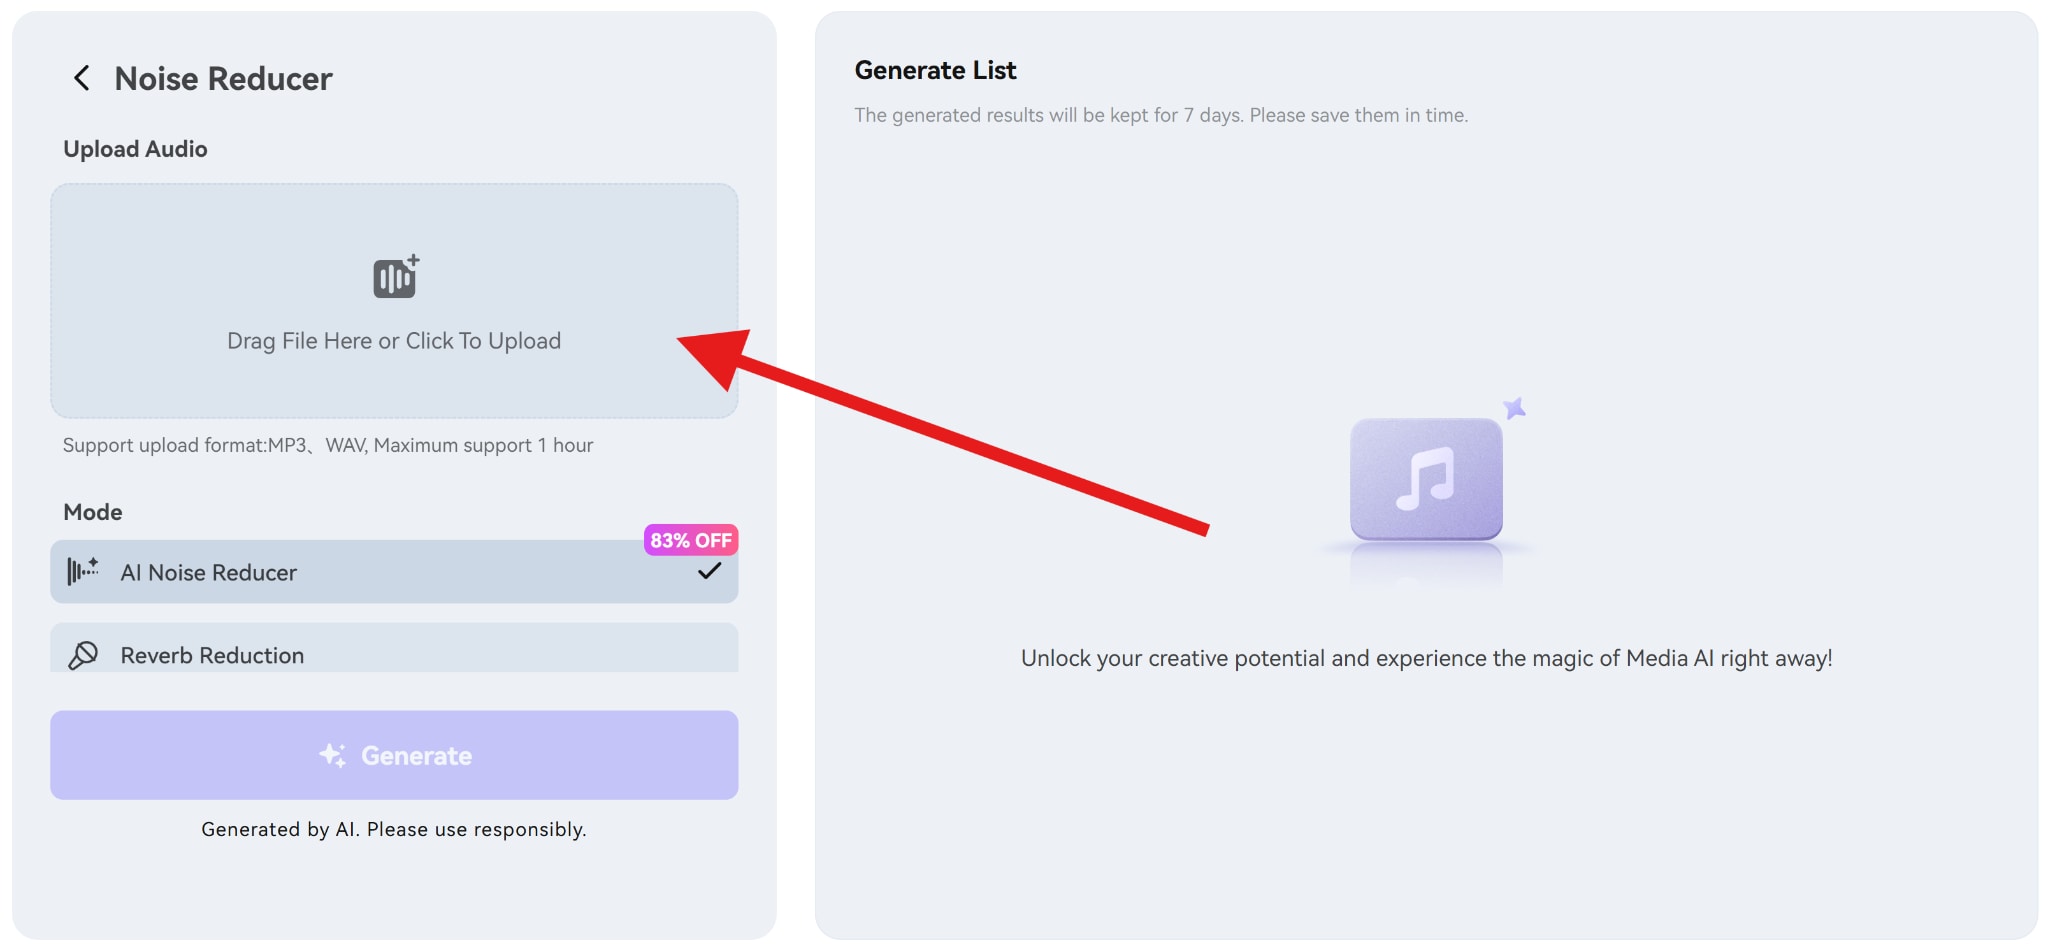
- Select the AI Noise Reducer and click on Generate.
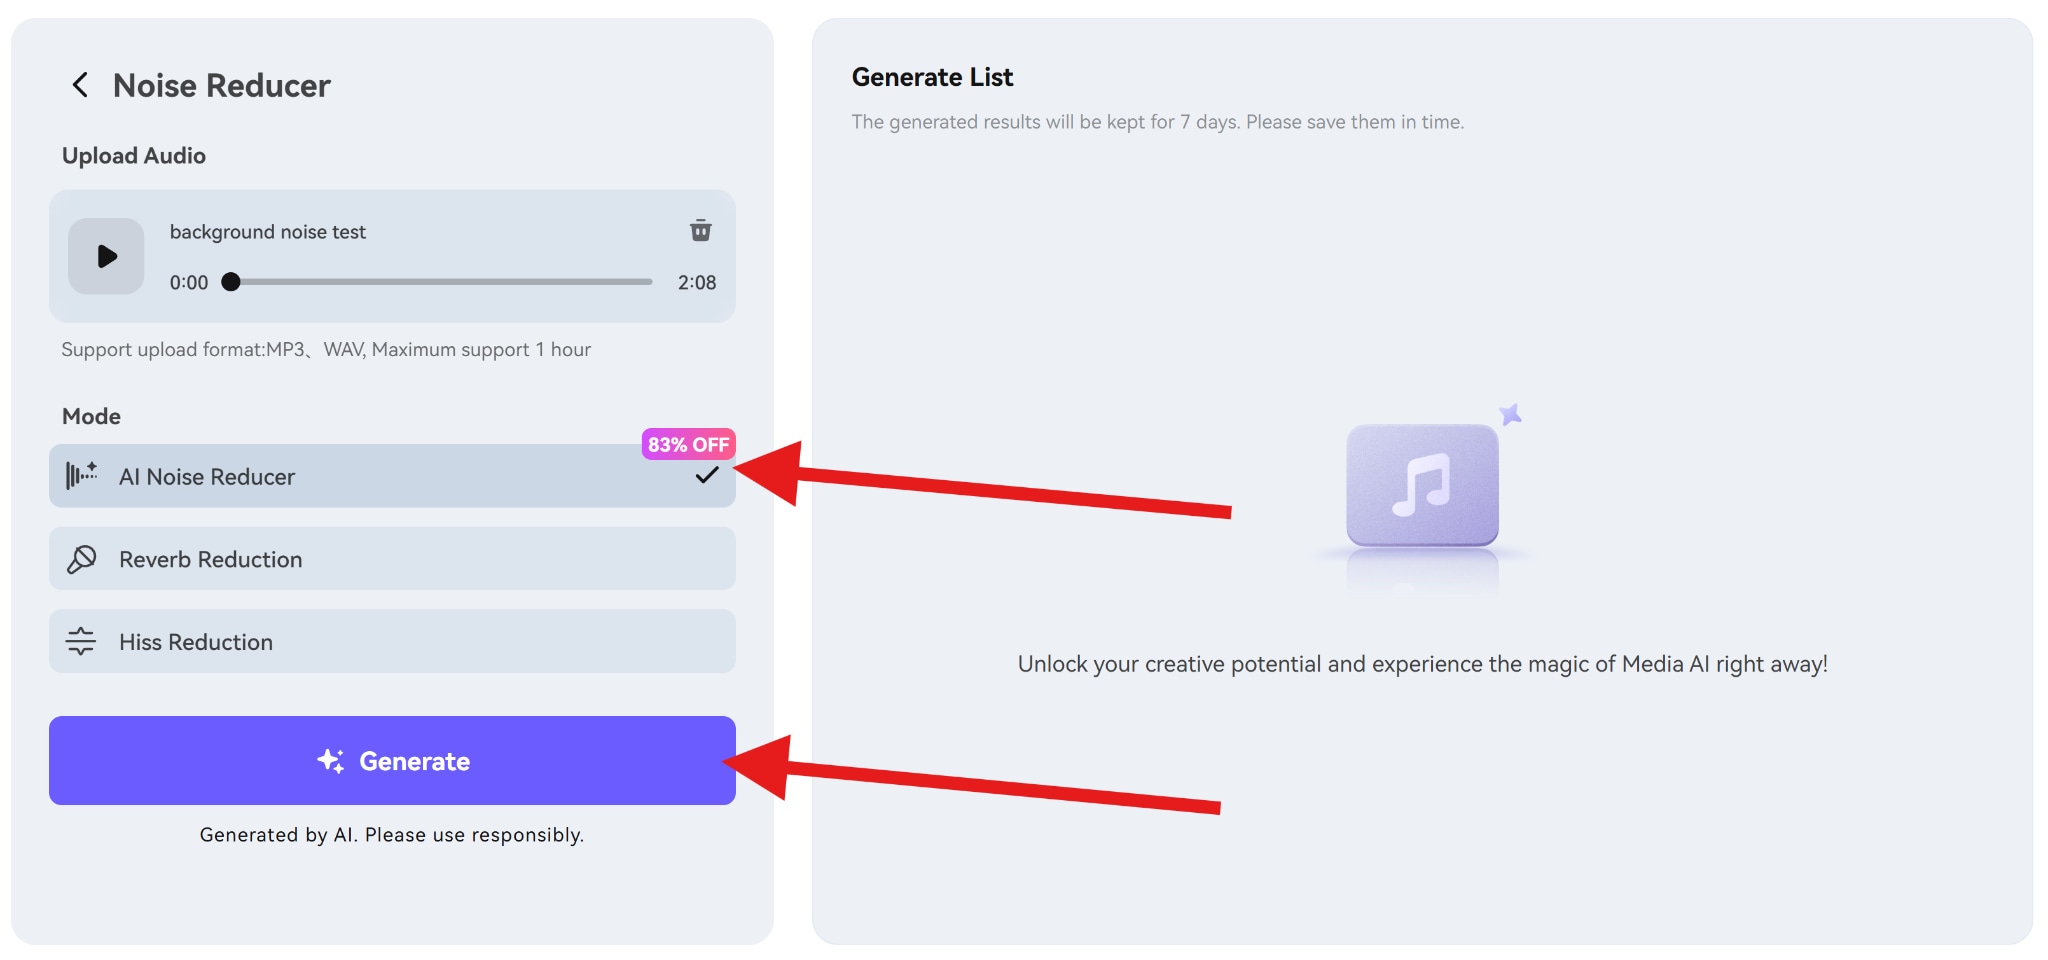
And, after a few moments, you will get a clean audio file with the background noise removed. Also, this tool offers noise-specific features, like Reverb Reduction, Hiss Reduction, Wind Noise Reduction, and you can even remove Click Noises specifically, which is great news for gamer streamers.
AI generally excels with inconsistent noise and heavily contaminated recordings with mixed environmental sounds. Try it and see how it works.
Conclusion
OBS background noise removal works best when you respect its role. Use built-in filters for light, real-time noise control. Combine Noise Suppression and Noise Gate carefully, and avoid aggressive settings that damage voice clarity. When noise becomes complex or inconsistent, plugins or AI tools are the correct next step.
Choose your solution based on your workflow. Live audio favors stability, while recorded content favors cleanup.
FAQ
-
Can OBS remove background noise from pre-recorded videos?
Yes, but it's not ideal. OBS filters work best live. For prerecorded content, post-processing tools like Media.io delivers better results. -
Do I need an expensive mic for good OBS audio?
No. Mic placement, room control, and filter setup matter more than price. -
Why does my voice sound robotic after noise removal?
Over-processing. Reduce suppression strength or gating aggressiveness. -
How to reduce keyboard noise in OBS?
Use a Noise Gate after Noise Suppression, and lower mic gain rather than increasing thresholds, or use Media.io's Click Noise Reduction feature.