

 ChatGPT
 Perplexity
 Gemini
 Claude
 Grok
Grok
There might be instances when you wonder about the process people use to reverse video on iPhone, and more importantly, why do they do that in the first place. Talking about the ‘why’ part, while playing a movie or a particular scene, a few frames need your focus as an audience. If you’re a filmmaker or a vlogger, you might understand the significance of reversing the video as sometimes it is even done to demonstrate the events that took place in the past.
What's more, the effect is also used to represent a person who is going in the flashback visually. Because this cannot be shown using any other method, at least not that easy, the reverse effect helps the directors to put this into the audience’s mind.
Considering these situations, the following sections explain how to reverse a video on iPhone in several ways, without installing any app and using some of the most popular ones.
Part 1: How to Reverse Video on iPhone without an App
Because iPhone doesn't have the built-in feature or tool to reverse a video, if you don't want to install any app to complete this task, you need to use some online video editors to reverse a video without the cost of any penny and installation. Here, I will introduce the free online video reverser tool from Media.io.
Media.io allows you to perform almost all complex and simple post-production tasks, such as editing, converting, and compressing videos, images, and audio files.
Furthermore, there will be no watermark on the exported video after editing and reversing videos using Media.io. The steps below explain how to reverse the video on iPhone has with Media.io:
Note: Before proceeding, make sure that you have transferred the source video to your iPhone’s storage and that the clip is accessible from within the Photos/Camera Roll app.
Step 1: Upload the Source Video to Media.io
Launch Safari on your iPhone (iPhone 13 Pro Max is used here for illustrations) and go to Media.io Online Video Reverser.
On the landing page, tap Choose Files, tap Photo Library, tap to select the video that you want to reverse, tap Choose from the bottom-right, and wait while the video is uploaded to Media.io.
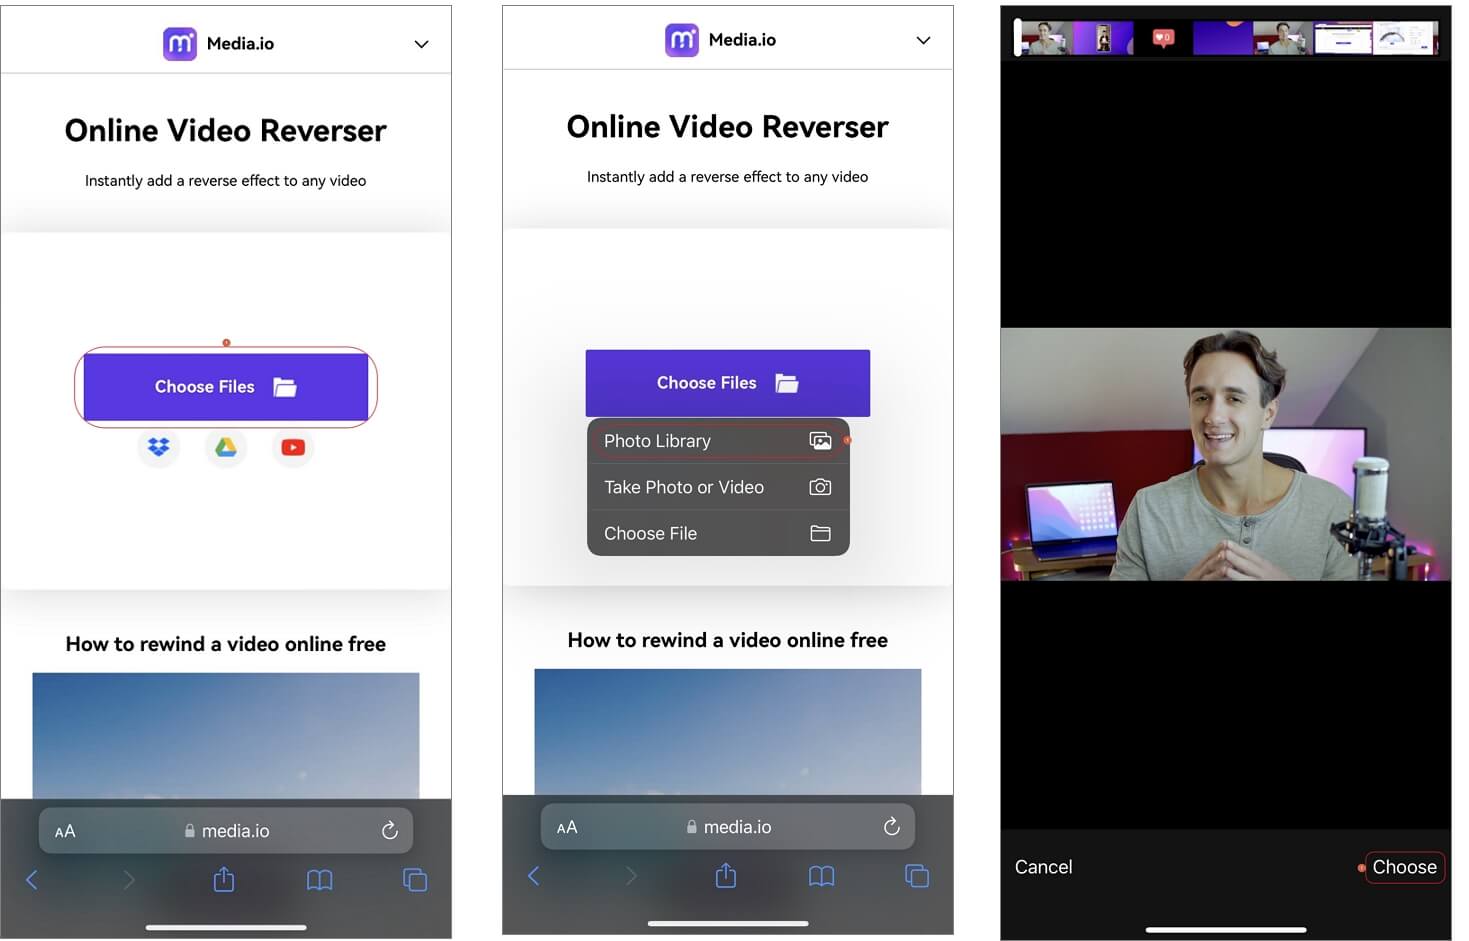
Note: Optionally, from the landing page, you can upload the source video from your Dropbox or Google Drive cloud storage account, or tap the YouTube icon to locate the footage if it is already published on the streaming media platform.
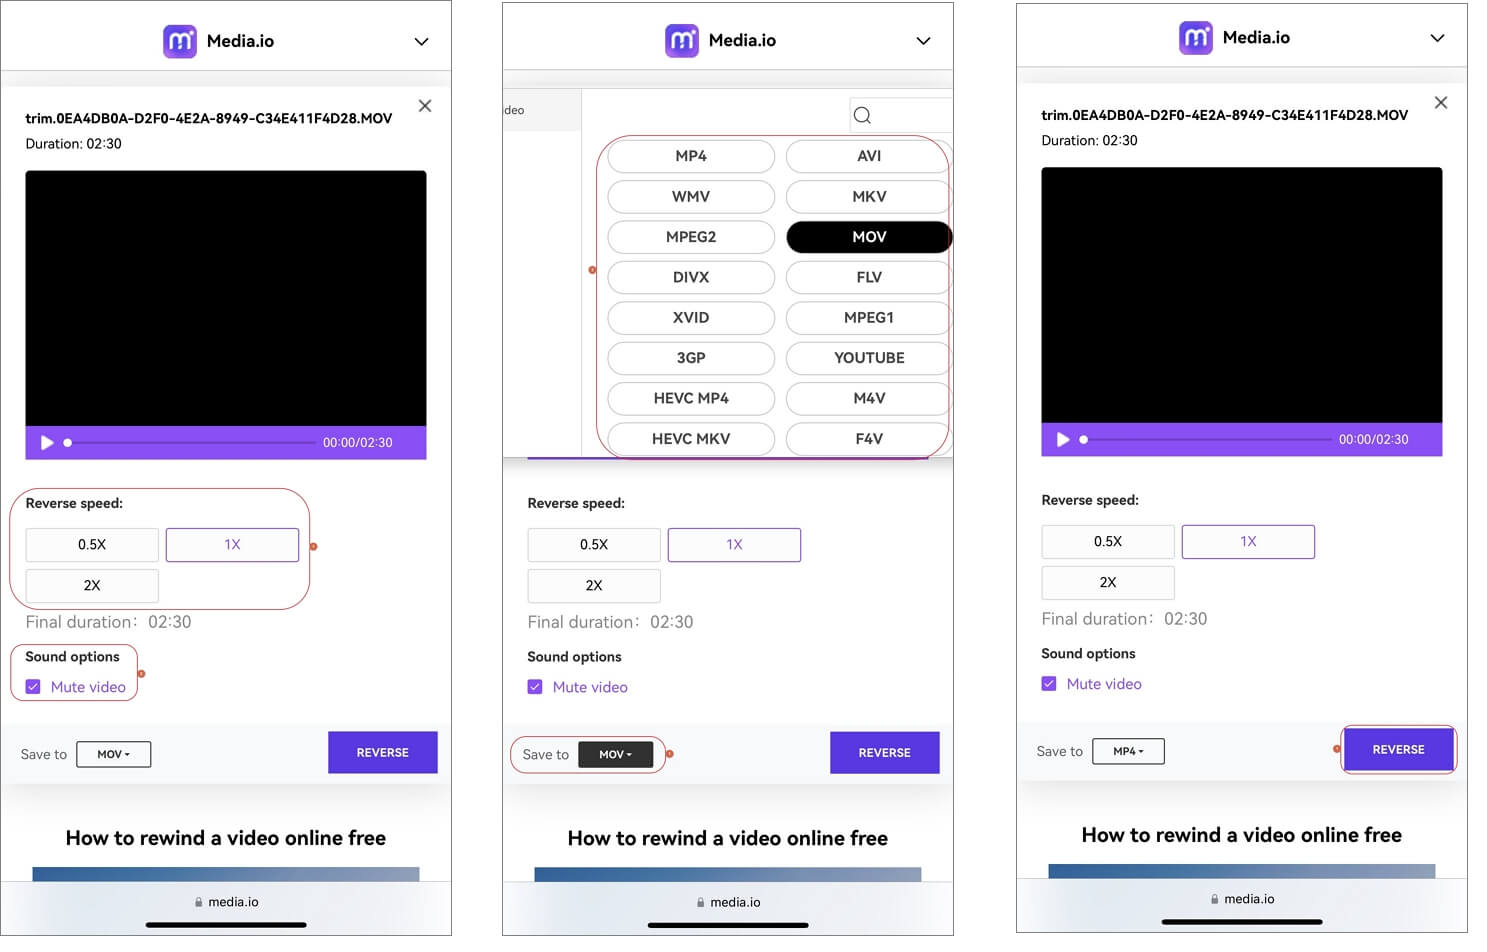
Step 2: Define Output Preferences
Once the clip is uploaded, tap to choose your preferred playback speed of the reversed video from under the Reverse speed section. Make sure that the Mute video box is checked under the Sound options section, so you don’t have to hear the glitched audio.
Tap to open the Save to menu and choose your preferred output format from the available list (MP4 is selected here for reference) and tap REVERSE from the bottom-right corner. Wait while Media.io processes the video according to your specifications to see how to reverse a video on iPhone without an app.
Step 3: Download the Video
Once the reversal process is complete, tap DOWNLOAD from the next page that appears and download the modified video to your iPhone.
Part 2: Best Apps to Reverse Videos on iPhone
Apart from using Media.io online video reverser to reverse video on iPhone, you can also install the following apps to complete the task without connecting to the Internet.
1. FilmoraGo
FilmoraGo is another video editing app from Wondershare which can be used on mobile devices, including iPhone and Android. The intuitive interface makes it simple yet powerful enough to manage multiple timelines. You can do some basic video editing such as trimming, splitting, merging, adjusting the playback speed, rotating the video, or adding animated texts and stickers.
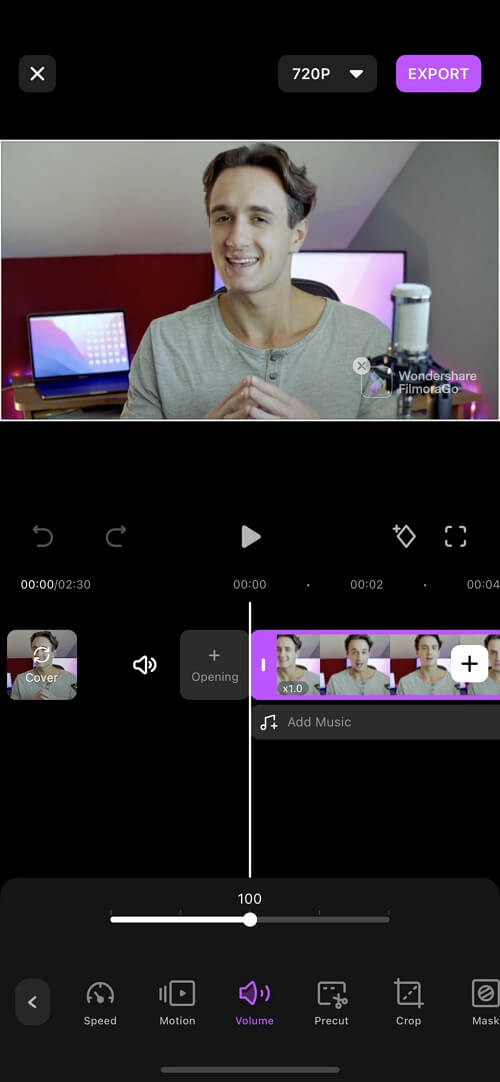
- Launch FilmoraGo on your iPhone after installing it from the App Store and then tap the NEW project to import the source video that you want to reverse;
- After the video is loaded on the timeline, you need to mute the video first by tapping the Volume button from the available tools at the bottom and dragging the volume slider to the left to set it to 0 (this will mute the video).
- Scroll the toolbar at the bottom to the right to tap Reverse, and then wait while FilmoraGo reverses the video
- Tap the Resolutionoption from the upper-right area, and use the available Resolution and Frames per Second sliders to define output preference
Watch the video below to find out more details about reversing video on iPhone with the FilmoraGo video editing app.
2. ReverseVid
ReverseVid is an app that is particularly dedicated to reversing the video clips that you import to it. At the time of this writing, the program offers three subscription plans that are per week, monthly, and annual basis.
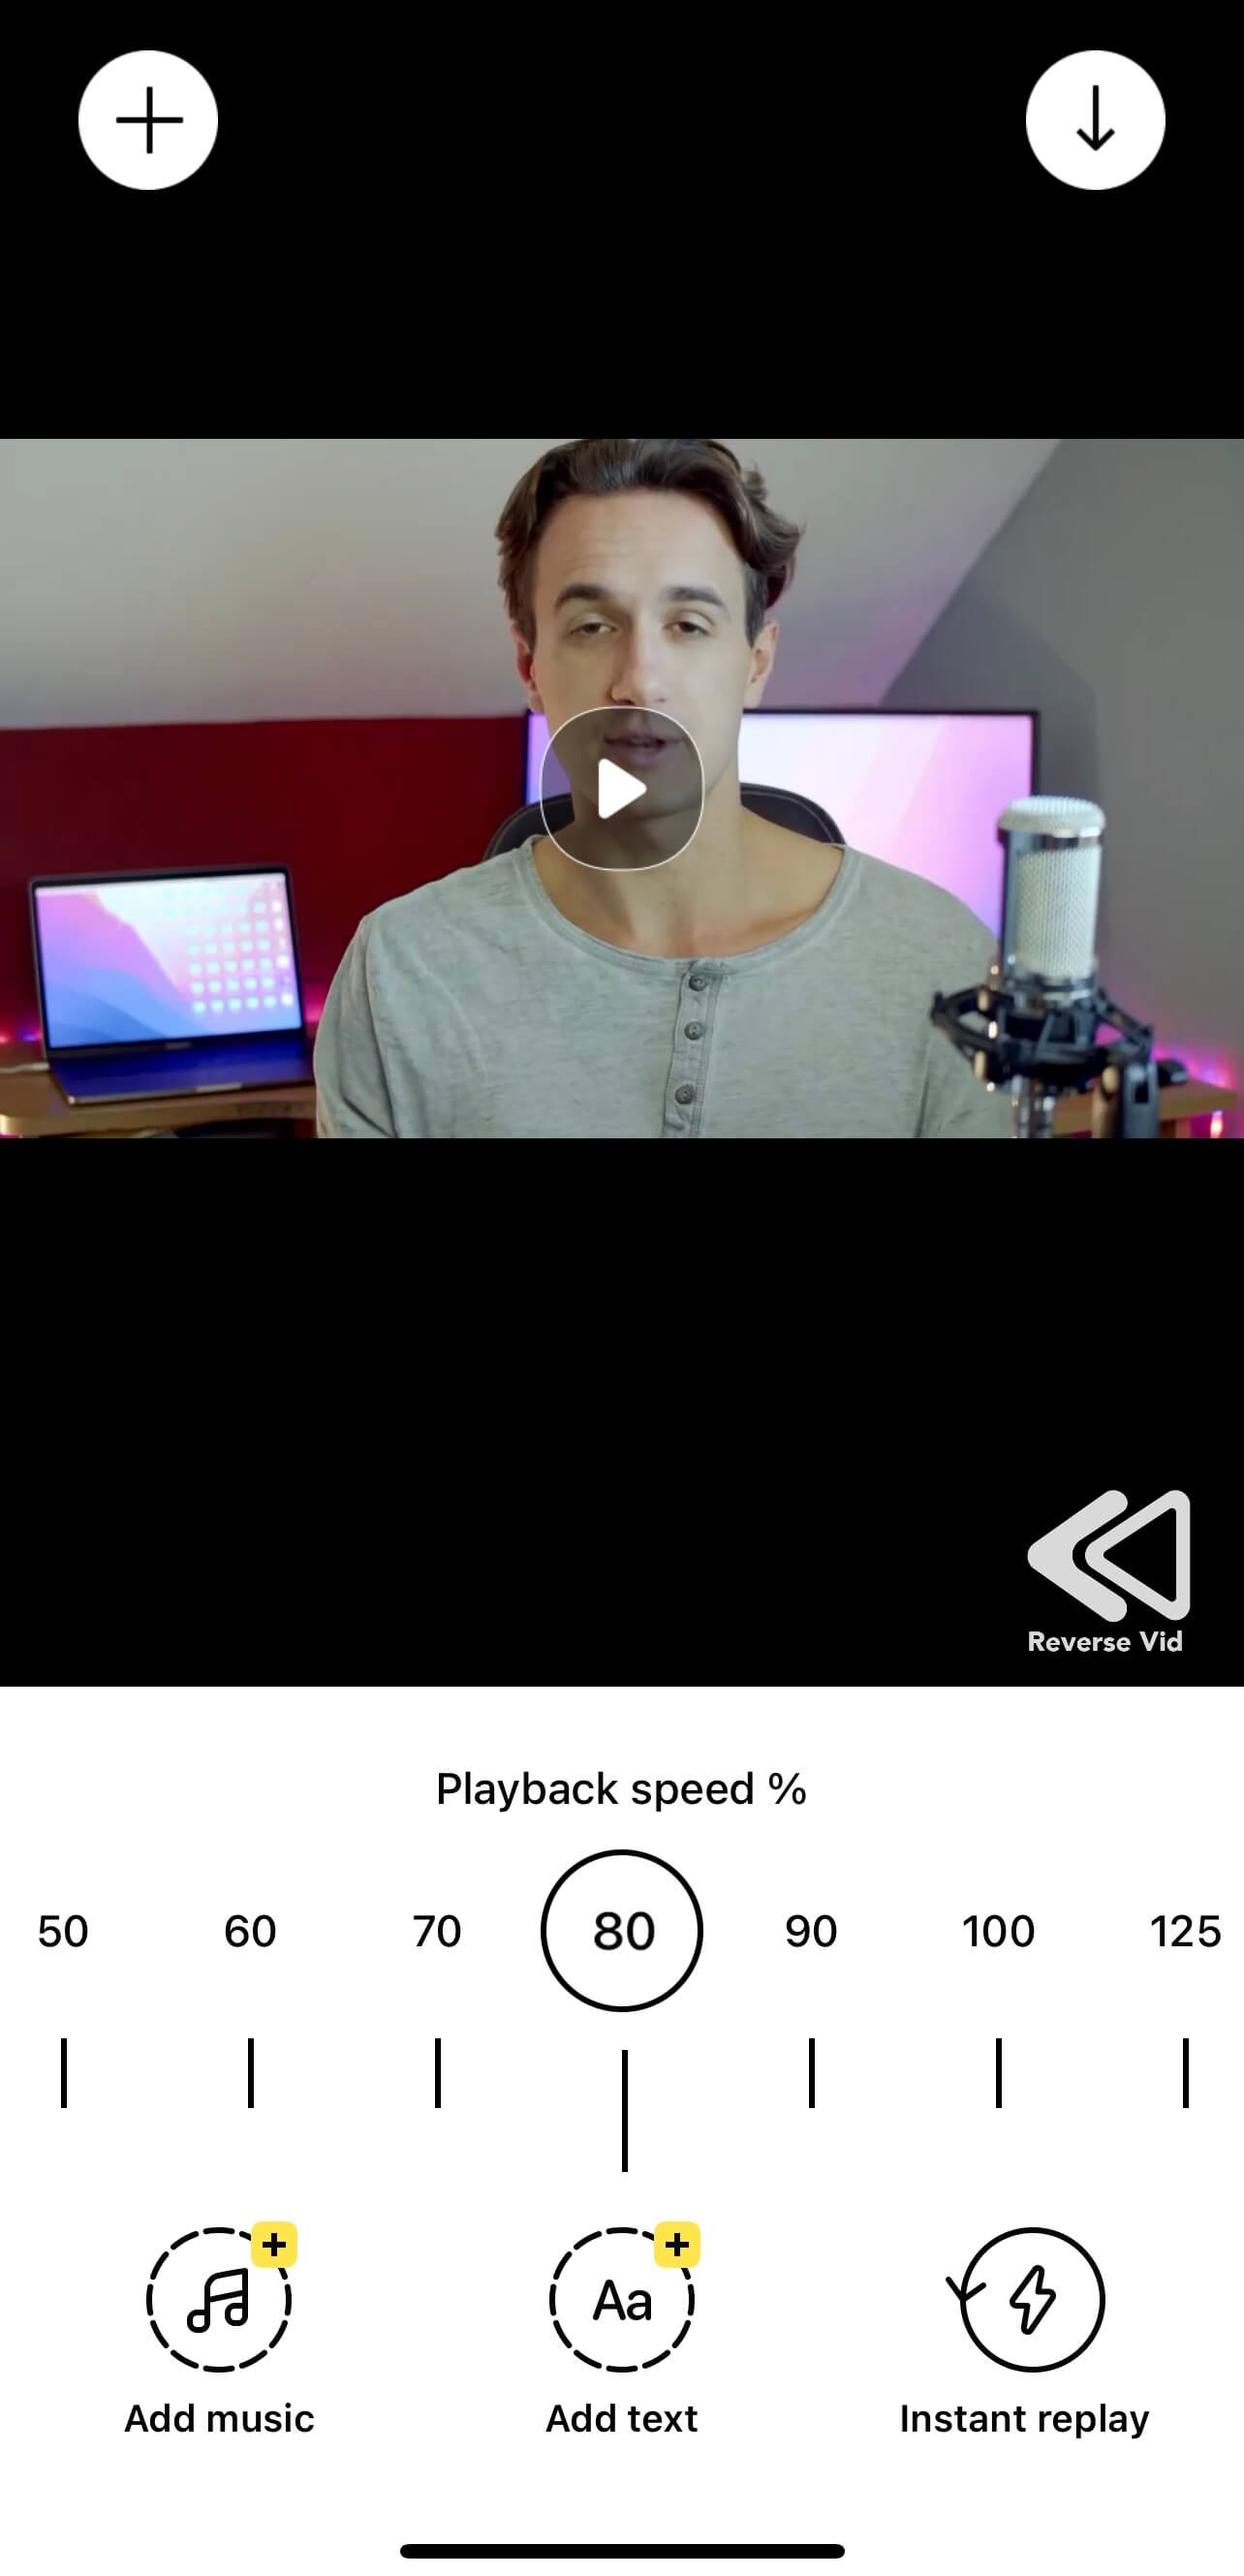
The process of how to reverse a video on iPhone with ReverseVid is given below:
- Launch ReverseVid on your iPhone and tap Choose from the library;
- Select the source video that you want to reverse and tap Choose from the bottom-right corner of the next screen that appears
- On the main interface, use the options that are given at the bottom to add music and annotations to the footage
- Use the Timeline meter to define the playback speed of the reversed video, and then tap the Save/Download button from the top-right corner to export and download the modified video to your iPhone
3. KineMaster
KineMaster is one of the most used video editing applications on Android and iOS platforms. The program is so popular that many times the users with some experience on it consider and introduce themselves as professional editors, and up to some extent, they are good at it too. KineMaster is versatile and is also populated with several advanced tools and features. Because of this, it wouldn’t be wrong if it is called a complete post-production mobile app.
KineMaster is free to use and offers monthly and annual subscription plans to unlock its advanced features.
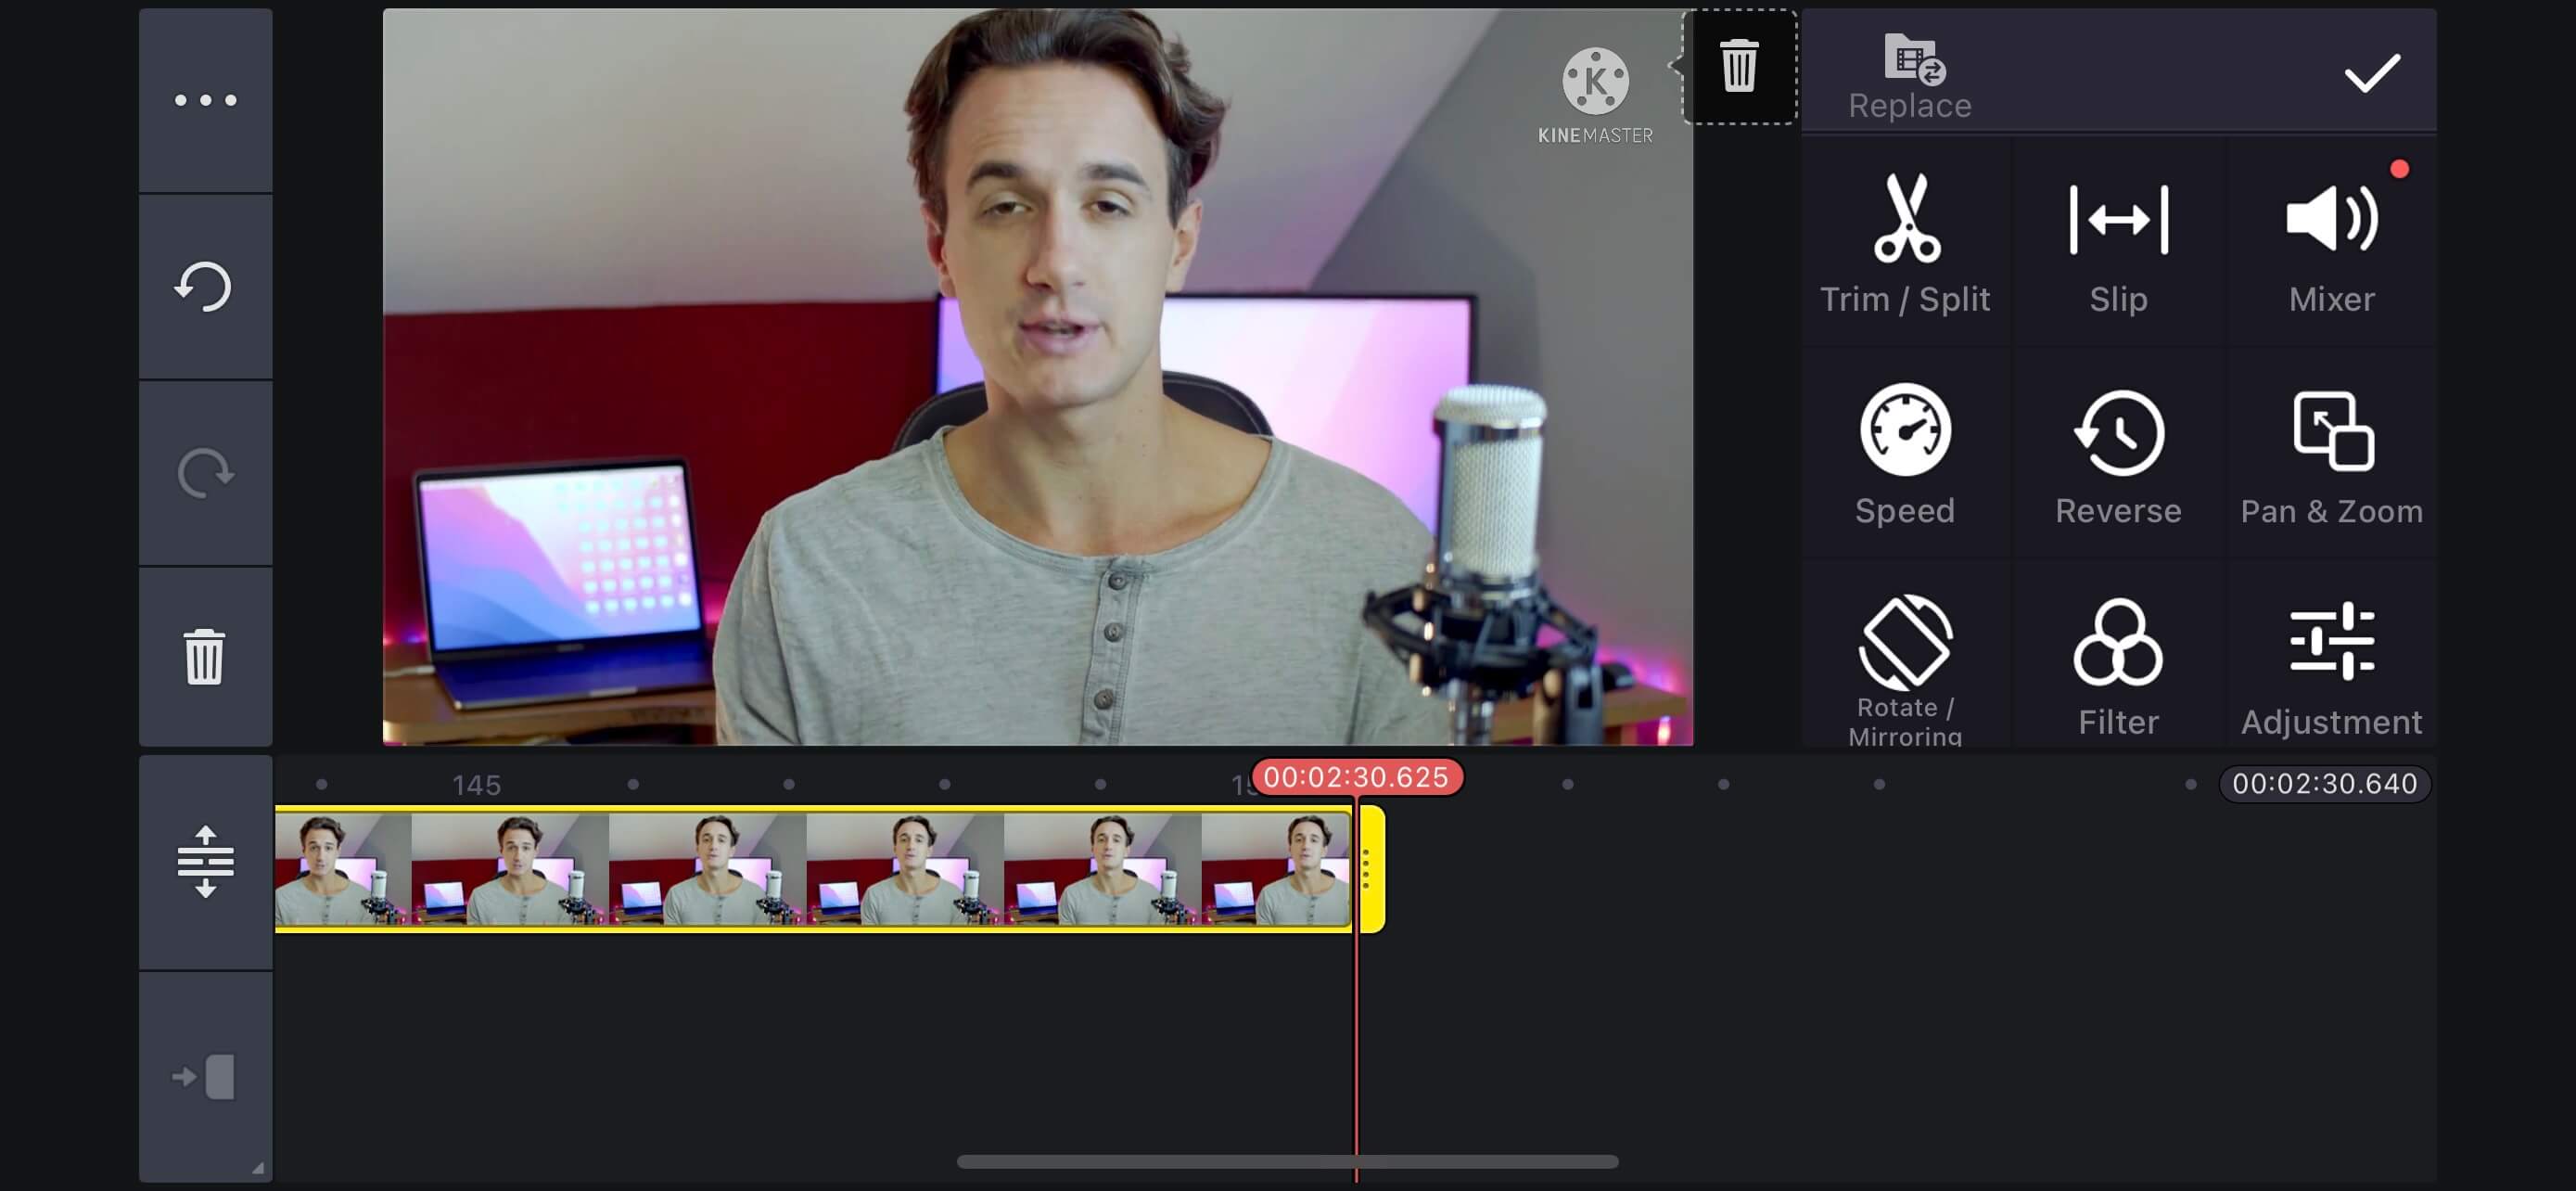
The process on reverse video iPhone with KineMaster is given below:
- Launch KineMaster on your iPhone and tap Start on the first screen
- Tap Create New and choose an output resolution by tapping the tile with your preferred aspect ratio and tap Next from the top-right corner
- Import the source video to reverse, and tap OK (tick mark icon) from the top-right corner
- Tap to select the media track in the Timeline, and then tap Mixer from the panel on the right. Reduce the Volume slider to 0 to mute the video and tap OK from the top-right
- Select the media track again and then tap Reverse this time from the right panel to wait while KineMaster reverses the video
- Tap OK from the top-right to save the modifications and tap Share from the top-right corner
- Define output preferences on the Save and Share screen and tap Save as Video from the bottom to reverse video on iPhone with KineMaster
Watch the video tutorial below to find out more details about reversing videos with KineMaster:
FAQs about Reversing Videos on iPhone
1. Can I reverse a video with iMovie on iPhone?
At the time of this writing, unfortunately, the iPhone/iPad version of iMovie doesn’t have any option to reverse the video. However, the Mac version of the program does allow you to do that with ease.
2. How to reverse a video on an iPhone without an app?
If you want to know how to reverse a video on iPhone without an app, the answer is simple. You must rely on an online program that works on web browsers. One such tool is Media.io online video reverser which is quite reliable and efficient and exports the videos without any watermark even if you’re using a free subscription plan.