Creating a watermark can be a challenging procedure if you don't know the tools and tricks. However, if you are going to upload your photos on websites or social media, it is important to add a watermark to preserve copyrights. This article is specifically designed to help users who don't know how to create a watermark. The best tool you can use for this purpose is Lightroom.
Here you will learn how to create a watermark in Lightroom. Other than this, we will also discuss a tool that will help you to remove watermarks from the photos.
In this article
Part 1: What are the Advantages and Disadvantages of Using a Watermark
Adding a watermark in a photo is helpful, yet there can be some scenarios that can bring some disadvantages to you. There are always advantages and disadvantages to using a watermark in a photo. If you want to discover both of these possibilities, have a look below:
Benefits of Using Watermarks in Photos
- With the help of a watermark, you can preserve the copyright of your work while keeping pace with professionalism.
- Watermark also ensures that when you share your work with other people, it will get brand recognition.
- People prefer to buy things from a known brand. You can attract more customers and increase your business with watermarks.
- You can also use the watermark to promote your products and services. Other than this, it also helps to make images more visually appealing.
- If you have the watermark embedded in your work, it will never be used without your permission. Thus, you can also ensure the attribution and credits with this.
Drawbacks of Using Watermarks in Photos
- If not made with a reliable tool, watermarks can compromise your images' overall quality and appearance.
- It can also lead to a negative user experience, such as users having difficulty seeing the details of the watermark that is not located accurately.
Part 2: How to Use Lightroom to Create a Unique Watermark
Adobe Lightroom is one of the industry standard tools among photographers and photo editors. You can also make watermarks in the Lightroom to show consistency in your photos. Moreover, you can also make eye-catching edits to the pictures to stand out on social media platforms. From exposure level to opacity of effects, you can customize every bit of your image with this.
The factors that make it a tool of choice are nondestructive editing and cataloging systems. You can also incorporate useful plugins for a more streamlined workflow. Moreover, Lightroom can also help with face detection along with watermark creation.
Key Features of Lightroom
- Adobe Lightroom offers the AI-powered feature of Denoise, through which you can remove digital noises from the pictures. Don't worry about the picture quality because you can do this without impacting it.
- To make more precise and accurate edits of the facial features, you can also get assistance from Masking.
- There are several presets in Adobe Lightroom, especially for portraits. This can include Darken Beard, Whiten Teeth, and more.
- If you want to give your videos a classic touch, Lightroom can convert any video into black and white and enhance its details.
Instructions for Making Watermark With the Help of Lightroom
Here are the instructions which you need to follow to know how to create a watermark in Lightroom:
01of 04
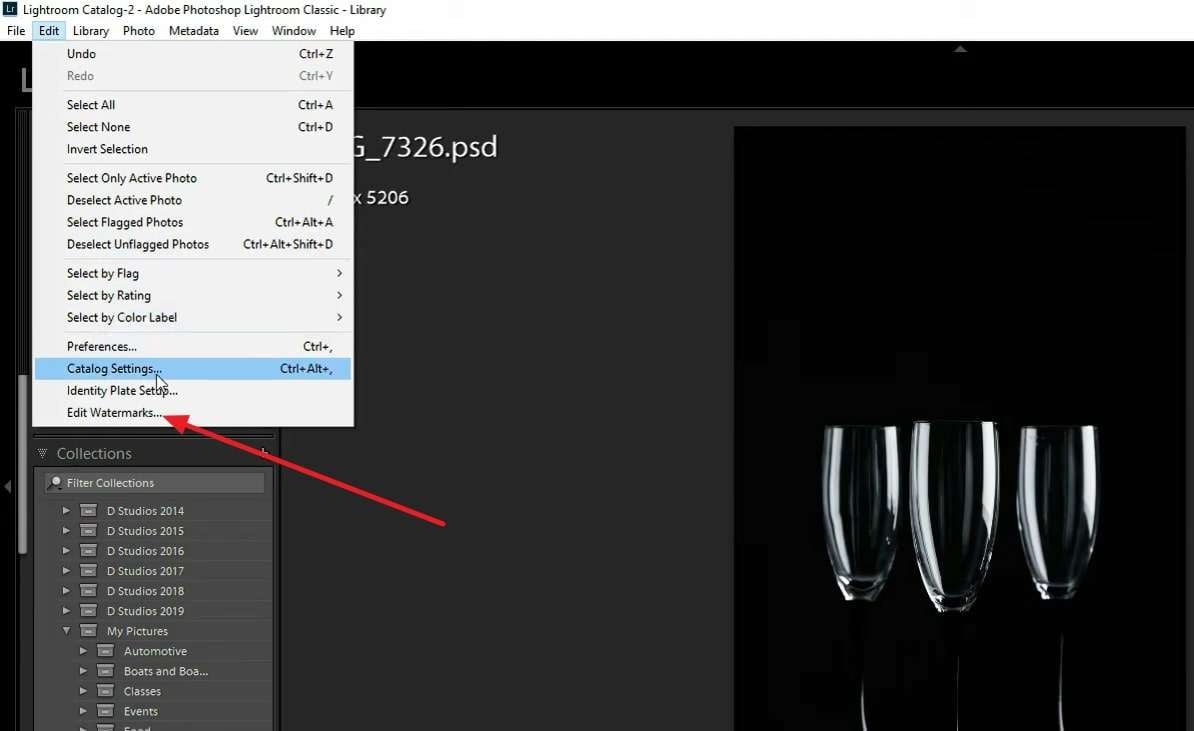
Launch Lightroom on your desktop and import the image of your choice. Next, click the “Edit” tab and hit “Edit Watermark.” On the pop-up window, write your watermark text and select the "Font" option. Now, choose the font of your choice and confirm the "Align" option of your choice.
02of 04
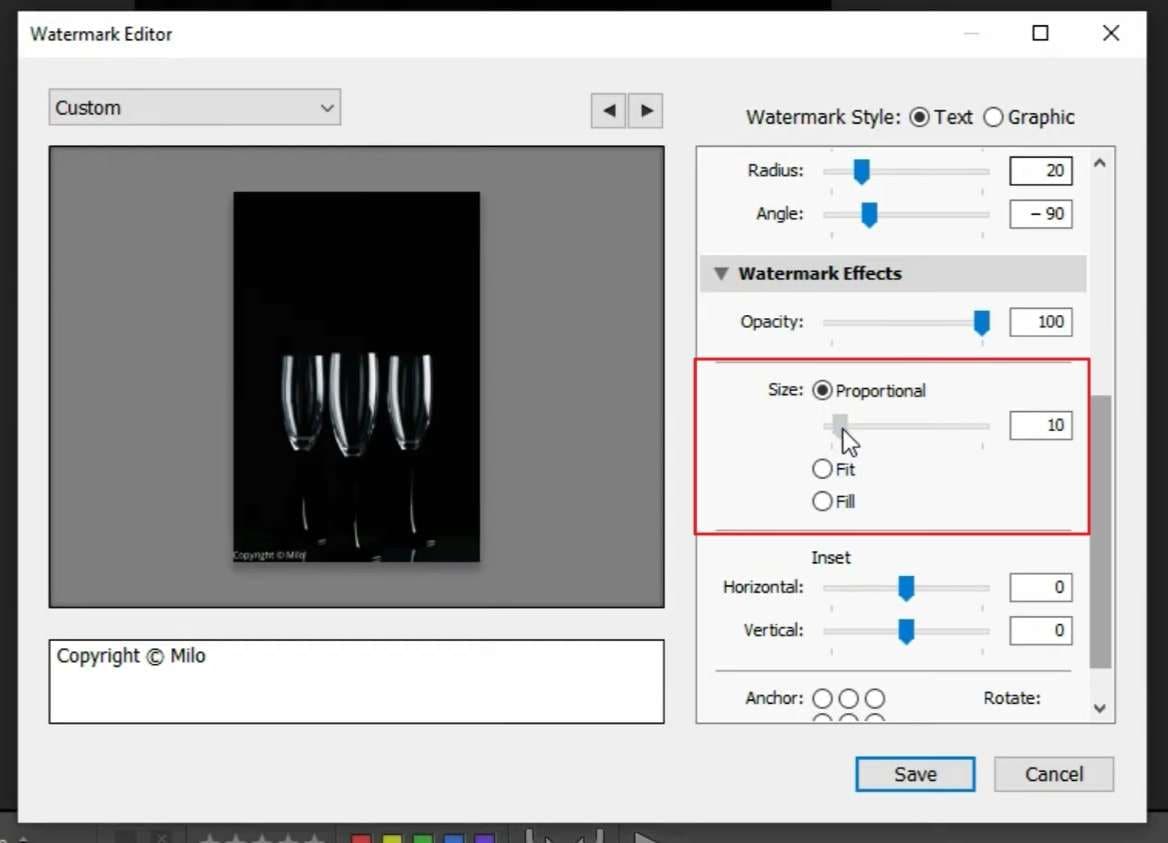
Hereafter, go to the "Shadow" section, and from here, you can manage "Opacity," "Radius," and "Angles." You can also enable or disable the "Shadow" per your needs. To manage the size of the watermark, go to the "Size" section, and you can select the "Proportional," "Fill," or "Fit" options.
03of 04
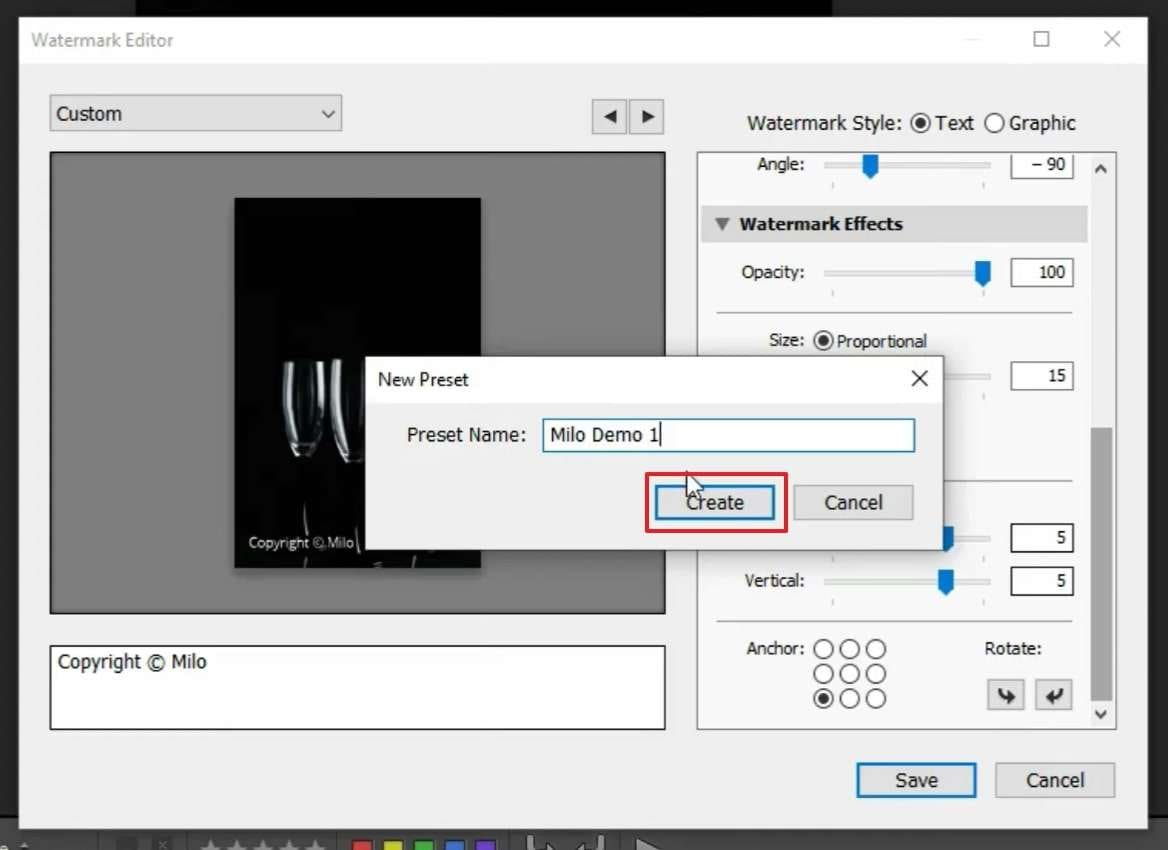
After adjusting the watermark, click the “Save” button and select "Create" after renaming it. Select the image of your choice and tap the "Export" button. To proceed, click "Create" and select a folder, or you can make a new one.
04of 04
Hereafter, go to "Watermark" and select the recently made watermark. Once selected, hit the "Export" button, and this will add a watermark to your images. If you wish to add an image watermark, follow the above-given steps, but you have to select "Image" rather than adding text.

Bonus Tip: The Perfect Tool to Remove the Watermark Disturbing the Picture Quality
If you are a Youtuber and wants to make a video on how to remove watermark from images, this section will help you. The best tool you can use for this purpose is AniEraser. Using AniEraser, you can remove any watermark from the images without impacting their content or layout. Above all, it never compromises the quality of images, so you can also use it for professional purposes.
The AniEraser is not a complicated tool, and you can use it even if you are new to the field of photo editing. The interface of this tool is quite beautiful and well-structured, so you will not face difficulty while exploring it. The processing speed is also blazing fast, which helps to remove watermarks in a limited time.
Key Features of AniEraser
- With its AI powers, you can remove texts and watermarks from the photos by highlighting the unrequired parts.
- It also helps remove several elements from the images, such as birds, emojis, or face spots.
- Before downloading the images to the device, you can preview them to analyze the results and prevent mistakes.
Instruction to Remove Watermark from Photo with AniEraser
Many of you think removing a watermark from several images can be hectic. Yet, it is not true if you follow the steps accordingly. To remove the watermark from photos, feel free to follow the instruction provided here:
Step1Access AniEraser and Add the Image
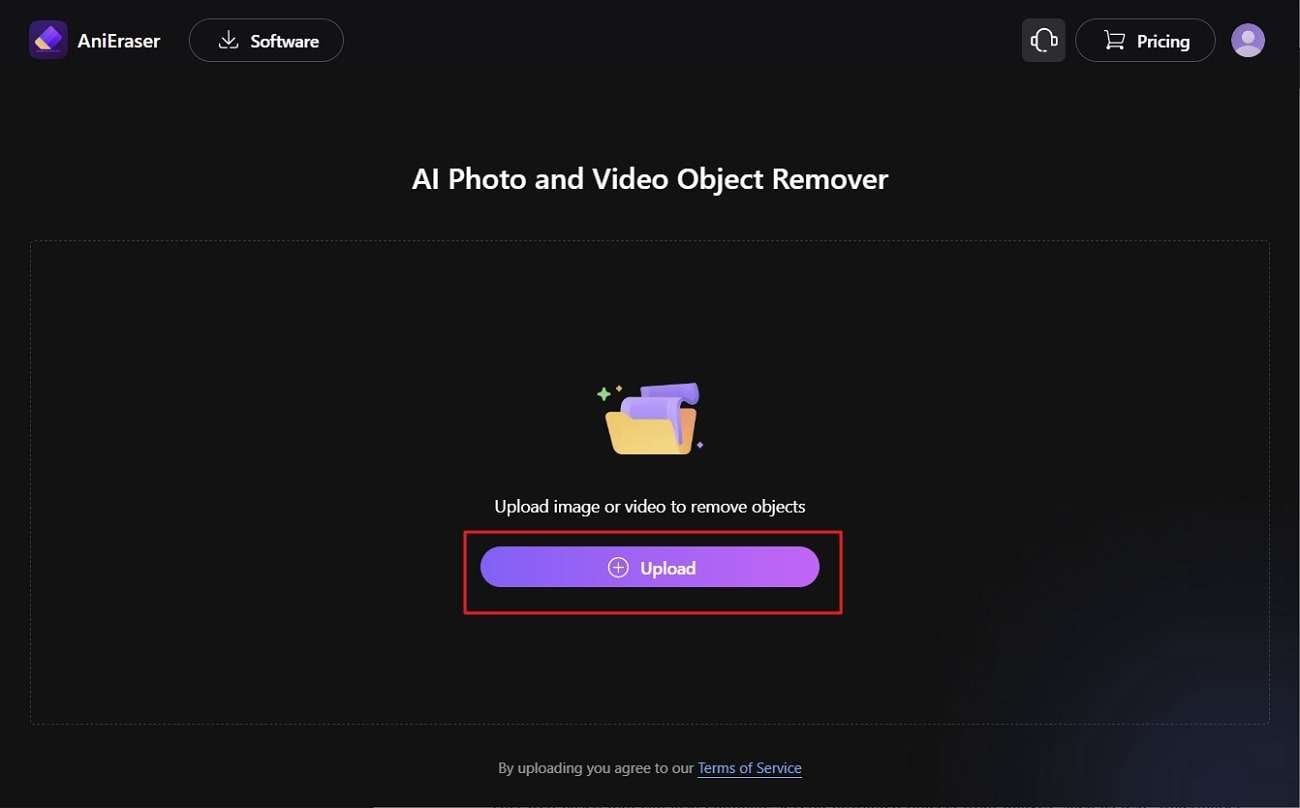
To get started, search for AniEraser on your browser and launch it. From the home screen, select "Upload Video or Photo" and click the "Upload" button. Next, add the image from which you need to remove the watermark.
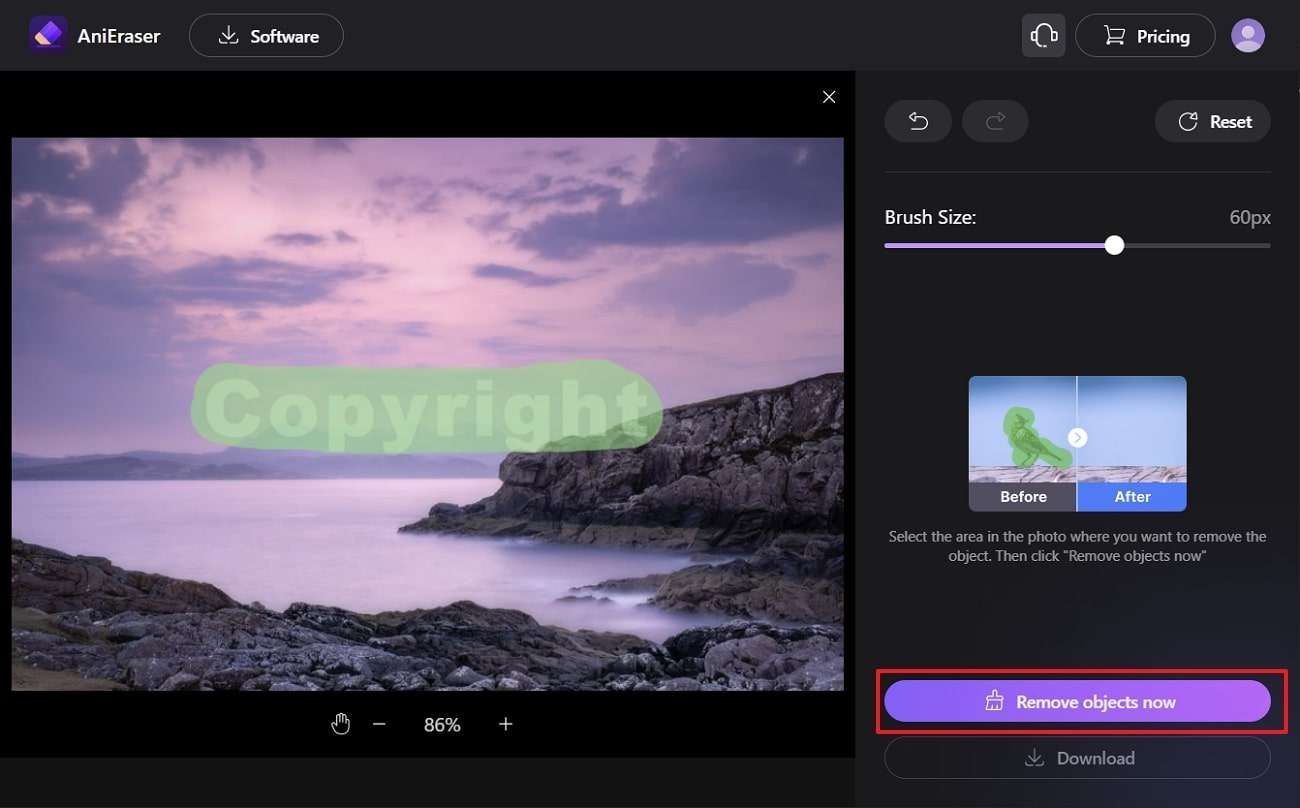
Step2Remove Watermark and Save the Image
To proceed, manage the size of the brush with "Brush Sliders" and highlight the annoying watermark on the photo. Make sure you highlight the watermark with precision. After highlighting, click the "Remove Objects Now" button and select the "Download" button.