
Did you know that hiss and hum are two of the most common (and most frustrating) audio problems you'll encounter? They're especially noticeable in spoken audio content, where even a low level of unwanted noise can distract listeners.
However, unlike issues such as echo or reverb, hiss and hum are usually constant. That makes them easier to detect, but not necessarily easier to remove. Poorly implemented noise reduction can quickly strip a voice of its natural tone, leaving a thin, robotic sound.
If you want to remove hiss or hum from audio, with clean, usable results without hours of trial and error. Well, this guide covers both traditional methods and modern AI-powered solutions, so you can choose the approach that best suits your skill level.
In this article
What Are Hiss and Hum in Audio?

Before choosing tools or techniques, it's important to understand what hiss and hum actually are, and why they behave differently.
Hiss is a high-frequency, broadband noise. It often sounds like a soft "shhh" and becomes more noticeable during quiet moments or pauses in speech.
Hum is a low-frequency tonal noise, usually tied to electrical interference. It often occurs at 50 Hz or 60 Hz (depending on your region), along with multiple harmonics above that base frequency.
The common causes of hiss include:
- Microphone self-noise
- High input gain
- Cheap or poorly shielded audio interfaces
- Recording in very quiet rooms where the noise floor becomes obvious
The common causes of the hum sound are:
- Ground loops
- Faulty or unbalanced cables
- Electrical interference from power supplies, lights, or appliances
- Poor grounding in audio setups
Most tools handle hiss more easily than hum. Hiss occupies a relatively predictable high-frequency range, which makes it easier to reduce without harming speech. Hum is trickier because its fundamental frequencies often overlap with the natural body and warmth of a human voice. Aggressive removal can make speech sound hollow or thin.
Understanding this difference is very important when choosing the right removal method.
Top Ways to Remove Hiss and Hum in Audio Compared
There are two broad approaches to removing hiss and hum from audio:
- Traditional manual methods, which rely on audio editors and plugins
- AI-powered noise reduction, which automates much of the process
Each approach has strengths and limitations, and neither is "right" in every situation. The best choice depends on how noisy the recording is, how much time you have, and how comfortable you are with audio tools.
Here is a quick table that compares these methods.
| Method | Ease of Use | Ideal For |
| Traditional (Audacity, editors, plugins) | Moderate to difficult | Users who want full control and have time to fine-tune |
| AI-powered (Media.io) | Very easy | Fast cleanup, inconsistent noise, non-technical users |
Traditional methods offer precision and flexibility, but they require experience. AI-powered tools trade some control for speed, simplicity, and consistency, especially on real-world recordings that aren't studio-perfect.
How to Remove Hiss and Hum from Audio Manually?

Manual noise removal has been around for decades and is still widely used, especially by audio professionals. One of the most accessible tools for this is Audacity, a free, open-source audio editor available on Windows, macOS, and Linux.
Audacity is commonly used because it's free, supports various noise profiling methods, handles hiss and hum, and allows precise control over settings. However, Audacity is not a one-click solution. It requires careful listening and restraint to avoid damaging the audio.
Here's how it works.
- Open Audacity, then click File > Import > Audio. After that, select an audio file from your hard drive and simply add it to your project.

- Find a section featuring a few seconds where no speech or music is present, only that pesky hiss or hum, and select it.
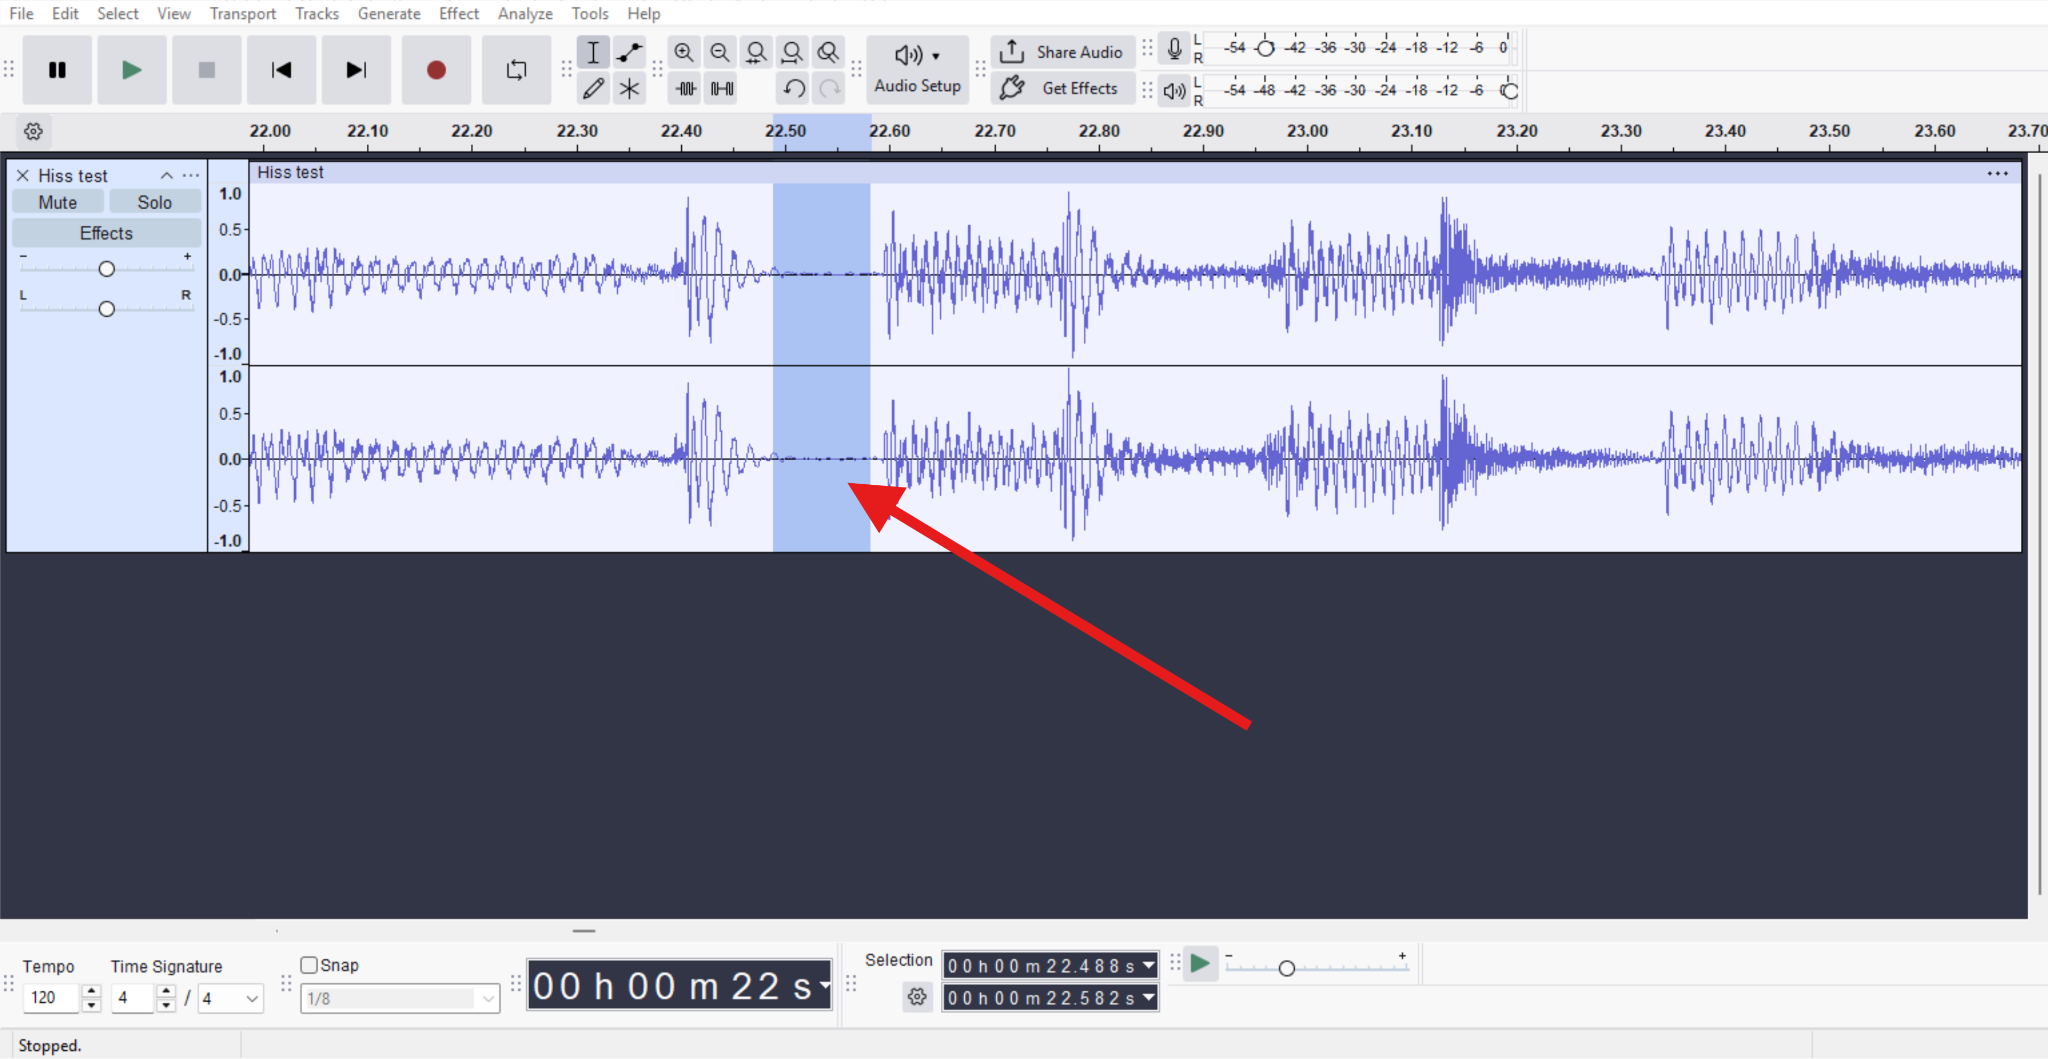
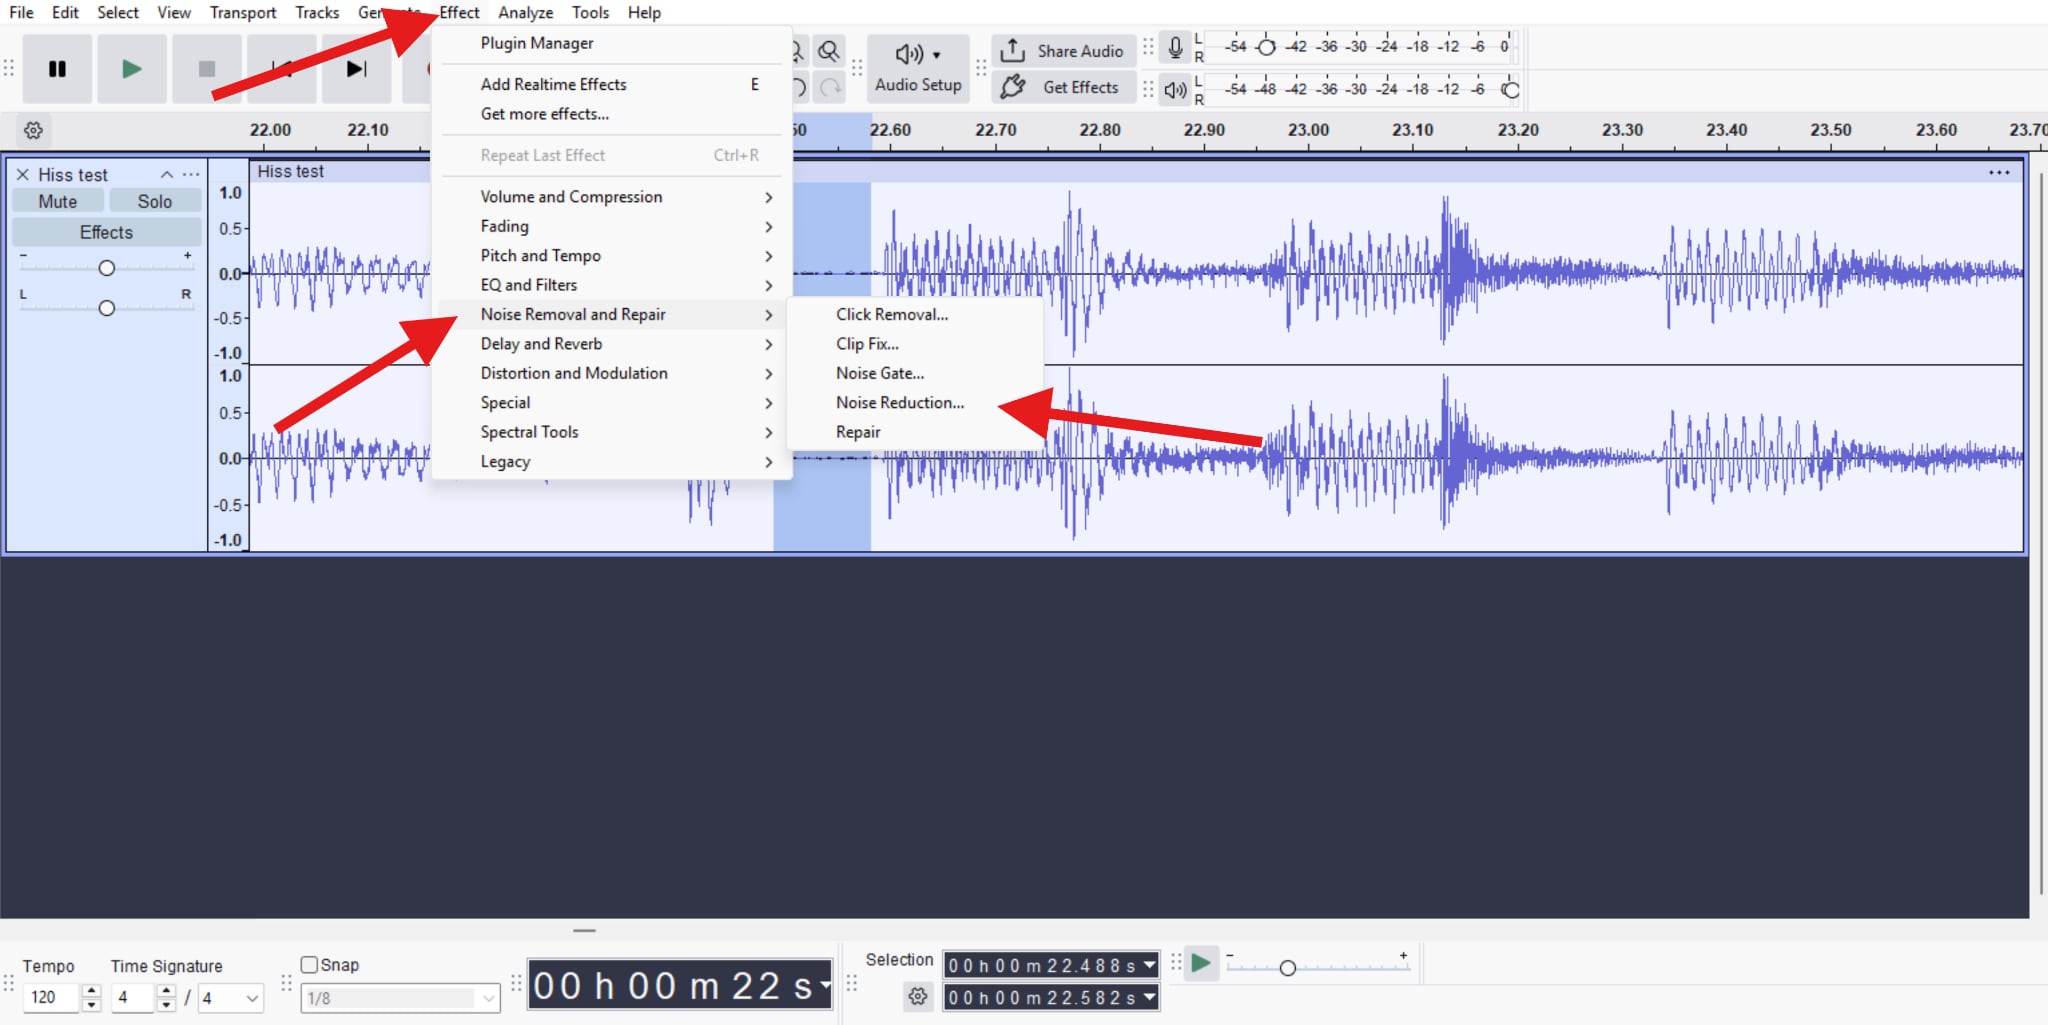
- Capture a noise profile Now, go to Effect > Noise Removal and Repair > Noise Reduction.
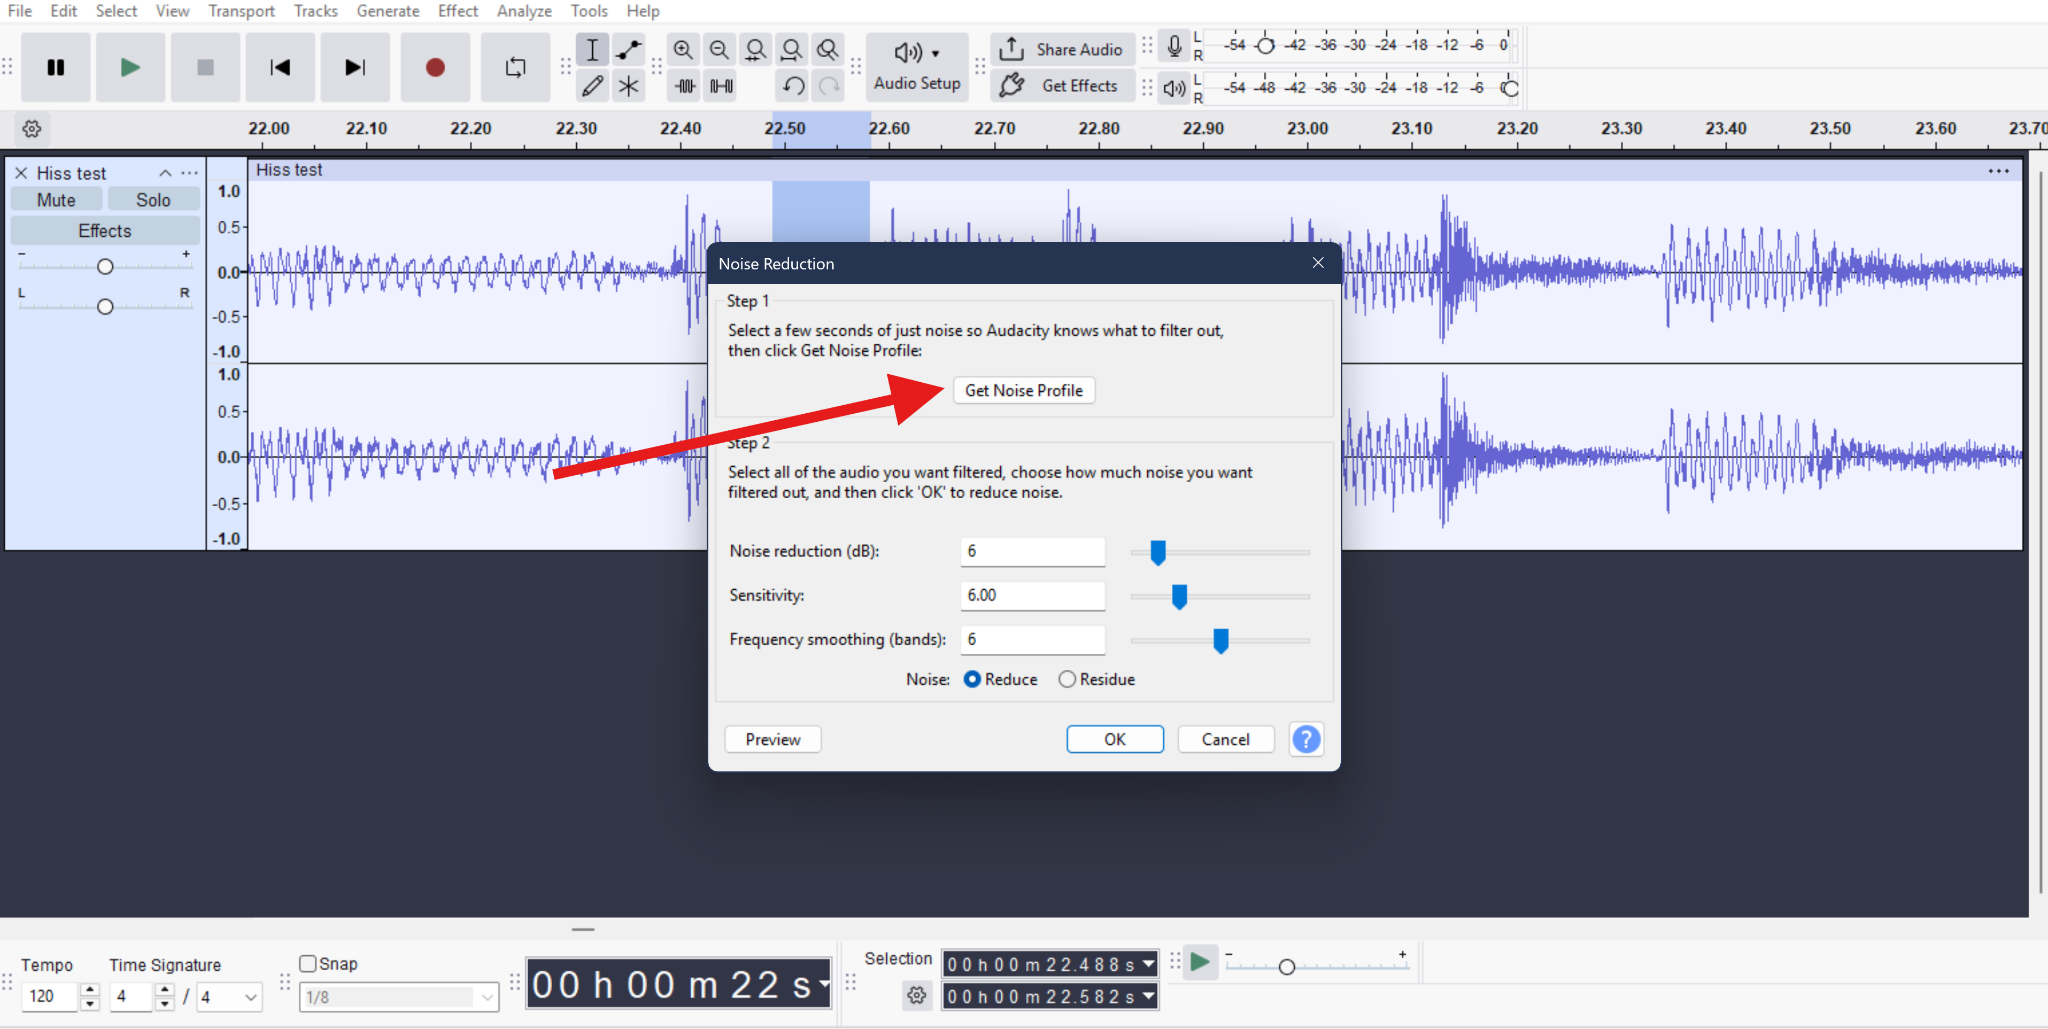
- Now, click on Get Noise Profile. This will teach Audacity what type of sound you want to remove.
- When Audacity has the Noise Profile, you can now select the entire track, go to Effect > Noise Removal and Repair > Noise Reduction again, and click OK this time.
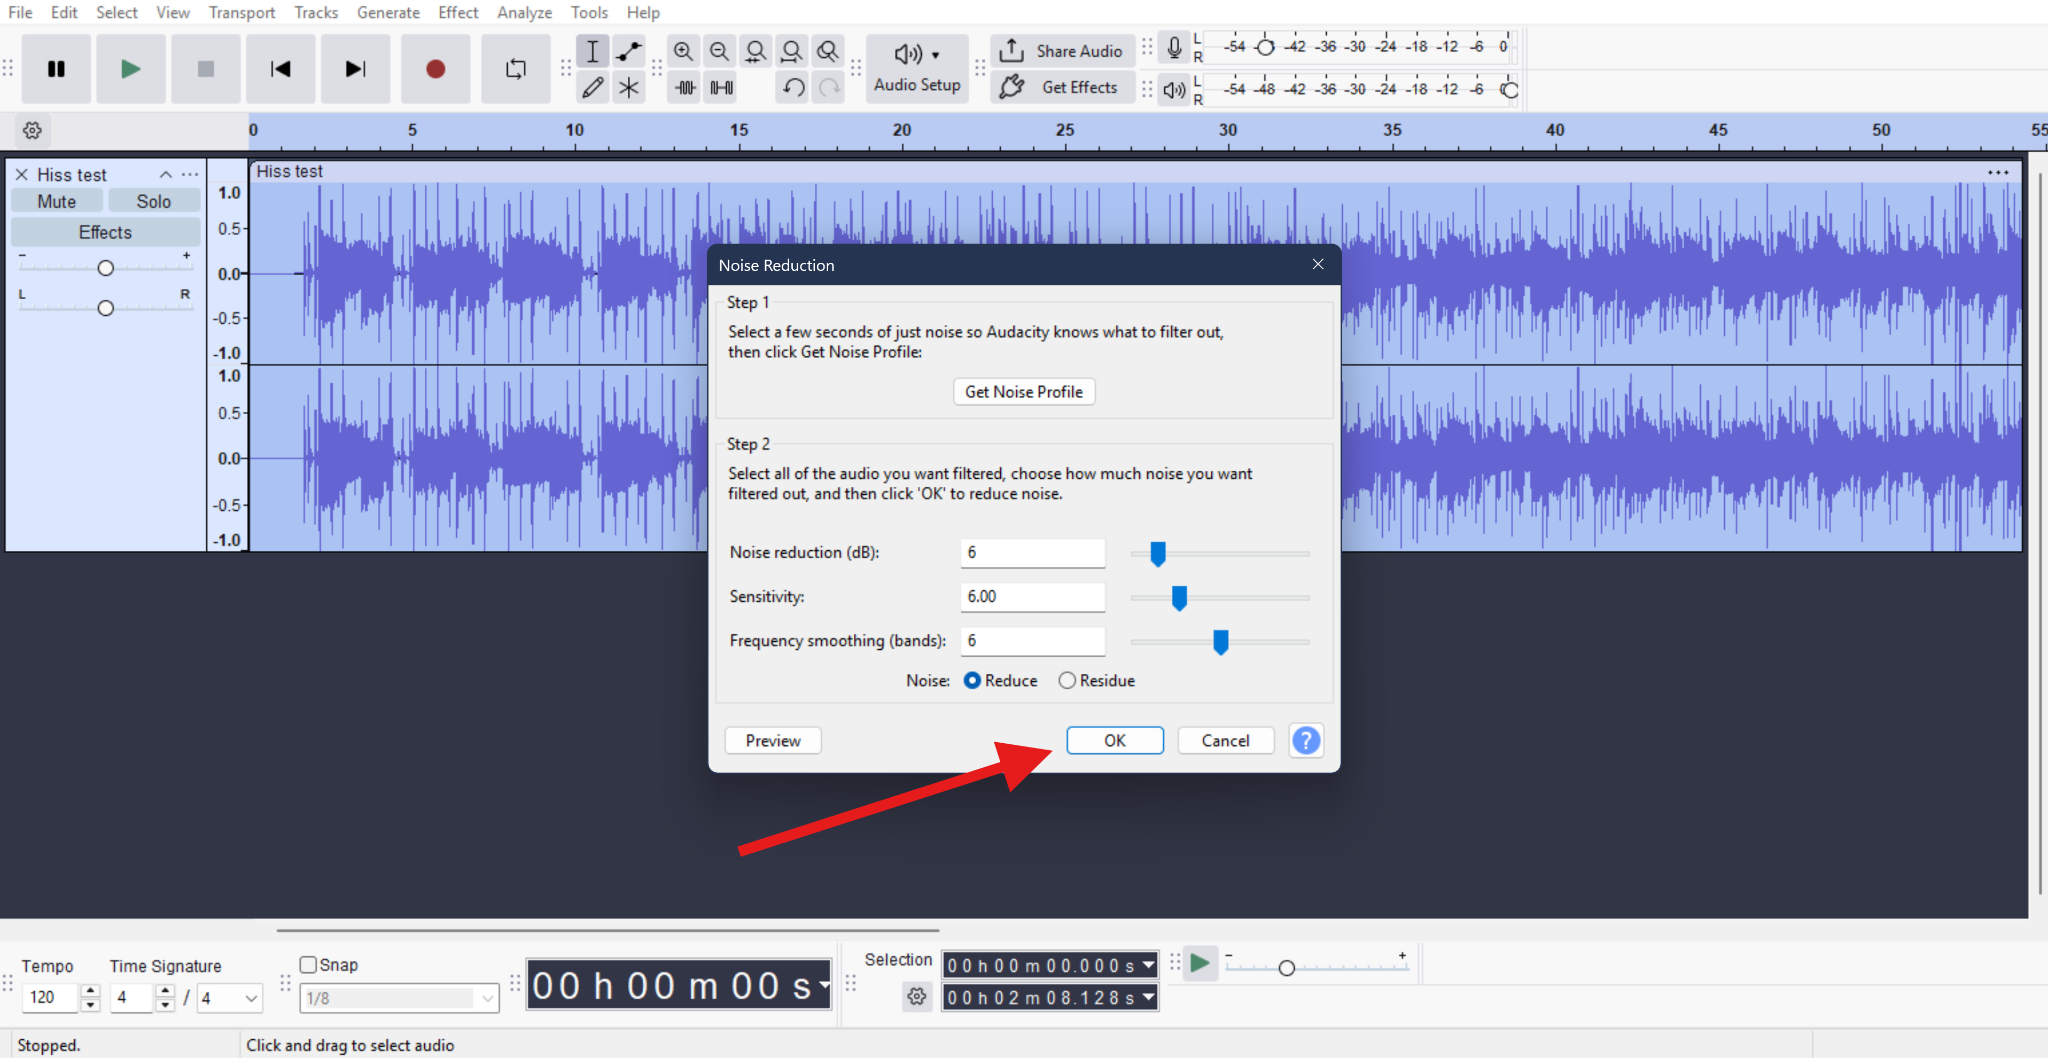
Before you click the OK button, you can manually adjust the extent of the hiss and him removal by adjusting the Noise Reduction (dB), Sensitivity, and Frequency Smoothing sliders. You can also preview before applying.
It is generally a good idea to preview changes before applying them. If the voice starts sounding metallic or hollow, reduce the settings.
Pro Tip: If you want to address hum separately, for electrical humming sounds, use EQ or notch filters to target 50/60 Hz and harmonics rather than relying solely on noise reduction.
So, in essence, manual methods work best when noise is consistent, and the user is willing to experiment carefully.
How to Remove Hiss and Hum from Audio with AI?
AI-powered noise reduction takes a fundamentally different approach. Instead of asking users to identify noise frequencies or profiles, AI tools analyze the entire signal and automatically separate voice from noise.
This approach is especially effective for mixed noise types, any kind of noise that changes over time, recordings made outside controlled environments, and other instances where the background noise in audio appears unpredictable.
One of the most accessible AI tools for this purpose is Media.io. Its AI Noise Reducer is trained on real-world audio scenarios, not just clean studio recordings.
It can reduce hiss, electrical hum, mixed background noise, and layered environmental sounds. Unlike traditional editors, it doesn't require noise profiles, frequency hunting, and manual EQ curves. This makes it particularly appealing for users who want fast, reliable results without deep audio knowledge.
Here's how it works.
- Go to their AI Noise Reducer feature and click on the box that reads "Drag Files Here or Click To Upload." This will allow you to upload files from your hard drive.
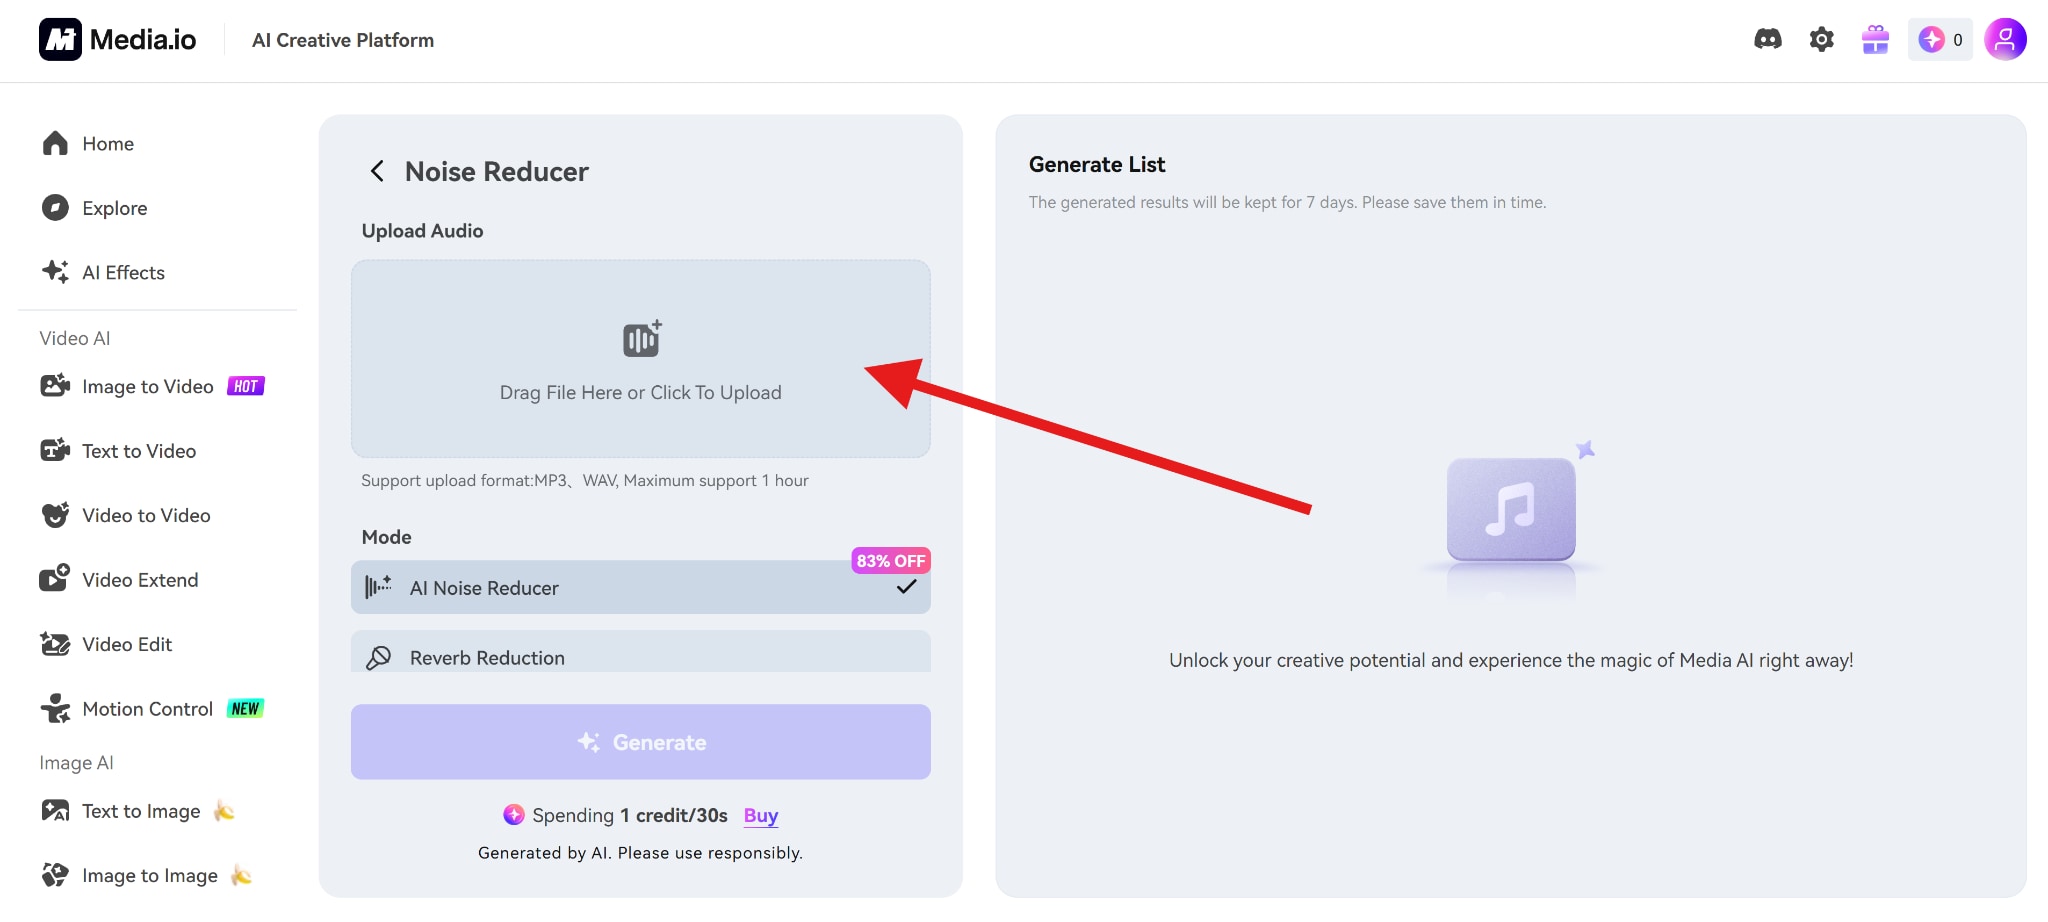
- Select the AI Noise Reducer feature and click on Generate.
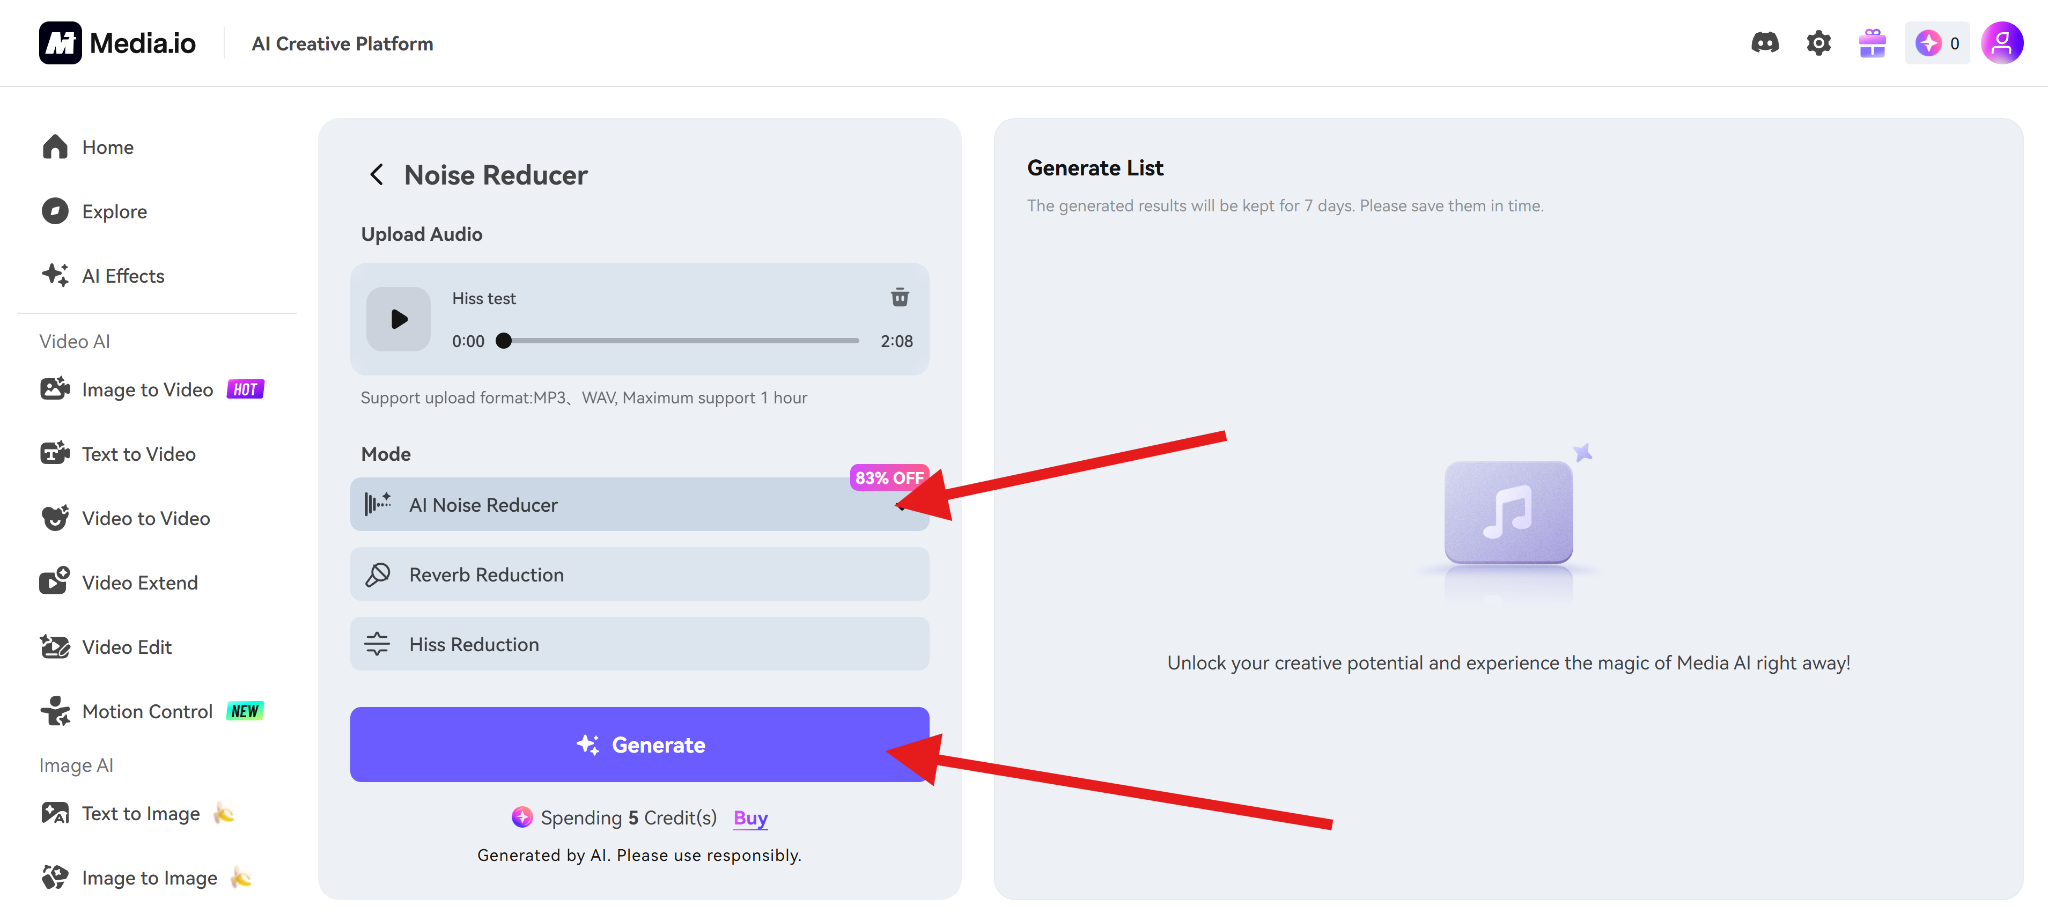
- After a short AI process, your clean audio will be ready to download.
Why Media.io Is the Best Option for Most Users
While traditional tools still have their place, Media.io stands out for everyday use cases. Here are the key advantages:
- Consistently strong results for removing hiss sound from audio
- Handles remove hum from audio tasks even when noise fluctuates
- Preserves natural voice tone better than aggressive EQ or gating
- Web-based workflow with no installation or setup
- No learning curve
Ideal Use Cases for Media.io
Media.io is especially well-suited for:
- Podcasts and interviews where speech clarity matters more than perfect silence
- Home-recorded voiceovers, especially when recorded with USB microphones or in untreated rooms
- Content creators and YouTubers who want a fast turnaround without diving into audio engineering
- Remote recordings where the noise quality varies between speakers.
In short, Media.io works best when you want clean, usable audio quickly, without spending hours tweaking settings.
Conclusion
Hiss and hum are unavoidable in many real-world recordings, but they don't have to ruin your audio. With the right approach, you can significantly improve clarity without sacrificing tone.
Manual tools like Audacity offer control and precision, but they demand time and experience. AI-powered solutions like Media.io provide faster, more consistent results, especially for mixed or inconsistent noise.
The best solution depends on your workflow, your audio quality, and your tolerance for technical complexity. Whatever method you choose, remember the core principle:
Reduce noise to improve clarity, not to chase silence. Clean, natural-sounding audio will always outperform aggressive noise removal.


