
Did you know that a hiss is one of the most common audio problems in home recordings, podcasts, interviews, and voiceovers? If you try to remove it, you may run into issues and even damage the voice in the recording. Luckily, there are solutions.
A free audio editing tool, Audacity, includes built-in tools that can reduce hiss when used correctly, but if you push them too hard, the results can sound rather artificial.
This guide walks you through how to reduce hiss in Audacity step by step, explains what hiss actually is, and shows you how to combine Noise Reduction, EQ, and smart settings for natural-sounding results.
In this article
What Counts as Hiss?

Before you open Audacity and begin your project, it's important to identify what kind of noise you're dealing with.
Hiss is a steady, high-frequency noise. It usually sounds like air, static, or a soft "shhh" behind the voice. Unlike clicks or pops, hiss doesn't come and go suddenly. Instead, it's present throughout the recording.
Hiss is most noticeable during pauses in speech, at the end of sentences, when you raise the volume or apply compression, and because hiss is consistent, it responds well to noise profiling, which is one of Audacity's biggest strengths.
To understand the difference between different noise types, take a look at this comparison table.
| Noise type | Frequency range | Example sound | Best removal method |
| Hiss | High (4 kHz–16 kHz) | Airy "shhh" | Noise Reduction + EQ |
| Hum | Low (50–120 Hz) | Electrical buzz | High-pass filter / Notch |
| Clicks & pops | Sudden transients | Mouth clicks, mic hits | Click Removal |
| Background noise | Broad spectrum | Room tone, fans | Noise Reduction (light) |
If the noise you hear is steady and high-pitched, you're dealing with some form of hissing sound, and Audacity can handle it well.
Reduce Hiss in Audacity Using Noise Reduction

Audacity's Noise Reduction effect is the go-to tool for hiss removal. It works by learning what the noise sounds like and then subtracting it from the entire track. But the keyword you should focus on is "restraint." Noise Reduction is a powerful tool, but if you push it too far, that's one of the fastest ways to destroy vocal clarity.
In any case, here's how it works.
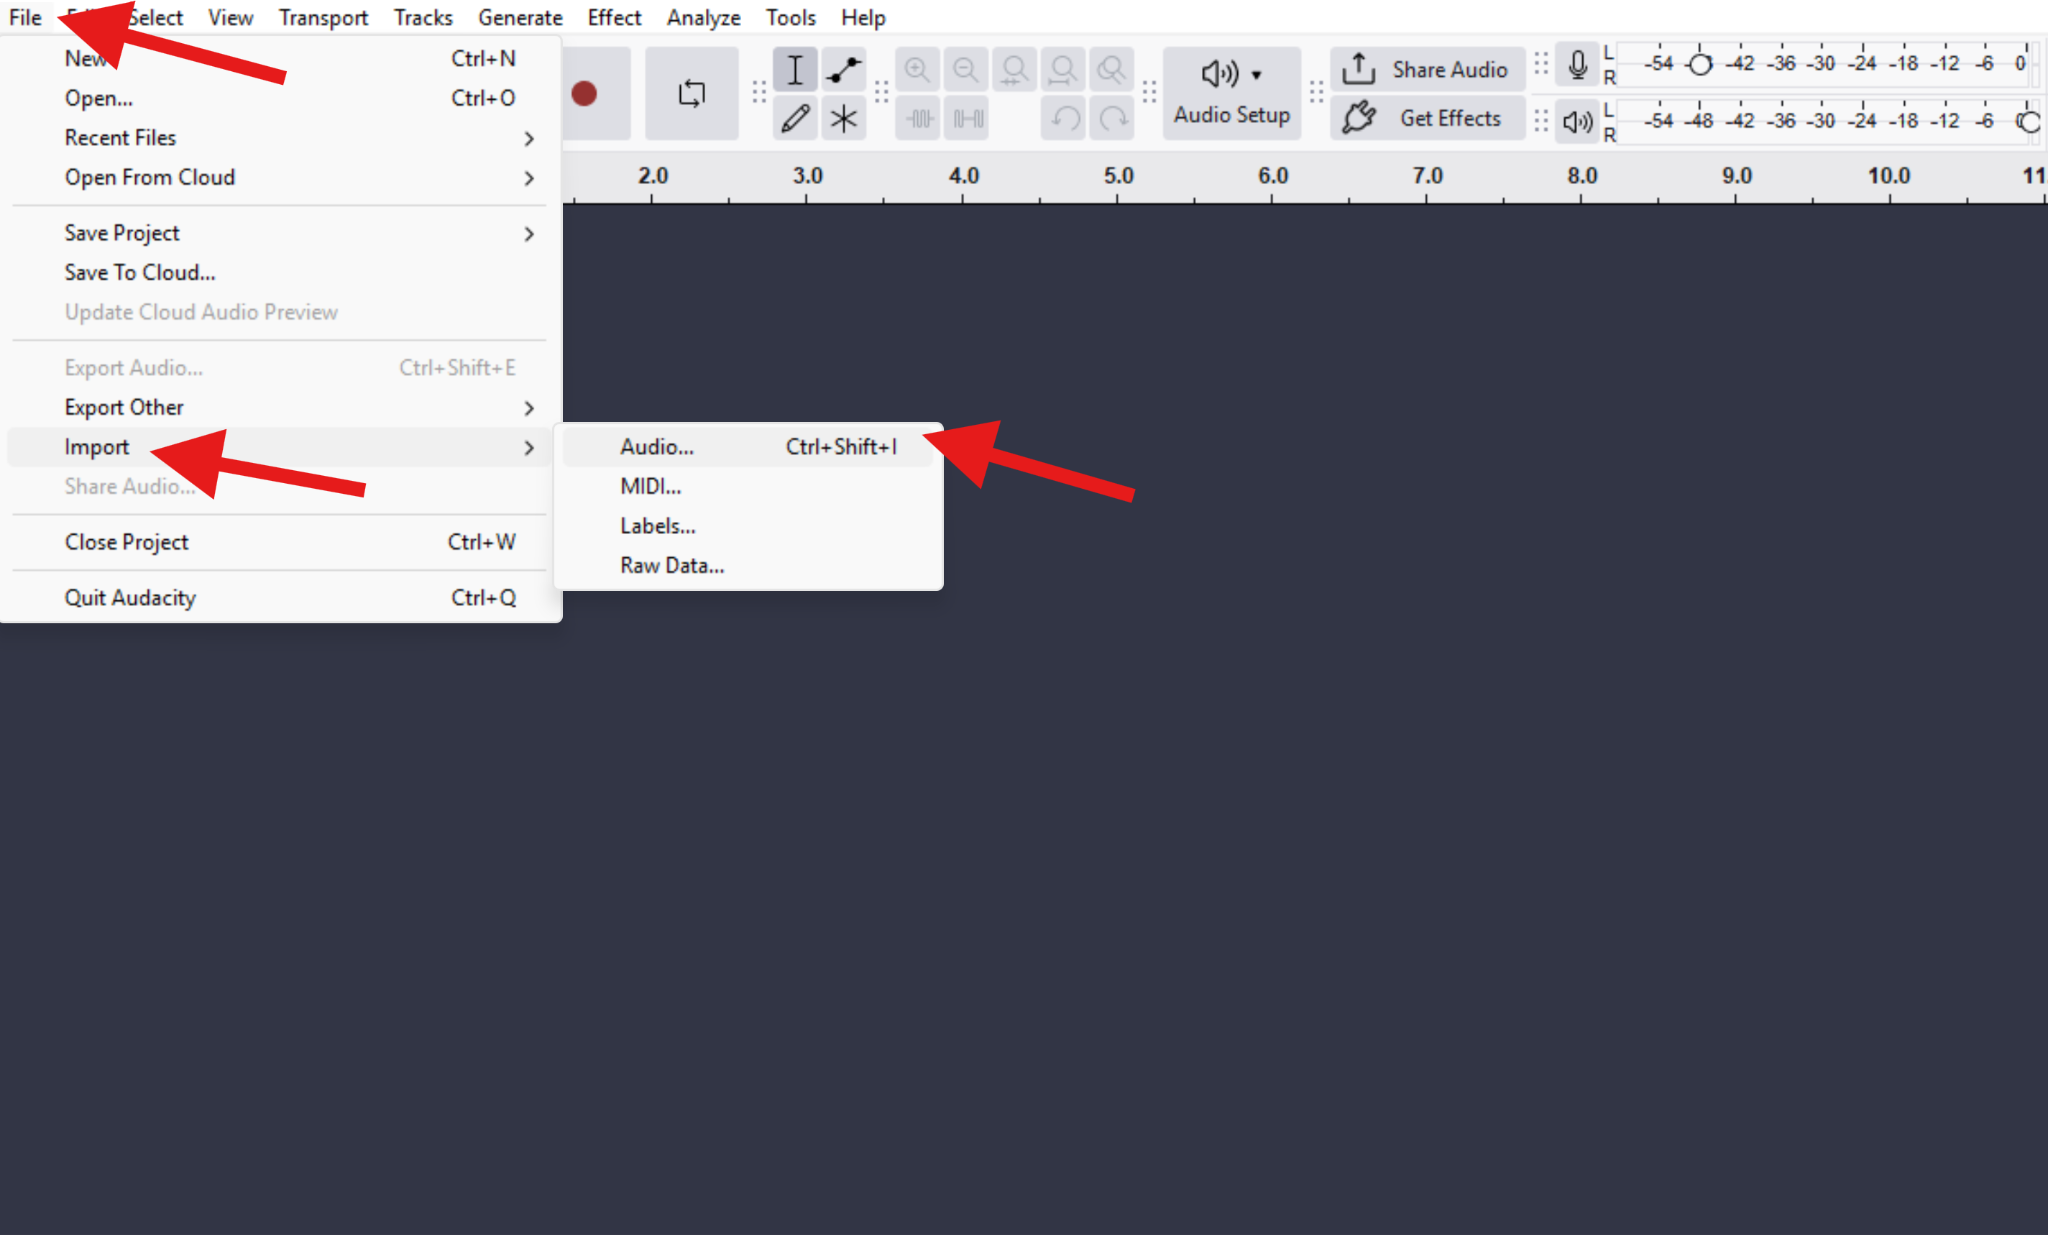
- Download and install Audacity.
- Open the program and import an audio file (File > Import > Audio).
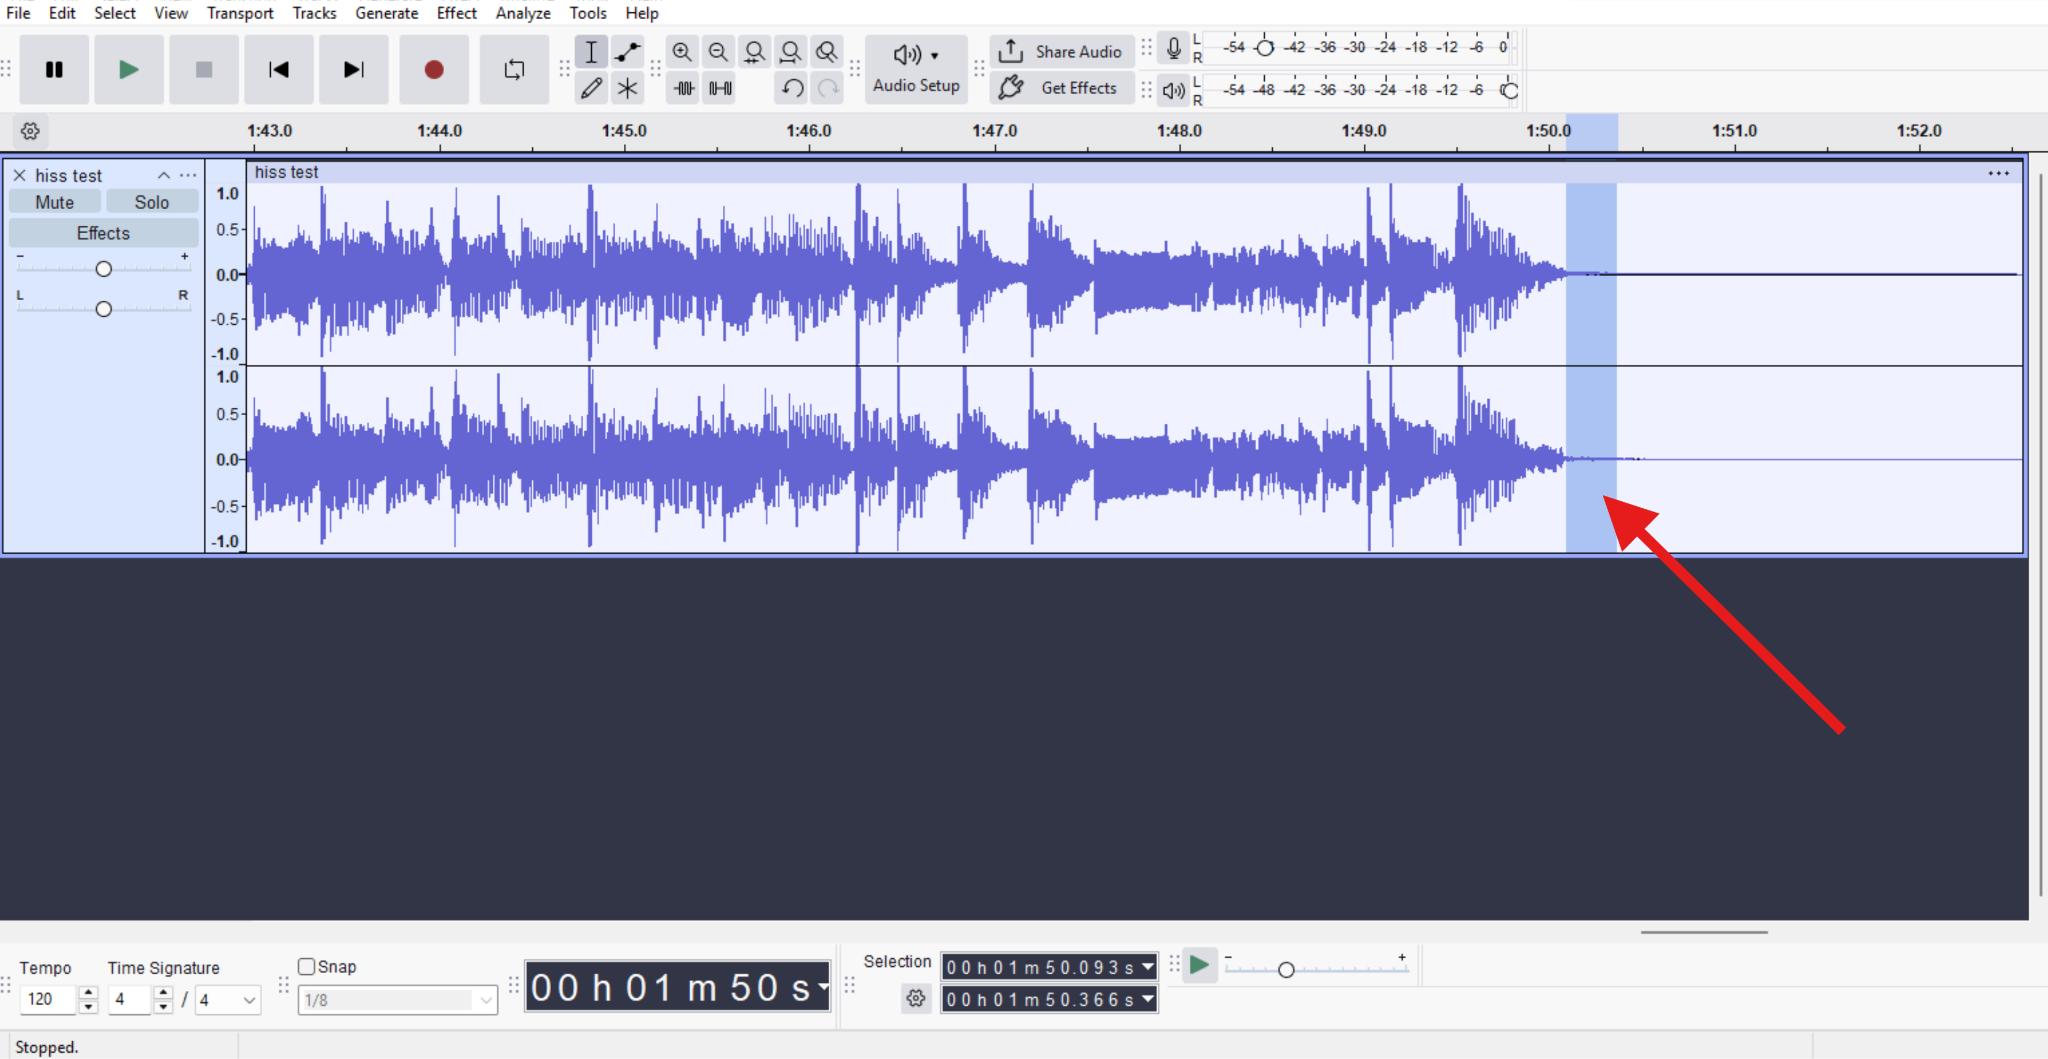
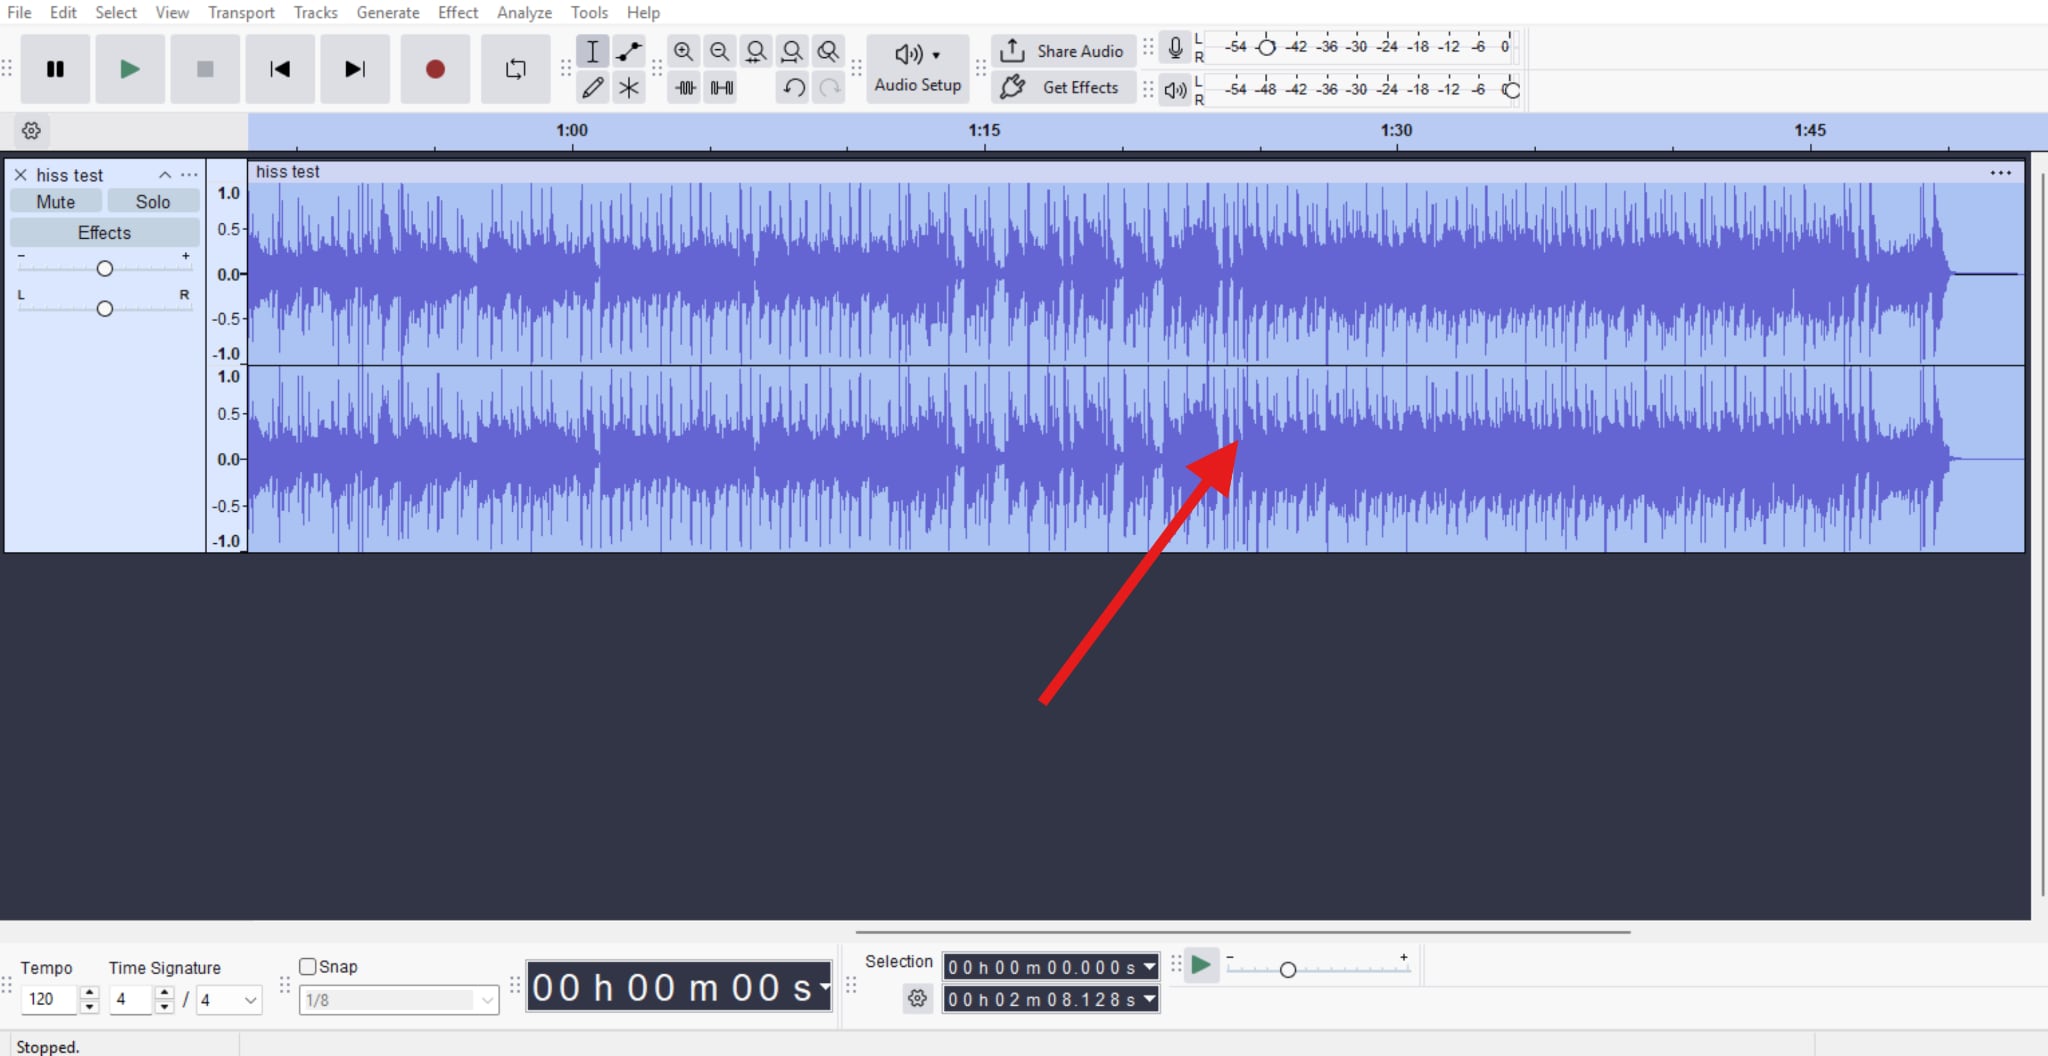
- Zoom in and select a part of the track where the hiss is prominent.
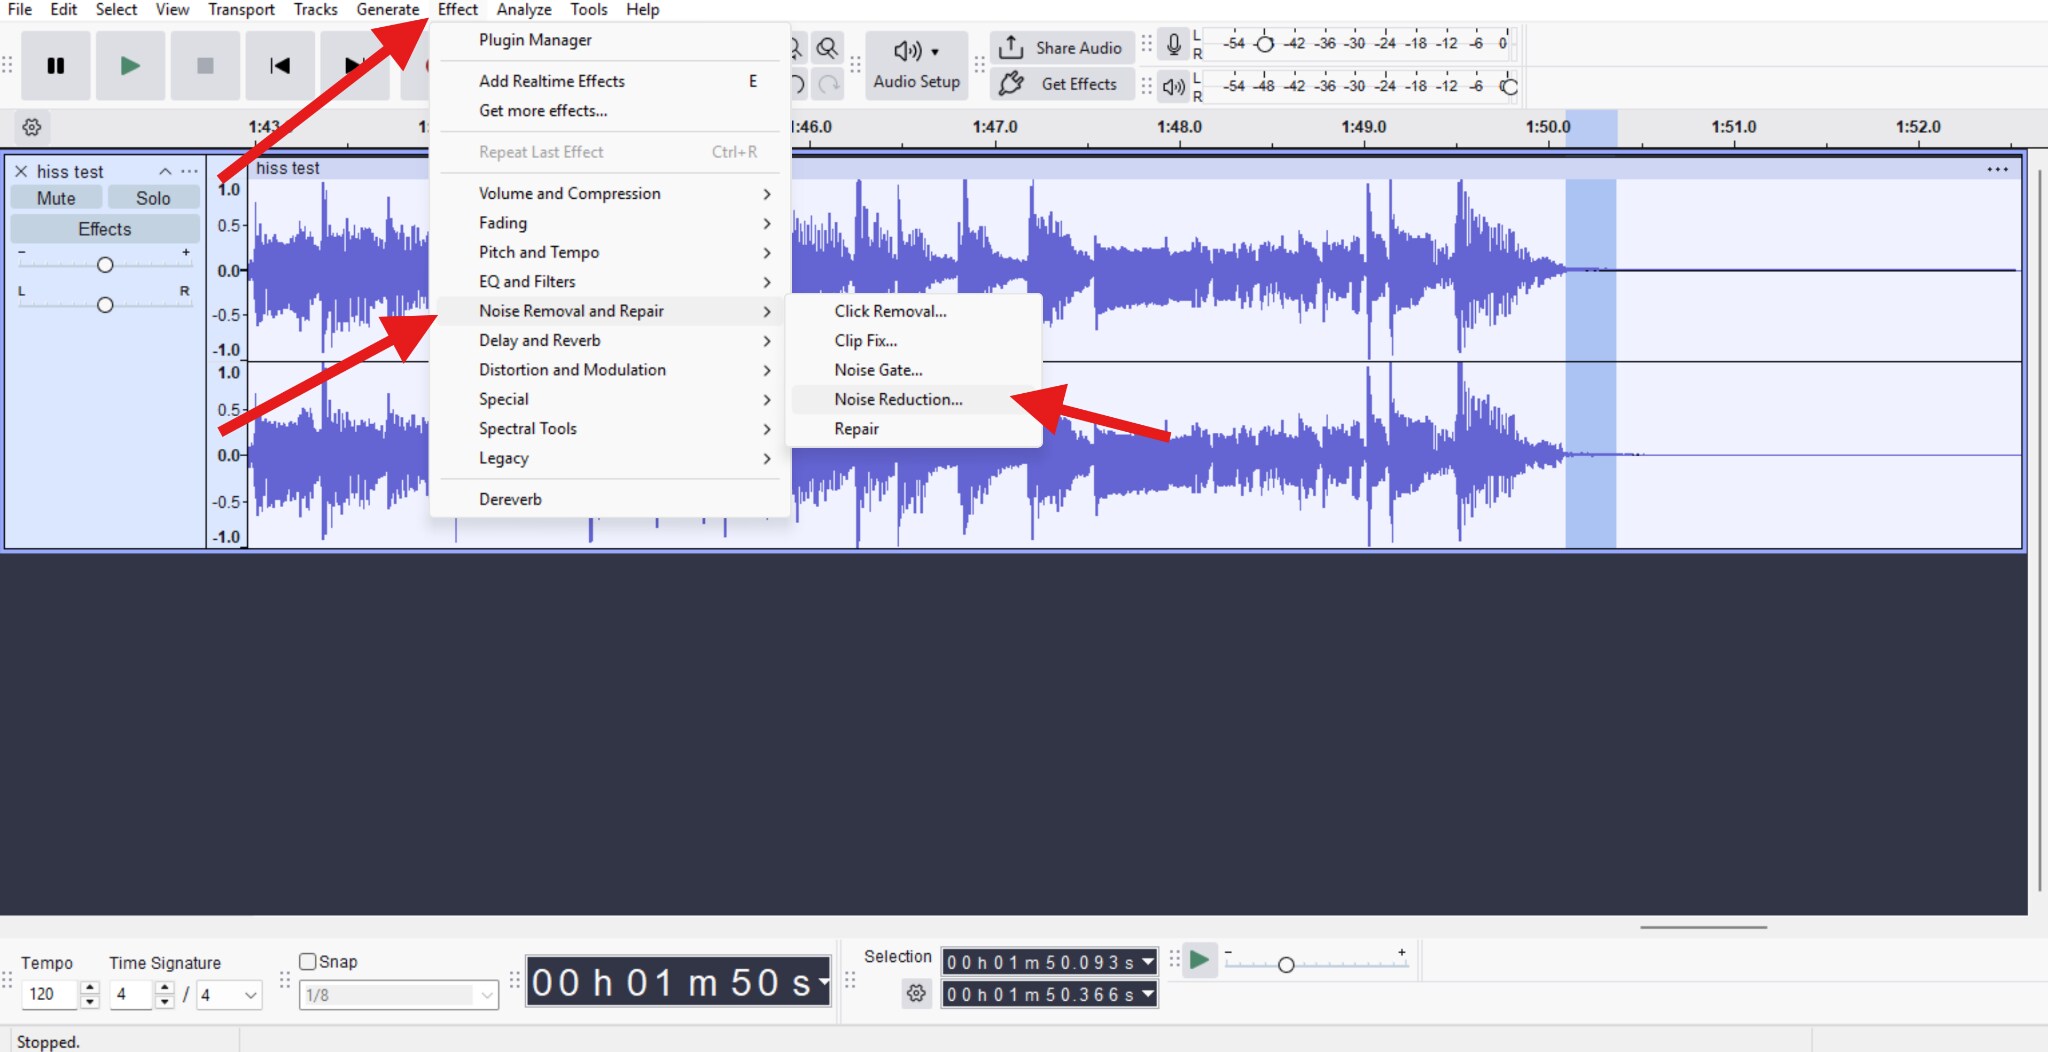
- Go to Effect > Noise Removal and Repair > Noise Reduction.
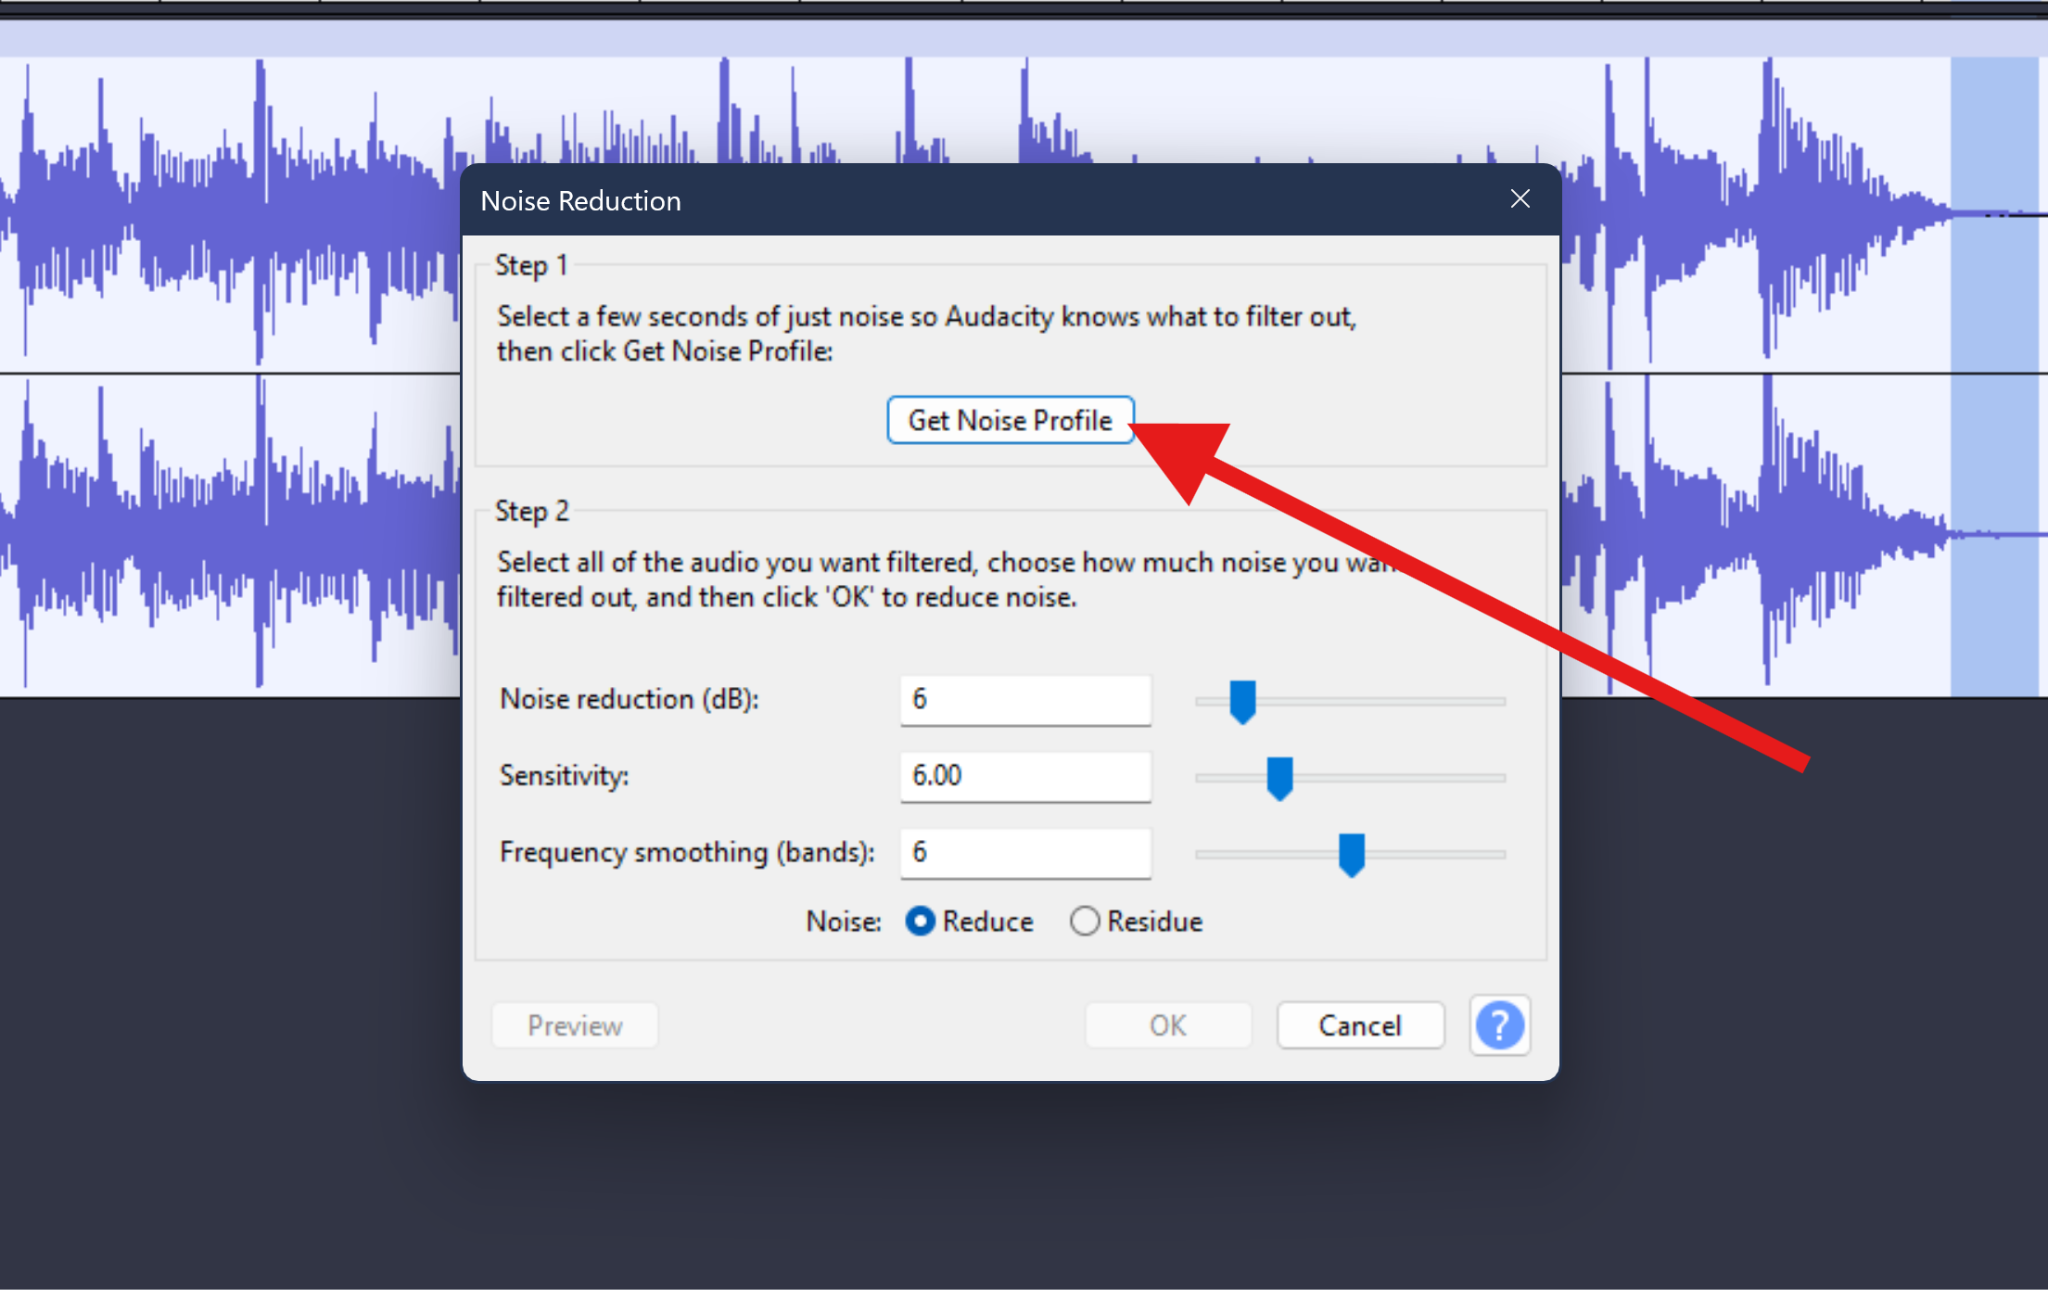
- Click on Get Noise Profile. Audacity will take the selected hiss audio clip as a source of noise.
- Zoom out and select the entire track.
- Activate the Noise Reduction feature again, and tweak the Noise Reduction (dB), Sensitivity, and Frequency Smoothing (bands) sliders.
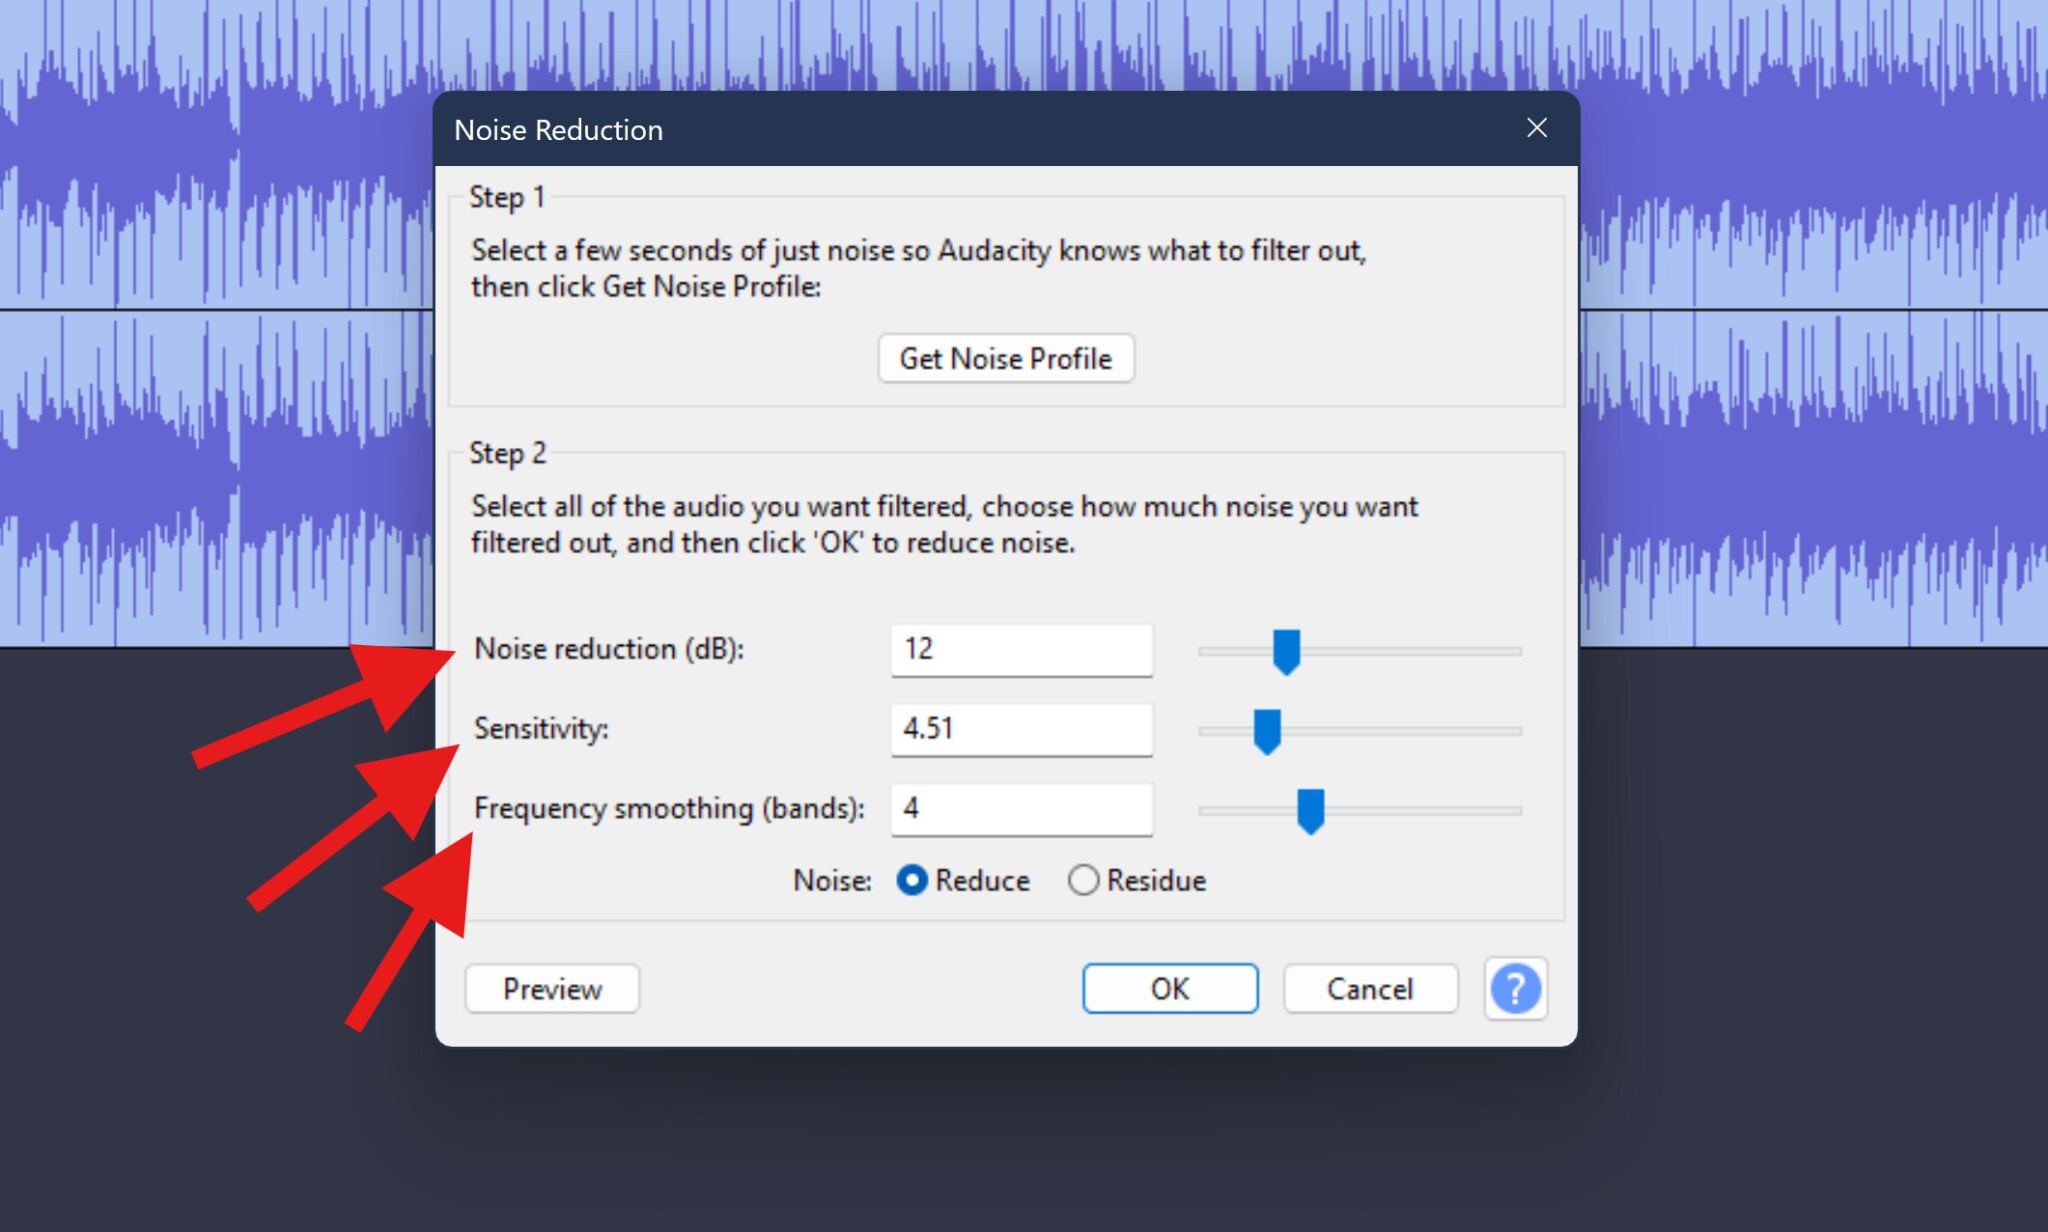
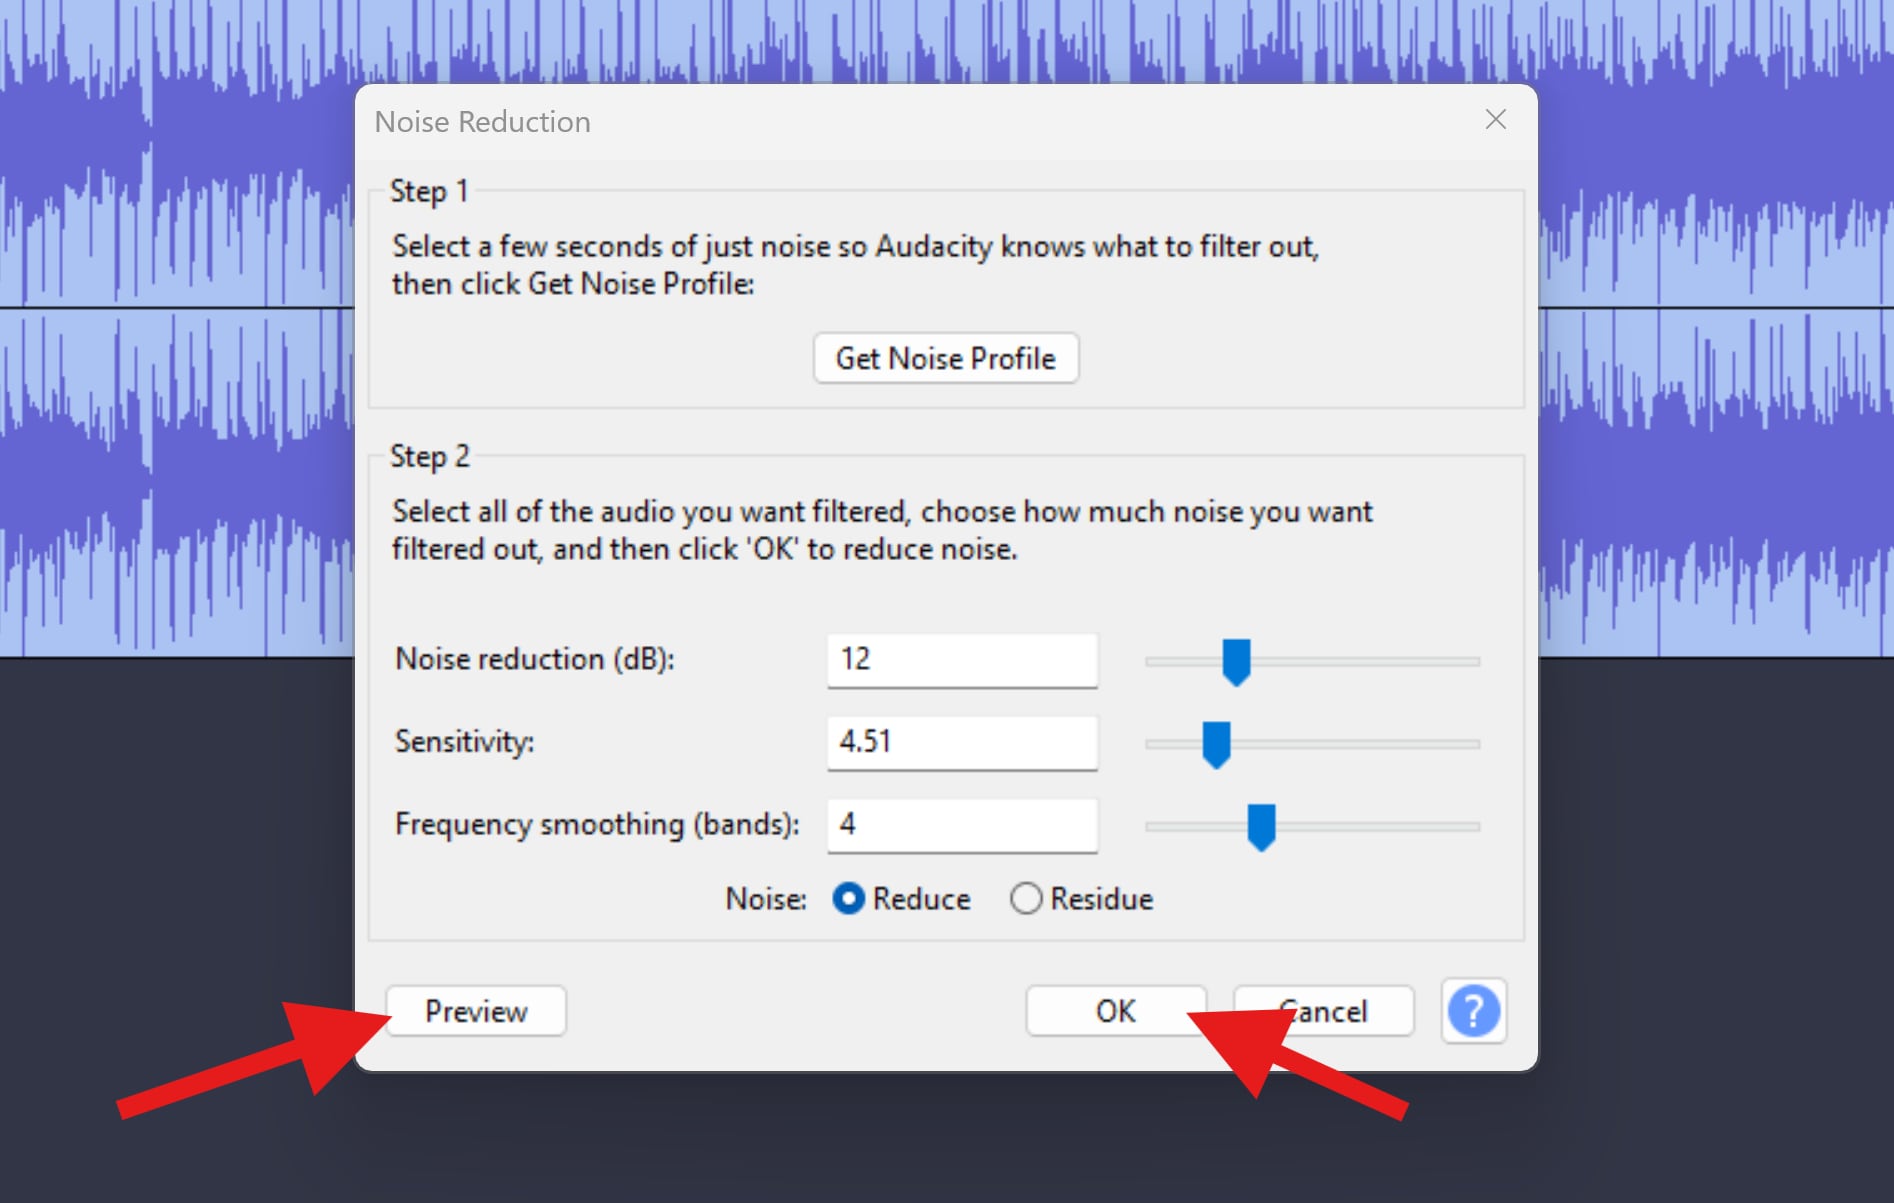
- Preview the results, and if everything is in order, click OK.
This approach works best for steady microphone hiss, consistent room noise, and light background noise under speech. It won't work as well if the noise changes frequently or overlaps heavily with the voice. Also, never push the settings too far. It will only damage the audio quality.
Audacity Hiss Removal Settings Explained
If you are using Audacity to reduce hiss from audio, make sure that you can fully understand the three sliders that Audacity gives to you.
Noise Reduction (dB) controls how much hiss is reduced in terms of volume. The typical range for voice is between 6 and 12 decibels. Going higher increases the risk of dull audio and other artifacts. Think of this as turning down the hiss and not muting it completely.
Sensitivity controls how aggressively Audacity detects noise. Lower values are safer, while higher values lead to more aggressive detection. For a hissing sound, moderate sensitivity works best. Too high, and Audacity starts attacking parts of the voice.
Frequency Smoothing (bands) helps prevent metallic or "underwater" artifacts by smoothing frequency transitions. You should go anywhere between 3 and 6 bands. Higher values can soften harsh processing, but too much may disrupt audio clarity.
The Best Settings to Reduce Hiss in Audacity for Voice
Voice recordings are especially sensitive to over-processing because the human ear is finely tuned to speech.
Here's a good starting point for removing hiss from any audio that features someone speaking:
- Noise Reduction: 6-9 dB
- Sensitivity: 6.00
- Frequency Smoothing: 3 bands
These settings won't eliminate hiss completely, but they will make it far less noticeable without killing clarity.
But remember, the goal is less noticeable hiss, not total silence. A tiny amount of hiss is far less distracting than warbling artifacts, hollow or metallic speech, and over-smoothed consonants. If you still hear some hissing after the first pass, do another light pass, but not a heavy one.
Audacity Hiss Removal with EQ and Filters
The Audacity Noise Reduction feature does most of the heavy lifting, but if you want to add a little more polish to the sound, you can use Filters and Equalizers. Once the hiss is reduced, a gentle EQ adjustment can clean up what remains without damaging the sound in any way.
The hiss sound primarily has a high-frequency, so small adjustments there can make a big difference. A good idea is to go with safe EQ moves for voice and start with a slight high-frequency roll-off above 10 or 12 kHz. Also, avoid sharp cuts, and never try to aggressively remove presence frequencies that go between 3 and 6 kHz.
Always preview your changes. If voices start sounding dull or lifeless, you've gone too far.
All EQ and Filter features present in Audacity can be found in the Effects tab.
Advanced Tips for Better Hiss Removal in Audacity
And now, here are a few tips that won't appear in other basic tutorials but can make a very noticeable difference.
- Preview your changes constantly, and as a rule, never click OK or Apply blindly.
- Process your audio in stages. Using a light Noise Reduction twice beats one heavy pass.
- Listen with headphones, as some frequencies in the hiss can be masked on speakers.
- Avoid compressing before you clean everything up, as compression will actually amplify the hissing.
- Normalize after you remove the noise, and not before.
- Leave a little room tone. Imagine total silence. It sounds unnatural, right?
And remember: small but thoughtful adjustments will always win.
The Best AI-Based Alternative to Hiss Reduction Audacity: Media.io
As we have learned, Audacity relies on static noise profiles. That's both its strength and its limitation. But when the hiss fluctuates, overlaps with speech, and changes throughout the recording, then AI-based tools often perform better. AI noise reducers analyze the entire recording, learning how the voice behaves over time. Instead of subtracting a fixed noise profile, they adapt dynamically.
And, one of the best options you can find right now is Media.io. Apart from many other AI features for videos and images, you can use tool to remove hiss from your audio online in just a couple of clicks.
Also, if you are on a tight deadline and you need faster results without manual tweaking, you will love the speed and simplicity of this AI tool.
Here's how it works.
- Navigate to Media.io's online AI Noise Reducer feature.
- Click on the designated area and upload your audio file.
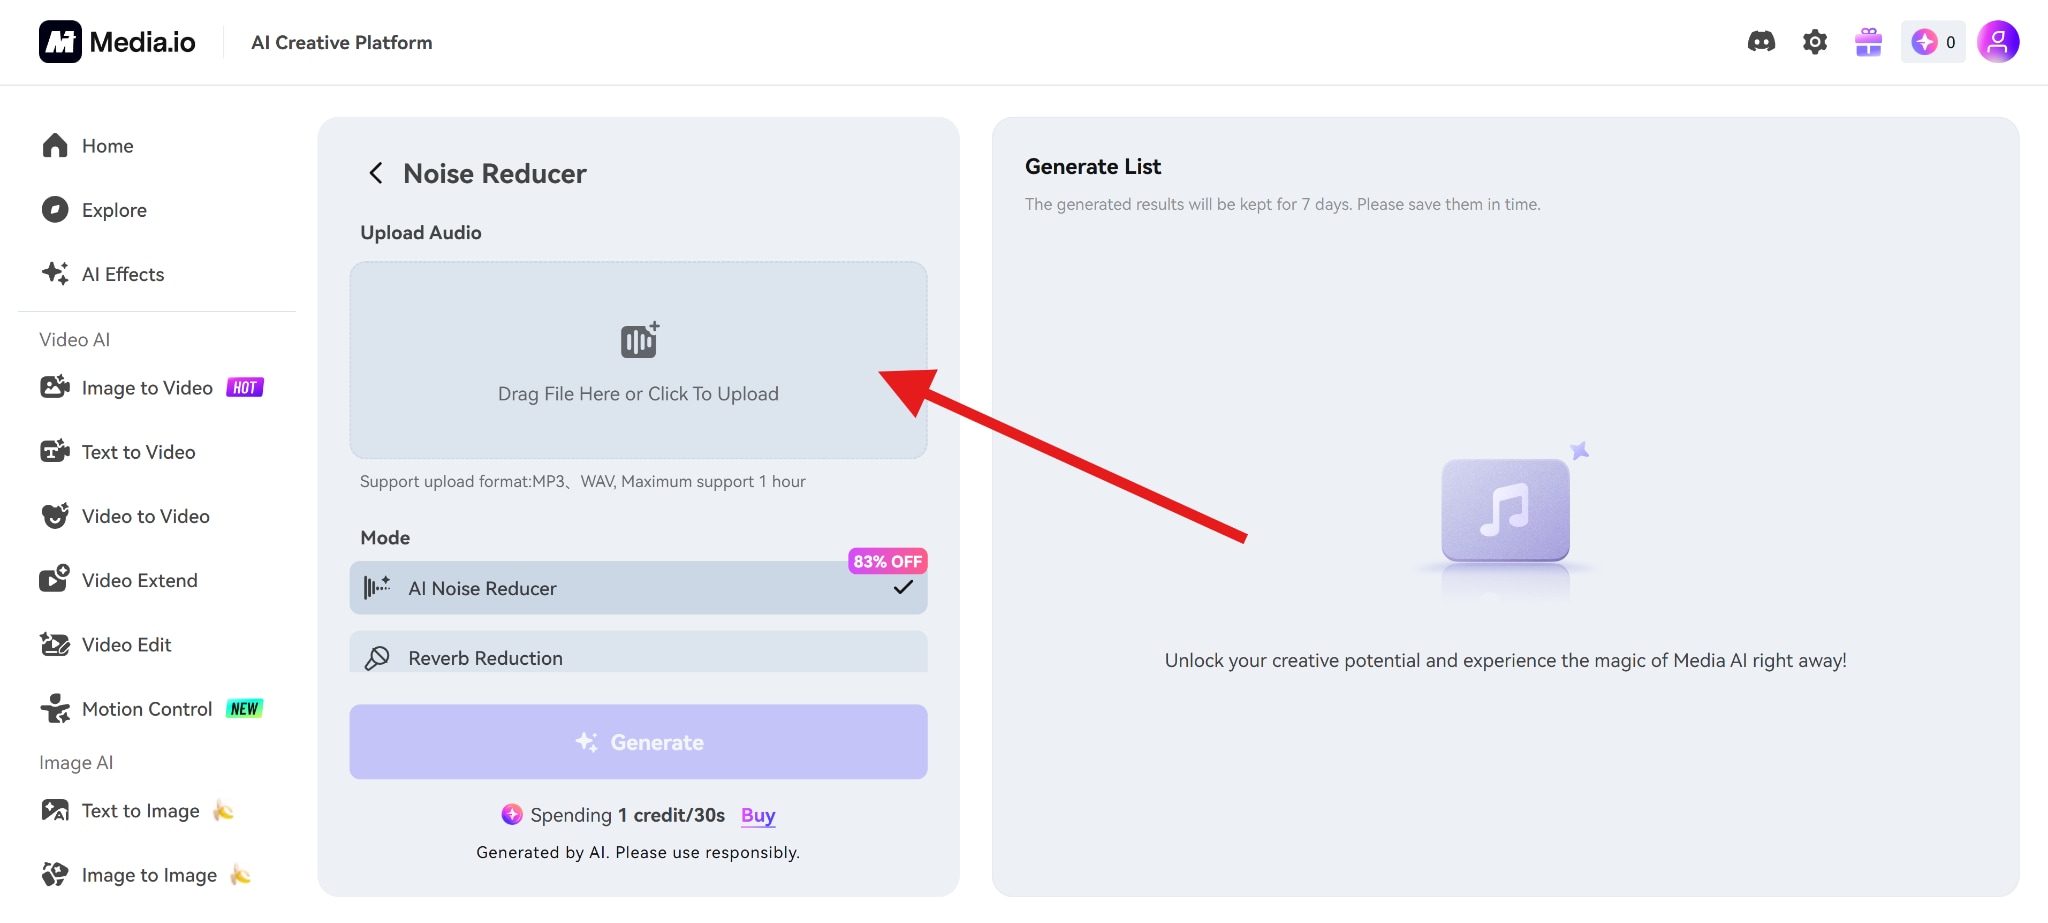
- Select Hiss Reduction, then click Generate.

- After that, all you need to do is review the result and click to download.
Conclusion
Audacity is highly effective for reducing steady, moderate hiss, especially when you understand what hiss is and how Noise Reduction actually works.
The best results come from moderate settings and multiple light passes. You can also use supporting tools, but any aggressive cleanup almost always backfires. And when tools like Audacity reach their limits, AI tools can save you a lot of time.
But ultimately, the cleanest results still start before you hit record. Practice good mic placement, sensible gain levels, and a quieter room will always outperform even the best noise reduction techniques.


