
If you've ever finished editing a video in Premiere Pro only to realize the audio sounds distant, hollow, or filled with echo, you're not alone. Echo noise is a common issue—especially when recordings are made in large rooms or without proper sound treatment.
The good news? You don't necessarily need to switch to another tool. Adobe Premiere Pro offers built-in features that can help reduce or even remove echo from audio.
In this guide, we'll explain what causes echo in recordings and show you how to remove echo from audio in Premiere Pro step by step. We'll also share practical tips for achieving cleaner sound and introduce an AI-powered online alternative for removing background noise more efficiently.
In this article
What is Echo? Definition and Explanation

Echo is created when sound waves bounce off hard surfaces, like walls, ceilings, or floors, and return to the microphone slightly delayed. This usually happens when:
- The microphone is too far from the speaker
- The room has hard, sound-reflective surfaces
- There's little to no acoustic treatment
Some people may confuse echo with reverb. Here's a quick table that perfectly explains the difference between the two.
| Feature | Echo | Reverb |
| Definition | A distinct, delayed repetition of a sound. | A dense collection of overlapping echoes. |
| Persistence | The sound stops and then starts again after a gap. | The sound "smears" and decays gradually. |
| Delay Time | Usually occurs when reflections arrive > 50ms after the original sound. | Occurs when reflections arrive < 50ms after the original sound. |
| Environment | Large open spaces with distant walls (canyons, large halls). | Enclosed spaces with many surfaces (tiled bathrooms, caves). |
| Perception | You hear the original sound and its "twin" separately. | You hear a "thickness" or "space" around the original sound. |
| Primary Use | Rhythmic effects, creative delays, or simulating vast distances. | Adding depth, warmth, and realism to voices or instruments. |
How to Remove Echo from Audio in Premiere Pro?

Right off the bat, we have to say that there is no single best method that works for every recording. Instead, echo reduction in Premiere Pro depends on how strong the echo is, whether the audio is dialogue or ambient sound, how close the microphone was to the speaker, and there are a few other factors.
But, as a general rule of thumb:
- For light room echo, use the Essential Sound panel.
- For moderate echo, use audio effects + EQ.
- For heavy or uneven echo, try AI-based cleanup before or after editing.
Let's walk through each option.
Remove Echo from Audio Premiere Pro Using Essential Sound Panel
The Essential Sound panel is usually the fastest and most beginner-friendly way to reduce echo in Premiere Pro.
It works best when:
- The echo is subtle
- The track is primarily dialogue
- The recording is otherwise clean
It struggles when:
- The echo is strong
- The microphone was far from the speaker
- There's a lot of natural ambience baked in
Follow the steps below to learn how to do it.
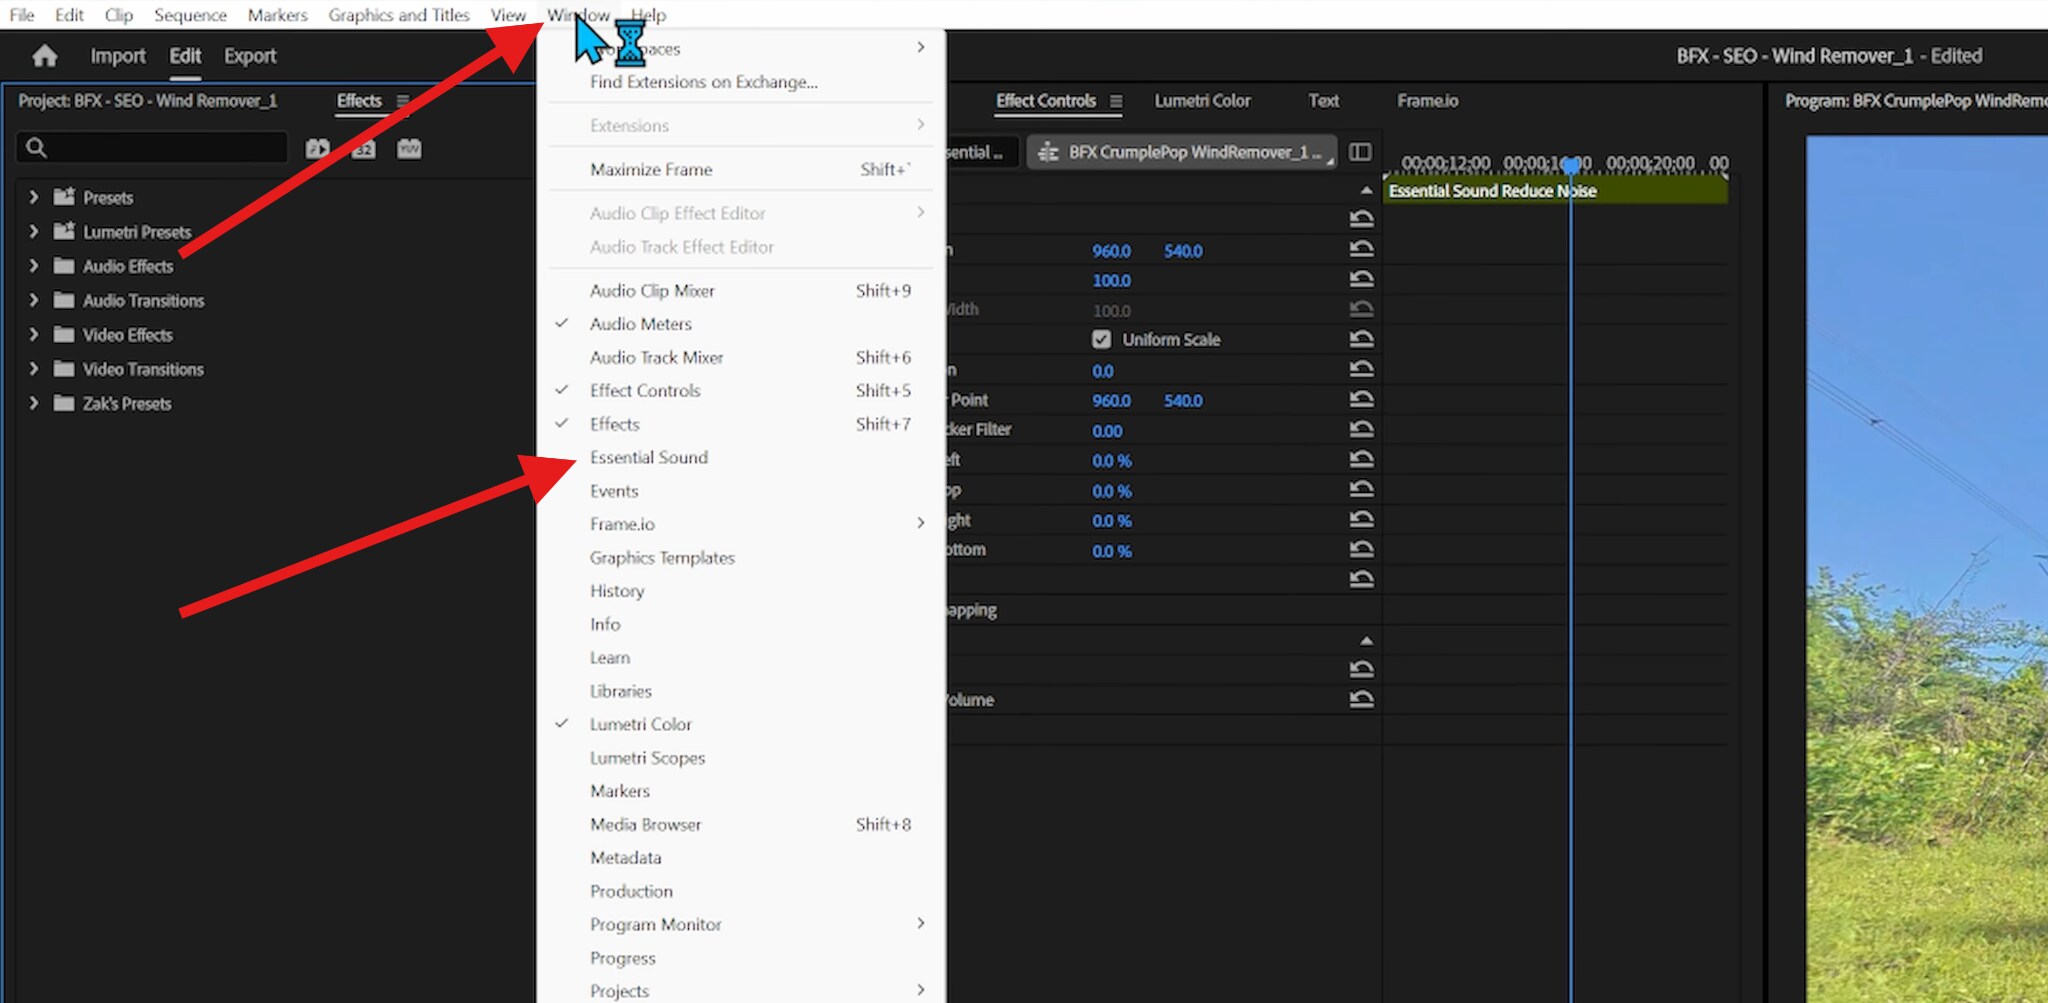
- Open Premiere Pro, import the audio files you want to remove echo from, select them, and then go to Window > Essential Sound. This will activate the Essential Sound Panel.
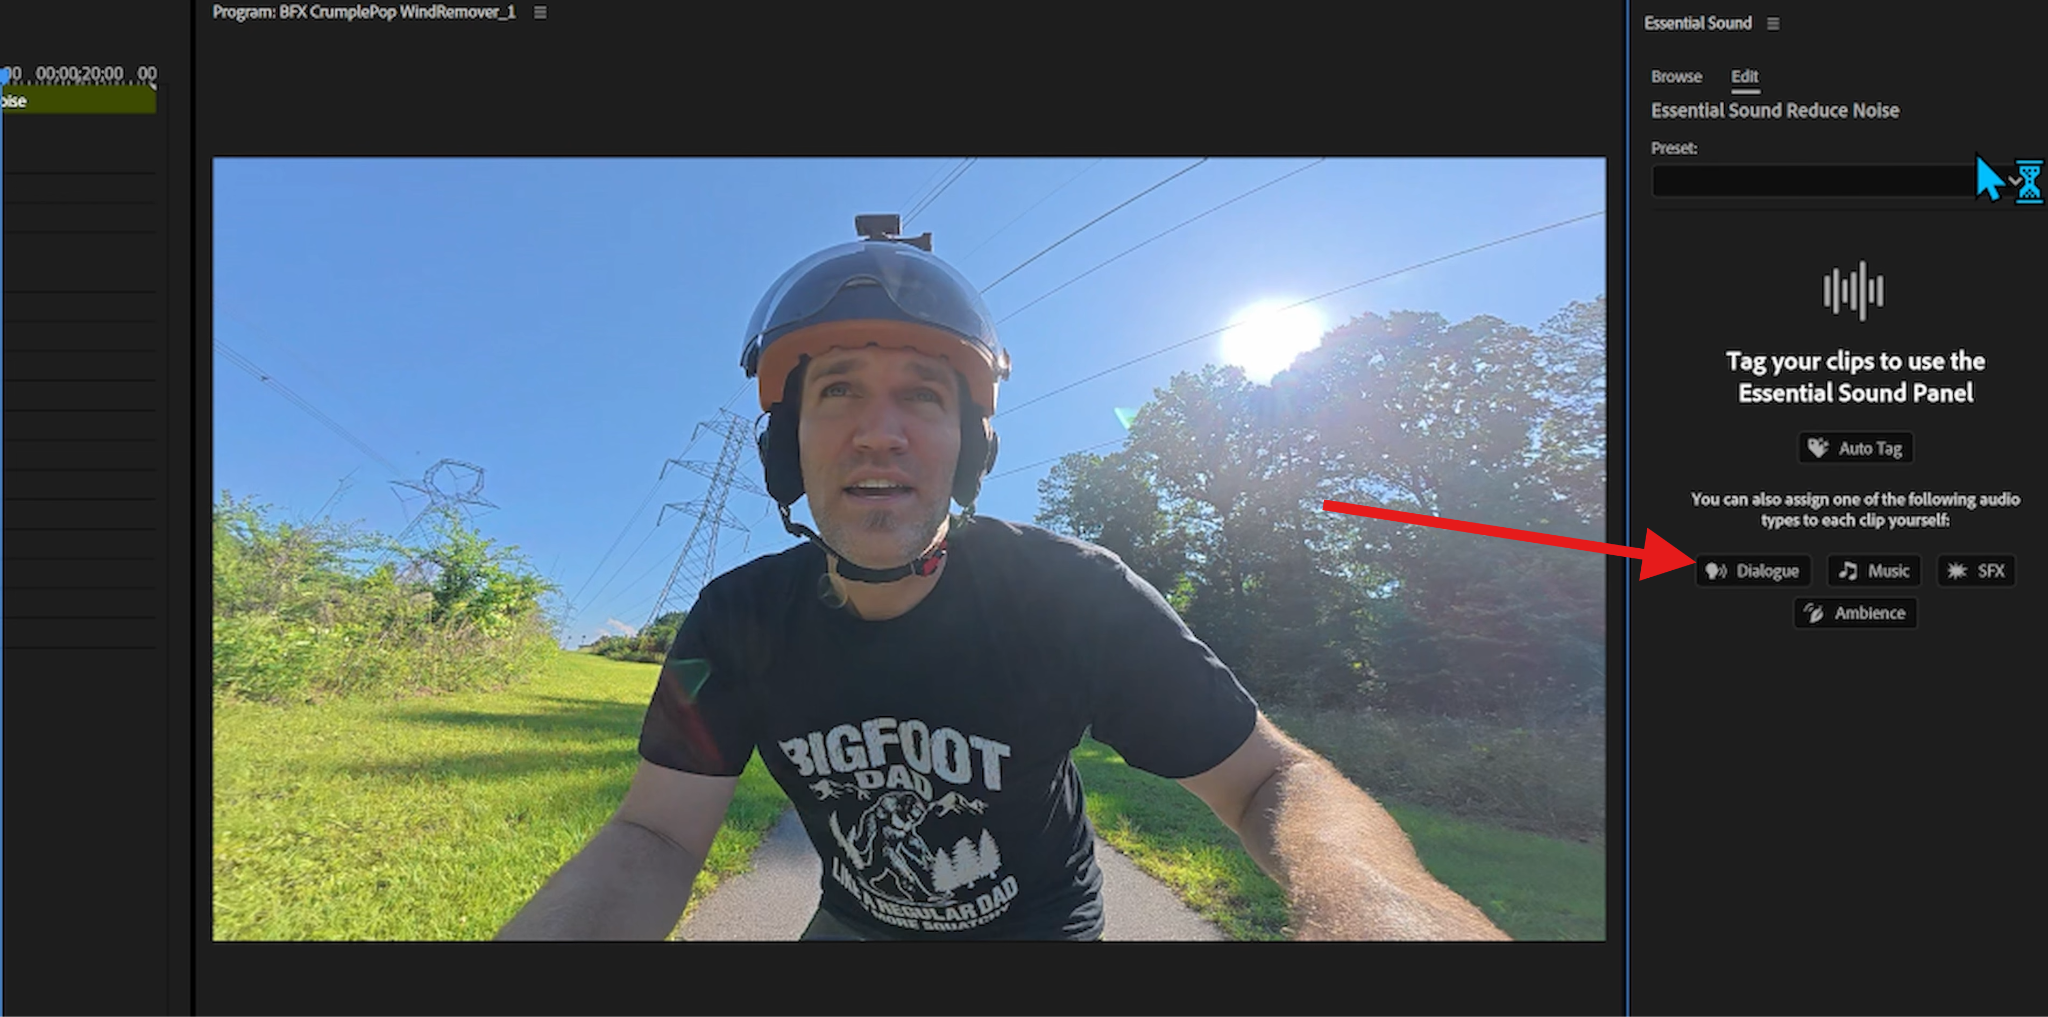
- Now, select the audio type. There are four options: Dialogue, Music, SFX, or Ambience. Pick one option depending on the type of sound you are working on. We will go with Dialogue.
- Now, activate the Enhance Speech function, click on Enhance, wait for Premiere Pro's AI to complete the task, and then adjust the Mix Amount slider until you are satisfied with the sound and the echo removed.
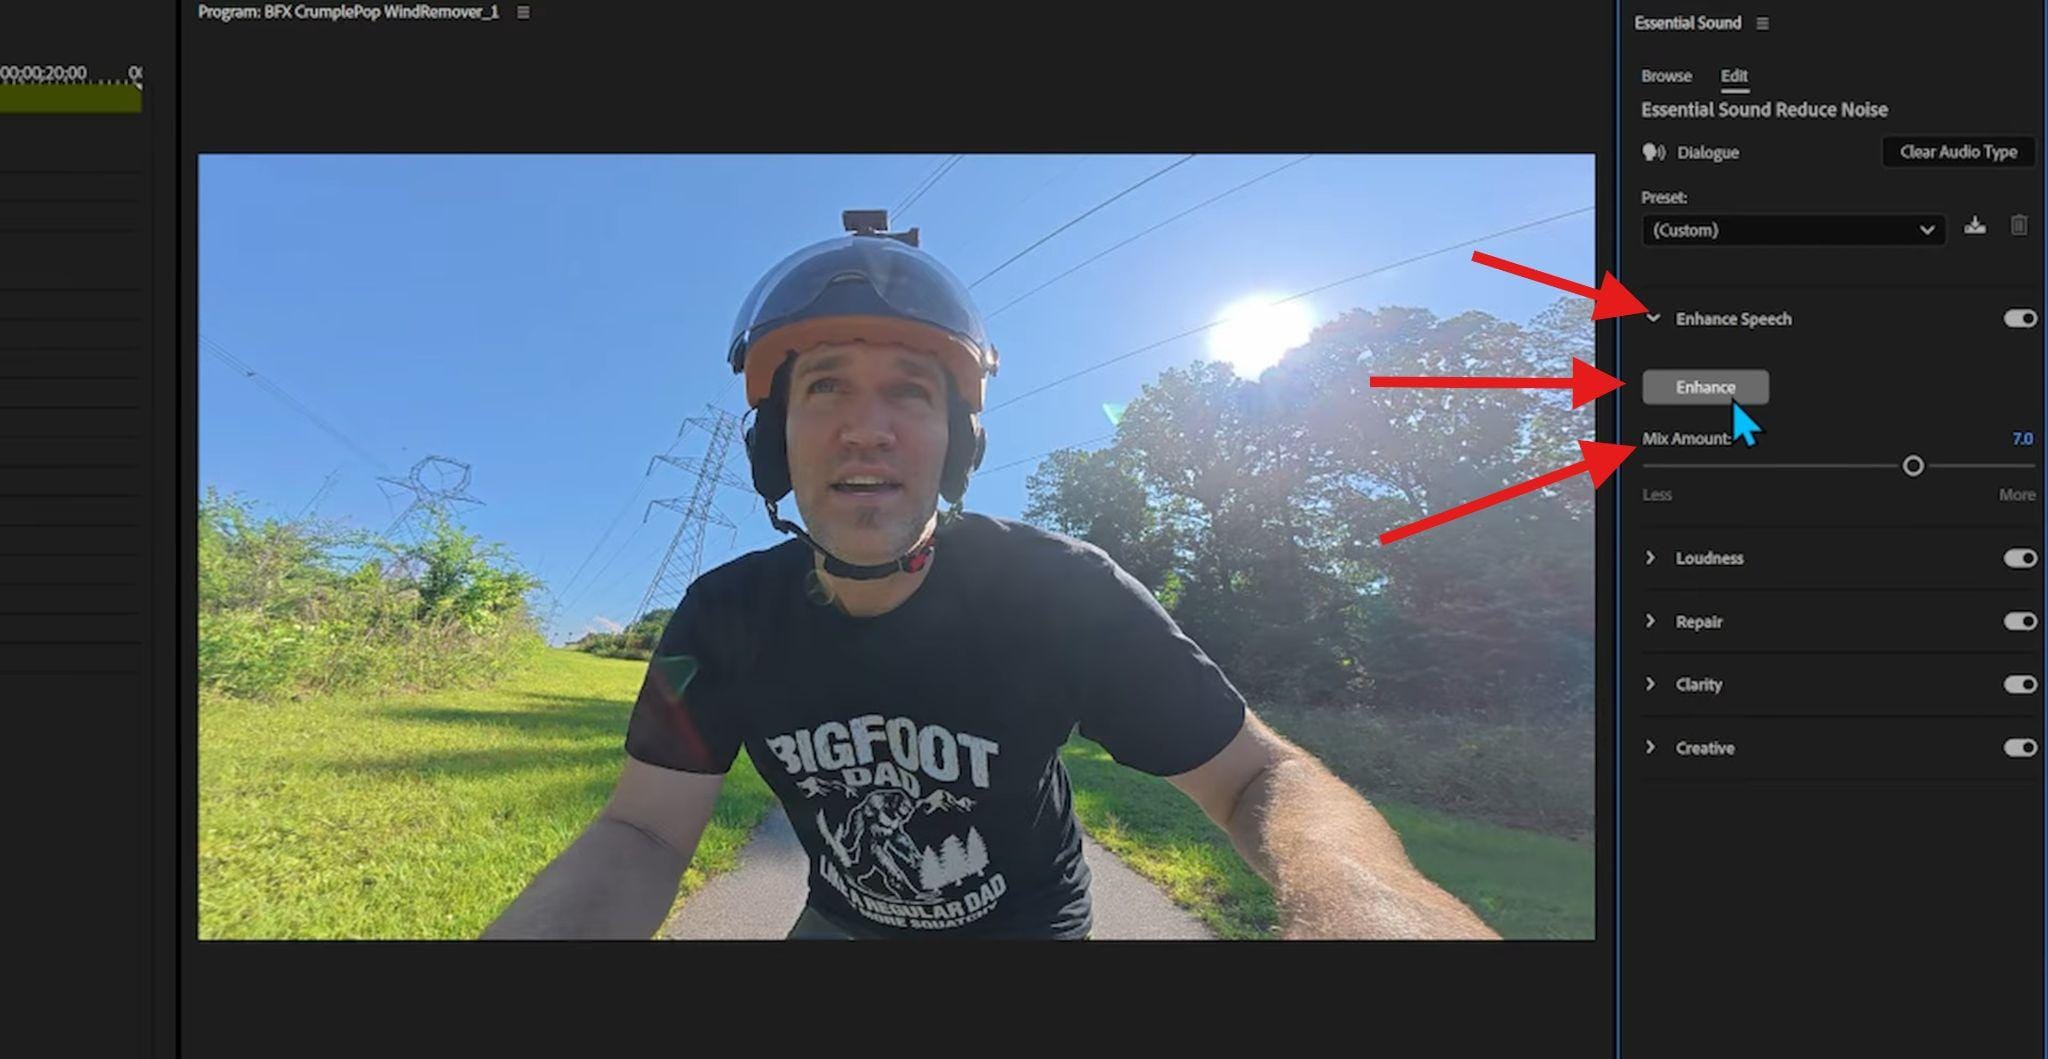
If you are still having issues with the audio, you can check other functions, like Loudness, Repair, Clarity, and Creative. If the first function didn't remove the echo enough, you can try combining a few of them until you get the desired result.
Premiere Pro Echo Reduction Using Audio Effects
When the Essential Sound panel just cannot do a good job, you can try audio effects, which give you a little more control.
Manual effects are useful when:
- Echo varies across the clip
- You want finer control over frequencies
- Essential Sound over-processes the audio
Commonly used effects include:
- Parametric Equalizer
- DeReverb-style plugins (when available)
- Combination EQ + light noise reduction
This approach requires more careful listening, but it often delivers more natural results when working with difficult audio files.
- With the audio clip in the timeline, select it, and go to the Effects panel, where you will search for the DeReverb effect.
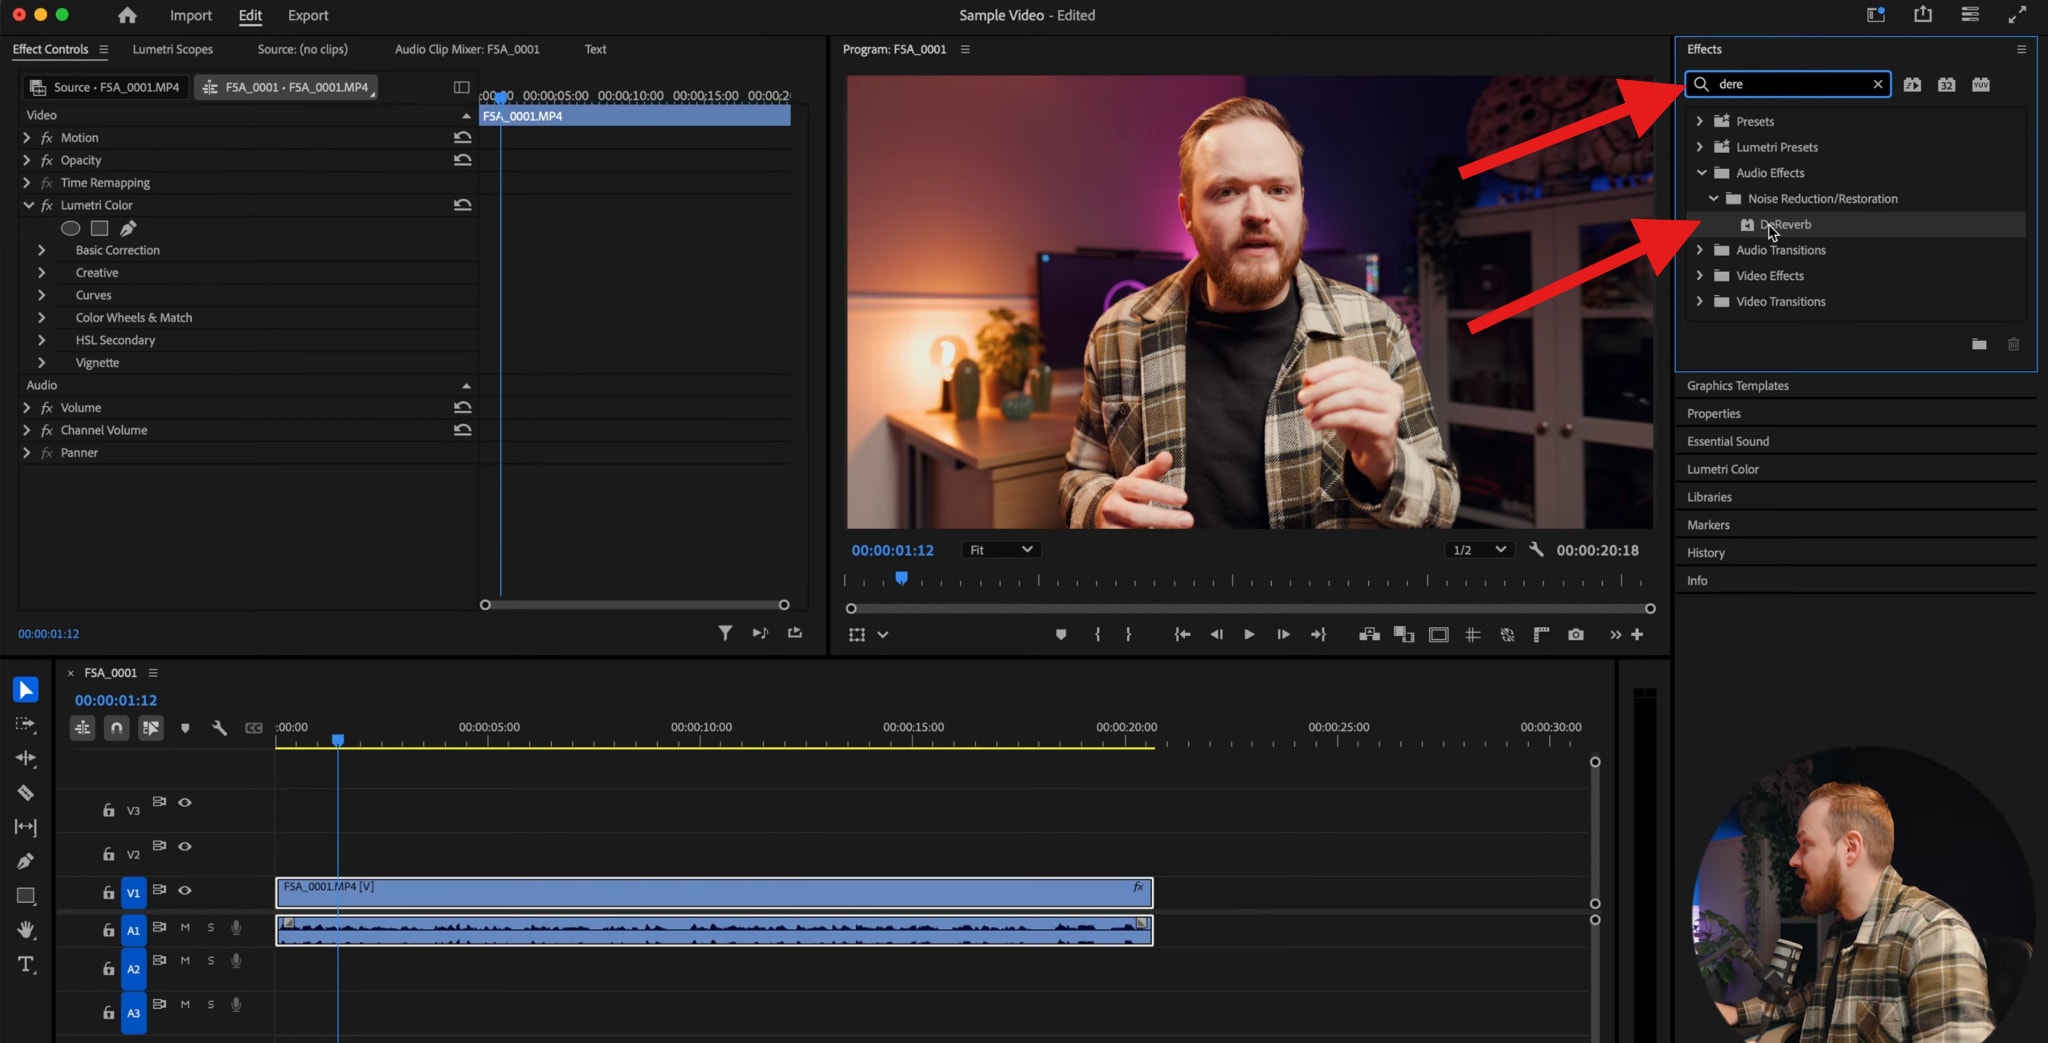
- Now, drag the DaReverb effect over the audio file in the timeline. Next, find this effect in the Effect Controls panel, find the Custom Setup row, and click on Edit.

- This will open a new window where you can adjust the effect. Play around with the Amount slider, or check the available Presets.
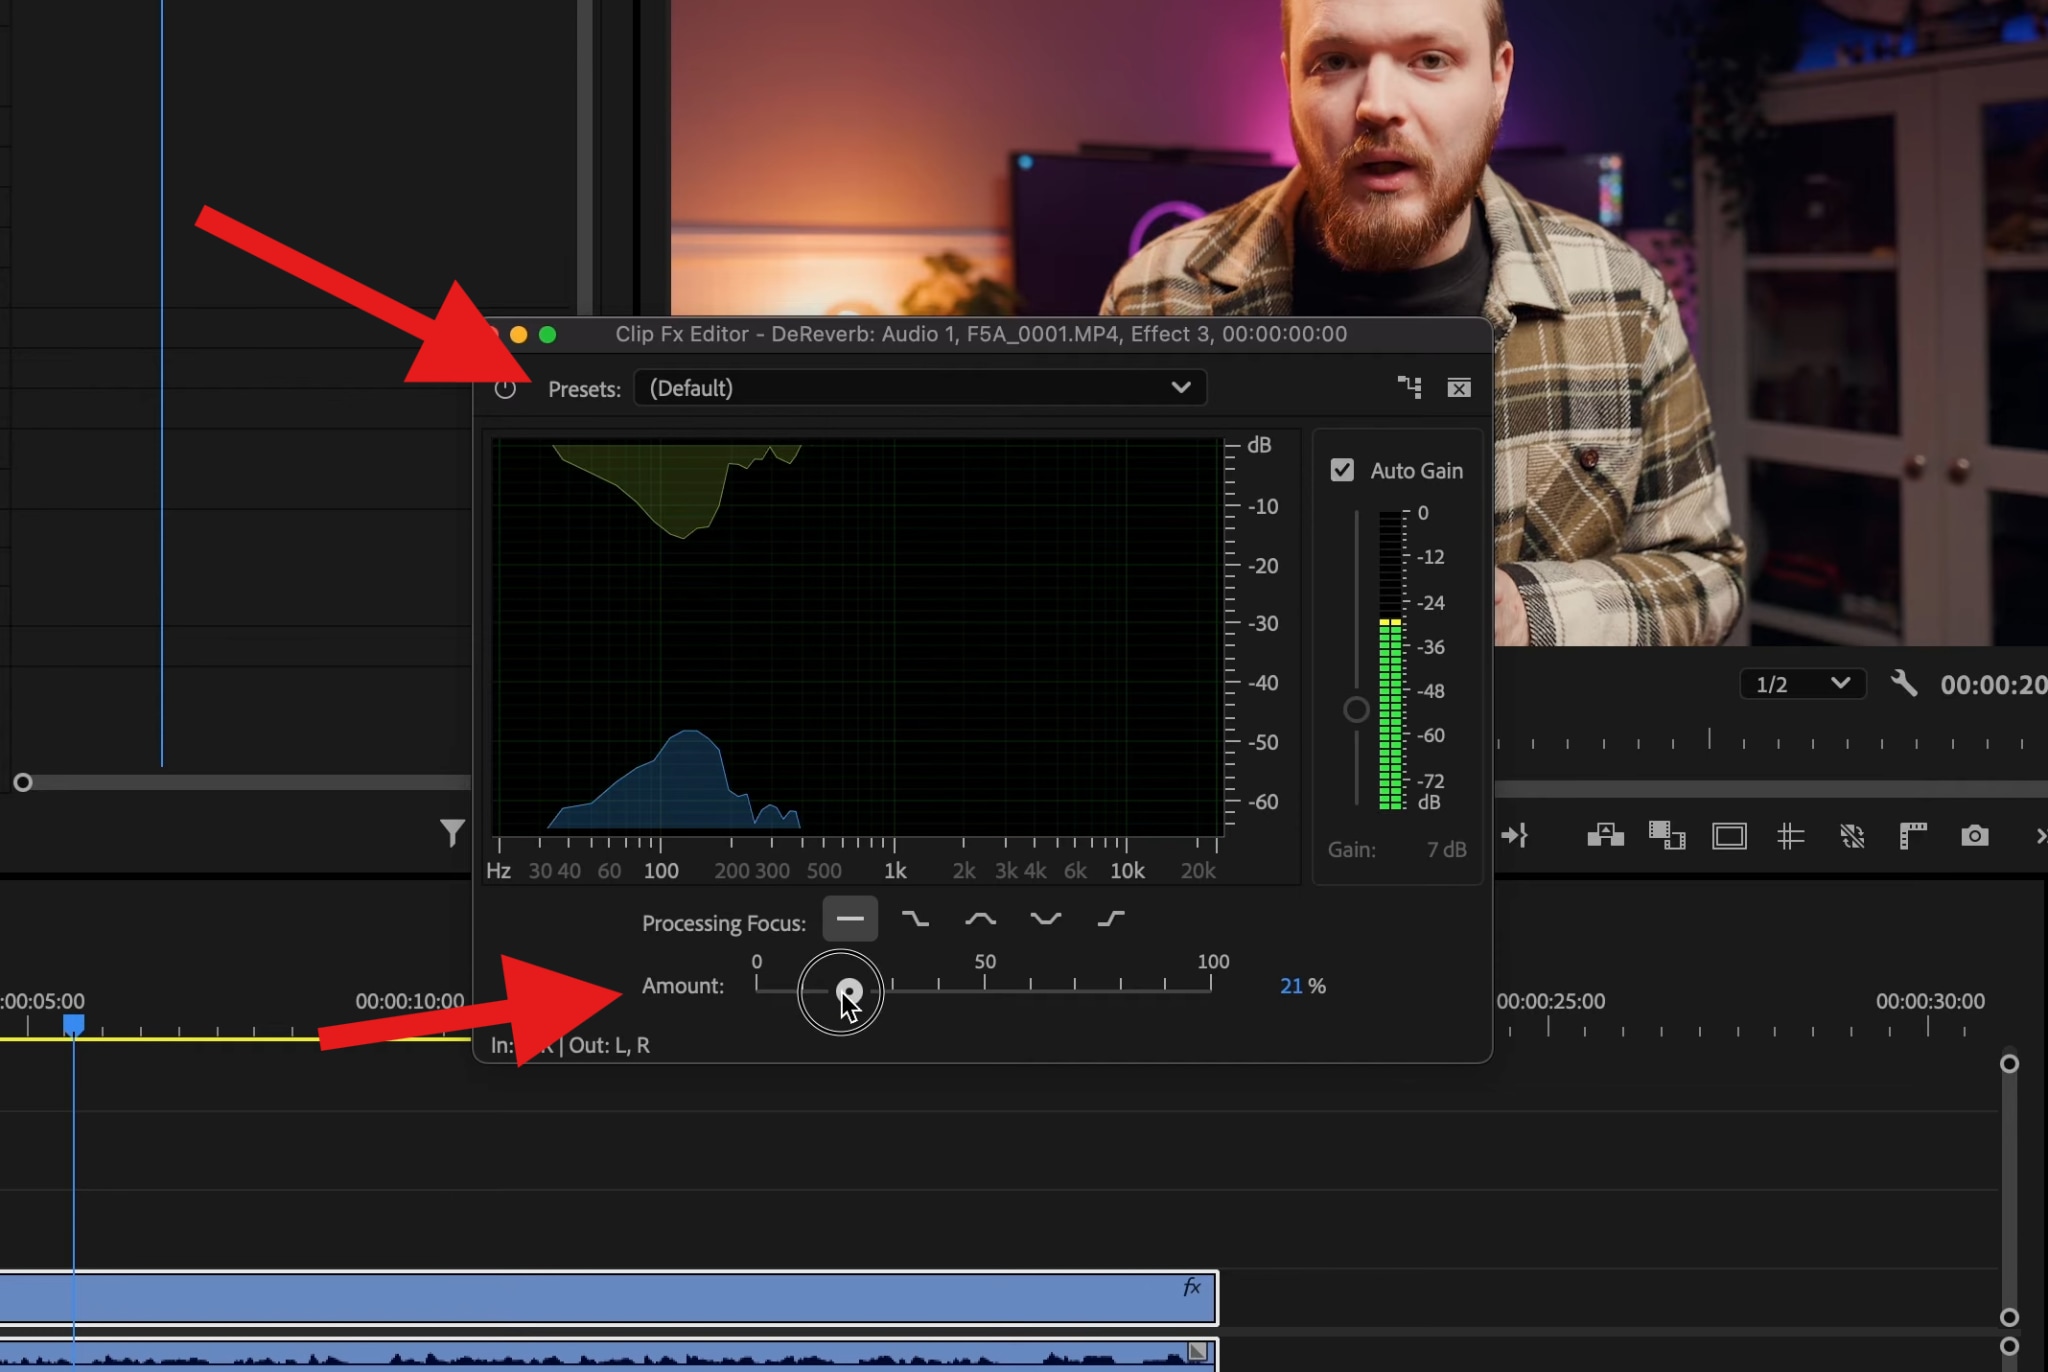
As you progress, you will need to listen carefully if the audio changes are working for you. You can finish editing when you feel that the audio has been cleaned up properly.
Premiere Pro Echo Removal with EQ Settings
You can use the Parametric Equalizer effect to reduce the ringing or boxiness often associated with room echo. While this cannot remove the actual reflections like the DeReverb effect, it is excellent for cleaning up specific frequencies that make the echo sound harsh or muddy.
Open the Effects panel, search for Parametric Equalizer, and drag it onto your audio clip (just like you did with DaReverb). Then, go to the Effect Controls panel and click Edit next to the Parametric Equalizer.
Now, we'll teach you the "Sweep" technique:
- Pick one of the middle frequency bands (e.g., Band 2 or 3).
- Increase the Q (width) to make the curve very narrow and sharp.
- Boost the Gain significantly (about 10–15dB).
- Play your audio and "sweep" the frequency slider back and forth.
You can now identify problem frequencies by listening for the point at which the echo or room resonance sounds loudest. Once you find that frequency, instead of boosting it, pull the Gain down (negative dB) to notch out that specific room sound.
You can do this for 2 or 3 different frequency bands to significantly clean up the tone.
Echoes often resonate at specific frequencies depending on the size of the room (e.g., in small rooms, a boxy sound can occur around 300Hz–500Hz). By cutting these frequencies, the echo becomes less distracting, even though the sound's tail remains.
Here's a cool YouTube clip that goes in-depth on how to use the Parametric EQ in Premiere Pro.
Pro Tip: Premiere Pro Reduce Echo for Voiceovers and Interviews

Not all dialogue recordings behave the same when it comes to echo reduction, for voiceovers, the Reduce Reverb control in the Essential Sound panel often works surprisingly well. You can usually apply moderate reverb reduction without noticeably degrading vocal quality, especially if the recording already has a strong, direct signal.
Interviews, on the other hand, and especially on-location or documentary-style recordings, are harder to fix. In these scenarios, pushing Premiere Pro's echo reduction too far can quickly make dialogue sound thin, distant, or artificial.
The best practices here are to reduce echo conservatively, focus on improving intelligibility rather than eliminating all room sound, and accept a small amount of natural ambience if it keeps voices sounding human.
AI-Based Alternative to Premiere Pro Echo Removal: Media.io
When the echo is heavy, uneven, or baked deeply into the recording, Premiere Pro tools often hit their limit. This is where AI-based cleanup becomes the better option.
At this point, we would like to introduce Media.io's Noise Reducer. This online tool uses AI to separate voice from room reflections, rather than relying on sliders and frequency guessing. Also, there are many other advantages over manual Premiere Pro workflows:
- No sliders or trial-and-error.
- Remove echo from audio in one click
- Specific options for reducing reverbs, hiss, wind and other audio noises.
In addition to that, Media.io delivers better results in those common scenarios such as untreated rooms with strong room echo and on-location interviews. Especially a good choice for those who don't have audio editing experience. Here are the easy steps to remove echo online with Media.io.
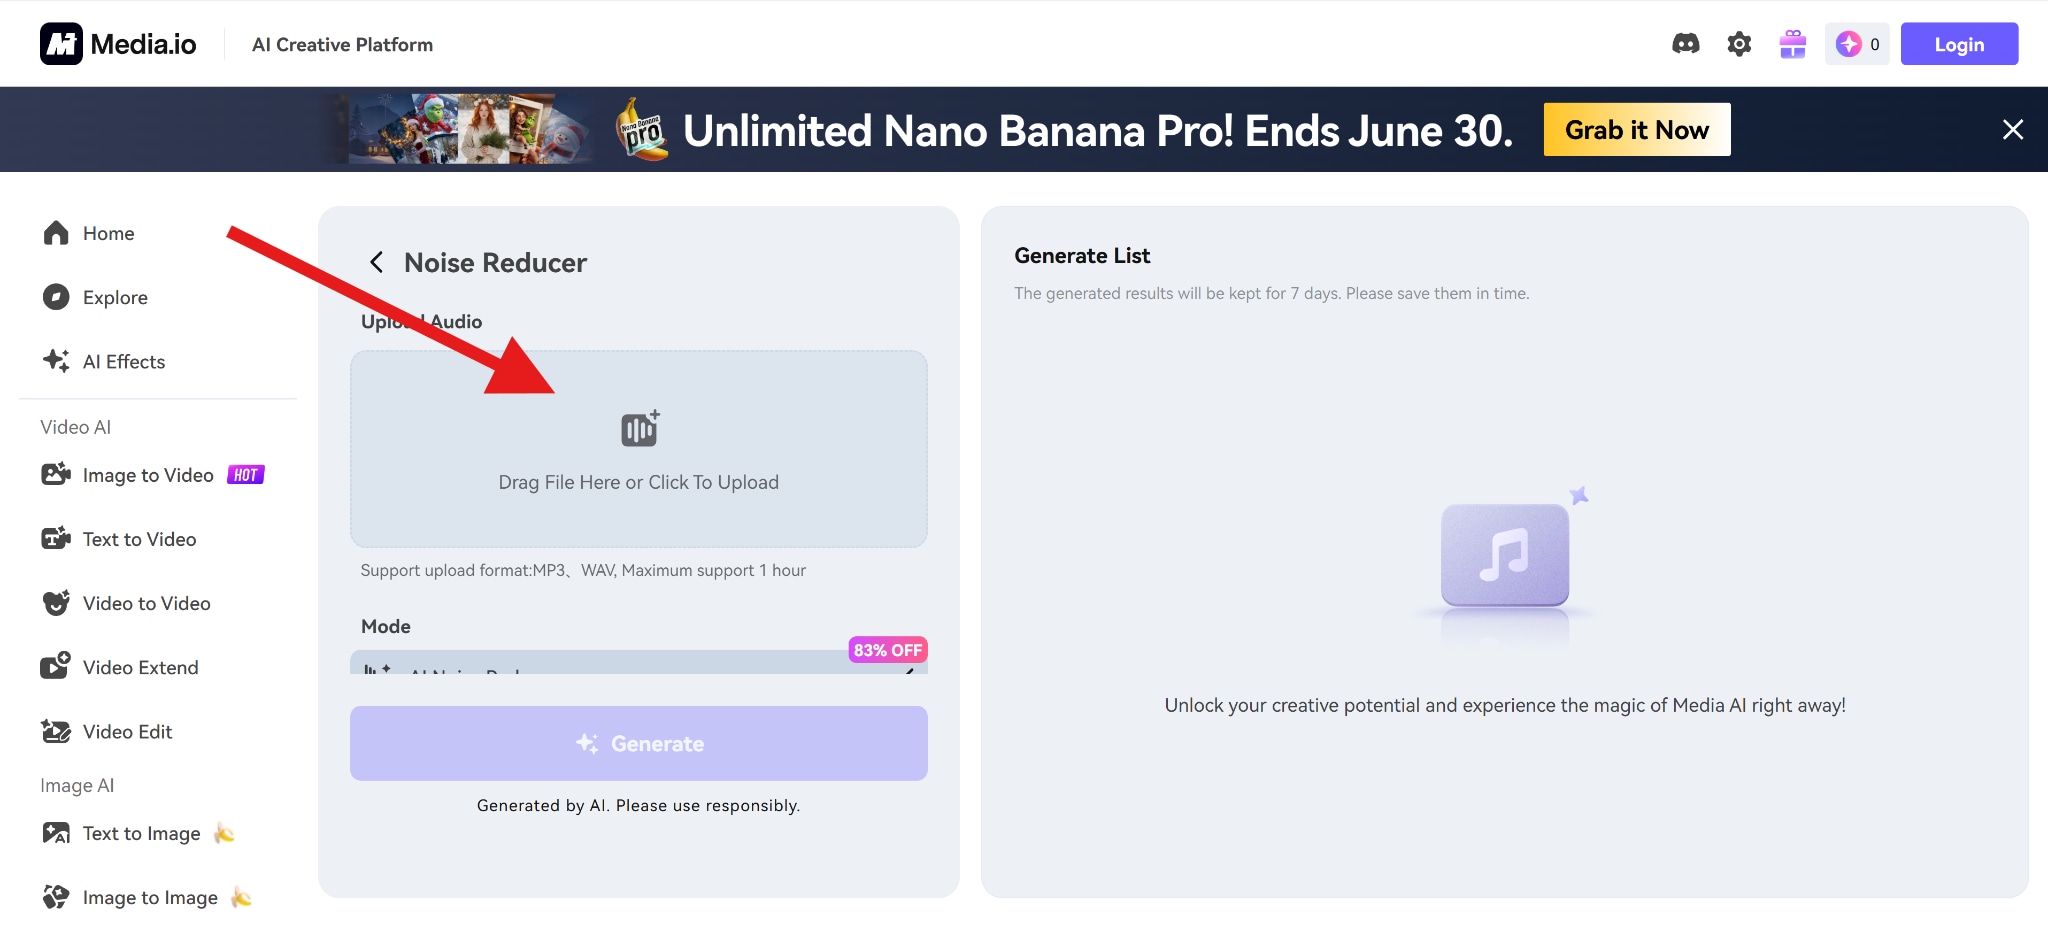
- Go to Media.io's noise reducer feature and click to upload your audio file.
- Pick a mode. We'll go with Reverb Reduction to remove the echo. Select that and click on Generate.
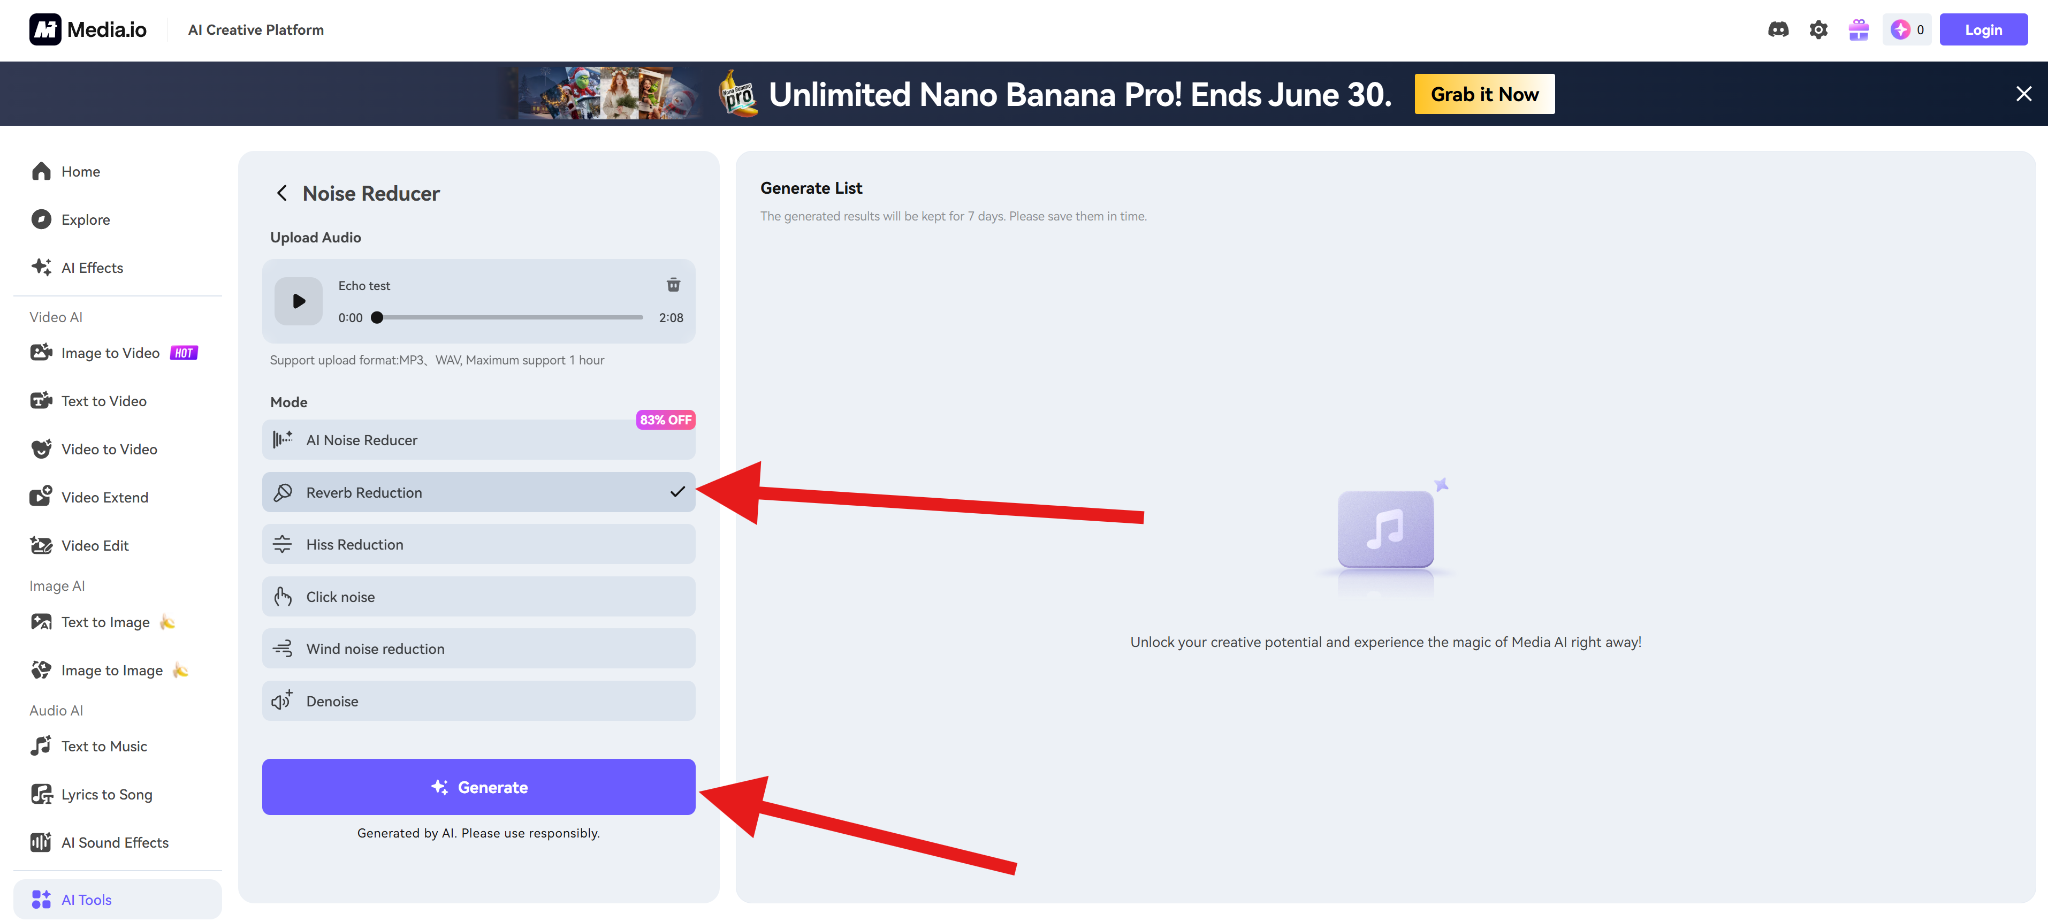
- After that, all you need to do is review the results and download them to your computer.
Conclusion
Premiere Pro can effectively reduce echo when it's light to moderate, and the audio is dialogue-focused. The Essential Sound panel is usually the best starting point, while audio effects and EQ provide more control when needed.
If you prefer an online option to reduce echo from audio, Media.io is a perfect choice which allows you to do that in seconds.


