

 ChatGPT
 Perplexity
 Gemini
 Claude
 Grok
Grok
If you're wondering how to remove background noise from audio in FL Studio, you're not alone. From mic hiss and room hum to low-level static, unwanted noise can quickly ruin an otherwise clean take. Many producers search for simple, step-by-step solutions using tools like Edison, EQ, or a noise gate inside FL Studio. In this guide, we'll walk through practical methods to reduce background noise and improve your audio quality without overprocessing your sound.
In this article
FL Studio Noise Reduction: Understand the Noise First

FL Studio is first and foremost a music production DAW, which can help with room hum, mic hiss, fan noise, and interface noise. Now, not all noise should be treated the same way.
- Consistent noise (steady hiss or hum) → Best handled with Edison
- Noise between words → Better handled with a noise gate
- Frequency-specific noise → Best handled with EQ
- Dynamic or messy noise → Often beyond FL Studio's comfort zone
But you should know that if you have rapidly changing background noise, heavy environmental contamination, or recordings with overlapping noise and voice, it will be extremely challenging to remove it from the audio.
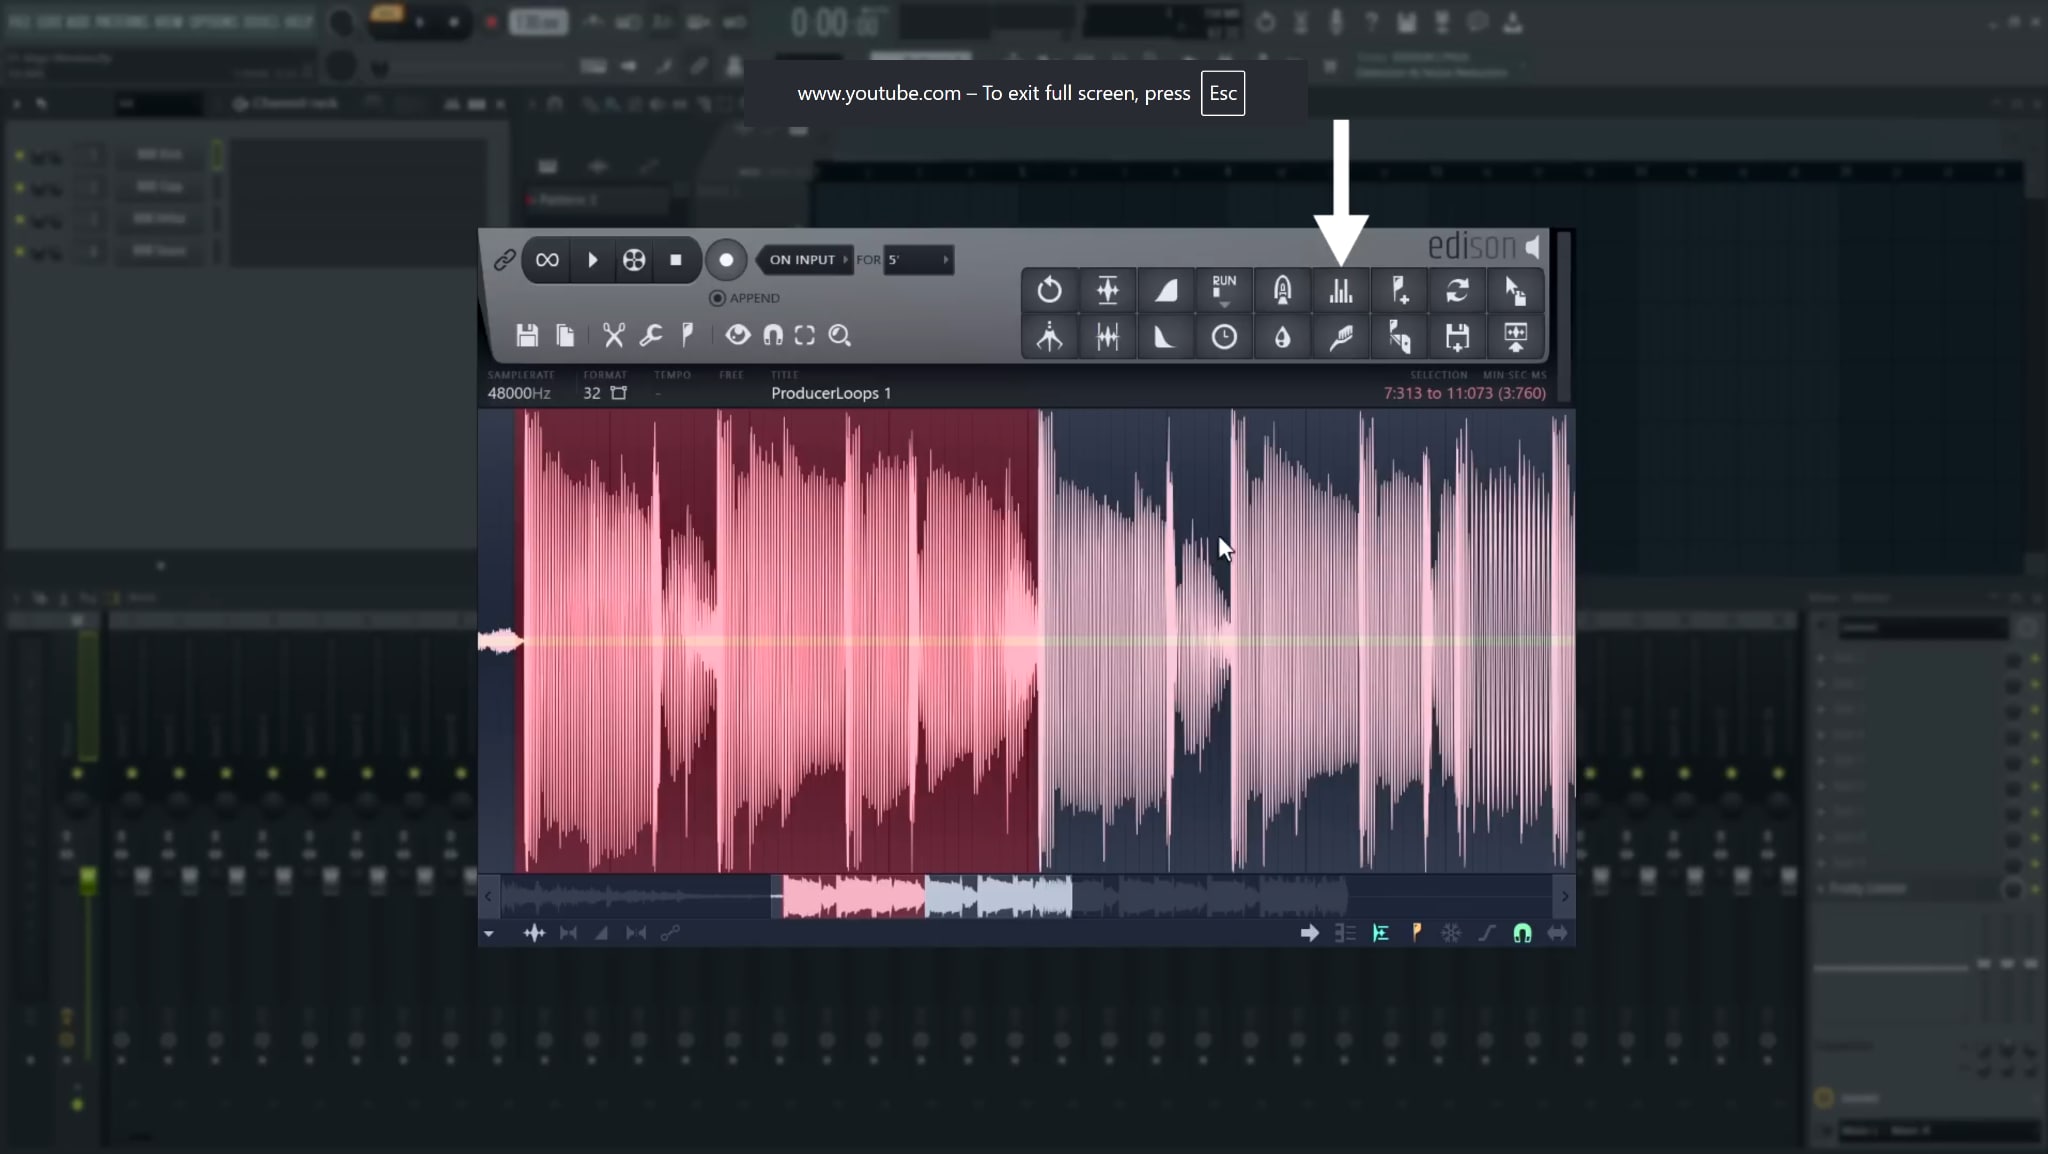
FL Studio Remove Background Noise Using Edison (Noise Removal Tool)

Edison is a built-in FL Studio feature, and most professionals consider it the heart of noise removal in the program. Unlike noise gates or EQs, Edison can actually learn what noise sounds like and remove it quickly and efficiently.
How to Get Rid of Background Noise in FL Studio with Edison
Here's how it works.
- Download and install FL Studio on your device.
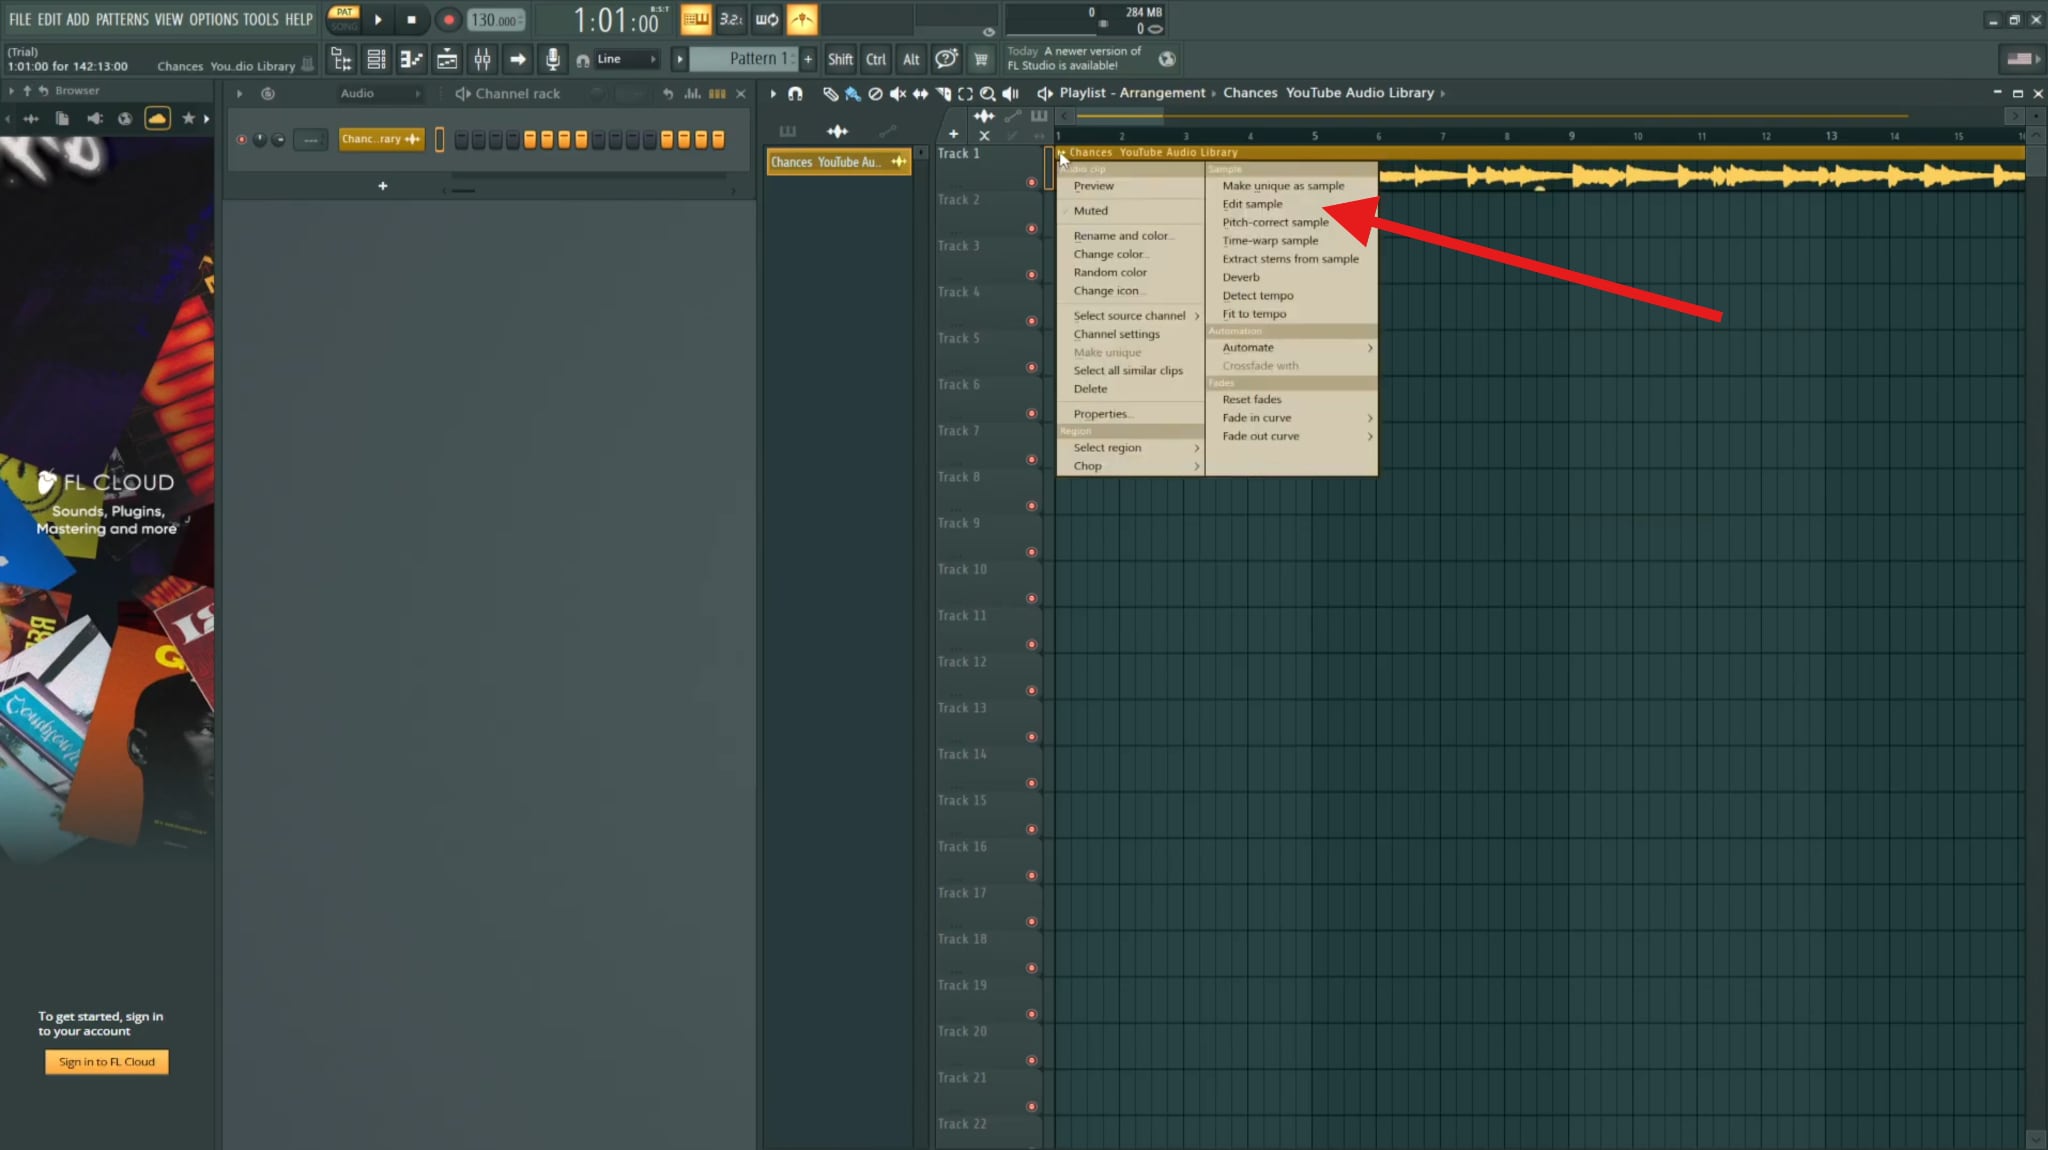
- Open the program, import the track with background noise issues, right-click, and select Edit sample.
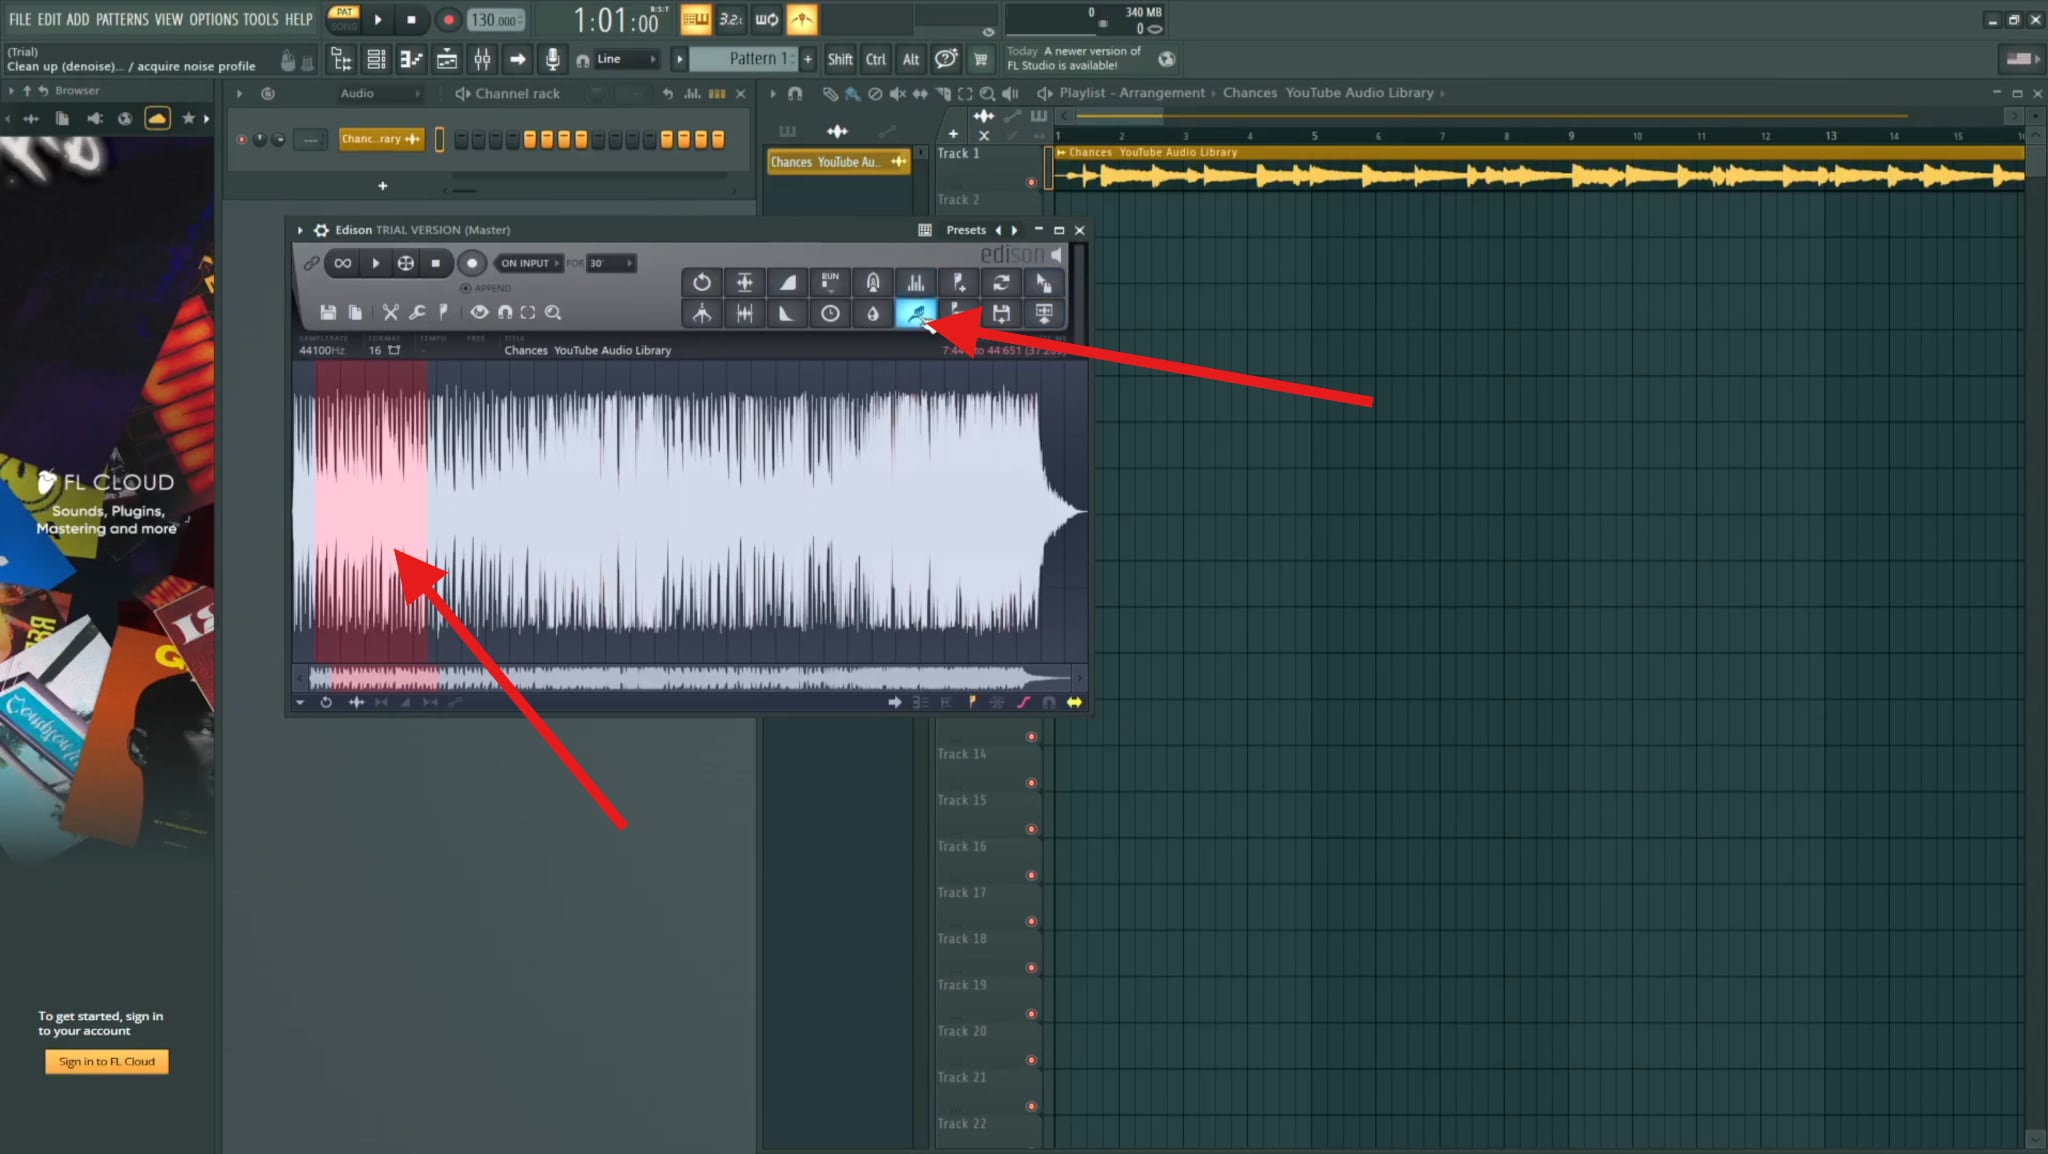
- This will open Edison. Within Edison's interface, select the part of the audio that prominently features the background noise you want to remove, and click to activate the Denoise tool.
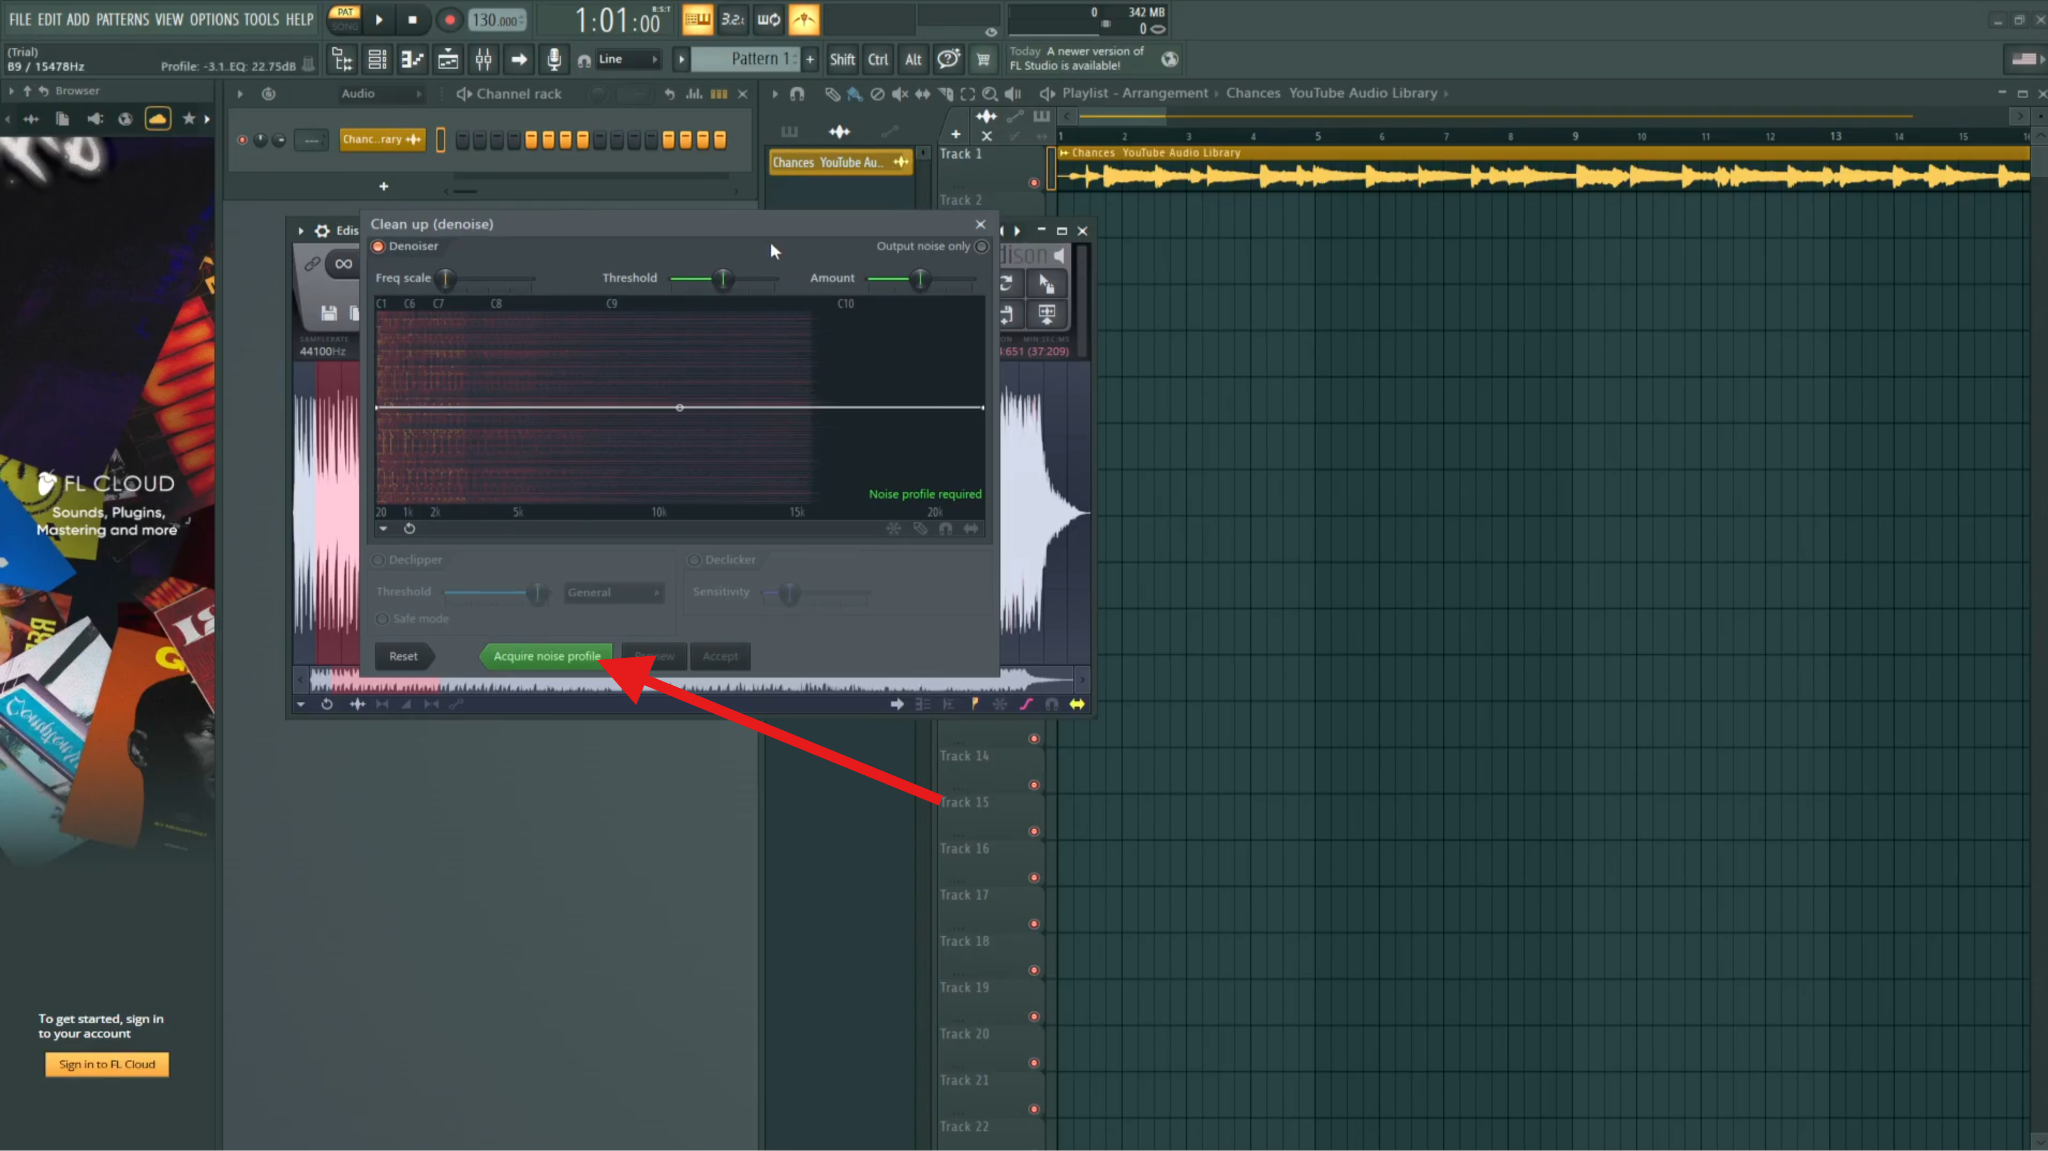
- Now, click on Acquire noise profile.
- Now, select the entire track, and repeat the process (right-click > Edit sample > Denoise). You can now click on Preview to listen to the changes before you click on Accept.

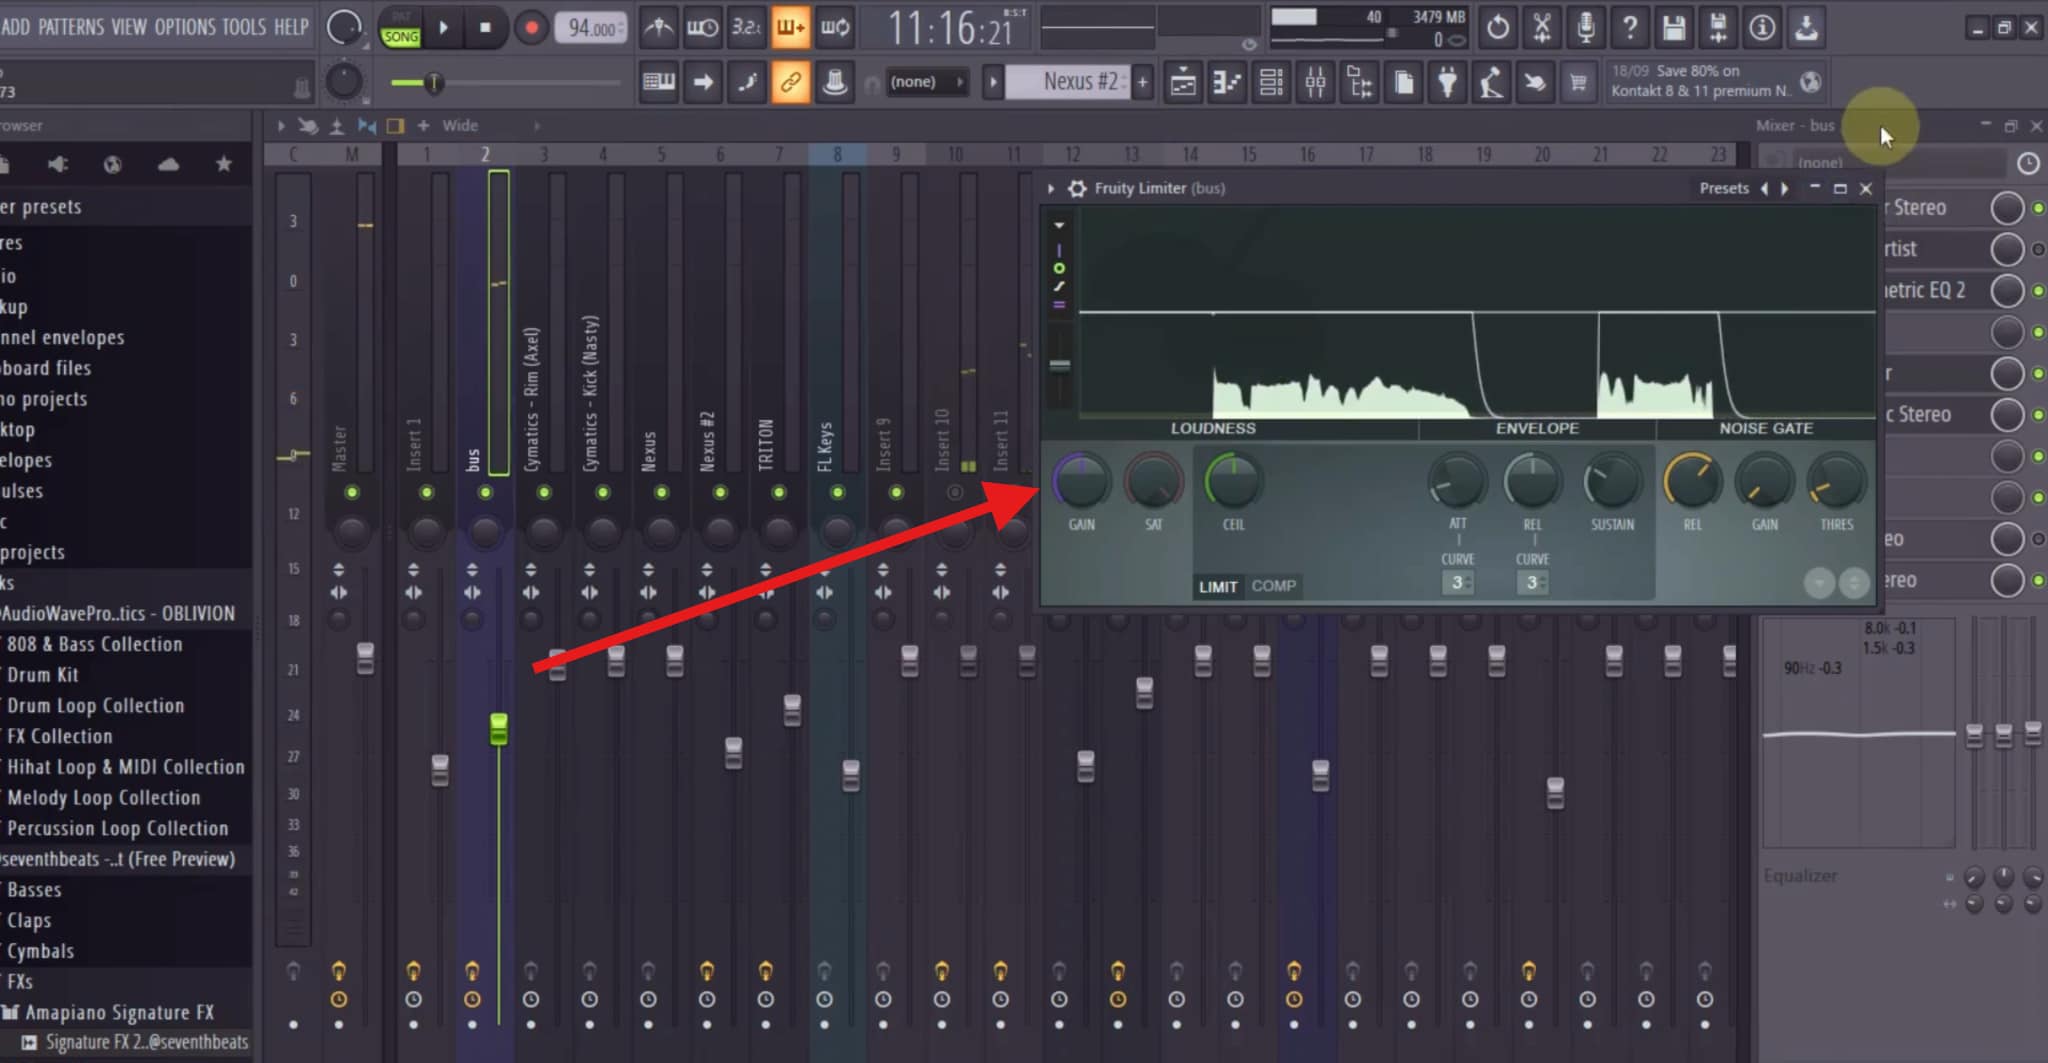
FL Studio Remove Background Noise with Noise Gate (Fruity Limiter)
Right off the bat, you need to learn that noise gates don't remove noise that is going on in parallel with voice or instrument sounds. They only mute the noise during silences, but this is still incredibly useful.
How to Use the Noise Gate in FL Studio
To activate this feature, open the Mixer in FL Studio and follow the steps below.
- Select the track you are working on, and in the Mixer section, click to add a new plugin, select Fruity Limiter, and add it to your channel.
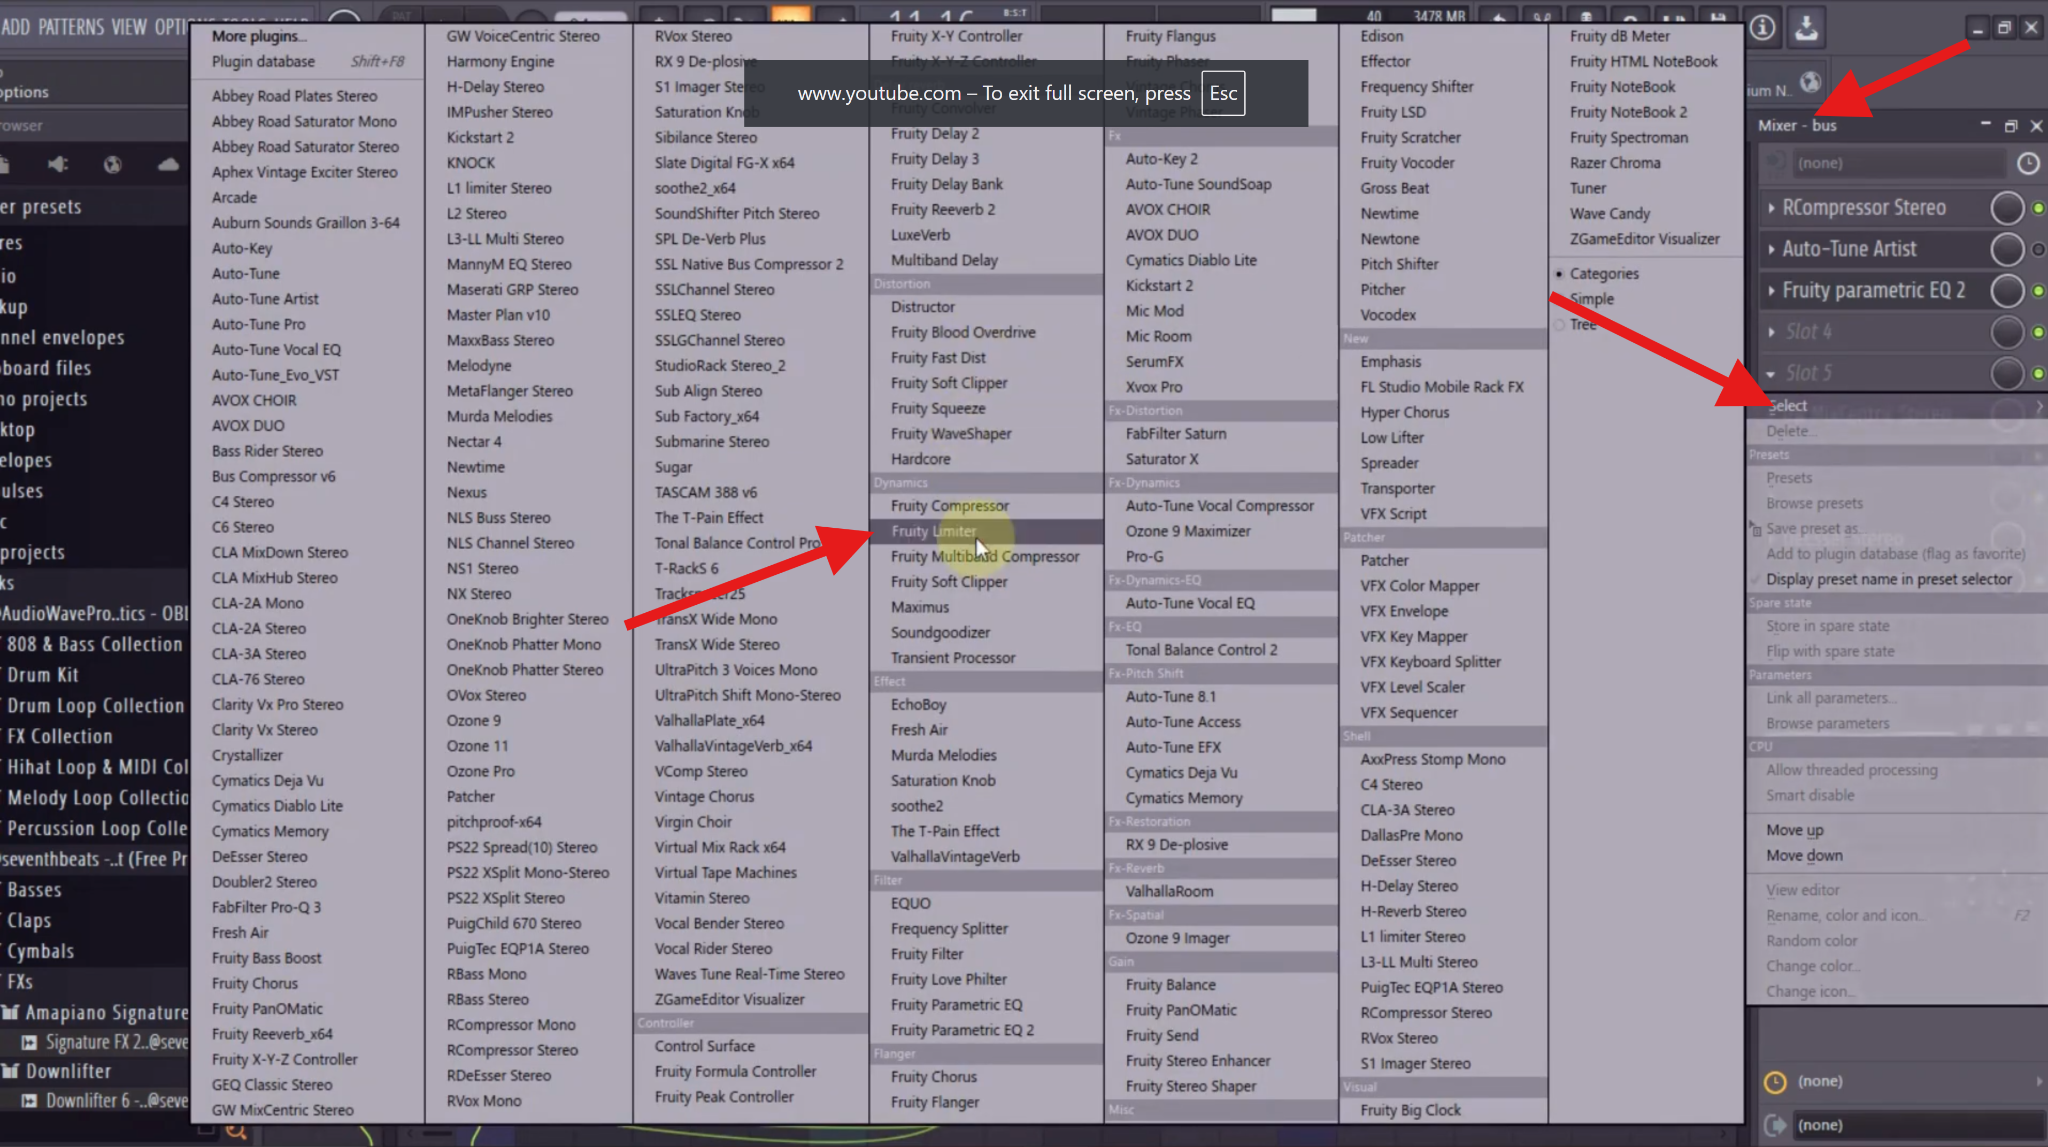
- Select the arrow pointing down, and go to Presets > Noise Gate.
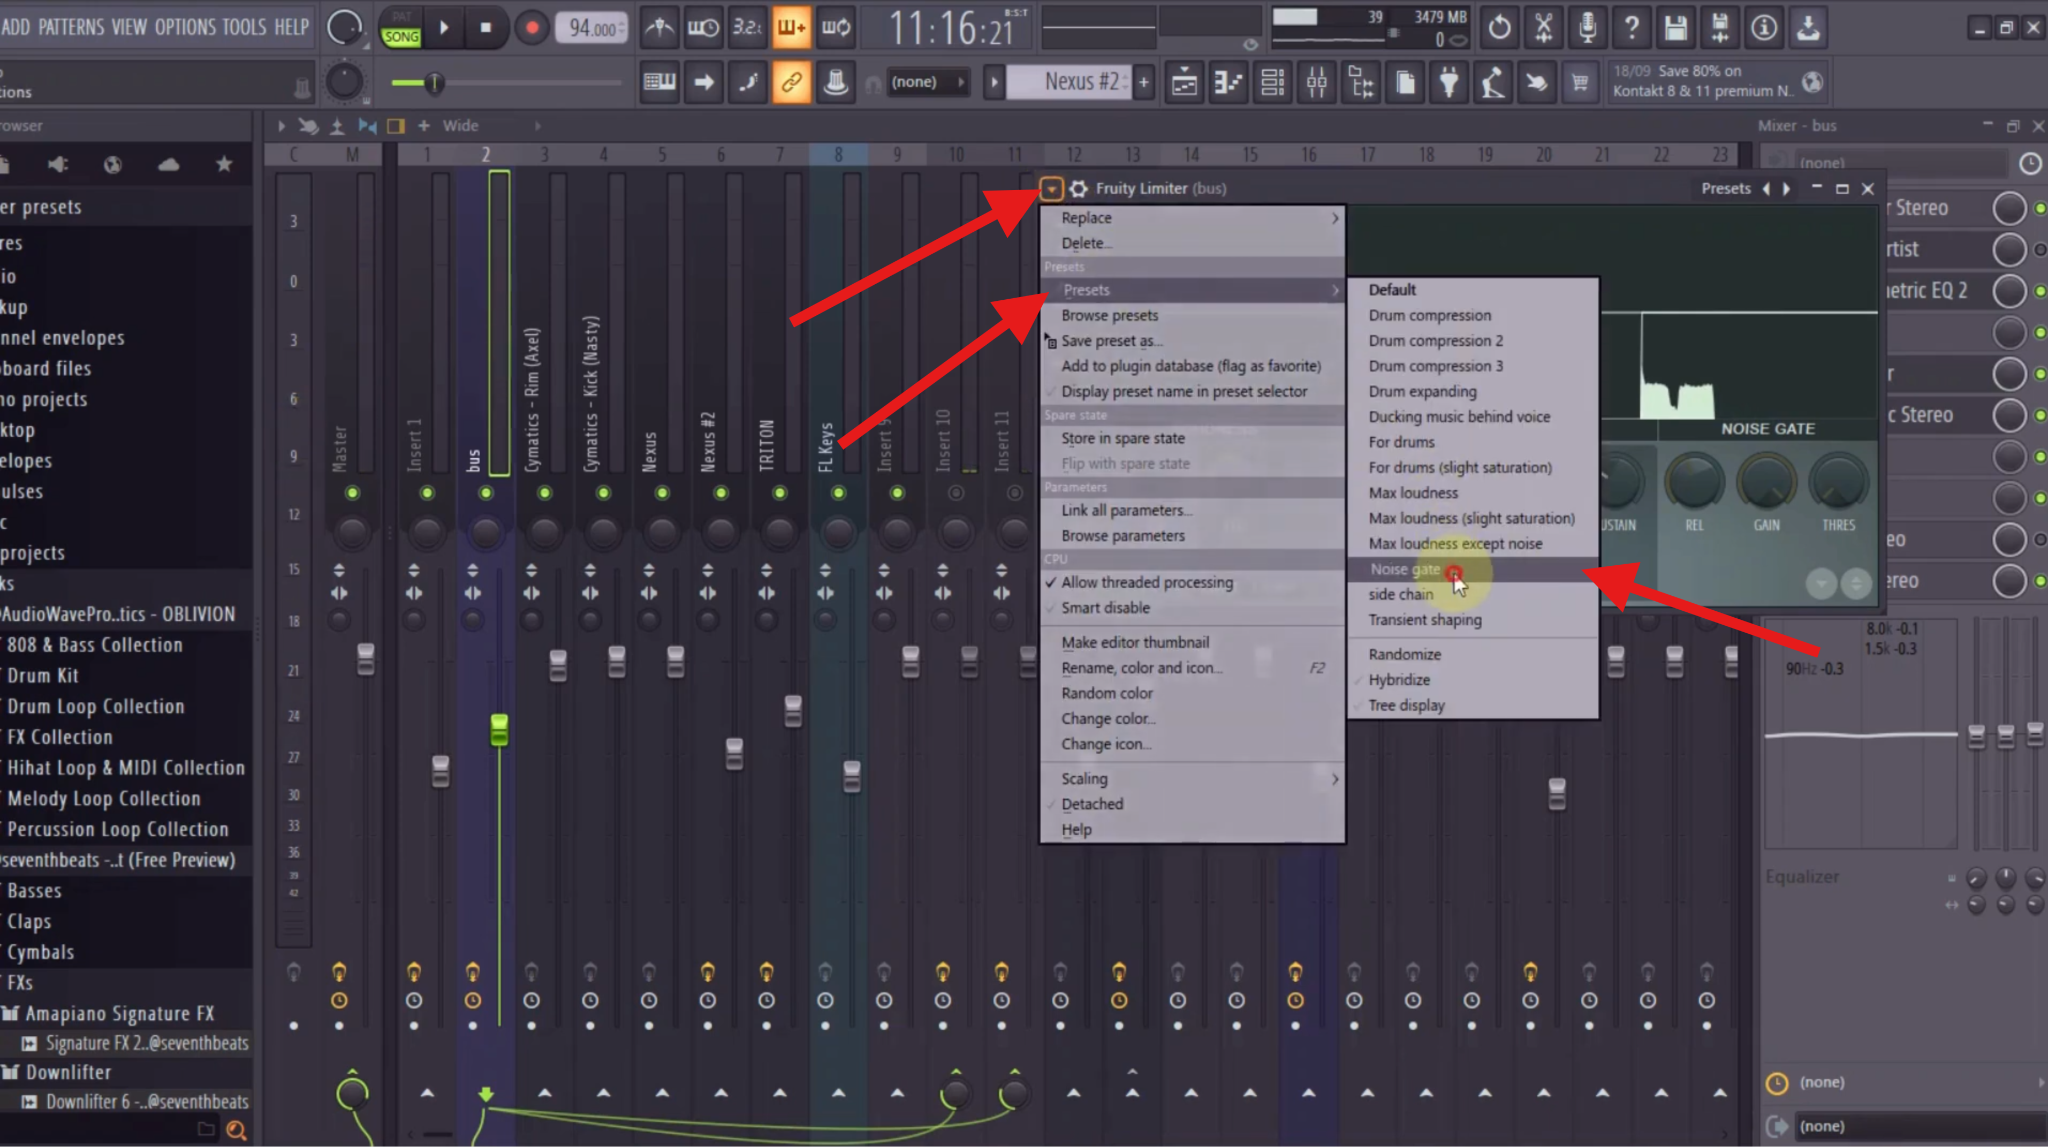
- You can continue adjusting the knobs until you get a result you like.
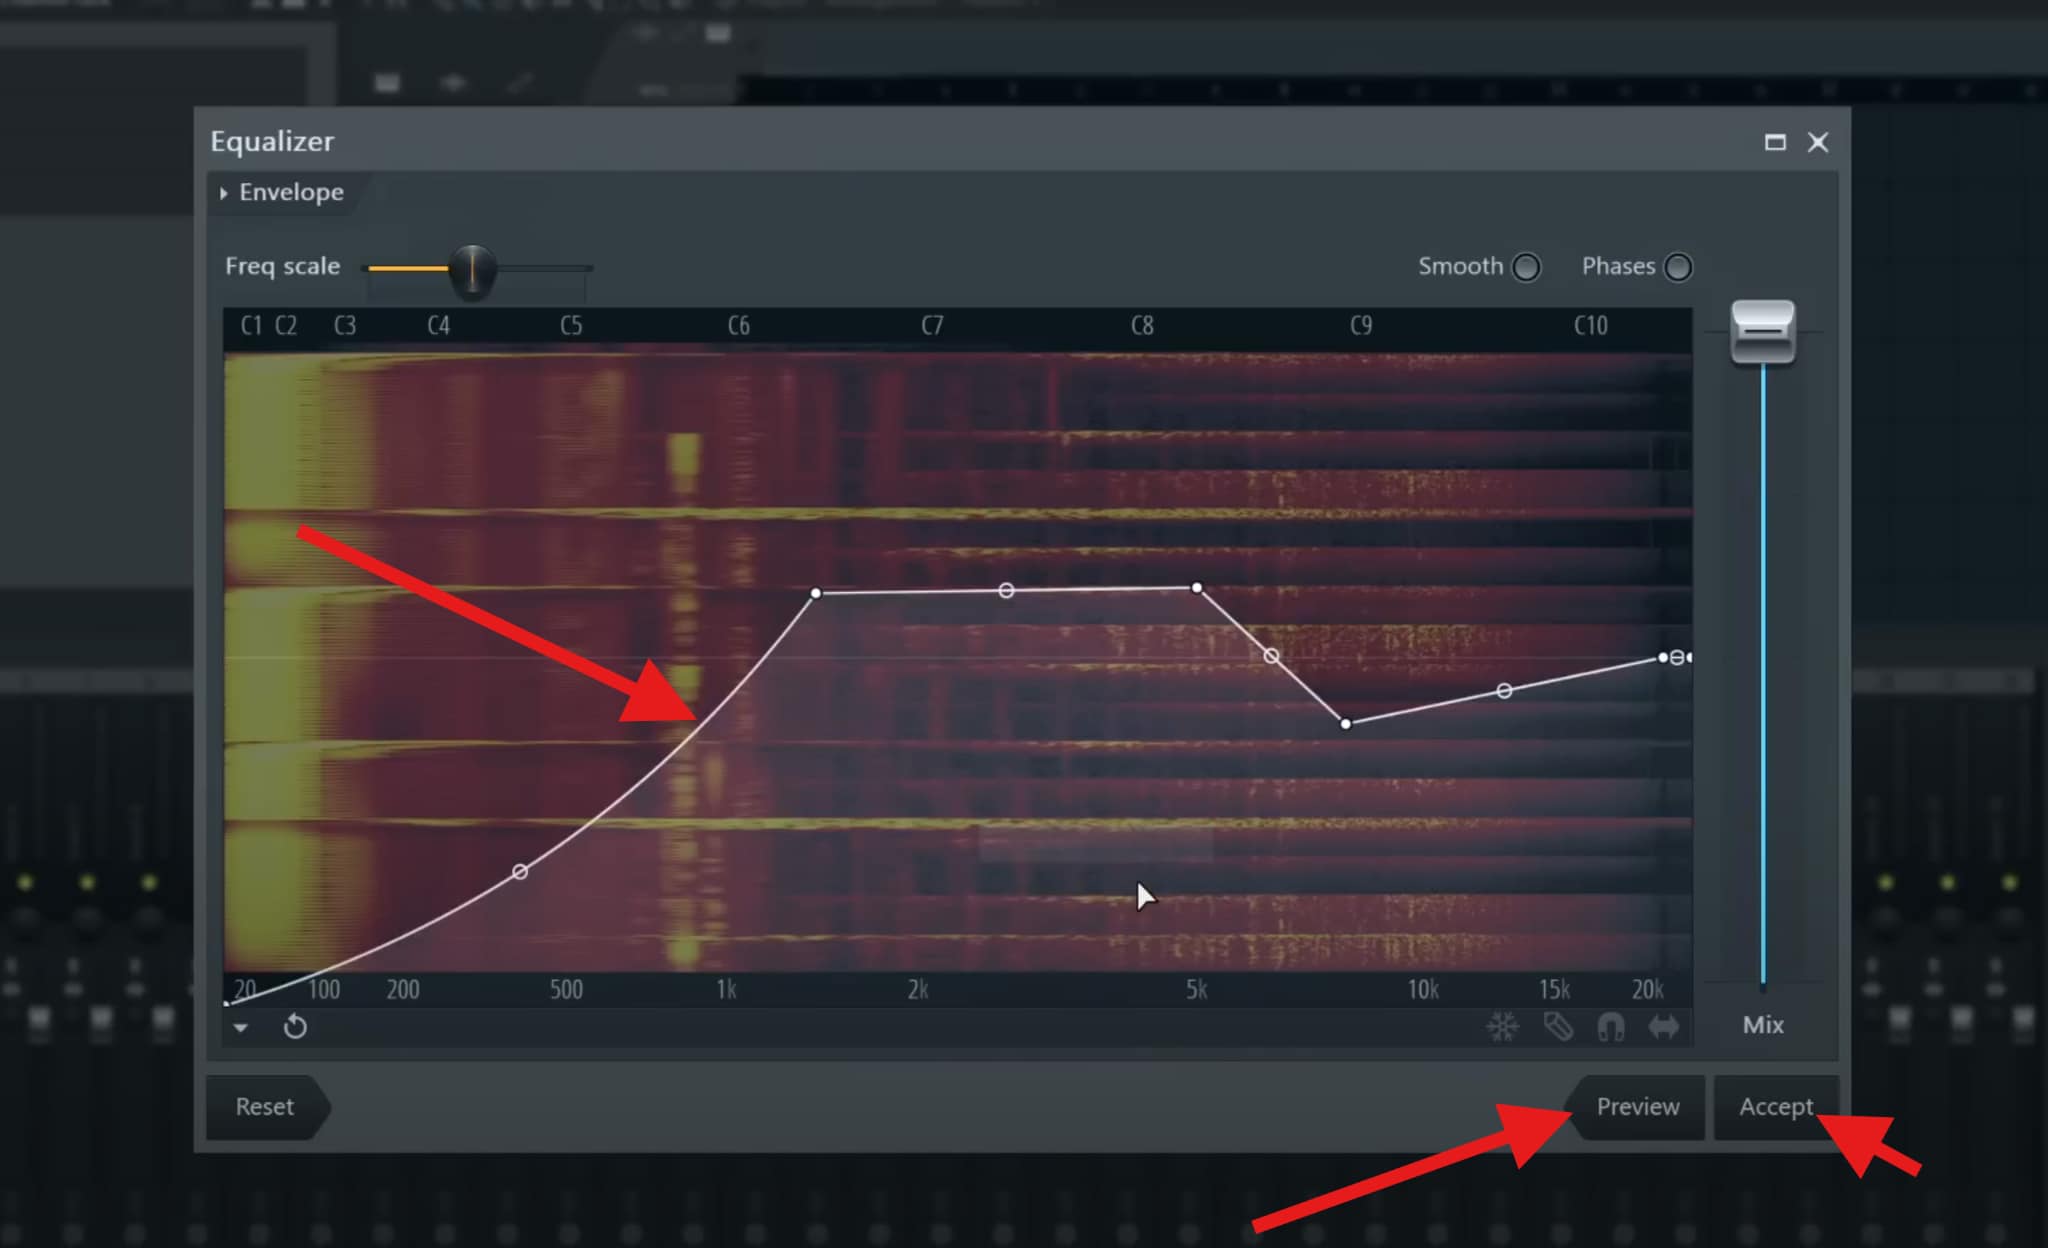
Remove Background Noise FL Studio with EQ Techniques
The first thing you should know is that the EQ doesn't remove noise, but it can reduce the volume of frequencies associated with specific types of noise.
You can activate it from the Edison editor by clicking on the EQ button.
When the new window opens up, you can adjust the frequencies until you get to a solid result. Preview every step of the way, and click Accept when you're satisfied.
Take a look at this table, where you can learn about the different types of background sounds and what frequencies they usually occupy. That way, you'll know which frequencies to lower depending on your case.
| Background Sound Type | What It Usually Sounds Like | Typical Frequency Range (Hz) | Notes for Cleanup |
| Low-frequency hum (power/ground noise) | Steady electrical buzz | 50–60 Hz (plus harmonics at 100, 120, 180 Hz) | Often caused by grounding or power interference; notch or low-cut carefully |
| Room rumble/floor vibration | Deep, low-end movement | 20–80 Hz | High-pass filtering is usually effective |
| AC / fan noise (low end) | Soft, constant airflow | 80–200 Hz | Can overlap with vocal body; avoid aggressive cuts |
| Mic handling noise | Thumps, bumps | 20–150 Hz | Transient; manual editing or automation works best |
| Boxy room tone | Muddy, enclosed sound | 200–500 Hz | Gentle EQ dips improve clarity |
| Computer fan (mid-range) | Whirring or steady mechanical tone | 300–800 Hz | Often needs a mix of EQ and denoise |
| General room noise/ambience | Subtle background wash | 200–2,000 Hz | Best reduced with Edison-style denoising |
| Mic hiss/preamp noise | "Shhh" or static | 4,000–12,000 Hz | Light denoise + gentle high-end shaping |
| High-frequency electrical hiss | Sharp, thin noise | 8,000–16,000 Hz | Easy to reduce, but don't kill vocal air |
| Wind noise (low energy) | Soft rumble | 20–200 Hz | High-pass filter helps; dynamic wind is harder |
| Wind noise (bursts) | Sudden low-frequency blasts | 20–500 Hz | Best fixed with automation or AI tools |
| Breath noise (vocals) | Heavy inhales/exhales | 1,000–6,000 Hz | Manual gain reduction works better than denoise |
| Keyboard/desk noise | Clicks, taps | 1,000–5,000 Hz | Transient; manual editing or gating |
| Background voices (bleed) | Muffled speech | 300–3,000 Hz | Hard to remove without damaging the main vocal |
Quick Workflow: Removing Noise from Vocals, Instruments, and Samples in FL Studio
Different sound sources react differently to noise reduction. Instead of using the same settings for everything, follow this quick workflow based on the type of audio you're cleaning.
For Vocals and Voice Recordings
Vocals are sensitive to noise processing, so the goal is to clean the background without damaging clarity. Identify the noise first, isolate the vocal, and listen for hiss, room noise, or low-frequency rumble. Find a short, silent section to capture the noise profile and apply light denoising. Keep the Amount conservative to avoid metallic artifacts.
For Instruments and Samples
Instrument recordings often contain natural noise, and removing too much can damage the character. Decide whether the noise is actually a problem; if so, you can use Edison for continuous noise. Capture a noise profile and apply subtle denoising for steady hum or background hiss. If noise appears only between notes, manually cut out the empty regions.
Common Mistakes When You Remove Noise in FL Studio
- Over-aggressive Edison settings
- Using noise gates to fix constant noise
- Applying noise reduction after heavy effects
- Forgetting to capture a clean noise sample
- Chasing silence instead of clarity
AI-Powered Alternative for Noise Cleanup: Media.io

If you're still hearing noise after using FL Studio's built-in tools, it might be easier to clean the file before you even start mixing. Media.io's AI Noise Reducer works directly in your browser, so there's no software to install. It can handle different types of background noise like hiss, wind, clicks, low hum, and even light reverb, without complicated manual settings.
For FL Studio users who focus on music production, Media.io also offers creative tools like Lyrics to Song and Text to Music, which can quickly turn ideas into demos. It's a convenient way to clean up audio and spark new inspiration in one place.
How to Remove Background Noise on Media.io?
- Go to the Media IO online noise reducer page.
- Upload your audio file.
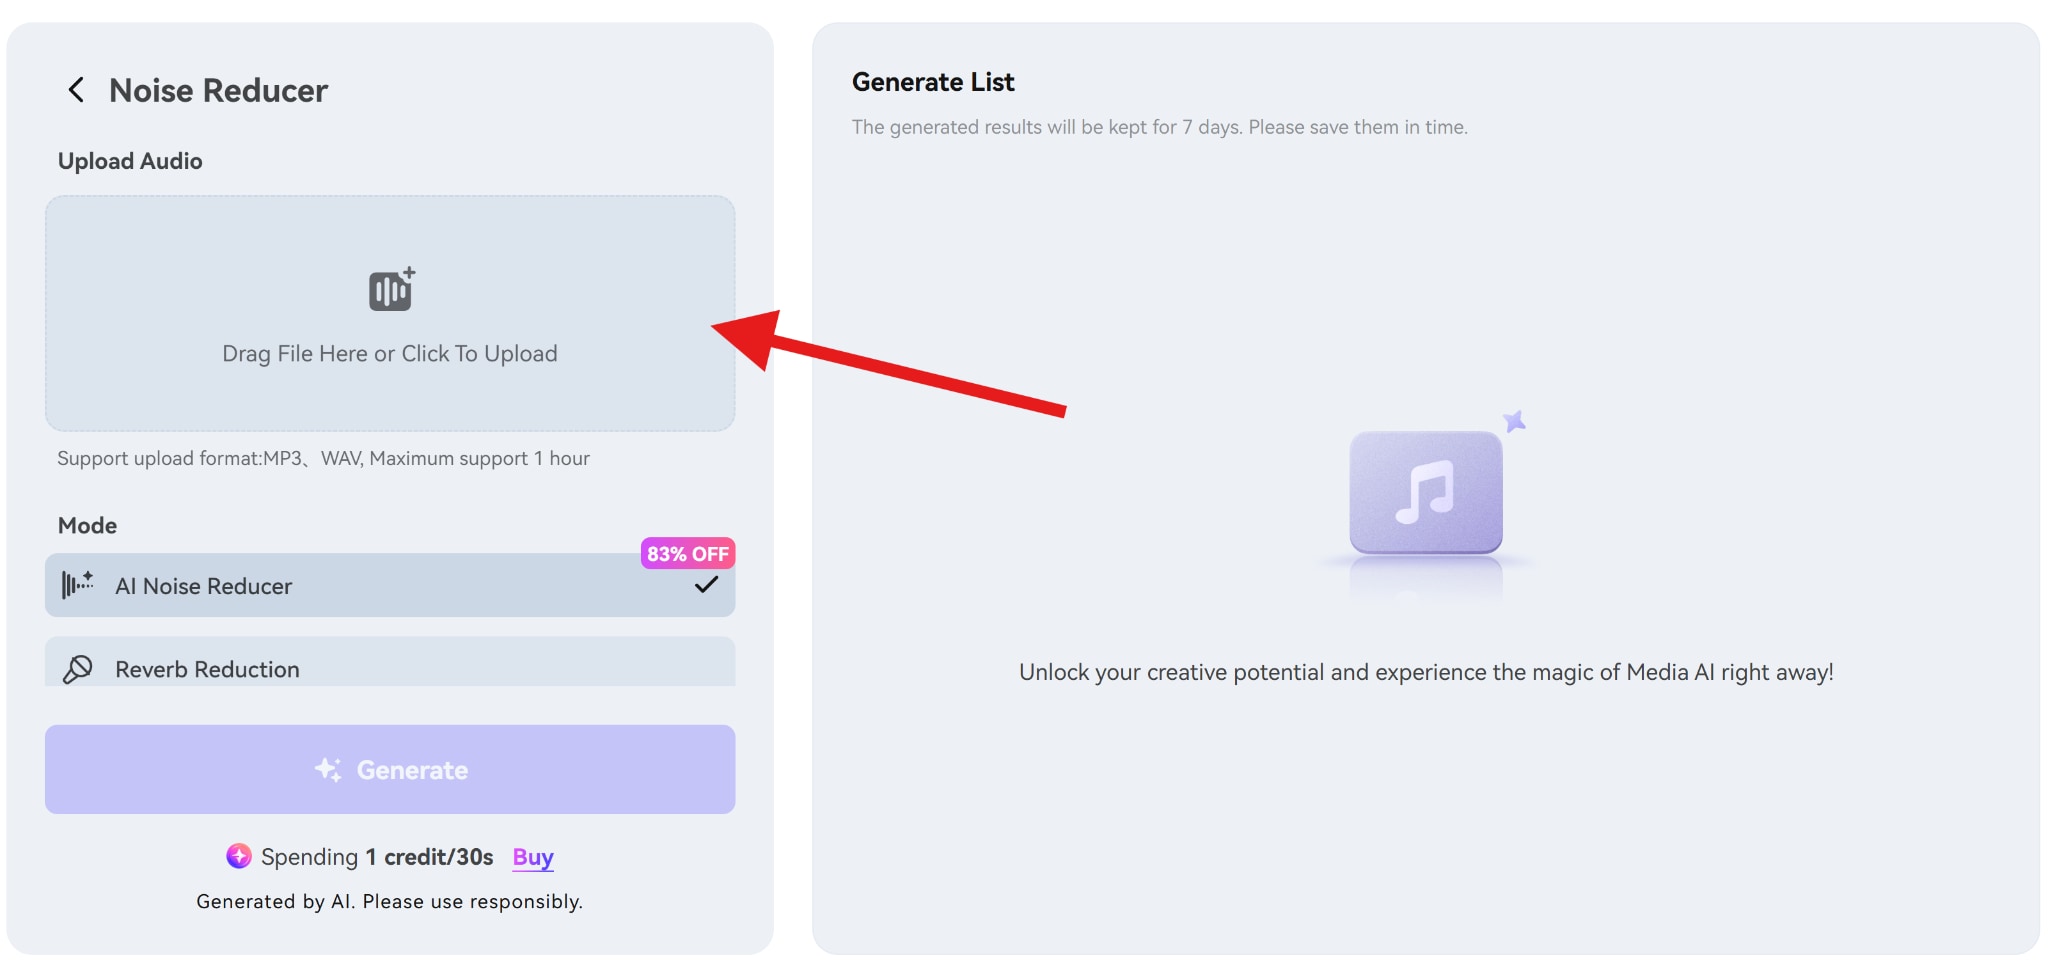
- Select the AI Noise Reducer feature and click on Generate.
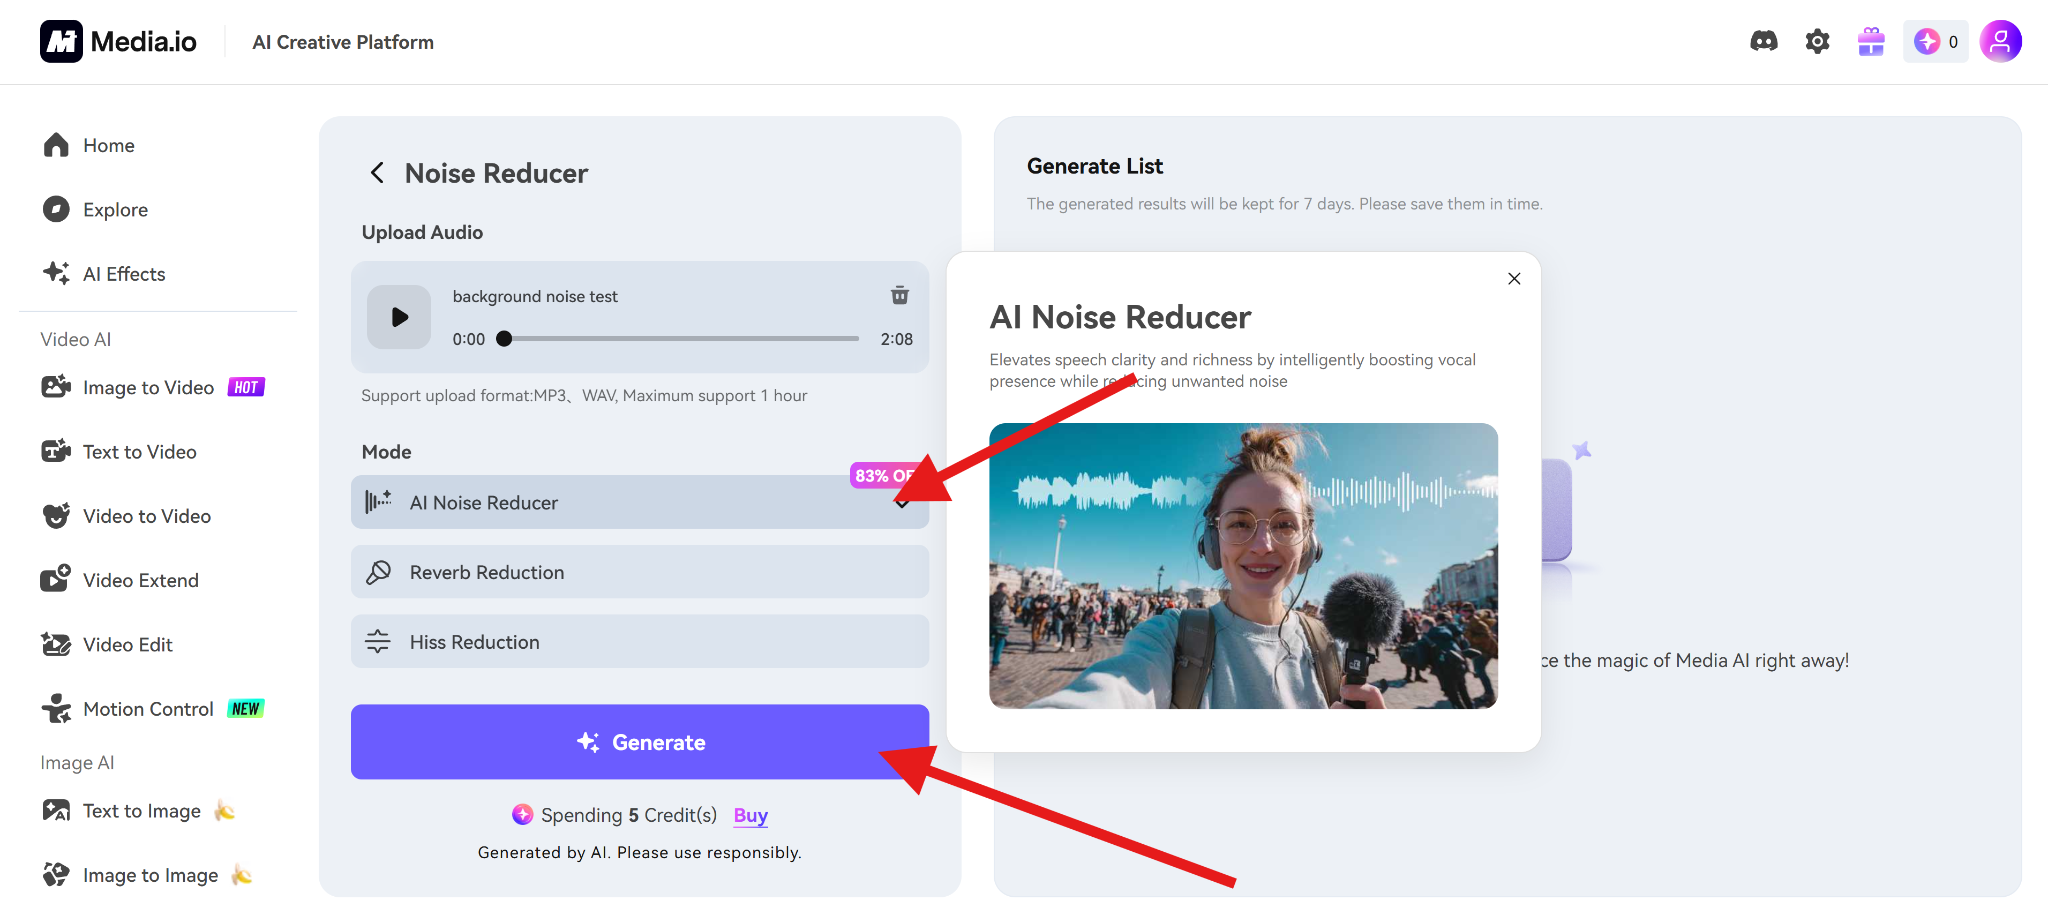
- The tool will clean the audio, remove all background noise, and, once done, you can download the audio file for backup or further editing.
Conclusion
So, as we have learned, Edison is the central tool for removing background noise in FL Studio. Noise gates and EQ help control noise before and after denoising, but they are not substitutes for proper profiling. Perhaps the best option is to use AI to remove background noise and FL Studio for minor adjustments.
In any case, start clean, denoise conservatively, and stop as soon as sound clarity improves enough.


