


 ChatGPT
 Perplexity
 Gemini
 Claude
 Grok
Grok
If you want to play the entire YouTube video or a section of the YouTube video backward, you will find there is no Reverse option in the YouTube video player. To reverse a YouTube video and play it backward, you can try some online video reversers or a desktop video editor to achieve it. In the following sections, you will find easy ways to reverse YouTube videos and YouTube reverse playlists on your smartphone or a Windows or Mac computer.
See also: YouTube Video Trimmer ↗
Part 1: How to Reverse YouTube Videos on Windows/Mac/Linux/Chromebook/Mobile Devices
Now, you might be wondering how come a single section can explain all the processes to reverse YouTube videos on so many platforms. You don't have to install any software on the device but will exploit the online video reverser from Media.io.
Media.io is an all-in-one online toolkit that has a plethora of integrated tools to help you do most, if not all, post-production tasks right on your web browser without installing any third-party application on your device.
As for the Online Video Reverser tool that Media.io has, it can help you decrease or increase the playback speed ranging from 0.5X to 2X respectively (while playing in reverse mode), mute the video, and even allow you to choose your preferred output format to best meet your requirements.
You can follow the step-by-step instructions that are given below to learn how to reverse YouTube video with Media.io:
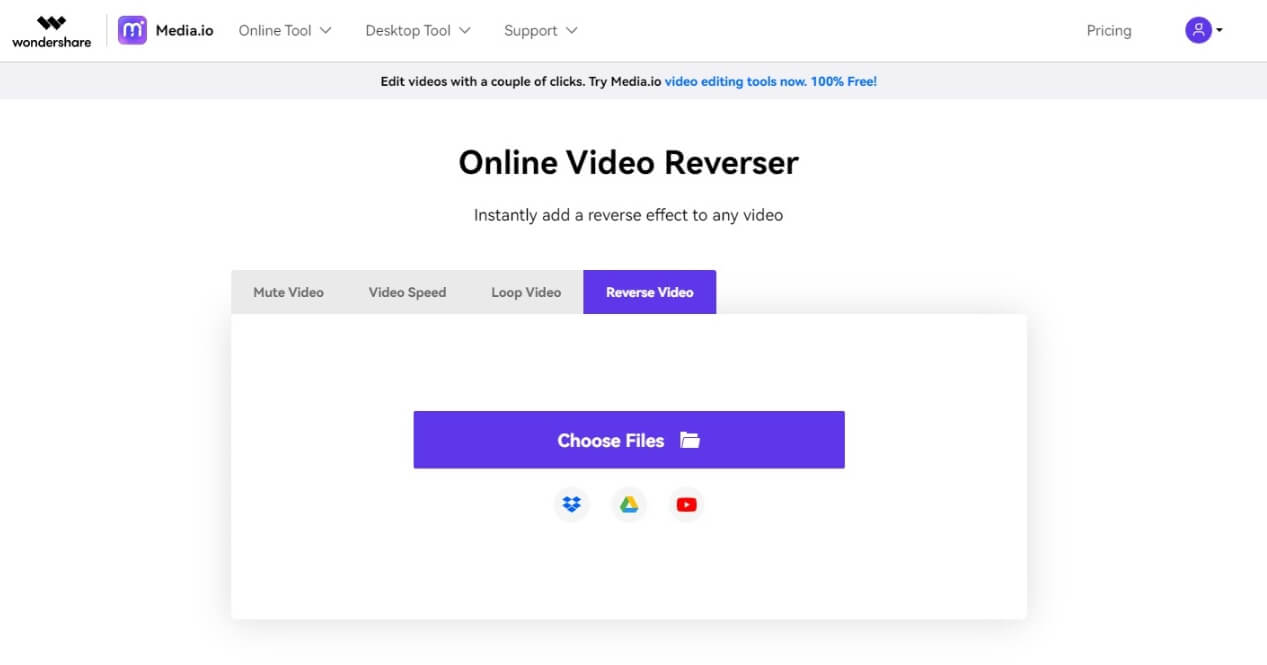
Step 1: Upload or Locate the Source YouTube Clip
On your computer or mobile device, launch your favorite web browser (Google Chrome on a Windows 11 PC is used here for demonstration), and launch the Media.io Online Video Reverser tool .
Click the YouTube icon to upload the YouTube source clip if you have published it online, or you can click the Choose Files option to upload it from the local file.
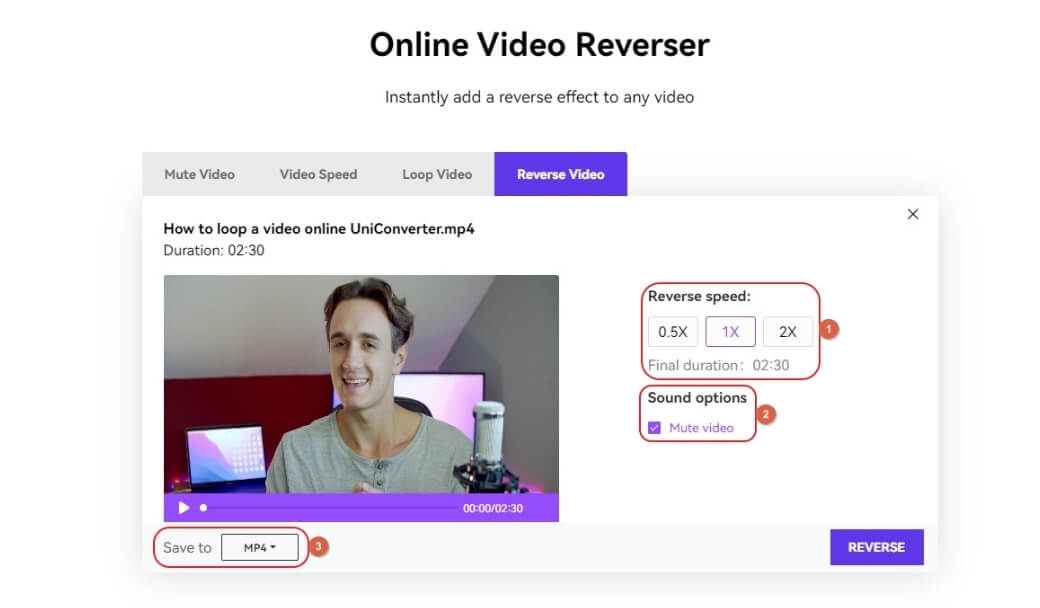
Step 2: Define Output Preferences
After the video is successfully uploaded, choose your preferred reverse playback speed from the Reverse speed section, and make sure that the Mute video box under the Sound options section is checked so Media.io can remove the audio that the clip may have.
Next, click to open the Save to menu from the bottom-left corner and choose your preferred output format.
Step 3: Start the Reversal Process
Once everything is done, click REVERSE from the bottom-right to start the process. After the video is reversed, you can download the clip and use it wherever you wish.
With the online video reverser from Media.io, you can easily playback the YouTube video backward without downloading it first. And you can also adjust the reversing speed of the YouTube video. Just visit Media.io online video reverser and have a try!
Part 2: How to Reverse YouTube Video without Network Connection [Windows and Mac]
If you have a limited network connection, you can install some desktop software on your device to play a YouTube video in reverse. Here I will share some video editing software for reversing a YouTube video.
1. How to Reverse YouTube Videos with Wondershare Filmora?
Wondershare Filmora is a full-fledged video editing and post-production application that is nowadays considered a competitor of Adobe Premiere Pro, Final Cut Pro X, etc. with almost similar, and in some cases, better capabilities.
Assuming that you have already downloaded and installed Filmora on your Windows PC, you can reverse YouTube by following the instructions given below:
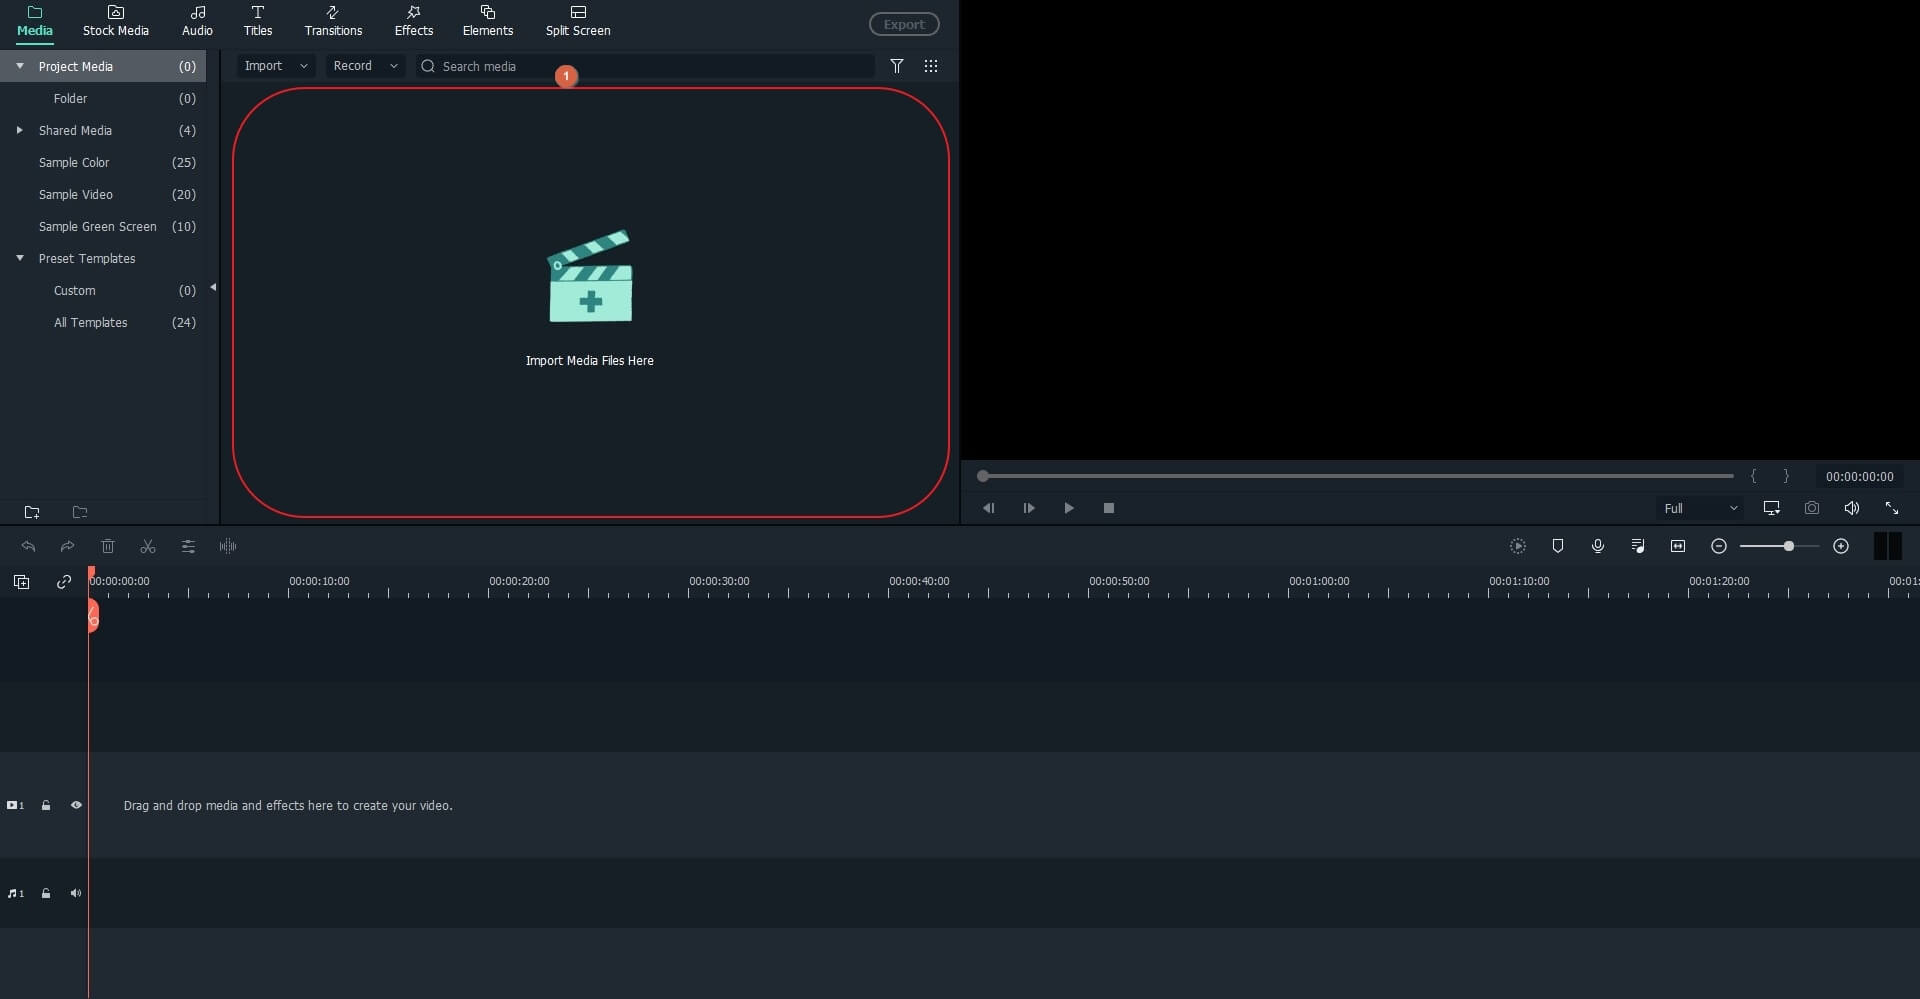
Step 1: Create a New Project and Add YouTube Video to Timeline
Launch Filmora on your computer (Filmora 11 on a Windows 11 PC is used here for illustrations), ensure that the splash screen is configured with all the required settings, click Login from the top, sign in to your Wondershare ID (you will need an Internet connection to do this), and click New Project once you’re done setting up and signing in to your account.
On the main interface, click anywhere inside the Media box, and locate and import the source clip to Filmora. Next, hover the mouse over the thumbnail, and click the + button from the bottom-right to add the media to the Timeline at the bottom.
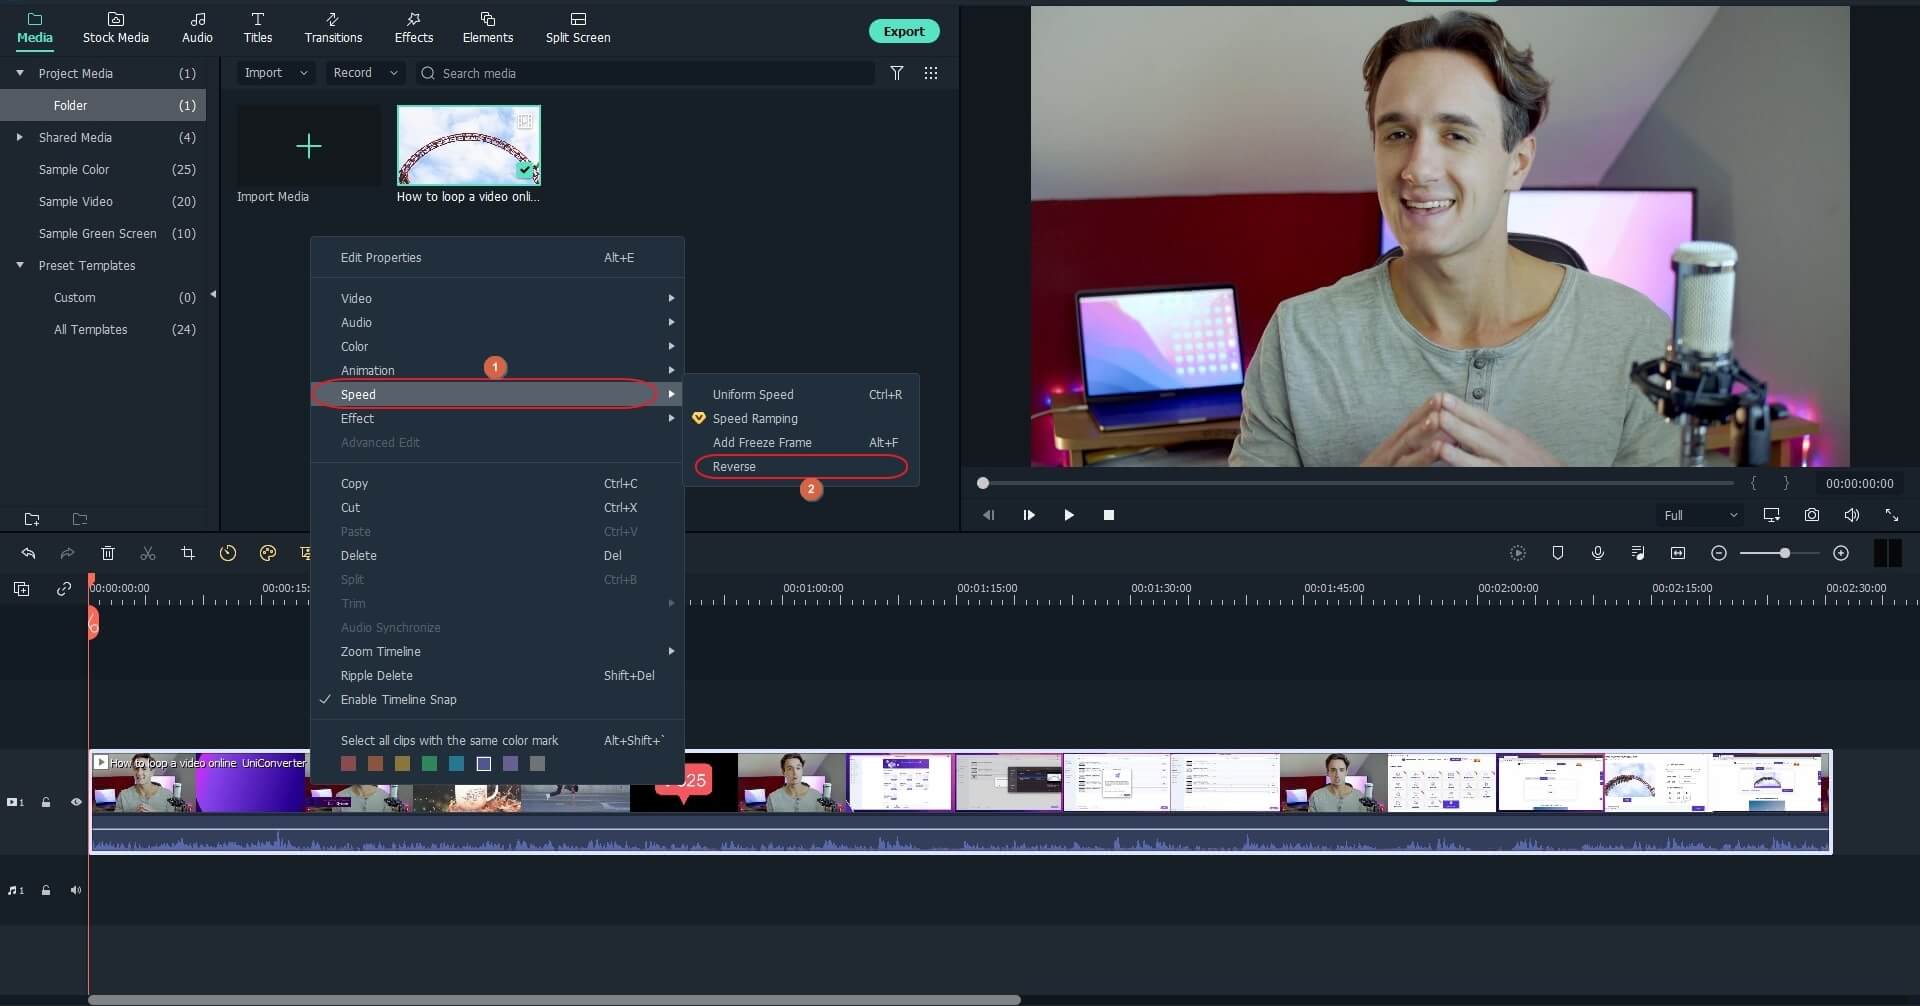
Step 2: Reverse the Video
Right-click the video in the timeline, go to the Speed option, and click Reverse from the submenu that appears.
Step 3: Mute the Audio
Right-click the film in the Timeline one more time, go to the Audio option, and click Mute from the submenu.
Optionally, you can click Detach Audio and remove the audio track from the Timeline to get rid of the acoustics permanently. Doing so could be helpful if you want to add a custom voiceover or background music to make the video look more professional.
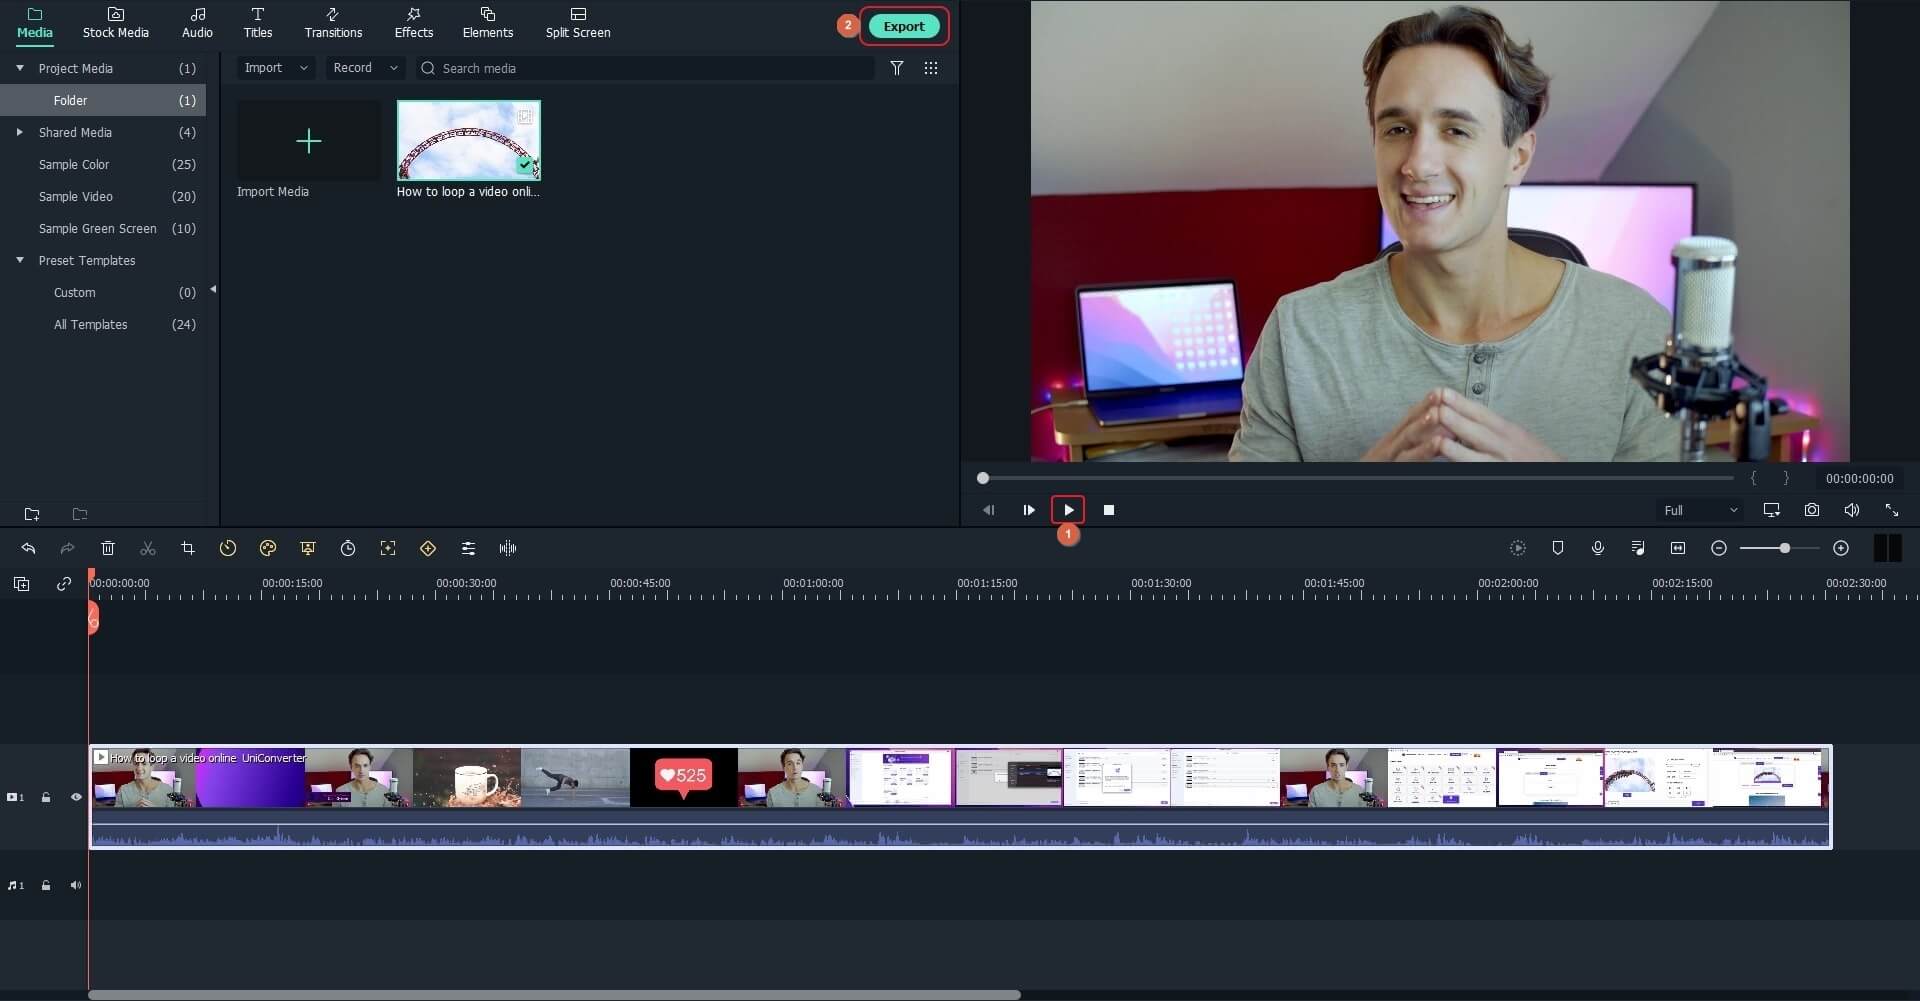
Step 4: Export the Modified Video
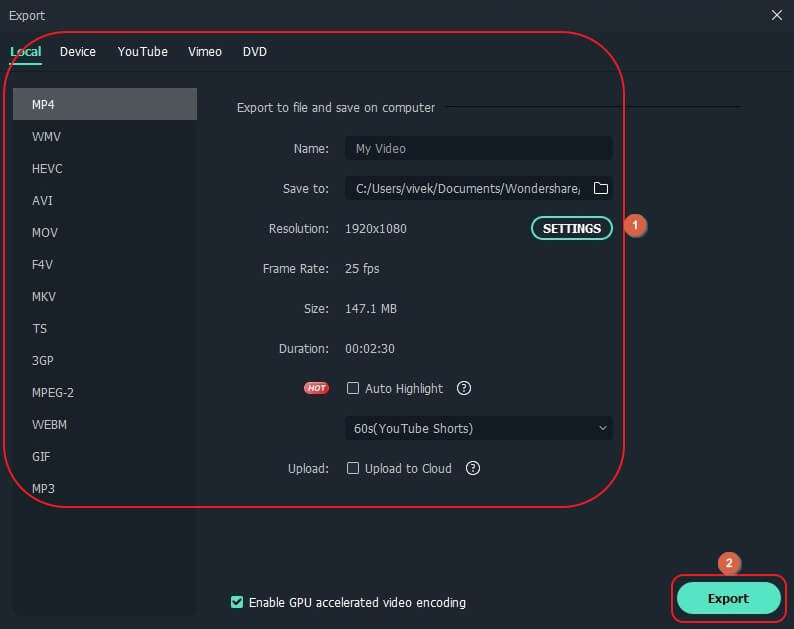
Click the Play button from under the Preview box, and if everything looks fine, click Export from the top. Next, configure your preferred output preferences such as file format, resolution, target device or platform, etc. using the Export box, and click Export from the bottom-right corner to export the modified video.
2. How to Reverse Video on Mac with iMovie?
iMovie can be thought of as a Lite version of Final Cut Pro X. The app is available for both iOS and Mac platforms and can be downloaded from the App Store. Yes, you need an Internet connection to download iMovie on your Mac, after which you can safely go offline and use the program.
Assuming that you have already installed iMovie on your Mac computer, the steps that are given below explain how you can use the software to reverse YouTube video:
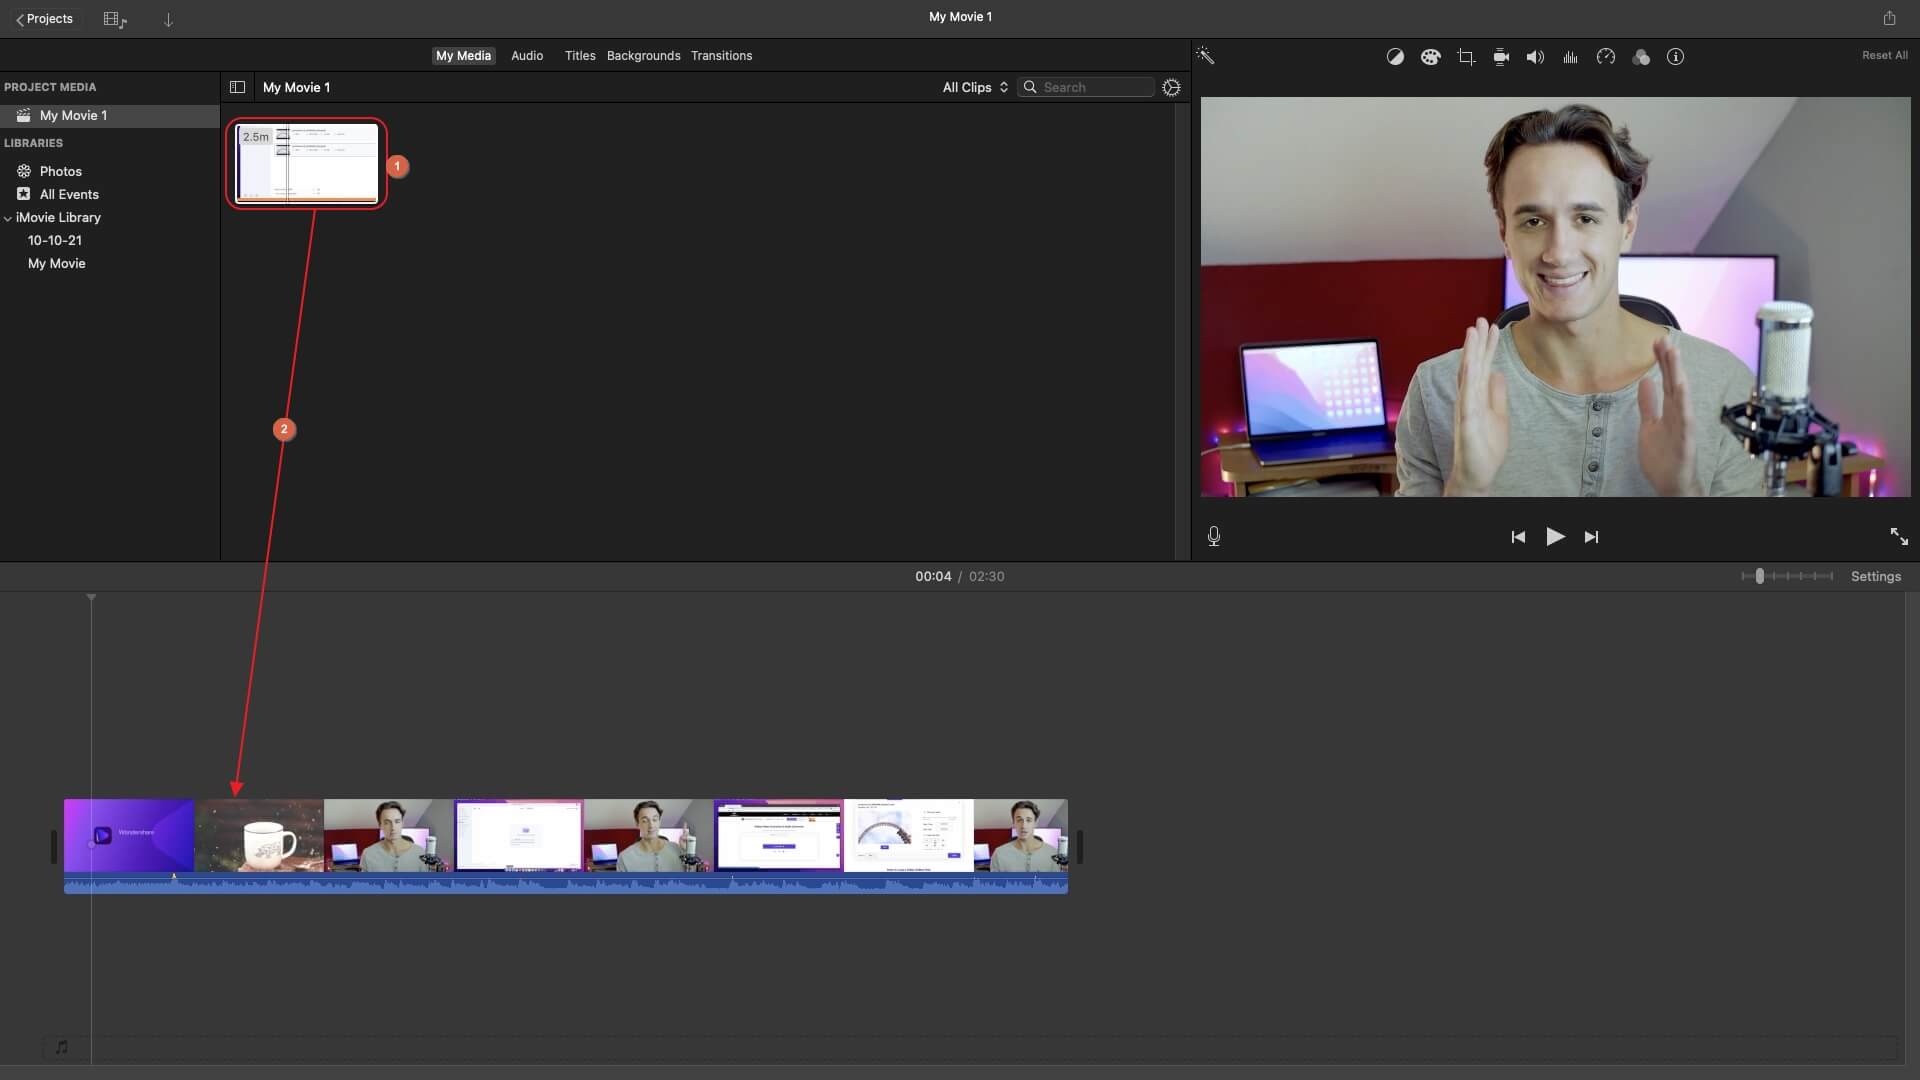
Step 1: Start a New Project and Import and Add the Source Video to Timeline
Open Launchpad from the Dock (MacBook Pro M1 is used here for illustrations), click Create New from the main interface, and click Movie from the available options. On the next window, click Import Media and select and import the source video to iMovie. Now, drag the media clip to the Timeline at the bottom.
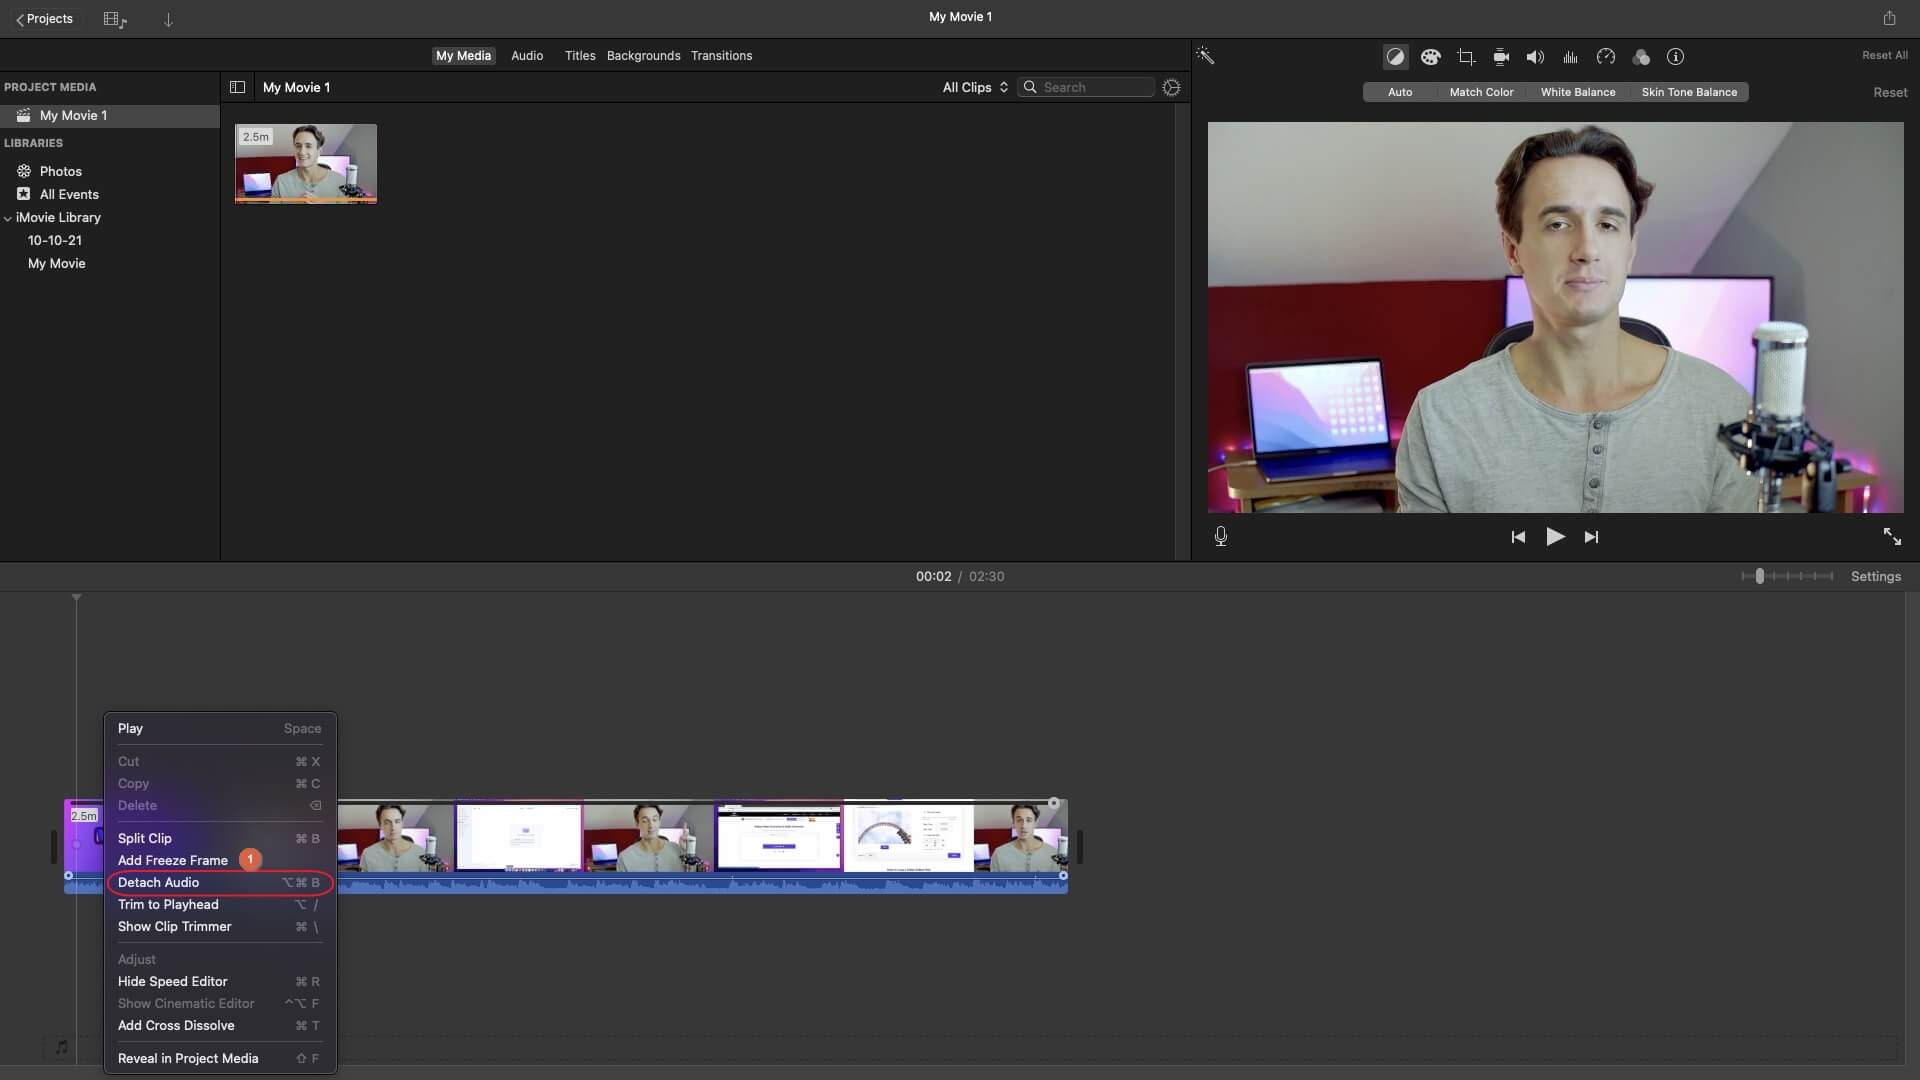
Step 2: Remove the Audio
Right-click the media track in the Timeline and click Detach Audio. After this, select and delete the audio track.
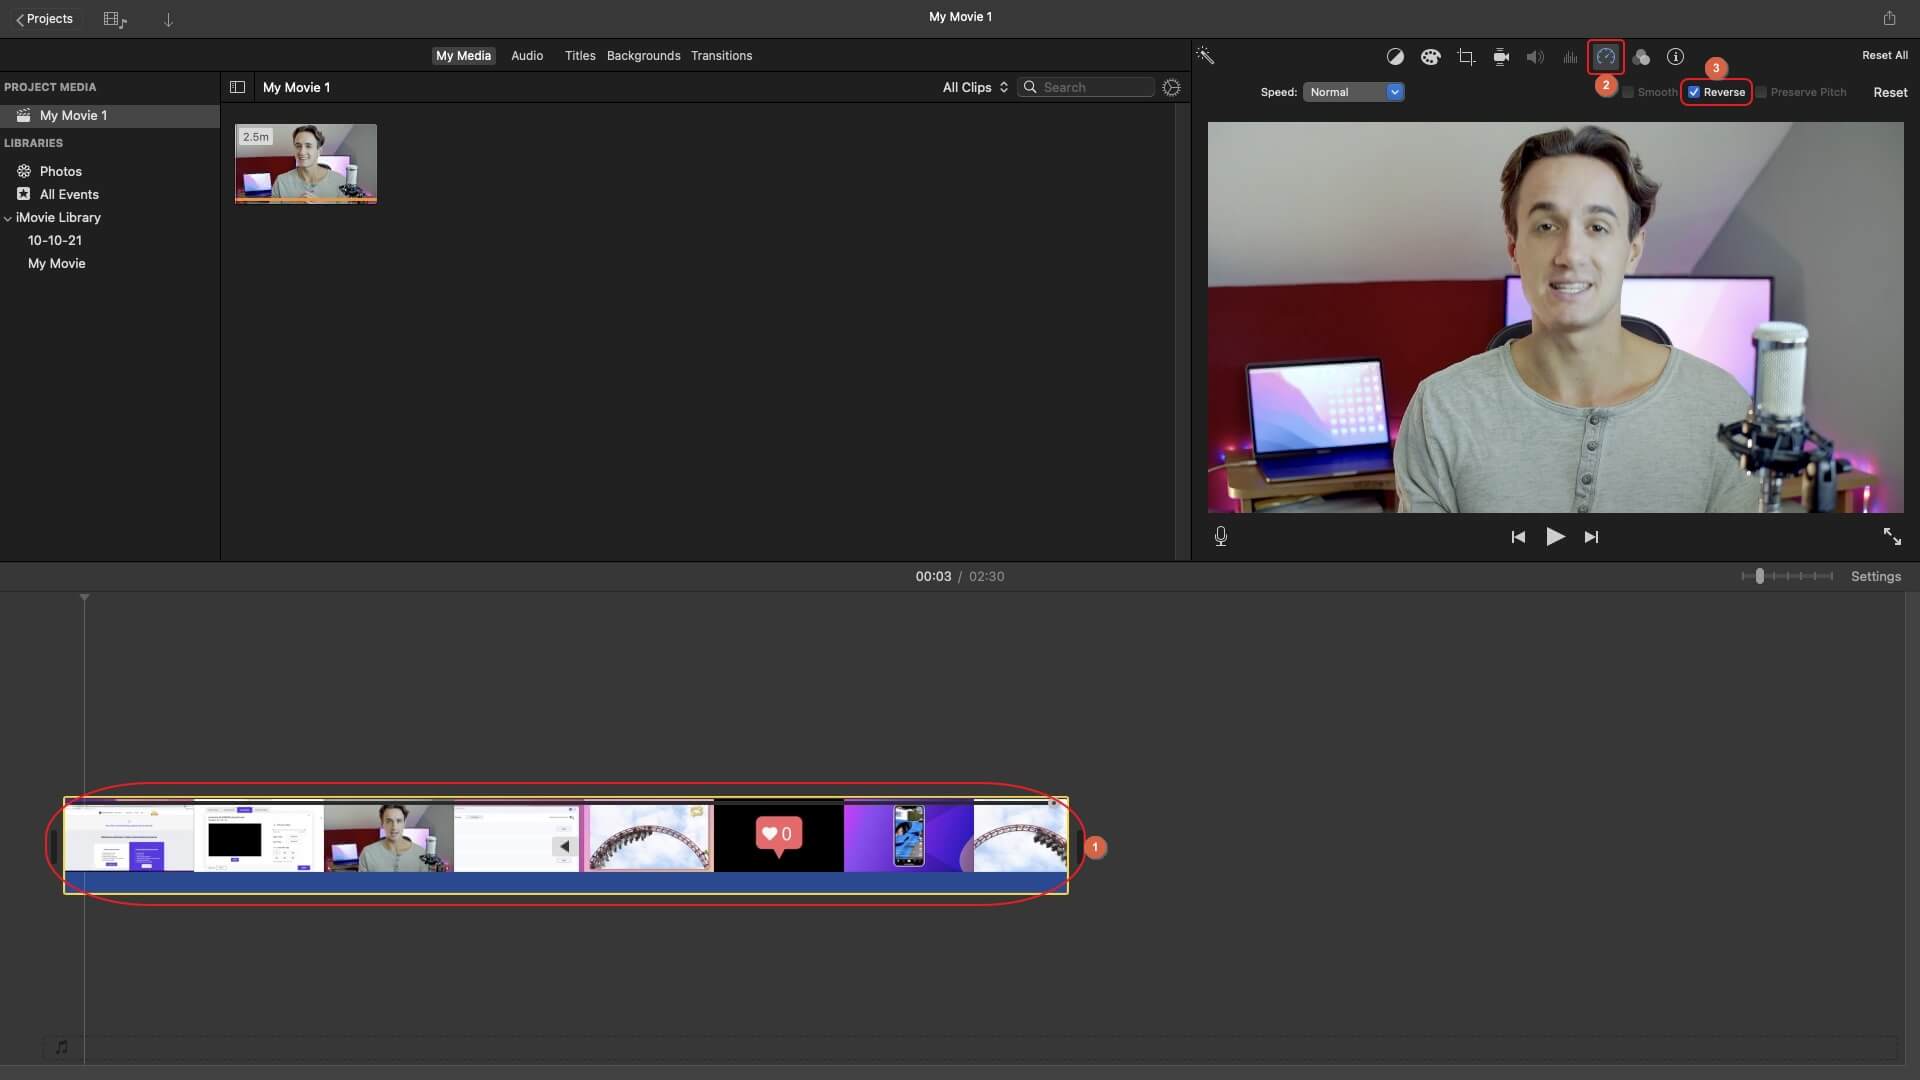
Step 3: Reverse the Video
Click the Speed icon from the toolbar that is present above the Preview window and check the Reverse box.
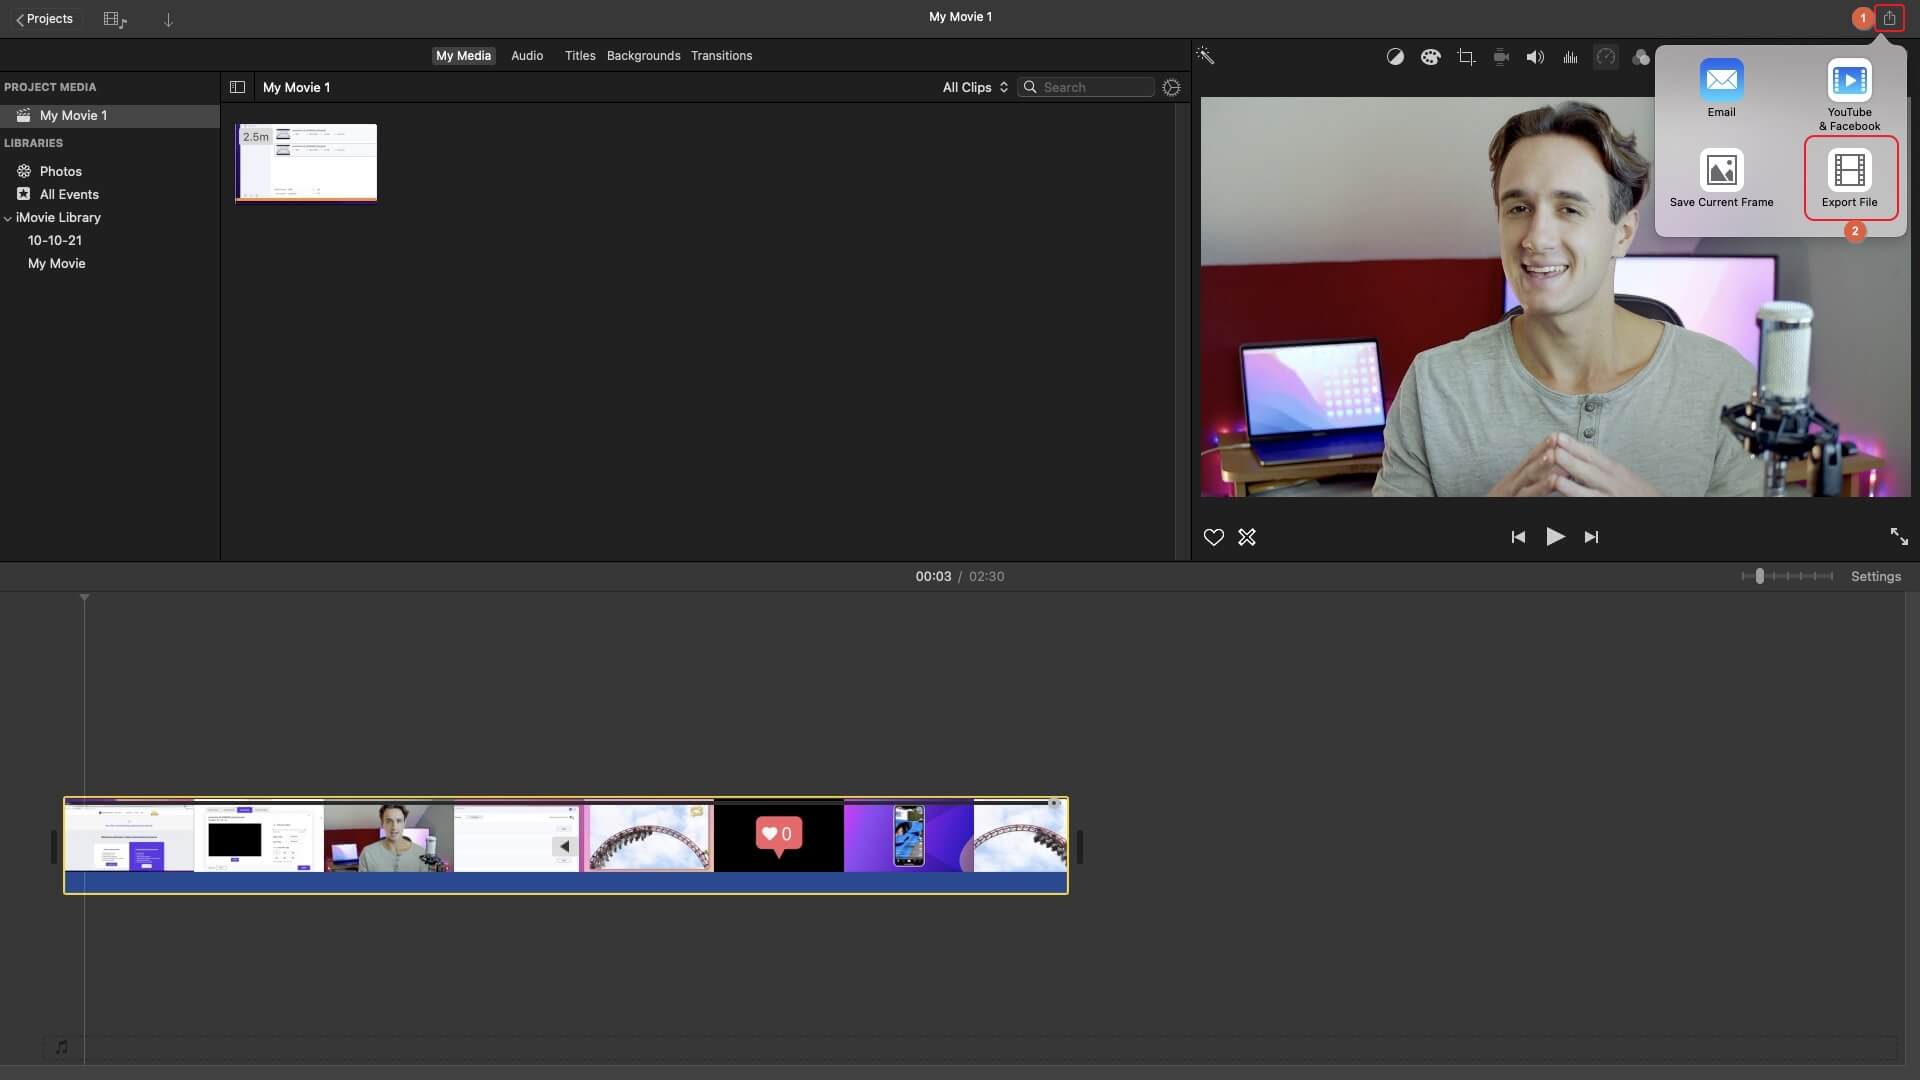
Step 4: Export the Video
Click the Play button under the Preview window to preview the modified video. If everything looks fine, click the Share icon from the top-right corner, click Export File, define output preferences in the File box, and click Next. On the box that comes up, give the output file a name, choose its destination location, and click Save to export the modified video to your Mac PC.
Part 3: How to Reverse YouTube Playlist
The meaning of the phrase YouTube reverse playlist is that all the videos that the playlist has will be played in descending order, i.e., the last one will be played first, the second-last will be the second, and so on. Although you can do this manually, there’s a web app that sorts the videos in both ascending and descending order according to your requirement.
You can follow the process that is given below to learn how to get YouTube reverse playlist:
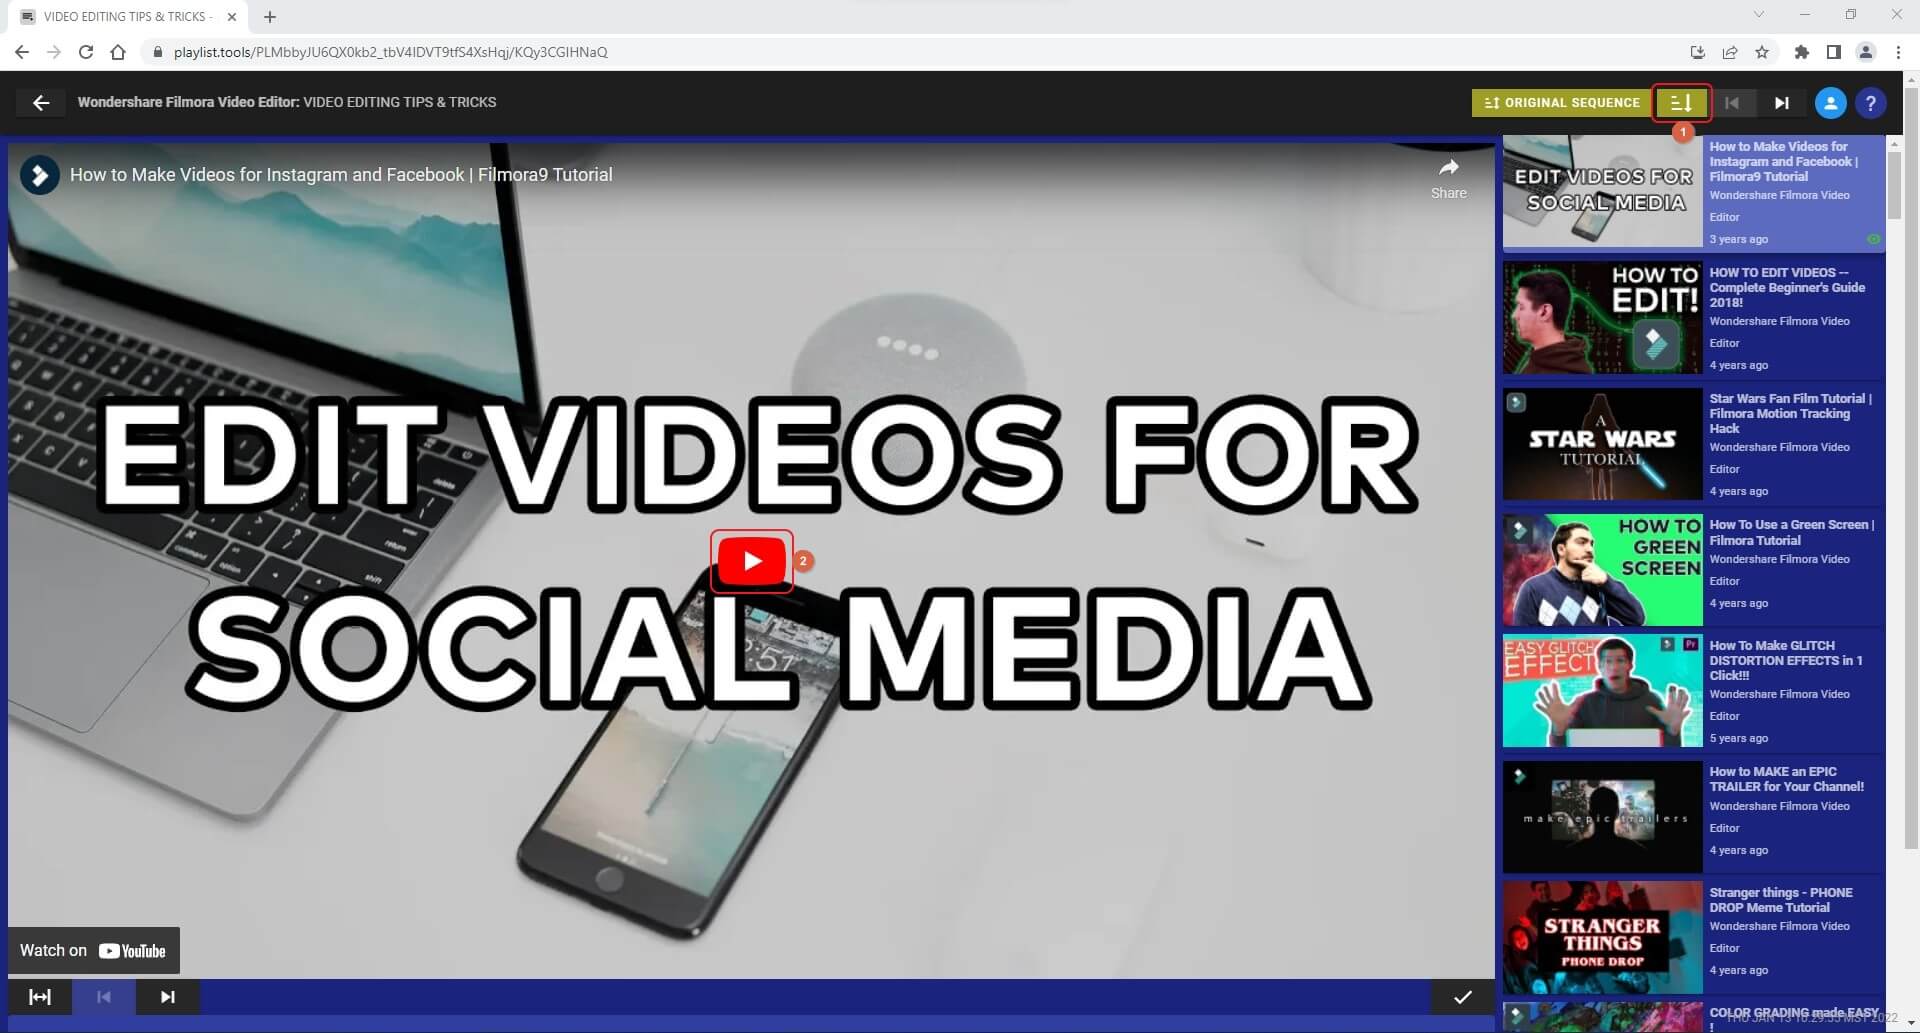
Step 1: Get the YouTube Playlist Link
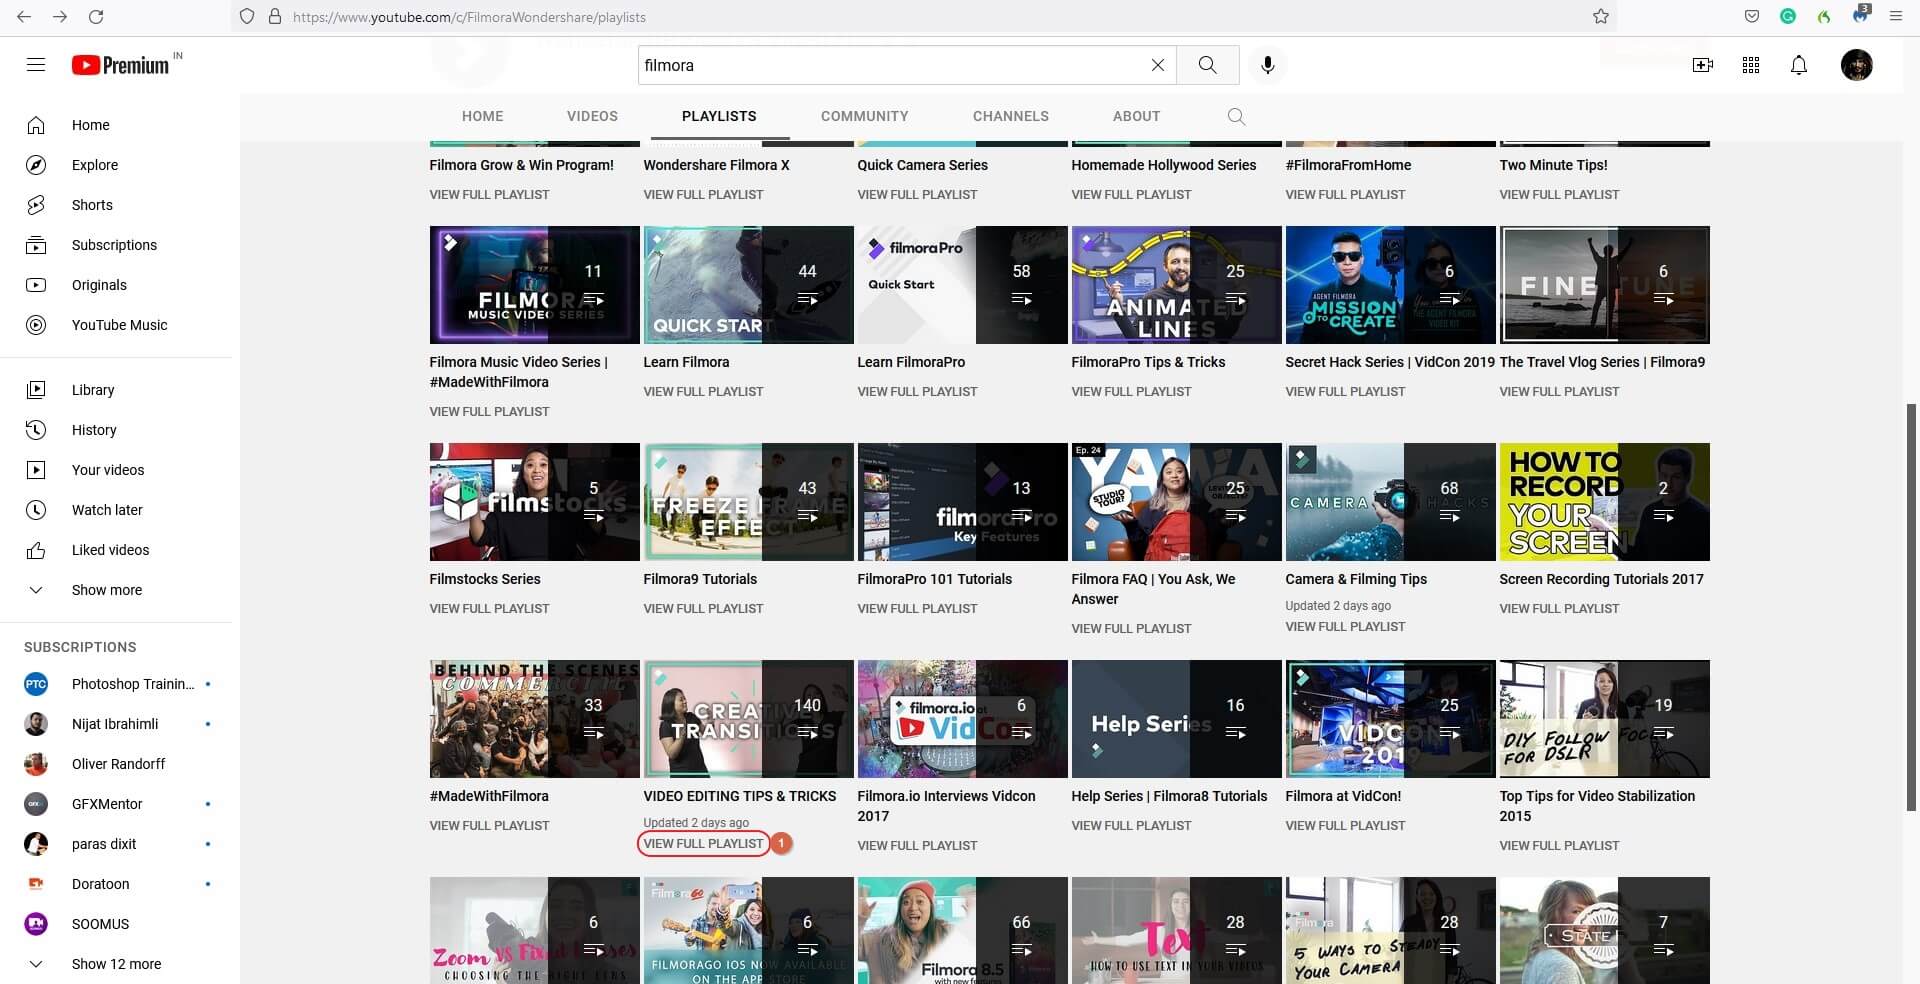
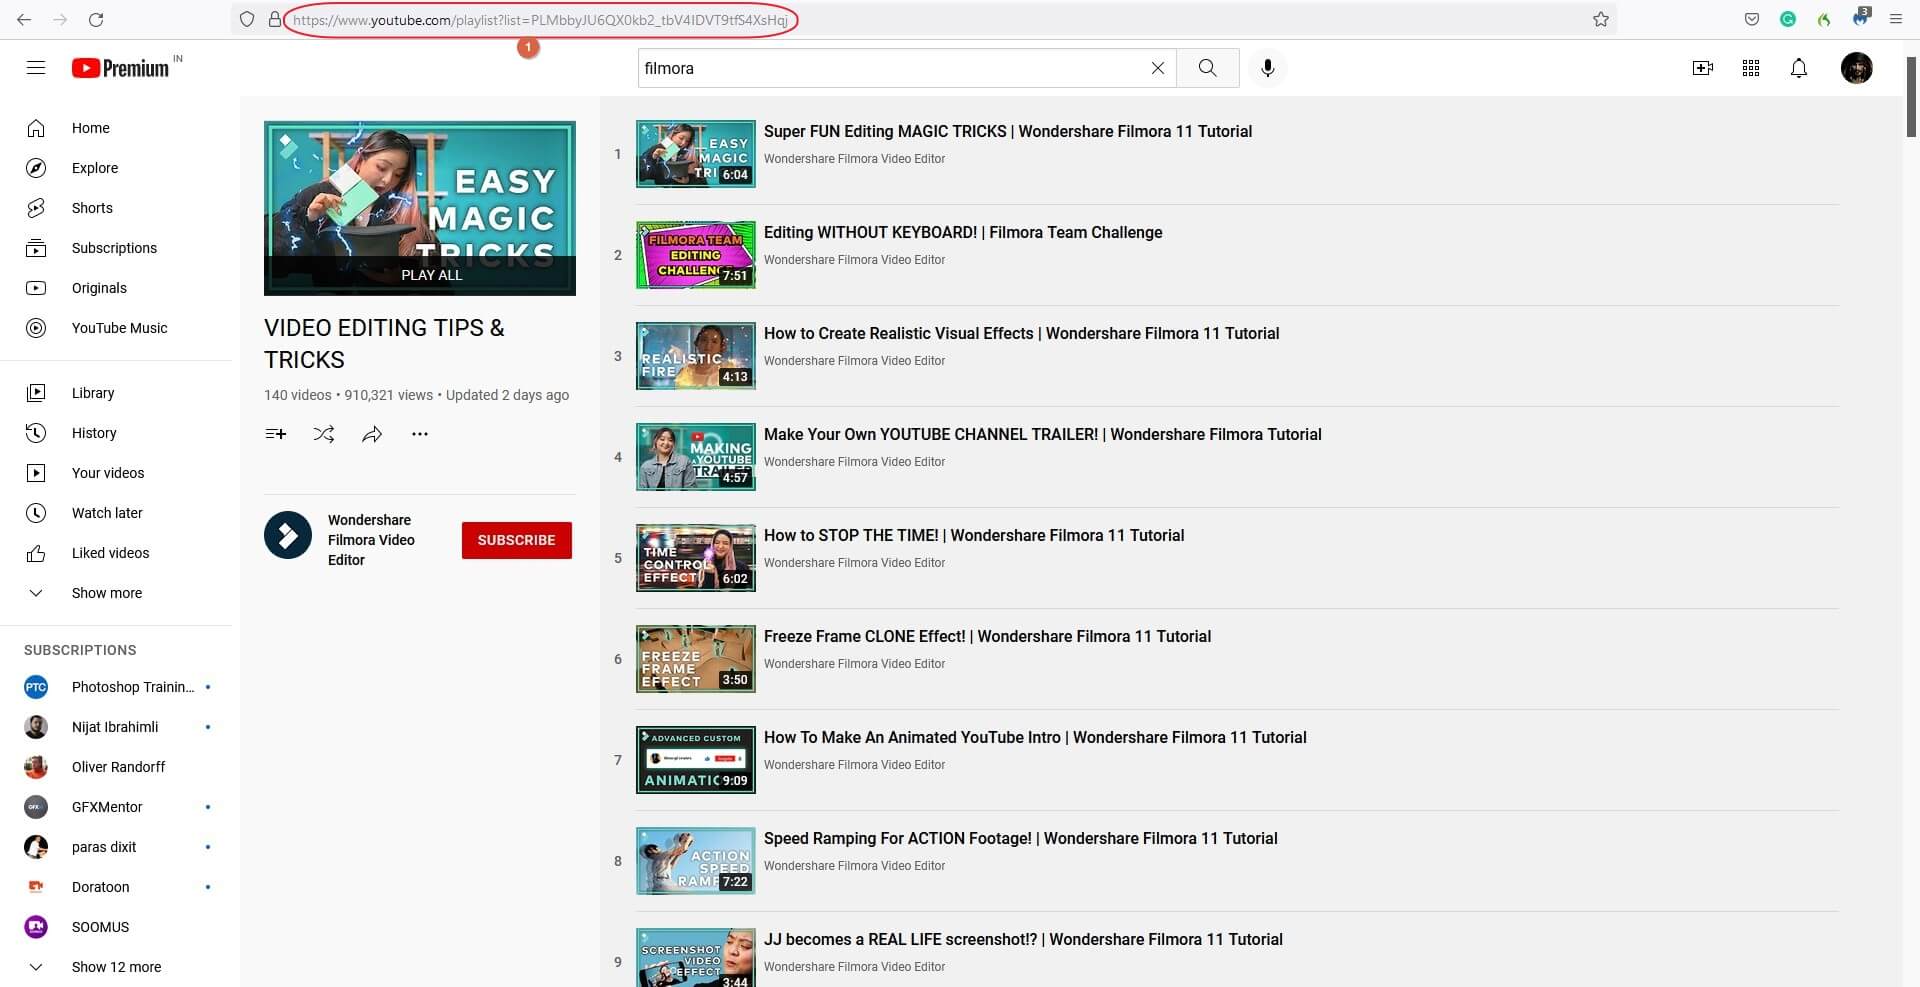
Open your favorite web browser, go to YouTube, locate and go to your preferred channel’s PLAYLISTS page, and click VIEW FULL PLAYLIST from under the playlist that you want to play in reverse order. On the next page, copy the URL of the full playlist from the address bar.
Step 2: Get to the playlist.tools Page
Open another tab on the browser and go to the https://playlist.tools/ URL.
Step 3: Open the YouTube Playlist with playlist.tools
In the YouTube Playlist URL field, paste the URL of the YouTube playlist that you copied.
Step 4: Play YouTube Reverse Playlist
Wait while playlist.tools fetches the YouTube playlist. Once it does, make sure that the SORT DESCENDING button is enabled from the top-right area and that the last video from the playlist is present in the player. Click Play to start playing the YouTube reverse playlist.
Part 4: FAQs about Reversing YouTube
1. Can I playback YouTube videos in reverse?
Yes, you can. However, you may need to use a third-party tool to do so. You can either use an online app like Media.io to reverse the video on any computer or use Wondershare Filmora or iMovie to get the job done on a Windows or Mac computer respectively.
2. Will there be a watermark after the YouTube video is reversed with Media.io?
No, Media.io never adds any watermark to the exported videos even if you’re using a free account.
3. Will the audio be reversed when reversing a YouTube video?
Yes, because the entire clip is reversed, any acoustics that the media has will also be affected. To avoid this, you can check the Mute video box in Media.io. If you are using any other app, you can either mute the audio track or detach and delete it from the video.
Conclusion
It is easy to reverse YouTube video as long as you have access to an efficient program like Wondershare Filmora. You can even use tools like iMovie but they have a steep learning curve that may need some time to get excel in. Therefore, your best bet would be to use a reliable web app like Media.io for the individual video reversal process as it is not only free but also never adds any watermark on the files that it exports.