Graduation is one of the most important milestones in an individual's lifetime. During this time, you feel a sense of achievement and honor. But to keep memories of this day burning, a perfect graduation slideshow will come a long way. It doesn't just have to be a collection of pictures taken through your education journey. A killer slideshow should contain background soundtrack (s) that perfectly blend with the video. So, if you don't know where to start, below are a few slideshow ideas for your graduation day.
Part 1. 10 graduation slideshow ideas you can't-miss
1. Simplicity is key
Most graduates make the mistake of creating complicated slideshows with unnecessary ideas. Instead, just pick out lovely photos from your graduation photo collage to make the graduation video template memorable and enjoyable. Try not to go overboard with pictures that don't depict your academic life.
2. Arrange the pictures in stages
Photos are usually the center of any slideshow. Therefore, ensure that the photos are of high quality and depict your educational progress. Remember that graduation is typically the result of hard work in all those years at school. So, arranging the photos in chronological order is vital. You can even ask your parents for pictures they took of you while in elementary school. All in all, start the slideshow with photos of your early childhood education and finish it up with photos of your graduation day.
3. Apply the school colors
To bring out the spirit of graduation, you may want to customize the slideshow's background theme with your school's colors. Fortunately, multiple slideshow makers let you do that with ease. Most allow you to customize the fonts, colors, and text styles to match your school. You may also want to settle for colors that mimic your graduation decorations.
4. Gather graduation quotes
As much as photos in a graduation slideshow can be captivating and attractive, texts can make the slideshow more appealing to watch. If you're short of time, just add some titles to relevant slides for organization purposes. For example, you can decide to note the years on every photo. There are also photos like group pictures that the audience might not recognize. In that case, use a short and clear explanation. You can even make the commentary humorous. Just don't overdo it.
5. Include short interview clips
In addition to audios and texts, you can also add a video or two to your graduation slideshow. This can be a short interview clip of yourself discussing your educational career or your parents recapping your first day at school. Again, simplicity is vital.
6. Choose a matching video template
This is somewhat a continuation of point number five. After creating the perfect video clip, it's time to get a graduation video maker with multiple template designs. Ensure that the templates are customizable with texts, fonts, logos, colors, and more.
7. Choose a nice song
Typically, including music in a slideshow makes things magical. Background music helps keep viewers engaged by bringing out the event mood. However, you don't have to use any audio on your graduation slideshow. The trick is to ensure the music rhymes with the event depicted on your slideshow slides. Fortunately, the internet is awash with graduation music ideas.
8. Use a quality camera/camcorder
Not even your own parents will enjoy watching a graduation slideshow full of blurry images and videos. So, to avoid this embarrassment, make sure that you use a quality camera to have more resolution on your videos and pictures. Usually, you can get an average one for less than $200. You can also borrow from a friend or rent for a small fee. As said initially, quality is everything.
9. Graduation slideshow length and speed
Last but not least, don't make your slideshow too short or too long. The most recommended period is 10 to 15 minutes. This is time enough to include up to 100 pictures and 3 to 5 music tracks. Also, display each photo for around 3 to 5 seconds to allow the audience time to view the images and read the commentary. For transition effects, 1 to 2 seconds should do.
10. Choose a reliable graduation video maker
After collecting all the necessary audios, videos, and photos, it's time to organize them and get ready for the event. Luckily for you, there are multiple programs online that will help you make an award-winning slideshow without breaking the bank. Although you may need subscription plans to unlock premium features, most are even free to use. Overall, choose a powerful graduation slideshow maker that works with your computer as this gives you enough customization space.
Part 2. How to make a creative graduation video with online tool
When it comes to creating a smashing graduation photo montage, check out Online UniConverter. This program is simple to use and boasts a fantastic set of tools to give you enough freedom to customize your slideshow. It supports all types of photo, video, and audio file formats. After uploading your graduation pictures, Online UniConverter allows you to customize them with a unique audio track. You can also trim the background audio and adjust the volume. Moreover, users can set an appropriate aspect ratio, slide playback duration, and export the graduation video to any video file format.
How to Create A Graduation Slideshow with Music
Key features:
- Free, open-source app with affordable plans.
- Add photos, videos, and audio with ease.
- It supports 1000+ media file formats.
- Customize graduation slideshow with unique aspect ratio, audio, transition effect, etc.
- It features an intuitive video editor for cutting, merging, and converting.
- Helpful 24/7 customer support.
Now apply these easy steps on how to make a graduation video using Online UniConverter:
Step 1: Launch the graduation video maker and add photos.
Use a web browser to visit the website, then click Online Tools. Now launch the slideshow-making feature by tapping Slideshow Maker. Next, click Choose Files to open your local media library and add your graduation photos. Alternatively, select your photos and then drag and drop them on the slideshow maker. Wait for a few seconds for the app to upload your photos successfully.
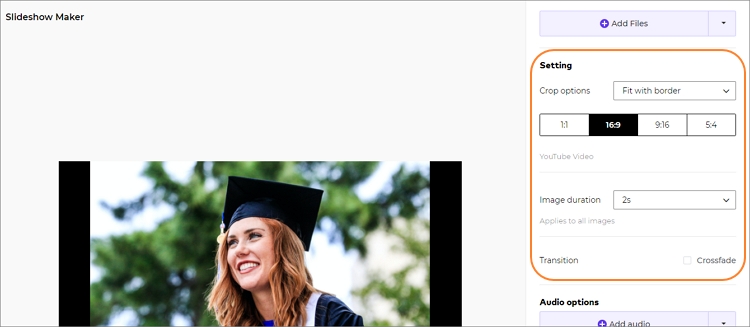
Step 2: Customize the slideshow settings and add audio.
Once you see your uploaded photos, move to the Settings section on the left pane and make some adjustments. Here, you can crop the image borders, choose a slide display duration, apply crossfade transitions, and select an appropriate aspect ratio.
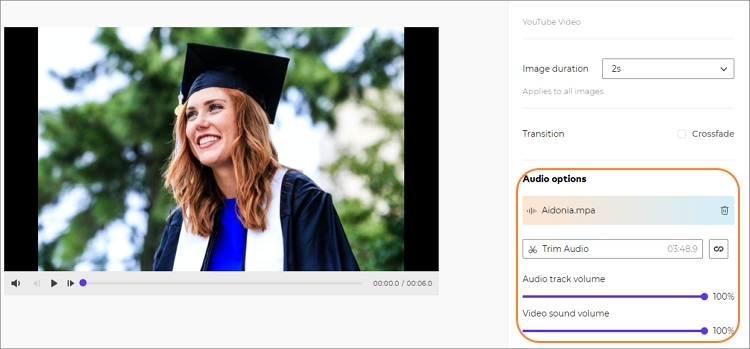
After that, scroll down to the Audio options;section and click the Add audio;button to upload your favorite background music. Remember, you can trim the audio and adjust the volume level. Also, it's essential to ensure the background music doesn't interfere with the graduation interview video. Fortunately, you can change that by reducing or muting the audio volume on the interview slide.
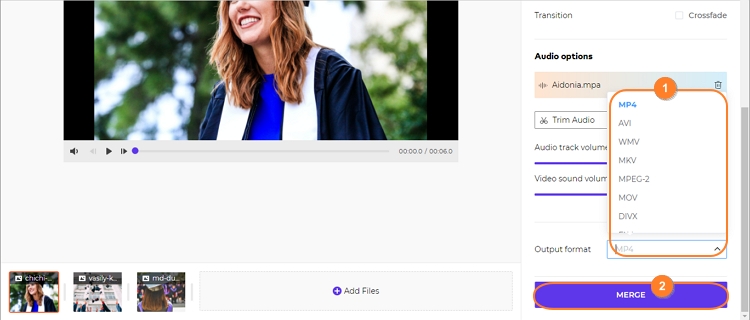
Step 3: Preview the video and merge.
Is everything looking clean and polished? Click Play;on the preview screen to confirm this. If you're satisfied, choose a target video format on the Output Format menu, then click Merge. Online UniConverter will process your graduation slideshow immediately. Finally, download the final product to your local storage or the cloud. It's that easy!
Part 3. 2 Other tools to make a graduation slideshow
Apart from Online UniConverter, you can also use these two;apps to design a fine graduation slideshow in minutes:
iMovie
iMovie is a free multimedia player for macOS and iOS that supports up to 4K quality video resolutions. But apart from its video playback capabilities, iMovie also boasts multiple video creation tools. With it, users can create professional-looking videos and slideshows and customize them by adding fade audio, applying transitions, trimming, speeding the video, and more. Even better, iMovie allows users to rock their creatives with 80+ royalty-free soundtracks.
So, without dilly-dallying much, below is how to use iMovie to create a graduation slideshow:
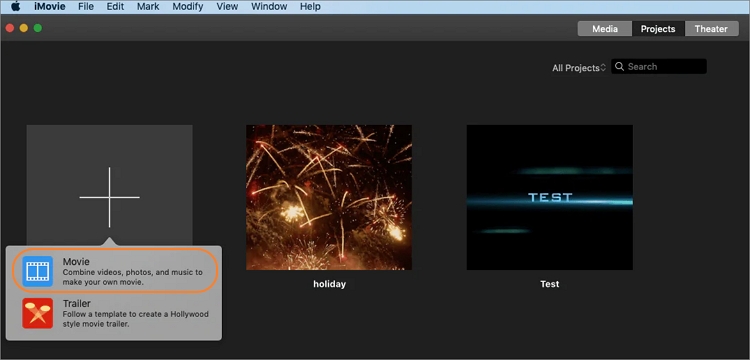
Step 1: Launch iMovie on your Mac and then create a brand-new project by clicking Project before tappingCreate New. Now choose the Movie option to join photos, videos, and audios.
Step 2: Next, click the My Media tab at the top menu bar, then press the Download icon to start adding videos, pictures, and soundtracks to your project. Interestingly, you can just click the Photos tab under Libraries on the left pane to upload media files from the Photos app.

Step 3: As you already know, arranging the photos and videos in a specific order is vital when creating a slideshow. Luckily, iMovie allows you to do that seamlessly by merely dragging and dropping to swap your pictures.
Step 4: After rearranging your photos, it's time to customize them with words and quotes for demonstration purposes. To do that, click the Titles tab, choose a title template, then drop it on the timeline. You can now enter texts in the preview window.
Step 5: Meanwhile, iMovie allows you to add sound effects and music tracks to your slideshow. You can import music from your local storage or iTunes. Just make sure you trim the audio accordingly before syncing it to your slideshow.
Step 6: Lastly, preview the slideshow and then save it to MP4 Format. You can also directly export it to platforms like Vimeo.
Filmora X
Another excellent graduation slideshow maker is Wondershare Filmora X. It's a fantastic video editor that runs smoothly on macOS and Windows and can make a slideshow for any occasion in minutes. After uploading your slideshow photos and videos, you can perform tasks like color grading, applying effects, adding transitions, and more. What's more, you can choose an output video format from multiple options.
Follow these steps to make a graduation slideshow with Filmora X:
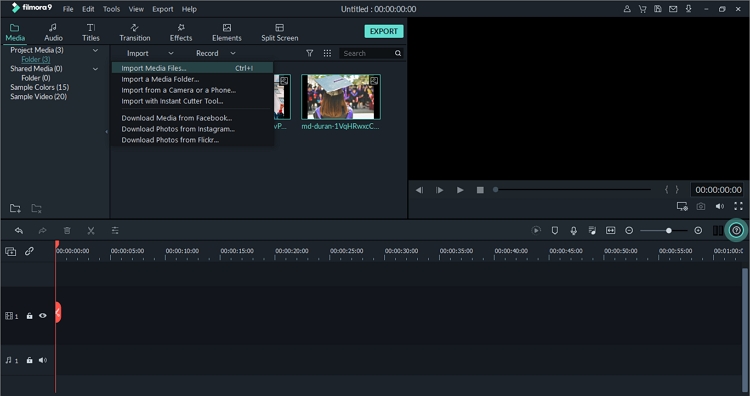
Step 1: Install and launch Wondershare Filmora, then press the New Project tab. After that, click Add to browse and upload your pictures, videos, and audio tracks. Another way is to drag and drop files on the timeline. If you want to add more videos and images, click the Import arrow, then tap Import Media Files.
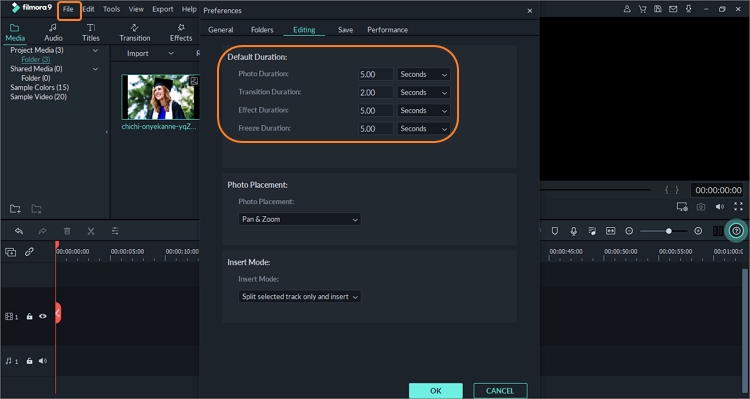
Step 2: After adding your photos successfully, it's time to choose the correct playback timing. To do that, click the File tab, then select Preferences. Now tap the Editing tab on the pop-up window, then set the duration for slide display, transition, freeze, and effect. Click Ok to save your settings.
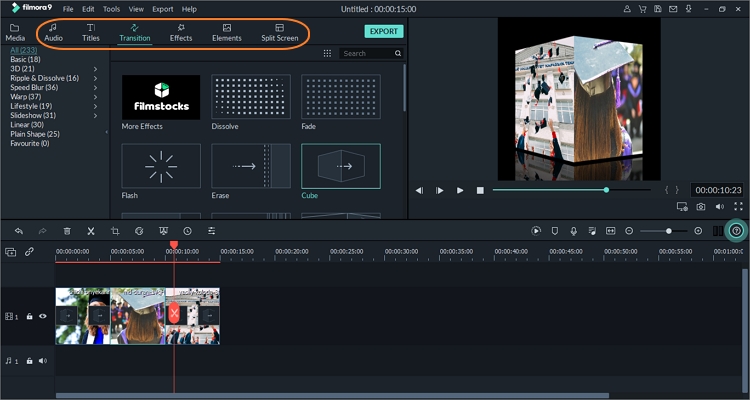
Step 3: Now click the Transition tab at the top and then select a slide transition you'd like to use. To apply the changes, choose your photos by clicking CTRL + A, then tap the + icon on your favorite transition design. You can also click the Effects tab to personalize your slideshow with hundreds of free video effects.
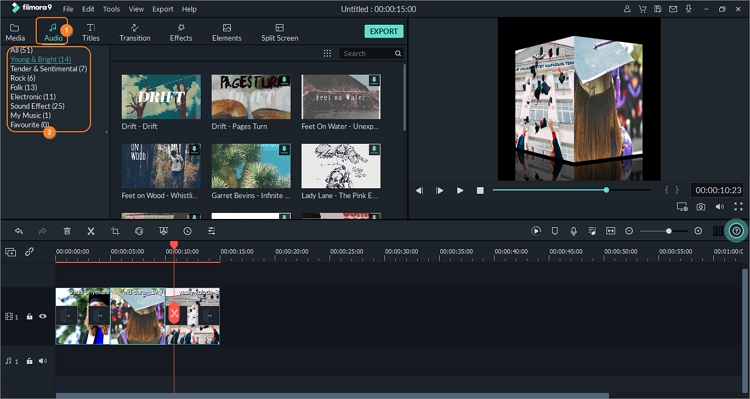
Step 4: Click the Audio tab, then tap My Music to upload background music from your local storage. You can also add music from Filmora's music library consisting of 50+ royalty-free music.
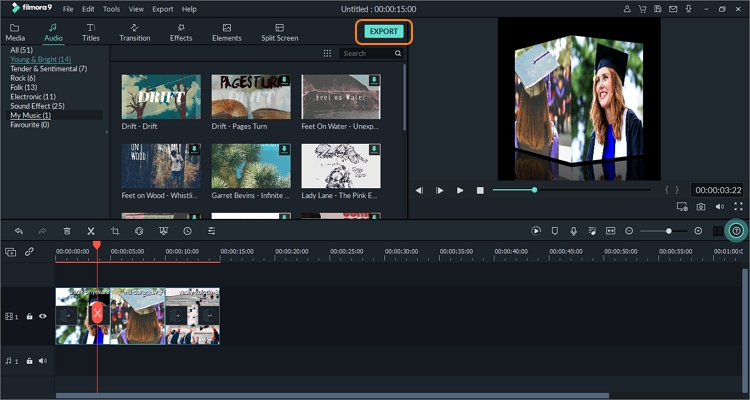
Step 5: Press the Play icon on the preview screen to crosscheck your slideshow, then hit the Export button. Filmora X will process your slideshow and ask you to select an output file format and resolution. Users can also export slideshows directly to Vimeo or YouTube. And there is that!
Conclusion
If you've read up to this point, it's obvious you want to create a graduation slideshow. Just follow the tips mentioned in the first part of this article and use either of these programs to design and build a slideshow. Of course, beginners should use Online UniConverter, as it's the most straightforward app among the trio. All the best!