

The need to reset your iPhone may arise in several situations like when the phone freezes suddenly, is unresponsive, and other similar situations. Additionally, if you are planning to sell your phone it is important to delete and move all the data for safety, and for this as well you need to reset your iPhone. There are different types of resetting options available that works in different situations. Know how to reset iPhone in the following parts.
Part 1. How to Soft Reset iPhone
A soft reset is a method where you simply turn off the power of your phone and then switch it on again. This method only closes the apps which are active ad does not delete any data. So, if any particular app is not working or your iPhone is behaving a little weird and you just need to quickly reboot it, soft reset can be done.
Steps on how to soft reset iPhone X, XS, and 11 series:
Step 1: Press and hold the Volume button and the Side button (earlier known as Sleep/Wake button) simultaneously on the iPhone X and later models. A shutdown screen will appear after which you can release the buttons.
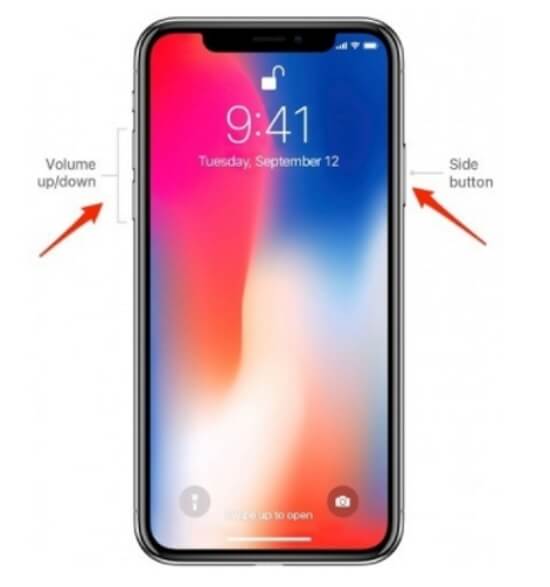
Step 2: Slide to power off your iPhone.

Step 3: The iPhone will now switch off and nothing will appear on the screen. To switch it on, press and hold the Side button till the Apple logo appears on the screen.
Note: If you are using the iPhone 8 or the earlier versions or the new iPhone SE, you need to press and hold only the Sleep/Wake button to get the power off slider. The steps for switching your phone on are the same as mentioned in step 3 above.
Part 2. How to Force Restart iPhone
If you are experiencing glitches and issues like a frozen app or the frozen home screen, you need to force restart your iPhone. So, when your device does not respond to any of your actions, hard or force restart is the solution. During this type of reset, there is no loss of data from the device.
Steps on how to hard reset iPhone:
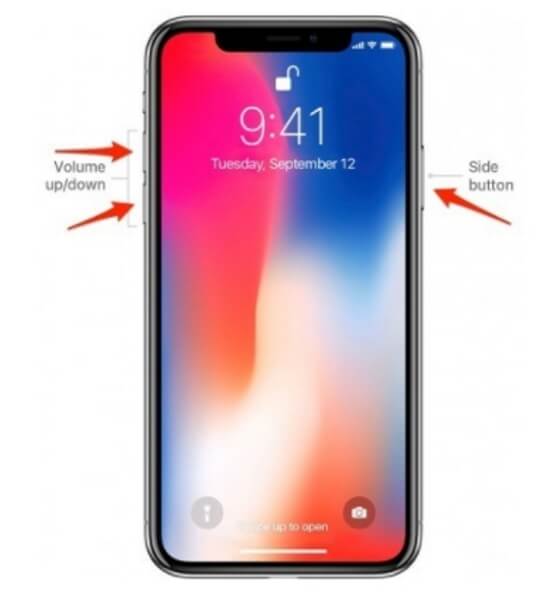
Step 1: Press and release the Volume Up button and then repeat the same with the Volume Down button.
Step 2: Next, press and keep holding the power button till you see the Apple logo on your screen.
Note: If there is Siri engagement that means the Volume buttons were not clicked properly, so try it again.
The iPhone rebooting will now start and in about a few seconds the device will restart.
The above steps work with iPhone X, XS, XR, iPhone 8, and 8Plus devices. For iPhone 7 and iPhone 7 Plus the process is a little different where you need to hold the Volume and the Side button till the Apple logo is seen on the screen.
Using Settings App to switch off the iPhone:
Though using the physical buttons is a simple and quick way to switch of your iPhone, but there is also an alternative method that can be used in case your buttons are not working or having any issues. Steps for the same are as below:
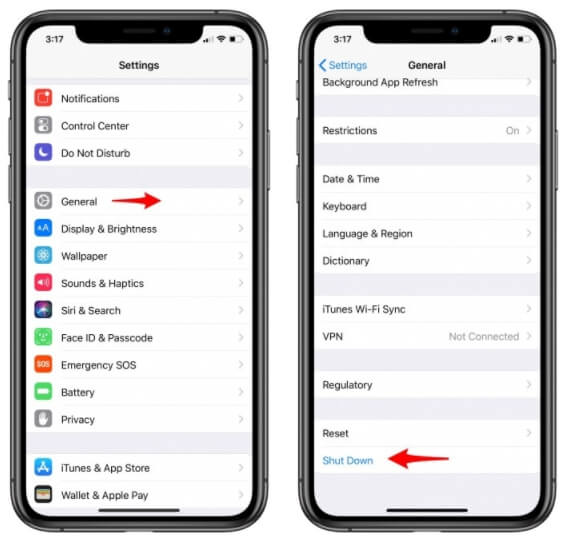
Step 1: Go to the Settings option on your iPhone and select General from the list.
Step 2: Scroll down to the bottom of the screen and click on the Shut Down button.
Step 3: Finally, slide to power off.
Part 3. How to Factory Reset iPhone
The factory reset is a method that should be used only when all other solutions fail, as this method will delete all the data from your device including apps, media files, information, and all others. After the factory reset the device will become just like the way you had it for the first time out of the box. The factory reset is also done when you want to sell your phone to another person or your device is stolen or lost and you want to wipe off all the data.
Before going for the Factory reset method make sure to take the back up of your iPhone as after the reset is done, all the device data will be permanently lost.
Back-up iPhone:
Backup of the iPhone can be either done using iCloud or iTunes.
Steps for iCloud Backup on iPhone:
- For iCloud backup, go to Settings > iCloud (your name) > iCloud (in some of the older iOS versions, you need to select Settings > iCloud)
- Next, toggle and select the items that you want to backup. It is recommended to take the backup of almost everything on your iPhone including contacts, photos, mail, notes, and others.
- Scroll down the screen and click on the iCloud Backup and if it is not enabling, toggle it ON.
- Connect your device to a WiFi network and tap on the Backup Now button to start the process.
BackUp iPhone Using iTunes:
Since iCloud backup is time-consuming and has limited storage, the iTunes method can also be used.
- Connect your iPhone to your PC and launch the latest iTunes app. Tap on the connected device icon on the iTunes interface.
- Move to Summary > Backups.
- Choose the Automatically Backup option and then select if you want to save the backup to the iCloud or the local system.
- Click on the Backup now button.
The iPhone backup will be done at the selected location in some time.
Steps on how to factory reset iPhone:
Once the backup of the data is done, its time to factory reset the iPhone using the below steps.
Step 1: Go to Settings > General > Reset.
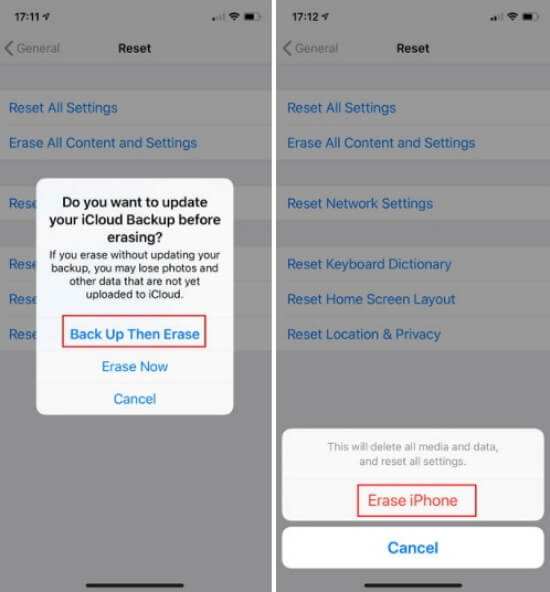
Step 2: Multiple reset options will appear from which you need to select Erase All Content and Settings option.
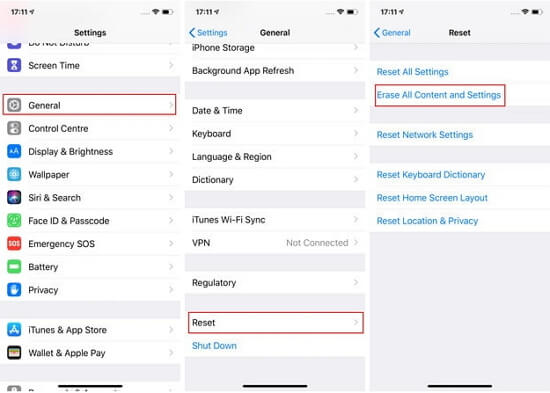
Step 3: If there is a FaceID, TouchID, or a passcode on your iPhone you would need to confirm the same. Click on the Erase iPhone option. If the backup of the device is not taken, you will be prompted for the same.
Step 4: Next, enter your Apple ID password to confirm erasing all the data on your device and also to disable Find My iPhone.
With this, all the data on your iPhone will be completely wiped off and you will go back to the original factory settings.
Part 4. Transfer multimedia files with Wondershare UniConverter
When you need to transfer only the selective videos, audio, images, and other multimedia files that are backed -up on your local system to your reset iPhone or new device, Wondershare UniConverter works as an excellent software. This is a versatile video tool-box that supports a wide range of functions like video conversion to over 1000 formats, video downloads from more than 10,000 sites, editing, DVD burning, and transfer of multimedia files to an array of devices including iPhone.
The process of file transfer is simple and quick, and multiple files can be transferred at a time.
Steps to transfer local files to an iPhone using Wondershare UniConverter:
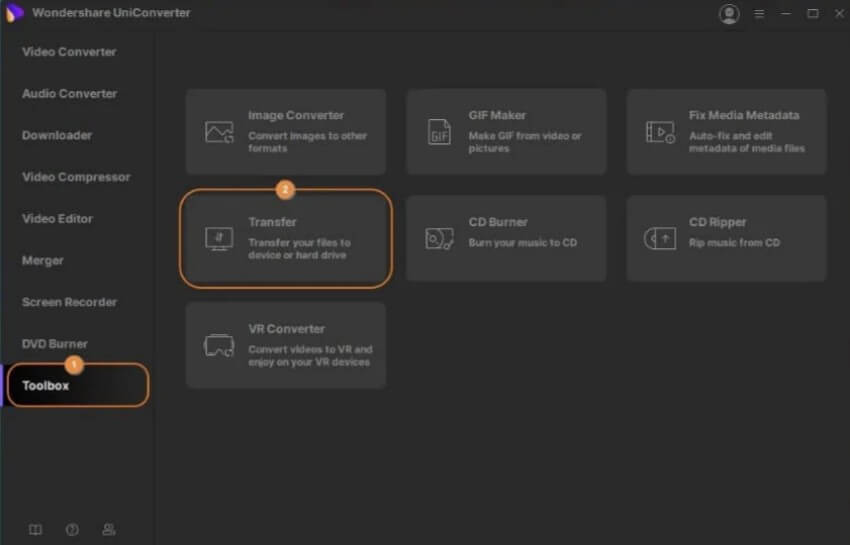
Step 1: Launch Wondershare UniConverter software on your system and from the main interface select Toolbox > Transfer.
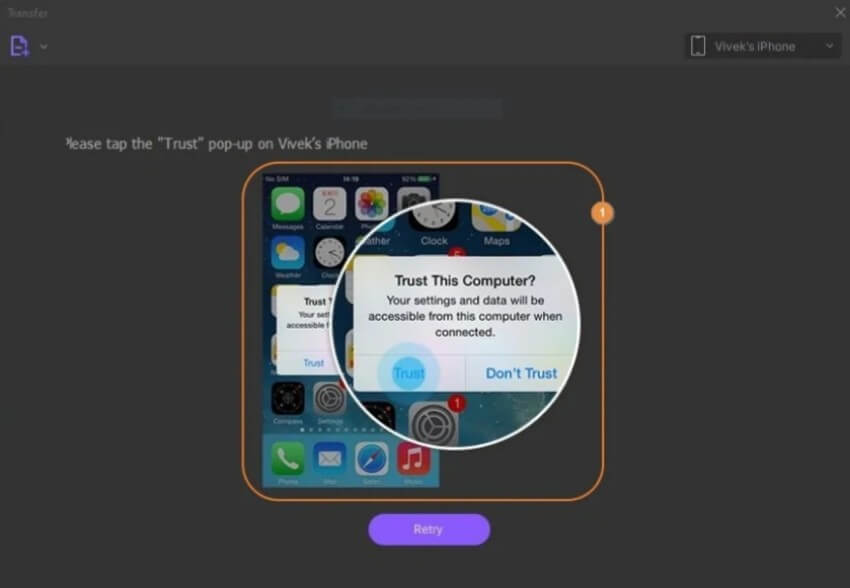
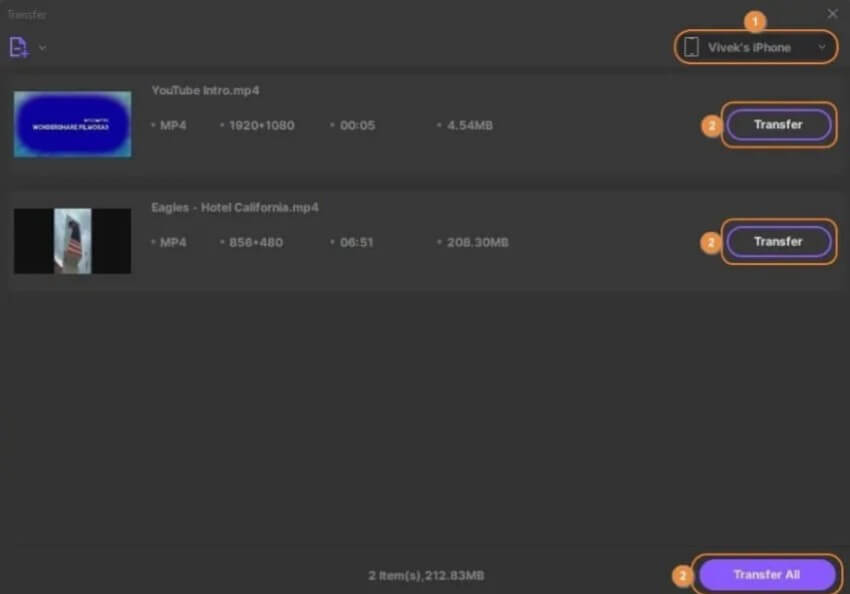
Step 2: Using a USB cable connect your iPhone to your PC. Tap on the Trust button on your iPhone when prompted and next enter the passcode to create the trust between the two. The connected iPhone name can now be seen on the Wondershare interface at the top-right corner.
Step 3: At the top-left corner, click on the Add Files icon to browse and load the files from the local system. Expanding the drop-down button at the icon will let you add a complete folder in one go.
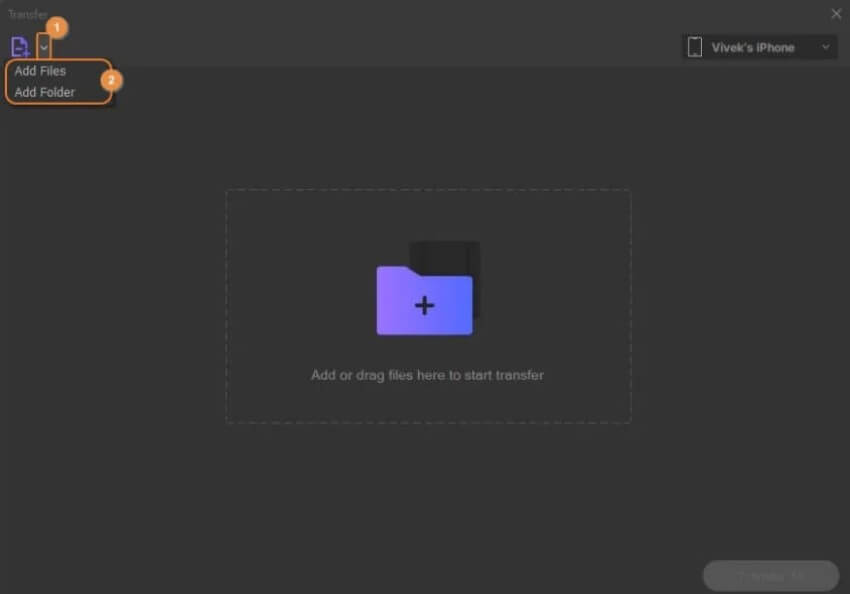
Step 4: The added files will now appear on the software interface. Finally, to move all the files to the connected iPhone click on the Transfer All button at the bottom-right corner.
Summary
Depending on the issues you are facing you can choose from the soft reset, hard reset, or factory resetting options. With hard and soft the data loss would not be there but with factory resetting all your iPhone data will be erased. To get selective multimedia data back to your iPhone or any other device Wondershare Uniconverter is a professional tool to use. An array of other useful functions is also supported by this versatile program.
- Directly convert videos to MP4, AVI, MKV, and other 1,000 formats without quality loss at 30X faster speed.
- Convert videos to devices such as iPhone, iPad, iPod, and Android phones directly.
- Edit videos with advanced video editing functions, like trimming, cropping, adding watermarks, subtitles, etc.
- Download/record videos from YouTube and other 10,000+ video sharing sites.
- Burn videos to DVD or Blu-ray disc to play with your DVD player.
- Support additional functions like Video Compress, VR Converter, GIF Maker, Fix Video Metadata, etc.