

The GIFs that you see online and/or download to your computer might not be as good as you expected them to be, and you may feel the need to apply various GIF filters to make these files more appealing and exaggerative.
Here you will learn the best 3 ways about how to add filters to GIFs easily and quickly.
Part 1. Top 2 Online Free Tools to Add Filters to GIFs
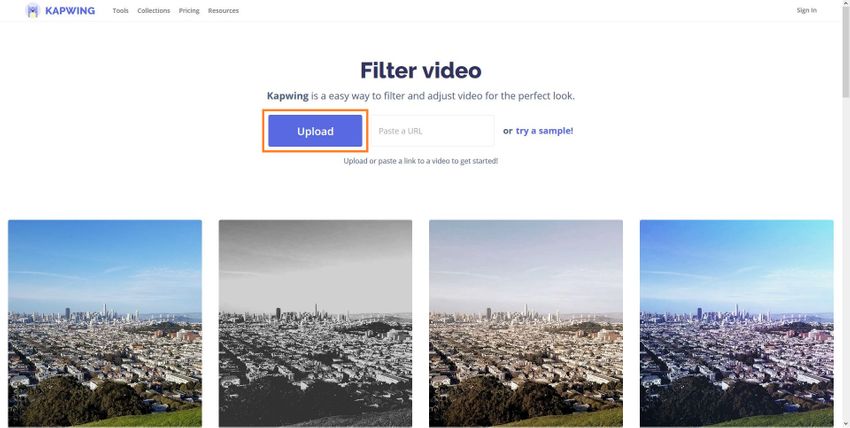
KAPWING
https://www.kapwing.com/tools/filter-video
KAPWING is an umbrella online editing platform for every media manipulation needs. With all the built-in programs accessible from the Tools page, the portal lets you create slideshows, memes, add audio and/or subtitles to the videos, enable looping, and even trim the clips to remove any unwanted content from them.
Pros:
- Comprises of almost all video editing tools, and users don’t have to look for any third-party program to manage their media files.
- In most cases, the free subscription is sufficient to manipulate your media files.
Con:
- It is an internet-based tool, can't use it without a network.
How to Add Filters to GIFs with KAPWING?
Step 1. Click Upload and Import a GIF
On the Filter video page, click Upload, select the GIF file that you want to add filters, and click Open from the bottom-right corner of the box.
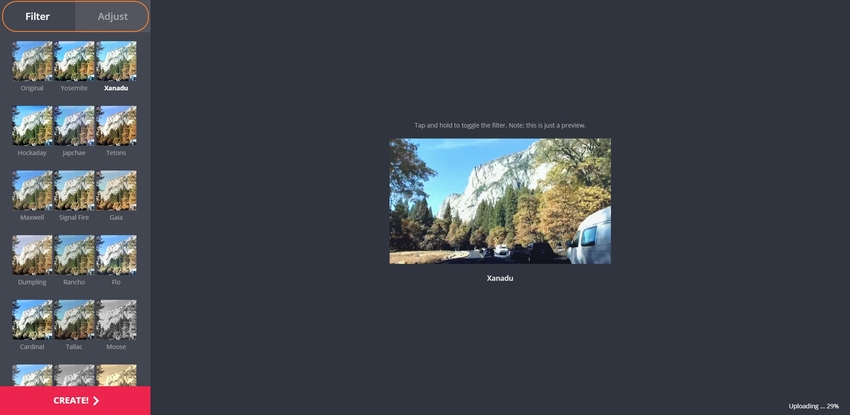
Step 2. Click a Filter Preset or Apply a Custom GIF Filter
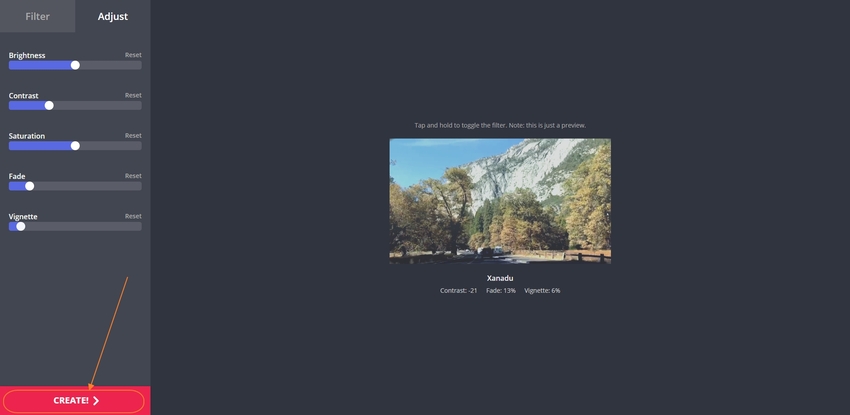
On the Filter tab, click any of the available GIF filter thumbnails from the left pane and preview the effect in the right. If none of the available filters is good enough, click the Adjust tab from the top of the left pane, and drag the sliders to make your custom filter to the GIF.
Step 3. Click CREATE! to Export the GIF
Once you are satisfied with the filter, click CREATE! from the bottom-left corner of the page to apply your custom GIF filter to the source file.
EZGIF
EZGIF is another useful online solution to apply GIF filters to your creations or existing files. Apart from this, the main features of EZGIF are that it can convert videos or images to GIFs, resize and crop the existing GIF files, add texts to them, or optimize them for better usability. EZGIF can even split a GIF and save each of its frames as a separate PNG or JPG file.
Pros:
- EZGIF is absolutely free to use.
Con:
- The web portal is populated with distracting advertisements.
How to Add Filters to GIFs with EZGIF?
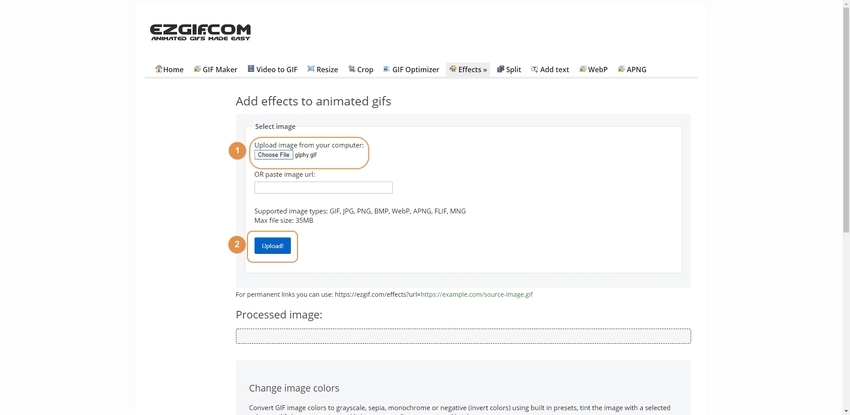
Step 1. Click Browse and Upload the GIF
Launch your favorite web browser, and use the link given above to open the Add effects to animated gifs page. Click Browse from the Select image section, select the file you want to apply GIF filters to, and click Open from the bottom-right corner of the box. Back on the main page, click Upload! to upload the GIF file to EZGIF.
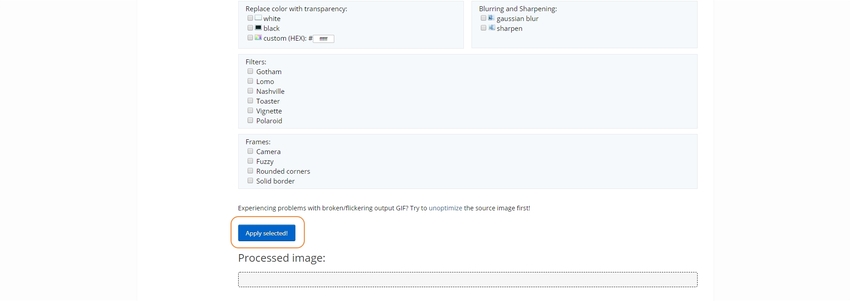
Step 2. Check the Boxes or Drag the Sliders for Custom GIF Filters
Check the available boxes, drag the sliders, and scroll down and make more adjustments to create your own custom GIF filter for the file you uploaded.
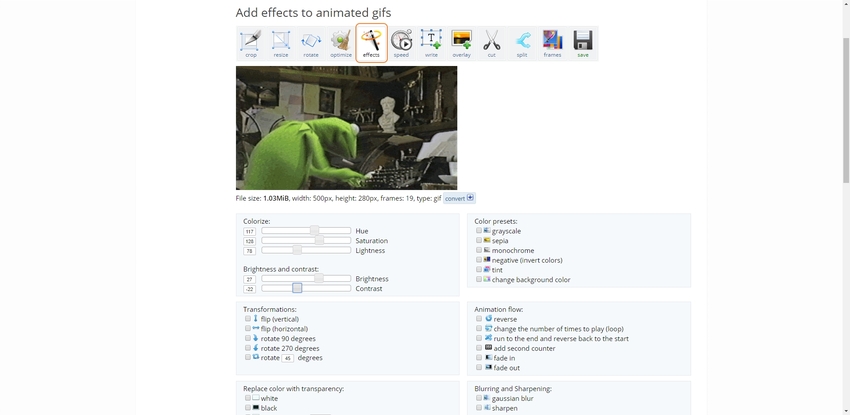
Click Apply selected! from the bottom to apply filter to the GIF.
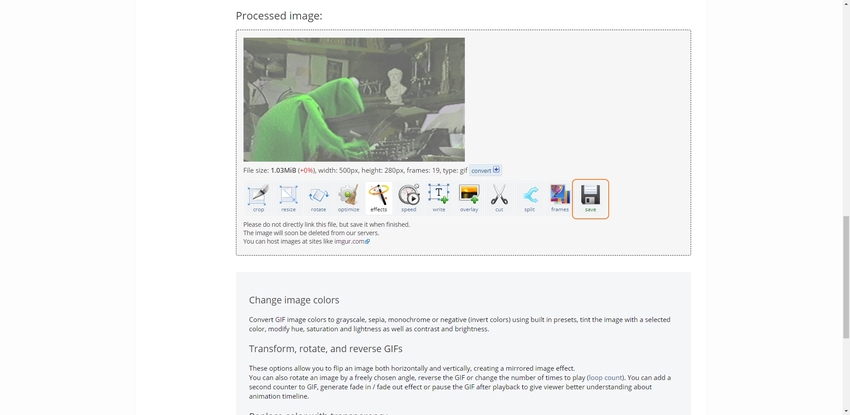
Step 3. Preview the Output and Create GIF
Review the expected output in the Processed image section, and if everything seems acceptable, click Save and download the GIF file to your PC.
Part 2. Adding Filter on GIF in Wondershare UniConverter
Being a feature-equipped program, Wondershare UniConverter is the best solution to create and apply GIF filters without relying on your Internet connection. Top two reasons why you should choose Wondershare UniConverter over any other online or offline tool to apply filters to your GIF files are:
1. Wondershare UniConverter comes with several built-in filters presets that can be applied to your media files. The best part is, each preset can be clubbed with your custom GIF filter settings that you can create by dragging the Brightness, Contrast, and Saturation sliders. The Effect window in UniConverter even lets you select a deinterlace type to make the final output more efficient.
2. Unlike many online solutions, Wondershare UniConverter gives unrestricted access to all the advanced features that could be essential to create custom GIF filters. The program also has no restriction on the file size, and the filters can be added even to the big videos without any delays or lags.
- · In its Toolbox functions, it has convert images, creates GIFs, burns CD, rips CD, cast to TV, and fix Meta tags.
- · Windows and Mac are supported download.
- · It has a simple interface, so it's easy for most beginners.
- · Wondershare UniConverter allows you to burn video and other media files to DVD as well.
- · UniConverter allows you to transfer videos from computer to iPhone or Android mobiles without using iTunes.
How to Add Filters to GIFs in Wondershare UniConverter?
The process of adding GIF filters to a file in Wondershare UniConverter comprises two sections, where in the first section, you apply filters to a video. In the second section, you convert the video to GIF. The entire procedure to use GIF filters with UniConverter is explained below:
Section 1. Add Filters to Video
Step 1. Click Add Files and Import a Video
Launch Wondershare UniConverter on your Windows or Mac computer, ensure that the Convert tile is selected from the top, click Add Files, select the video file in the box that appears, and click Open from the bottom-right corner of the box.

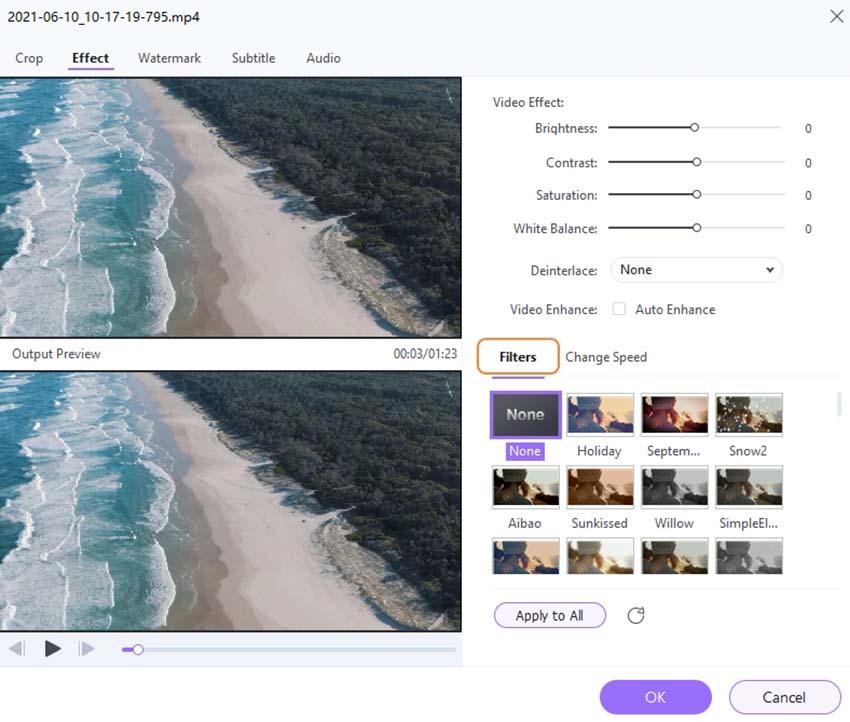
Step 2. Go to Effect and Apply Filters
Click the Effect icon from under the thumbnail of the video you imported. Click your preferred filter from the Filters section in the left pane of the Effect window. Optionally use the Brightness, Contrast, and Saturation sliders to make further adjustments to the applied filter. Click OK from the bottom to save the changes.
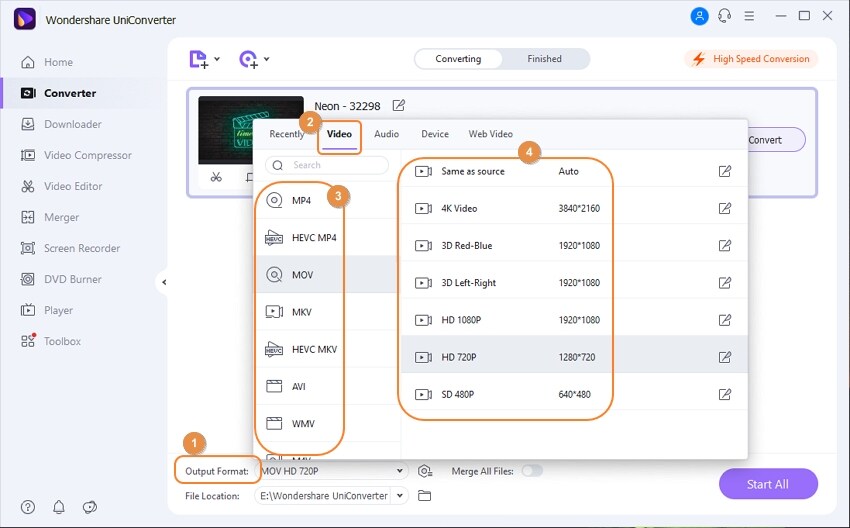
Step 3. Select Output Format and Convert
Once you are back on the main window, open the Output Format menu at the bottom, select your preferred output format (MP4 is recommended and selected in this case). Confirm (or specify) the output folder from the bottom, and click Start All.
Section 2. Convert Video to GIF
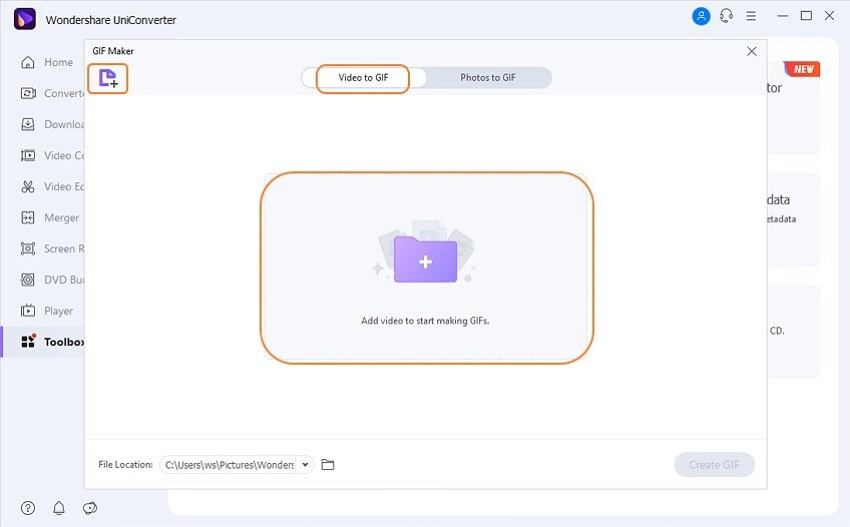
Step 4. Launch GIF Maker and Import the Video
Launch UniConverter if not already open, click the Toolbox tile from the left pane of the interface, and click GIF Maker. When the GIF Maker box appears, ensure that the Video to GIF tab is selected from the top, click Add Files from the top-left corner, locate and select the video you created in Section 1, and click Open from the bottom-right corner of the box.
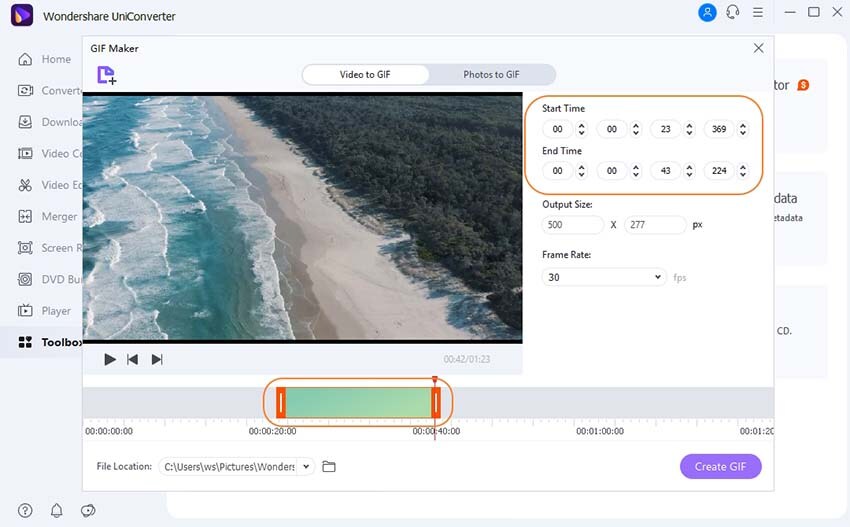
Step 5. Adjust Settings and Create GIF
Use the options in the right section of the GIF Maker box to adjust the settings for the GIF file you are about to produce, define the output location in the Save to field, and click Create GIF from the bottom to add GIF filter and save the file on your PC.
Summary
Although online portals to apply GIF filters to your files are free to use and even have all the basic options to make your creations look attractive, they still have certain restrictions such as watermarks (unless you pay for the subscription), file size limitations, etc.
On the other hand, Wondershare UniConverter gives you unrestricted access to all the features that you may need in order to apply GIF filters, and there are no file size limits when working with the software either.