Photoshop is an industry-leading tool that helps you to create notable and illustrious images. With this tool, you can also create cartoon pictures. Photo-to-cartoon Photoshop is a challenging procedure due to which only a few people know how to use Photoshop for converting pictures to cartoons.
In this article, you will learn to create cartoon pictures and what types of pictures you can create with Photoshop. Above all, you will also learn about a reputable tool by which you can straightforwardly create a cartooned picture.
In this article
Part 1: What Types of Pictures Can You Create With Photoshop?
Before getting into turning photos into cartoon Photoshop, you first need to know what type of picture you can make with Photoshop. Have a look below to discover the answer to this question:
1. Digital Art
With the help of Photoshop, you can create diversified digital art, such as illustrative art, dynamic painting, pixel art, and more. Photoshop is loaded with tools and brushes that allow you to create stunning digital art. It is perfect for those who love to lead social media page art. You can also create vector and raster paintings with it.
2. Virtual Mockups
Before launching your brand, you initially need to present its virtual mockups. It helps to demonstrate your niche and your brand products, and people can learn about your brand most easily. Photoshop has a proper toolset that allows you to make eye-catching mockups for your brand. The 2D and 3D mockups also help to create mockups of materials, packaging, and promotions.
3. Marketing Material
Digital marketing is one of the crucial components of a successful business. Photoshop helps you to create impressive digital marketing material like banners, ads, email headers, and more. You can also create multiple types of digital content that reflect your brand's message worldwide. You can also customize the results for a better user experience.
4. Intuitive Typographies
Instagram and Pinterest pages are loaded with typographies. This tool allows you to create unique typographic images that hold the capability to attract more users. You can use several types of features of Photoshop, like strokes and brushes, to accomplish the task. It also allows you to apply pattern and textures to images to make them stands out.
5. Collages and Graphics
With the help of Photoshop, you can create mesmerizing collages with full customization. It also allows you to add personalized masks, layers, and other metrics. In addition to this, Photoshop support 3D modeling along with rendering. You can create multiple types of 3D objects and add various effects and filters.
6. Photo Editing
If you have a photo with lots of unwanted objects, it won't be easy to share it on social media. With the help of Photoshop, you can remove unwanted objects from photos and can also apply multiple types of adjustments to photos. From filters to effects, you can customize everything to attain the results you want.
Part 2: Step-by-Step Guide to Convert Photo to Cartoon Using Photoshop
Do you want to convert photos to cartoon Photoshop? Worry no more because the below-given steps will help you regarding this issue:
Step 1: Open Photoshop on your device and add the image you want to convert into a cartoon. From the right toolbar, click on the "Lock" icon to enable layers. Right-click on the "Layer" options and select "Convert to Smart Object." Rename the layer for your convenience. After this, go to the "Image" tab and select "Image Size."
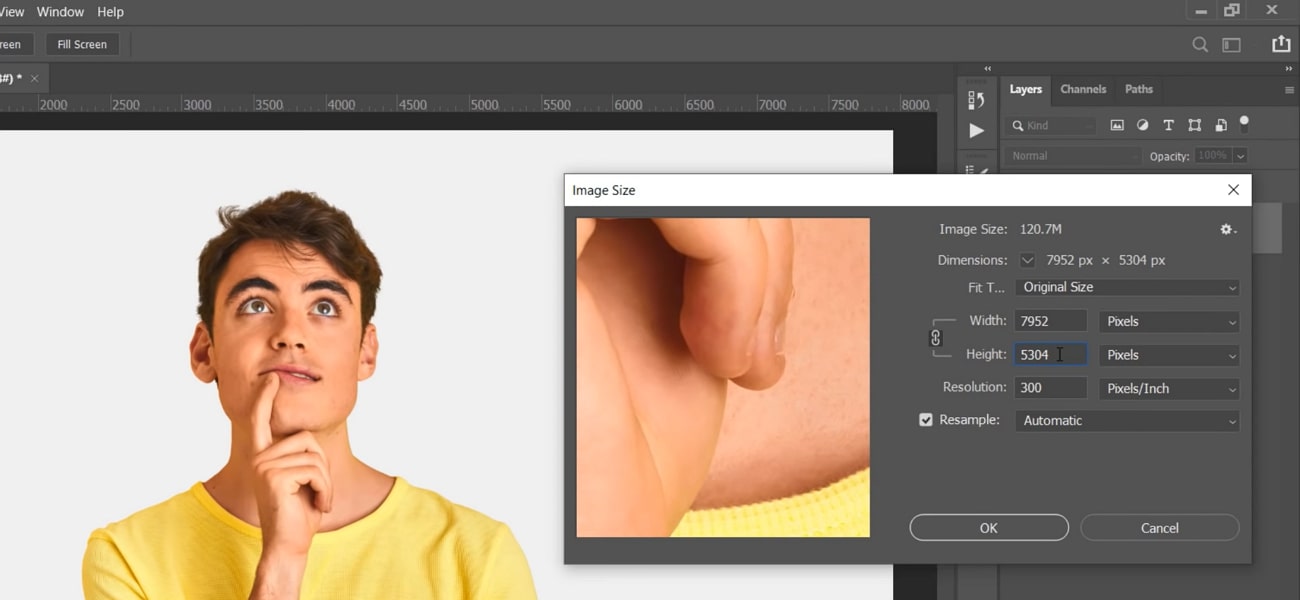
Step 2: From the newly opened window, customize the "Width," "Height," or "Resolution" of the image and click "OK." Now you need to create an effect, and for this, select "Layer" and press "Ctrl/Command + J." Once the layer is duplicated, rename it and go to the “Filter” menu. From the enlisted options, select "Liquify." From the enlisted option, you can manipulate the "Eyes," "Nose," and "Mouth" settings.
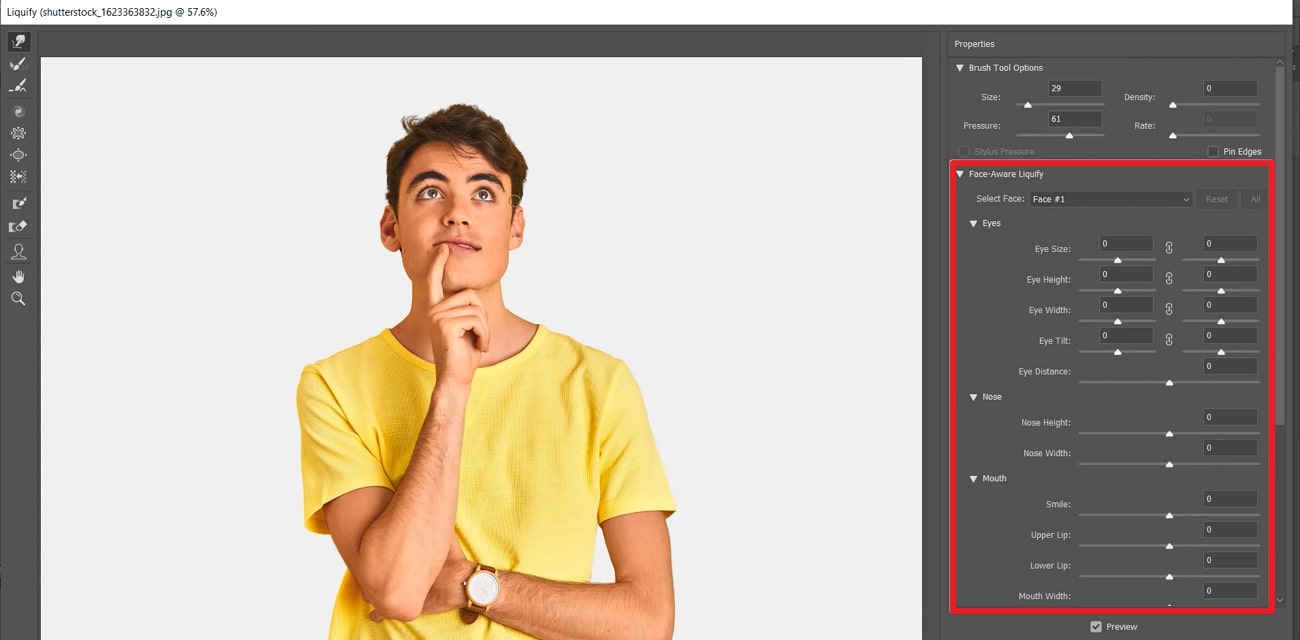
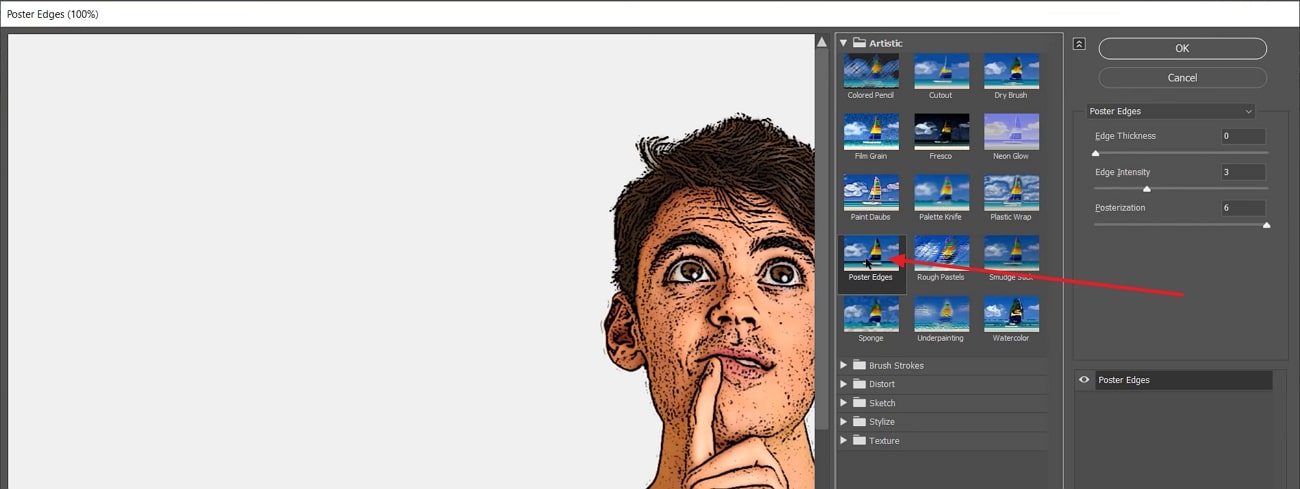
Step 3: You can alter all the features of the face with the help of sliders of "Face-Aware Liquify." After adjusting, click "OK" and again select "Layer." Again, go to "Filter" and select "Filter Gallery," and from the "Artistic" section, select the filter such as "Poster Edge Filter." You can also manage "Thickness" and "Intensity" with it. Following this, click "OK" and select "Filter," click on "Sharpen," and choose "Unsharp Mask."
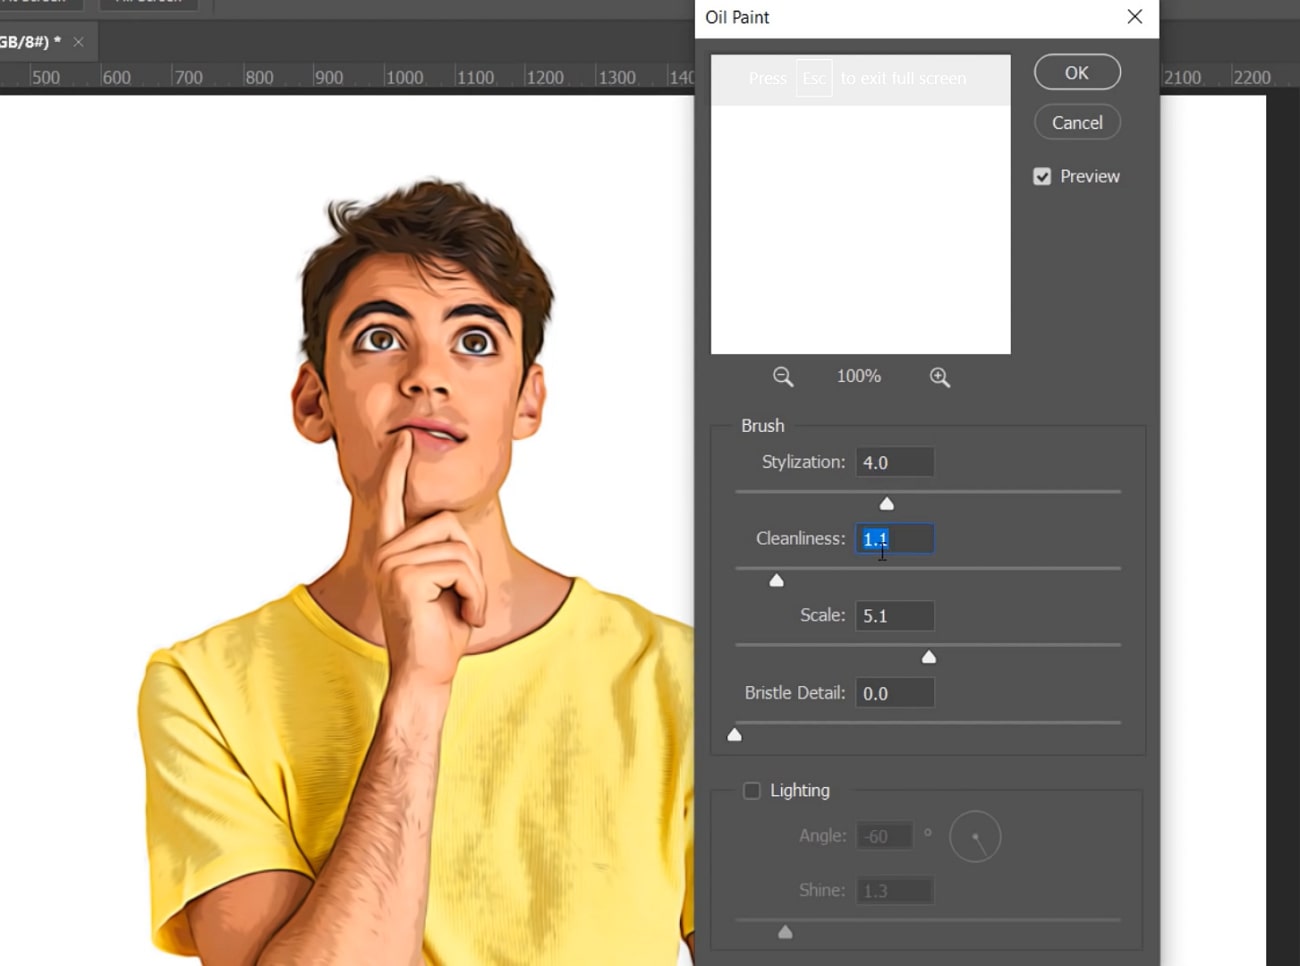
Step 4: From the opened window, change its "Amount," "Radius," and "Threshold." You can also enable and disable "Preview" to check results. Hereafter, click "OK." Again, go to "Filter," select "Stylize," and choose "Oil Paint." Change the "Stylization," "Clearness," and "Scale" until you are satisfied. You also need to change "Scale" and "Bristle Details" to cartoonize the image.
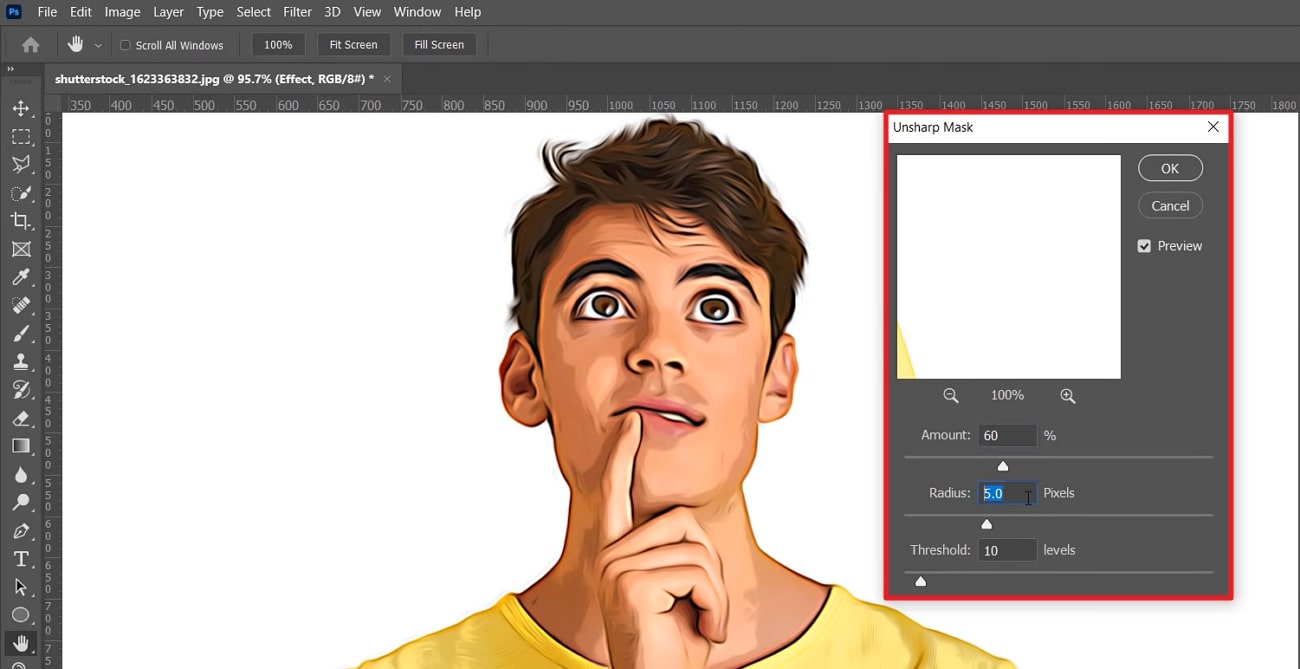
Step 5: Don't forget to uncheck the "Lightening" option and click "OK." Go to "Filter," click on "Sharpen," and select "Unsharp Mask,” but this time, you need to change the values for a softer look. After this, click "OK" and move towards outlines and adjustments. For this, duplicate the "Layer" by pressing "Ctrl/Command + J" and then rename it.
Step 6: Hold the “Alt” key and drag the “Liquify” filter from the old layer and drag it to the new one. Select the "Outline" layer, go to "Filter," and select "Filter Gallery." From the "Artistic" section, select the "Poster Edge Filter" and change its intensity. Click "OK" and again select the "Outline" layer and go to "Filter." Choose "Stylize" and click on "Oil Paint." Keep the "Oil Paint" values as the previous ones and tap the "OK" button.

Step 7: Go to the "Blend Mode" drop-down menu and click "Overlay." You also need to decrease its "Opacity" and collapse both layers. Following this, select the "Outline" layer and press "Alt + Ctrl/Command + Shift + E," and once the new layer is created, rename it. Select the new layer and go to "Filter," select "Other," and choose "High Pass."
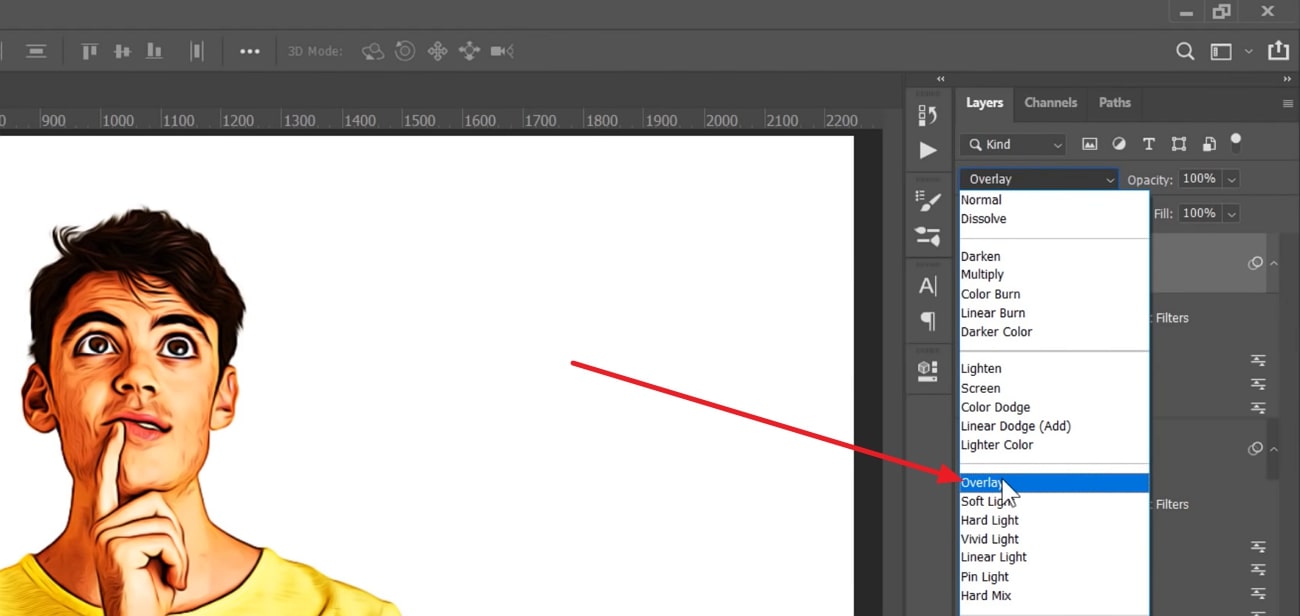
Step 8: After this, change the "Radius" and click "OK." Select the new layer and go to the "Image" menu and click on "Adjustment." Now, click "Desaturate" and go to "Blend Mode." From the various Blend Mode options, select 'Overlay."
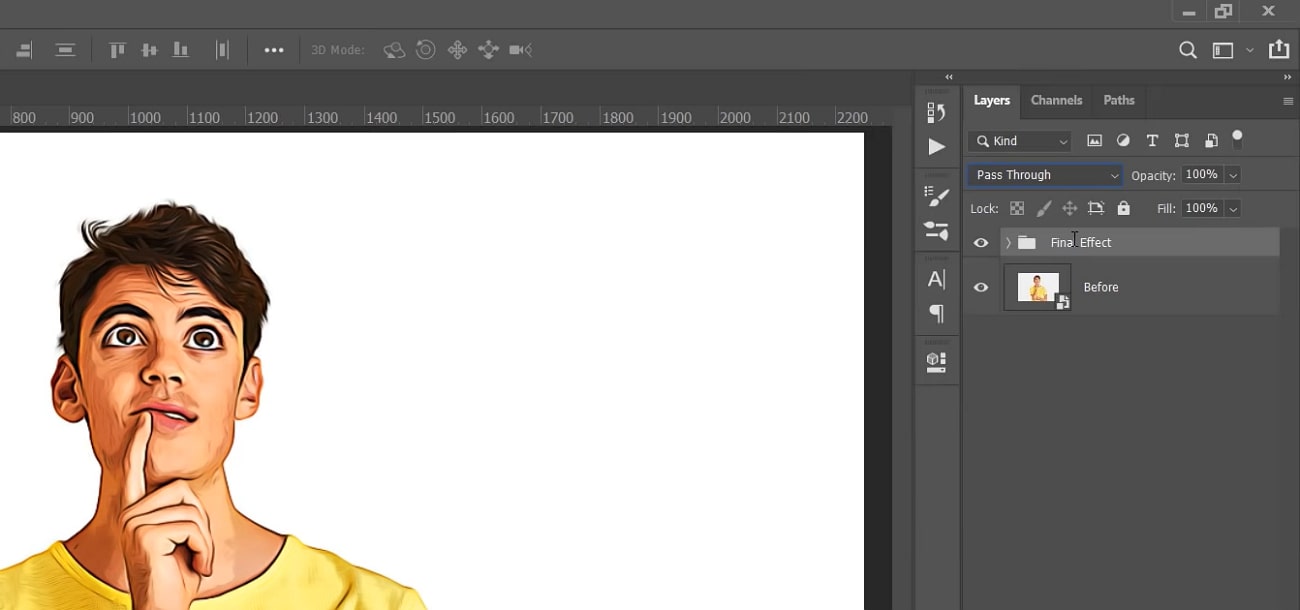
Next, select the "Top Layer," hold "Shift," and click on "3rd Layer.” Once selected, drag and drop it to the "Group" icon and rename it "Final Effect." Afterward, you can add some "Adjustment" layers to boost image details if needed.
Part 3: Easiest and Powerful Online AI Alternative to Cartoonize Photoshop Feature
Picture to Cartoon Photoshop can be a challenging procedure for those new to photo editing. For this reason, you need to work with a tool that offers a straightforward method of image cartooning. You can use Media.io – Cartoonizer to accomplish this task with ease.
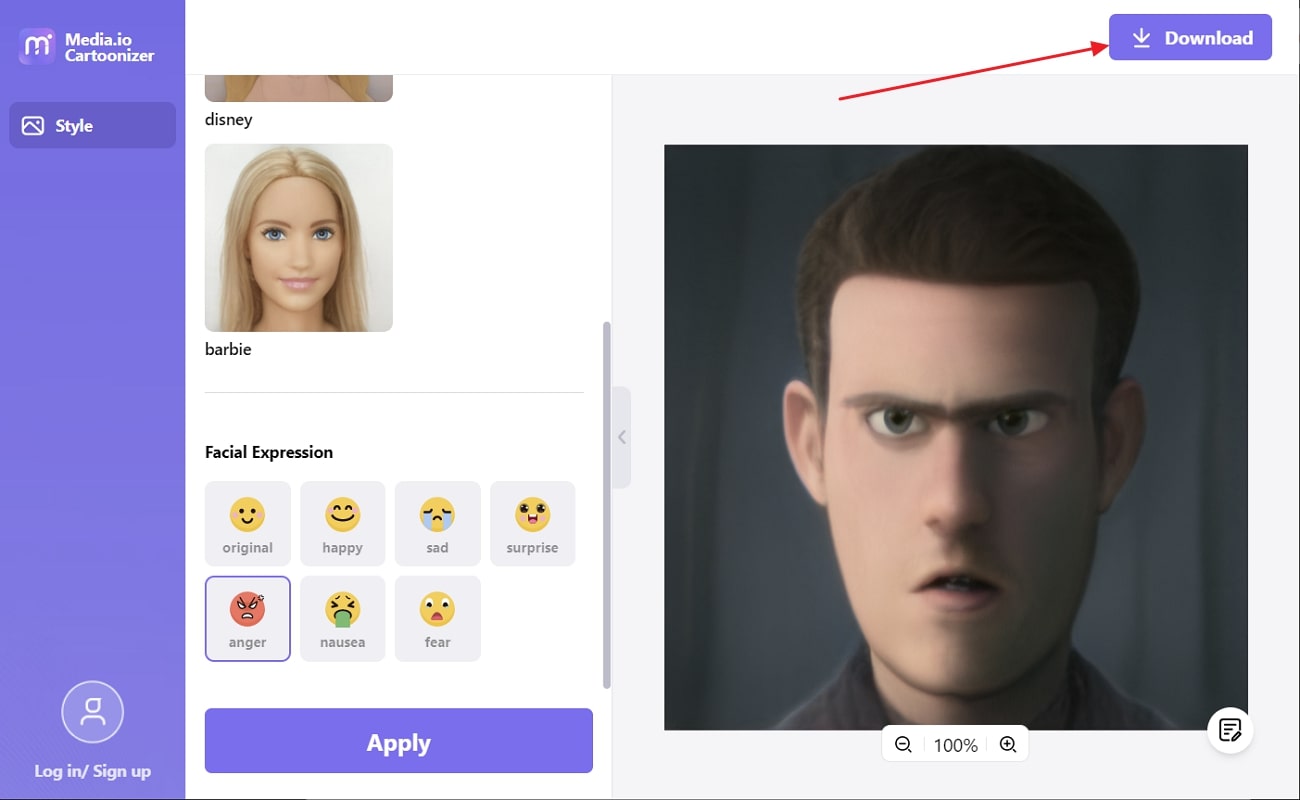
You can create 3D avatars of yourself in multiple types, such as barbies and Disney princesses. One of the best things about Media.io – Cartoonizer is you can also select the emotion you wish to express in your photo. The steps instructed below will help you to cartoonize the picture in the most reliable way:
Step 1: Access Media.io – Cartoonizer and Add Image
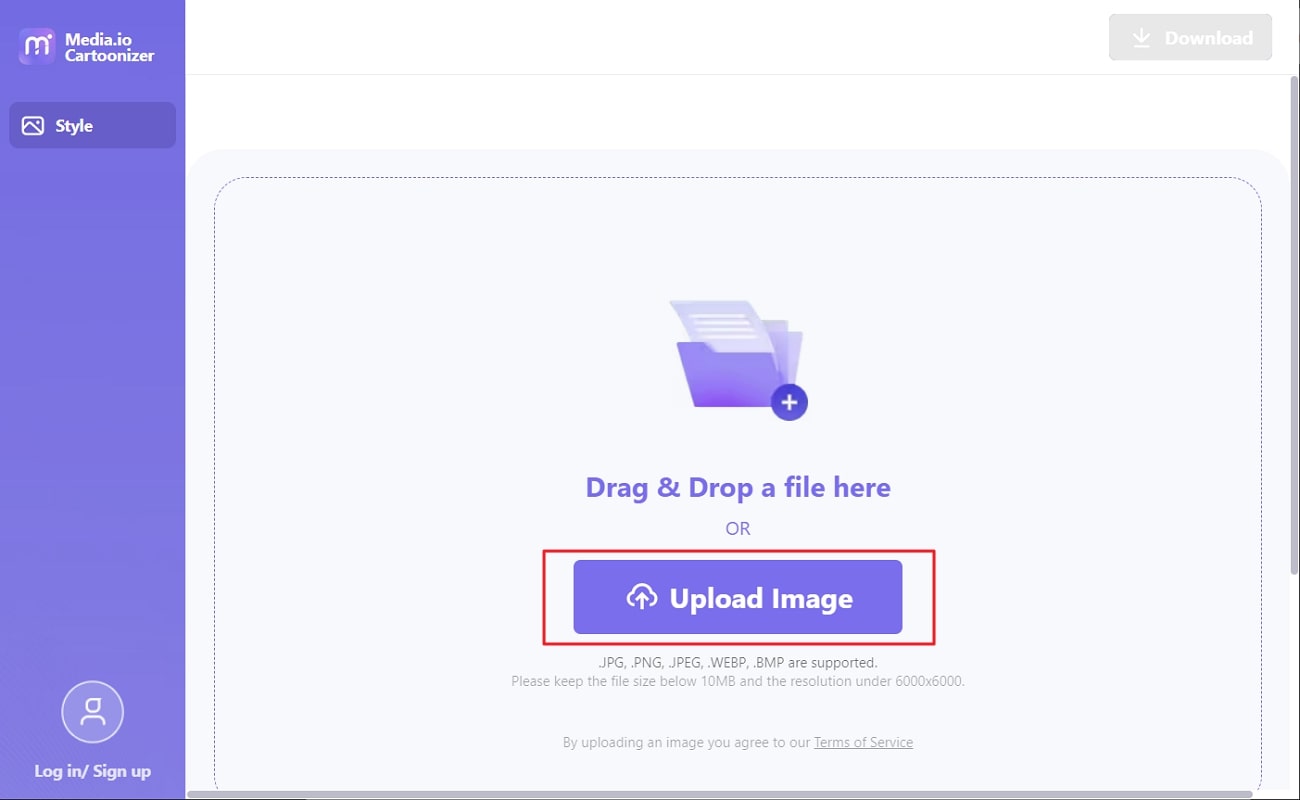
To cartoonize an image, open "Media.io – Cartoonizer" on your browser and select "Upload Profile Picture Now." After this, select "Upload Image" to add the image you want to cartoonize with minimum effort.
Step 2: Create a Customized Cartooned Picture
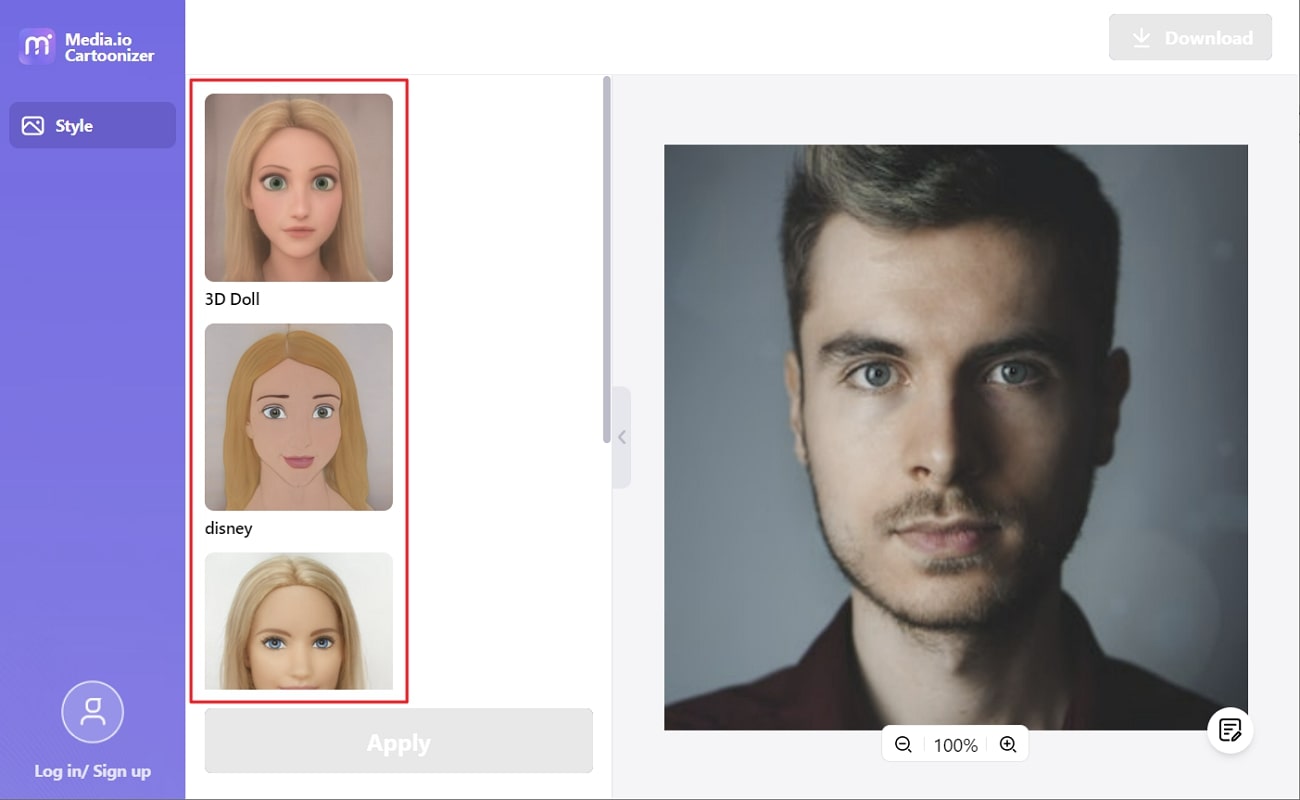
Once the image is added, go to the "Style" section and choose one style from the options of "3D Doll," "Disney," and "Barbie." After this, go to "Facial Expression" and select the expression of your choice. Click on the "Apply" button and wait a few seconds to apply the settings on the picture.
Step 3: Export the Cartoonize Picture
As you will be satisfied with the results because of the powerful AI technology of Media.io, click on the Download" button from the top right of the screen. Now, you can use the cartooned profile picture as you wish.